If you’ve ever eyeballed your neighbor’s perfect peony bush and wished for one of your own, you’re in luck.
Provided you have a generous neighbor, you can take a small division from their plant and have your own to show off in no time.
Or perhaps you’re yearning to propagate a peony from seed. It’s a time-consuming process, but an incredibly satisfying one.
We link to vendors to help you find relevant products. If you buy from one of our links, we may earn a commission.
Whatever the reason, peonies can be propagated in a few ways, saving you a bucket load of cash and allowing you to reproduce a plant that you particularly love.
My neighbor has populated an entire garden with peonies that she propagated from divisions taken from people across the city – with permission, of course. It’s a stunning sight and it didn’t cost her a thing, except for a few thank-you cupcakes.
What You’ll Learn
To be clear, in this guide, we’re talking about herbaceous peonies.
There are two different types of peonies: herbaceous and woody. Woody, or tree peonies can be grown from seed as described below, but dividing and grafting are also options that require a different process than what’s described here.
With that cleared up, let’s jump right in.
When to Propagate
First up, let’s talk about timing. Deciding when you should start propagating depends on which method you use.

For simple root division, autumn is best. Though you can divide any time during the growing season, that’s when peonies start to go dormant, and all the trauma of digging them up and cutting them apart has less of an impact on them.
Note that if you ever decide to dig up a peony to transplant it, you should divide it at the same time.
If you dig up a peony without dividing it, the plant won’t develop enough new roots to return to its full vigor. But when you divide it, you encourage the plant to put out lots of new, healthy roots to support the growing crown.
Three- to five-year-old plants are the best for dividing, though you can do it on older plants. It will just be a bit more challenging due to the dense, matted root system that forms as the plant matures.
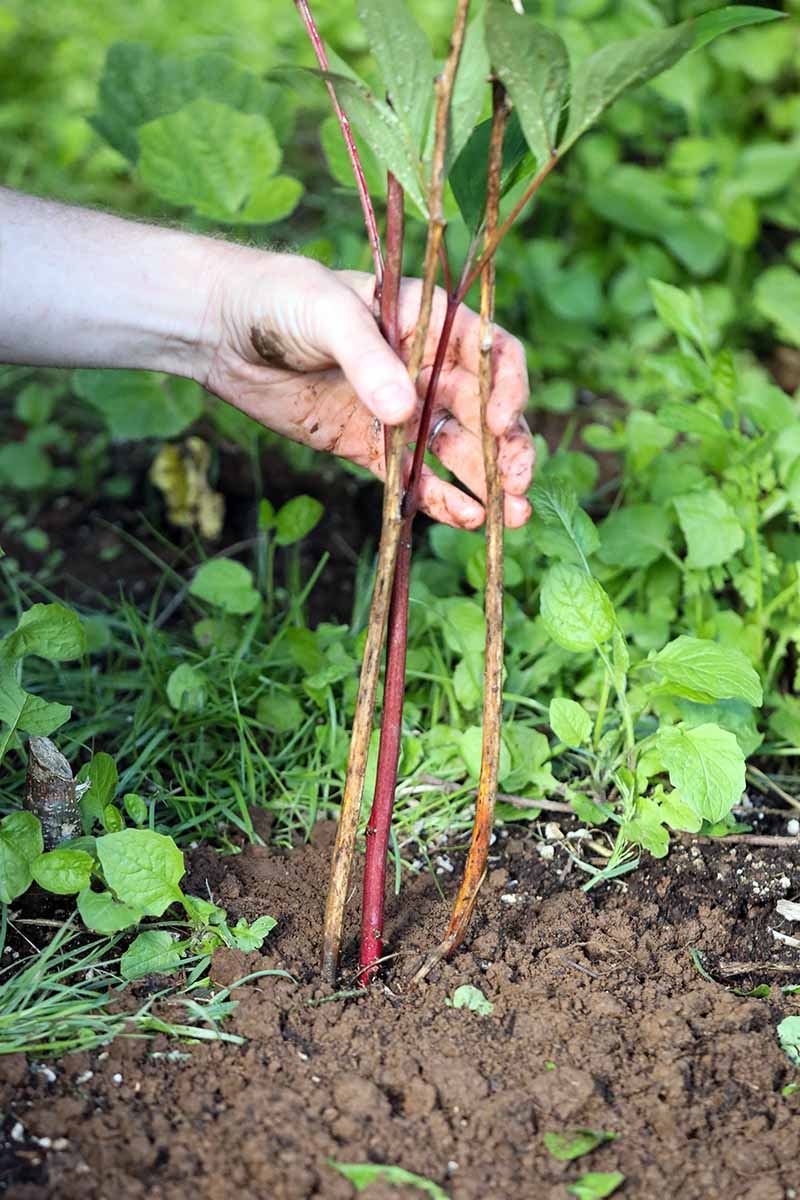
Divide Herbaceous Peonies
The first step is to dig up as much of the root ball as possible, with the crown attached, of course.
Start digging about six inches out from the stems with a spade. Once you’ve circled the plant, stick your spade as deep as you can into one of the trenches you made and angle it under the peony.
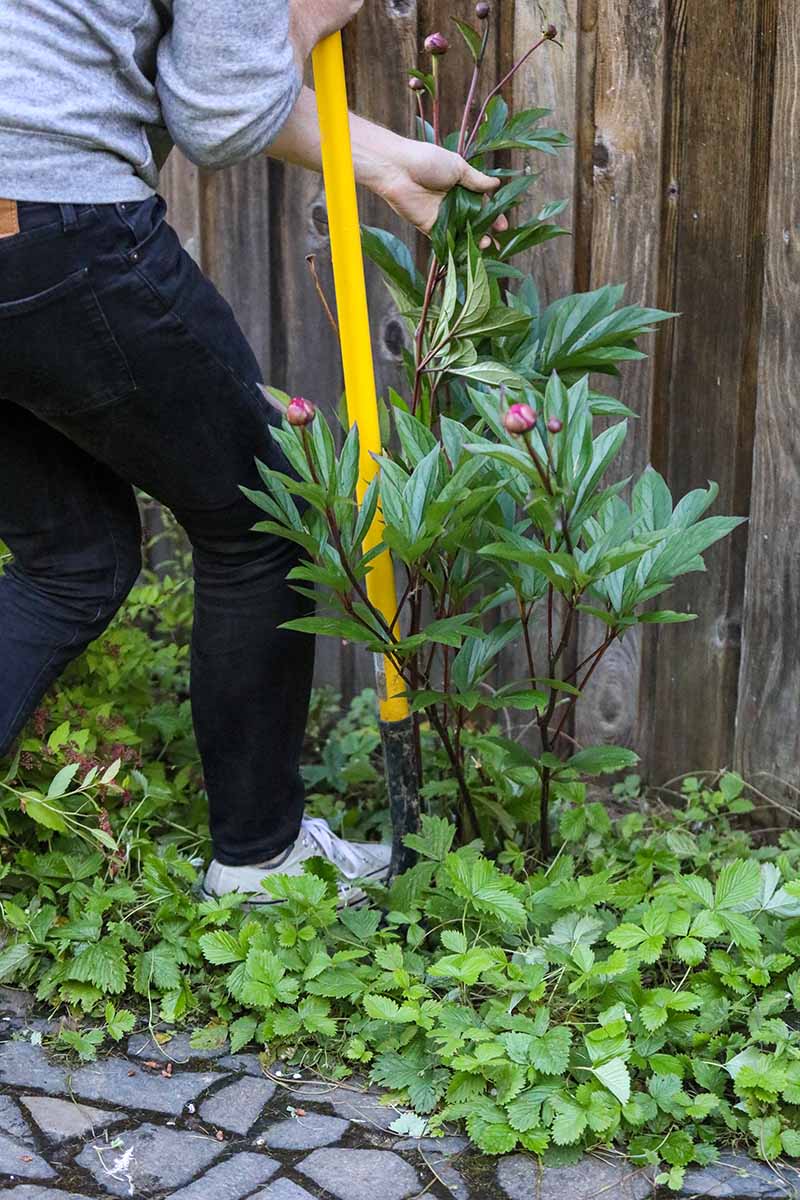
Gently lift. Then remove the spade and move over to the next section of the circle and do the same thing. Do this over and over until you’ve worked your way around the plant entirely.
Now it’s time to put the spade as far under the plant as possible and lift. The goal is to get underneath the roots, which can be a foot long, without breaking any off.
If you’re dealing with an extremely large plant, you can just dig out a “pie slice” section from the plant using a clean spade. You’ll need to dig a foot down to make sure you have as many of the roots as possible.
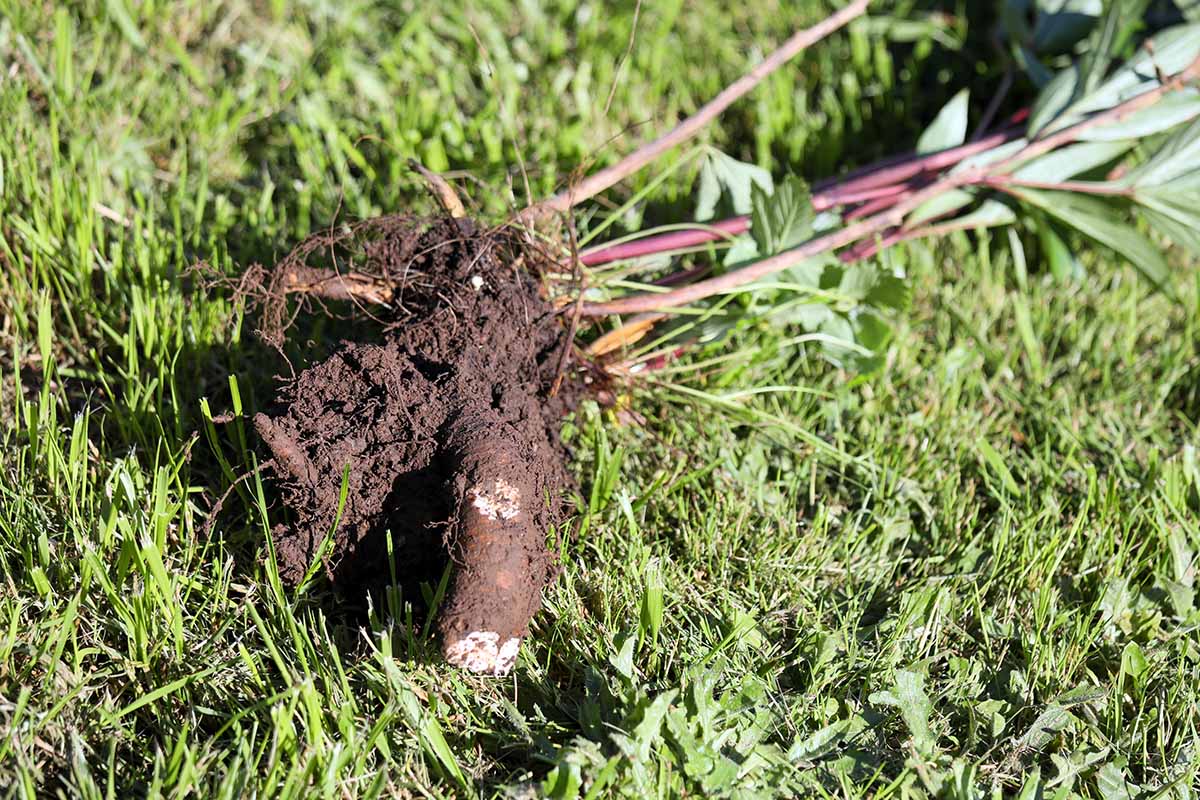
Use a gentle stream of water to wash away as much of the soil as you can. You want to be able to examine the roots closely, so they need to be clean. I like to do this over the lawn or on a tarp to try and limit the mess it makes.
Now we’re going hunting for eyes. Nope, this isn’t some creepy Halloween game! The little buds that will eventually develop into a mature plant section are called eyes, and that’s what we’re talking about here.
They’re usually pink but they can be closer to brown, purple, or red. They look like little pointed nubs emerging from the top of the roots. But they won’t always be present, depending on the time of year.
Your goal is to cut away a section that has at least three eyes, though five is better. Each of these sections should have three to five large roots attached. When I say large, I mean about the size of your thumb or larger.
If you’re working with a hybrid, the root system is usually much smaller, so you might have to settle for three eyes and smaller roots, but just do your best. If there are no eyes present, just focus on getting enough of the roots.
While you’re determining how many sections you can and want to make, snip off any dead or damaged roots with some clippers.
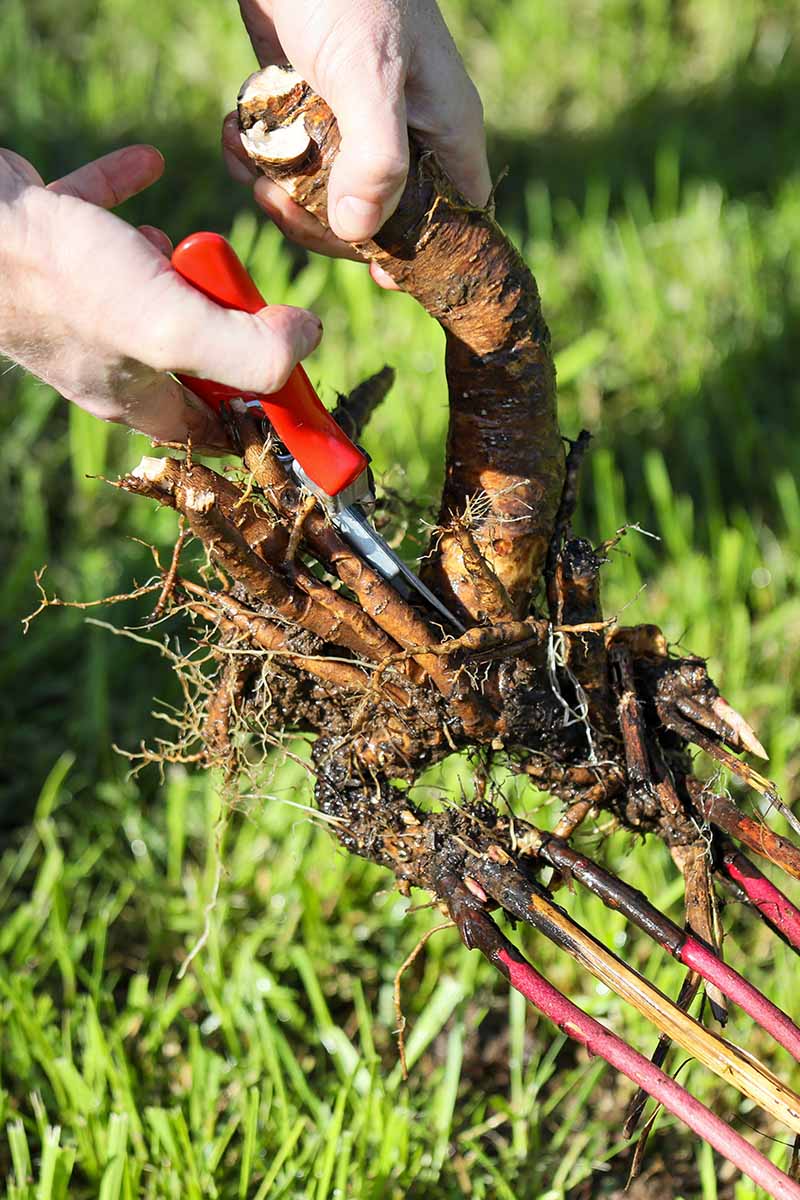
Now it’s time to get to work. Put the plant on a sturdy work surface and pull out your clean pruners or a sharp, sturdy knife. Peony roots can be tough, so this might take a little muscle.
Start cutting at the bottom of the root section, working your way up towards the crown. Avoid cutting through any eyes. Once you’ve cut through, gently tease the sections apart.
Remove all the small thread-like roots from the new section you just created. You should also cut away any dead, hollow, diseased, or damaged sections. Trim all of the roots back to about six inches in length.
You can divide as many times as you’d like, so long as you have at least three eyes and three large roots per section.
I have had success with a single eye and a single root from plants that I accidentally damaged while digging around, but they took years to reach a hefty size.
Place the original plant back in its hole and fill in around it with fresh soil. Transplant divisions as described in the section on transplanting below.
Growing Peonies from Seed
It is possible to grow peonies from seed, but keep in mind that they won’t grow true, meaning they won’t have the exact same characteristics as the parent plant – and they might look entirely different.
That doesn’t mean they won’t be perfectly lovely! But this is why most peonies are propagated by division, so you can ensure you’re getting the exact same thing, or in other words, a clone of the parent plant with identical DNA.
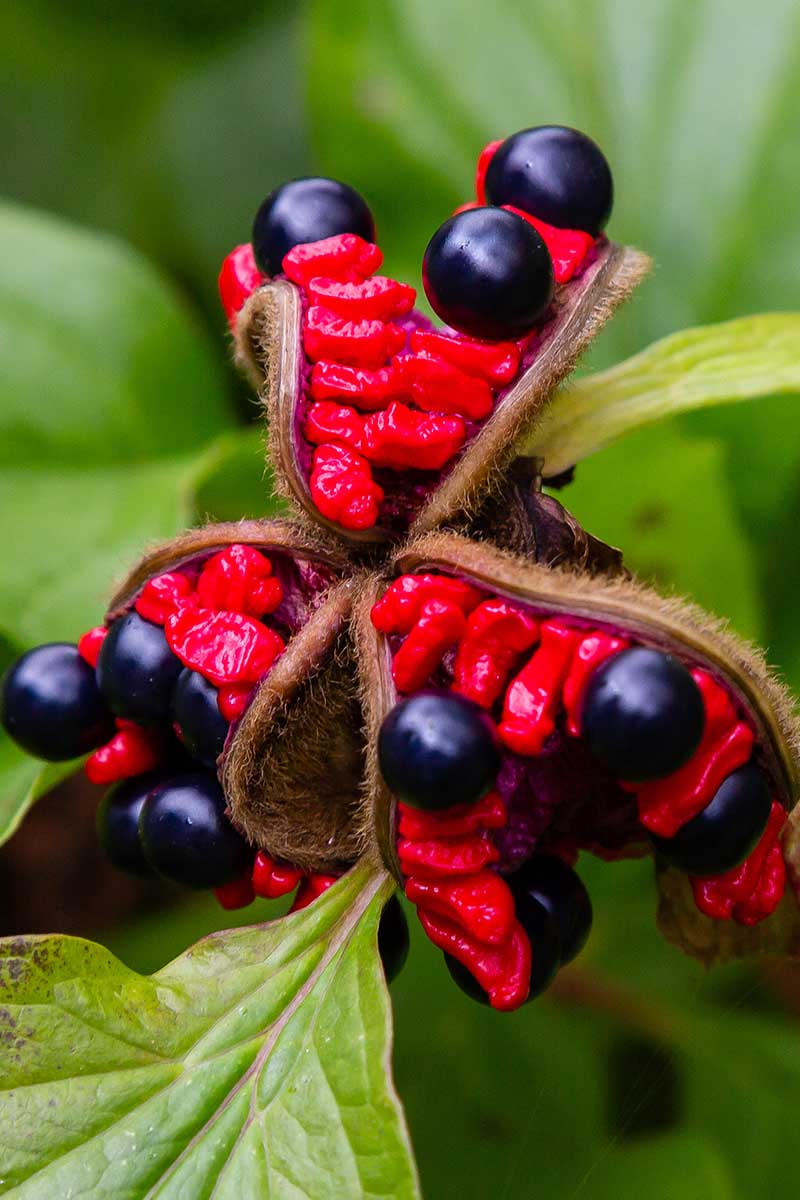
You can purchase seeds, or you can allow the seed pods on your peonies to mature fully. Once they turn brown and split open in the fall, scoop out the seeds. Place them in lukewarm water and toss out any that float. Then, plant them right away.
It can take a full year to see the green shoots emerging from the soil, so this method requires a lot of patience.
It’s also possible to start the seedlings indoors, but it’s much more complicated and less reliable. It requires soaking the seeds for several days, then placing them in a moist medium and incubating them at 70 to 80°F for about three months.
After that, they need to be just above freezing but below 50°F for another three months. At this point, roots start developing and the seeds need to be put back in 70 to 80°F temps to start growing.
By summer, you should have little seedlings popping their heads up. Leave them in place for another year, after which you can transplant your new babies.
Or you can just plant the seeds outside and let nature do most of the work.
In the late summer or early fall, find somewhere with plenty of sun, at least six hours per day or more. The soil should be well-draining but able to retain water. If that doesn’t sound like your soil, work in lots of well-rotted compost to improve drainage and water retention.
The area should be protected from drying winds and not too close to something that can reflect heat, like a brick wall or metal siding.
Till the soil and water it so that it’s moist but not wet. Place the seeds about an inch or two apart and an inch deep.
Cover with clear plastic to create a miniature greenhouse that will retain moisture and increase the temperature of the area.
Leave the plastic in place all winter and remove it as soon as spring rolls around, regardless of the temperature. It doesn’t matter if there’s a freeze on the horizon or a big pile of snow in the forecast. The seedlings will be just fine.
Transplanting
To transplant a seedling, prep the soil with well-rotted compost in an area that receives full sun.
Dig a hole twice as wide and about as deep as the container the seedling is growing in, or about six inches deep for a seedling that you grew in your garden as described above.
For a division, the depth should be about an inch deeper than the longest root.
Place the seedling in the hole and firm around it with soil. Water well so the soil feels like a well-wrung-out sponge.
Populate Your Garden with Propagated Peonies
There are so many gorgeous peony hybrids and cultivars out there that can be a real challenge to find in stores. Knowing how to propagate your own is a fantastic skill to have. That way, if you see one you love, you can make it your own.

Plus, it’s nice to be able to make more plants when you already have one that you love.
What do you plan to do with your new plants? Let us know in the comments section below.
If you’d like to expand your peony knowledge, we can help! We have several guides that you might find useful, including:


Wonderful information!! Thank you!
Thanks for reading Diane!