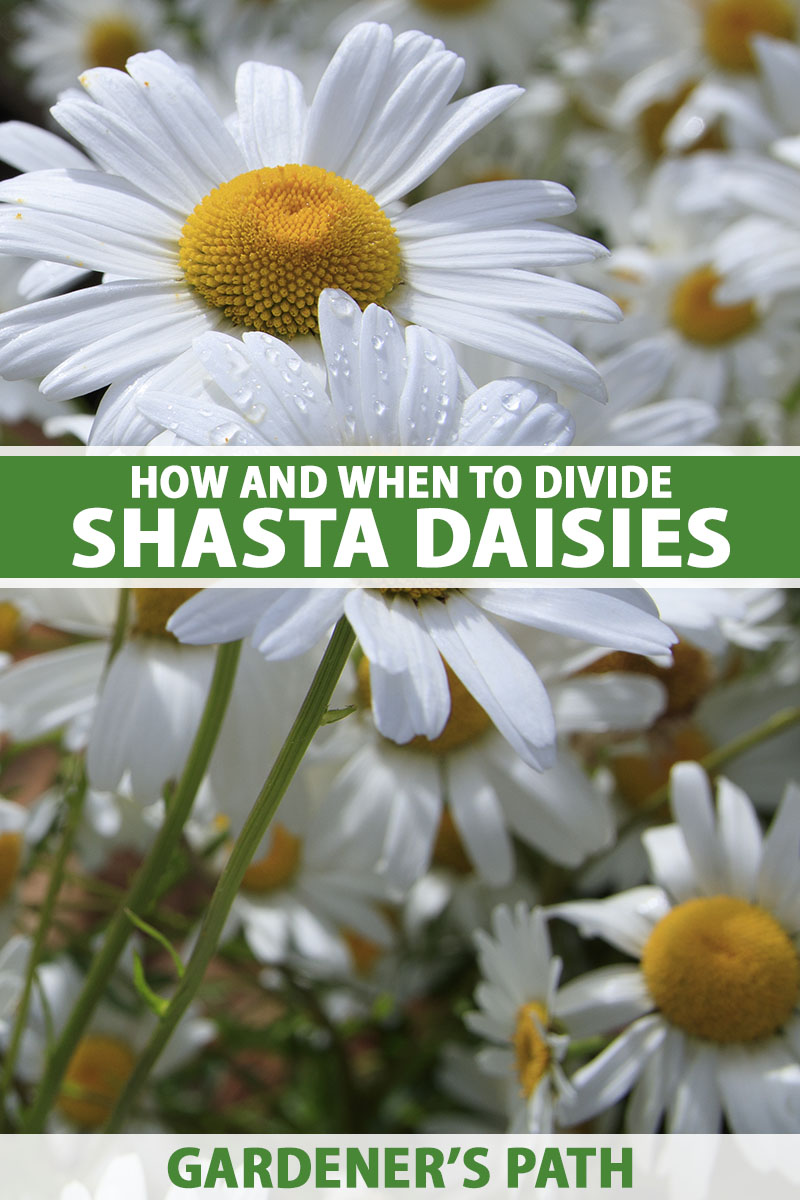
The Shasta daisy, Leucanthemum x superbum, is a summer to fall bloomer for USDA Hardiness Zones 4 to 9.
It’s a member of the Asteraceae family that contains asters, chrysanthemums, and sunflowers.
We link to vendors to help you find relevant products. If you buy from one of our links, we may earn a commission.
In our guide to growing Shasta daisies, we provide all you need to know to cultivate them at home.
The focus of this article is a vital task for Shasta daisy gardeners: dividing.
Dividing involves digging up and splitting one plant into two or more. Read on to find out why, when, and how we do it.
Here’s what’s in store:
What You’ll Learn
Let’s get started.
The Advantages of Dividing
Ideally, we plant Shasta daisies 18 to 24 inches apart to accommodate their mature dimensions. Early on, there is ample room for air to circulate between plants and for the roots to spread unchecked.
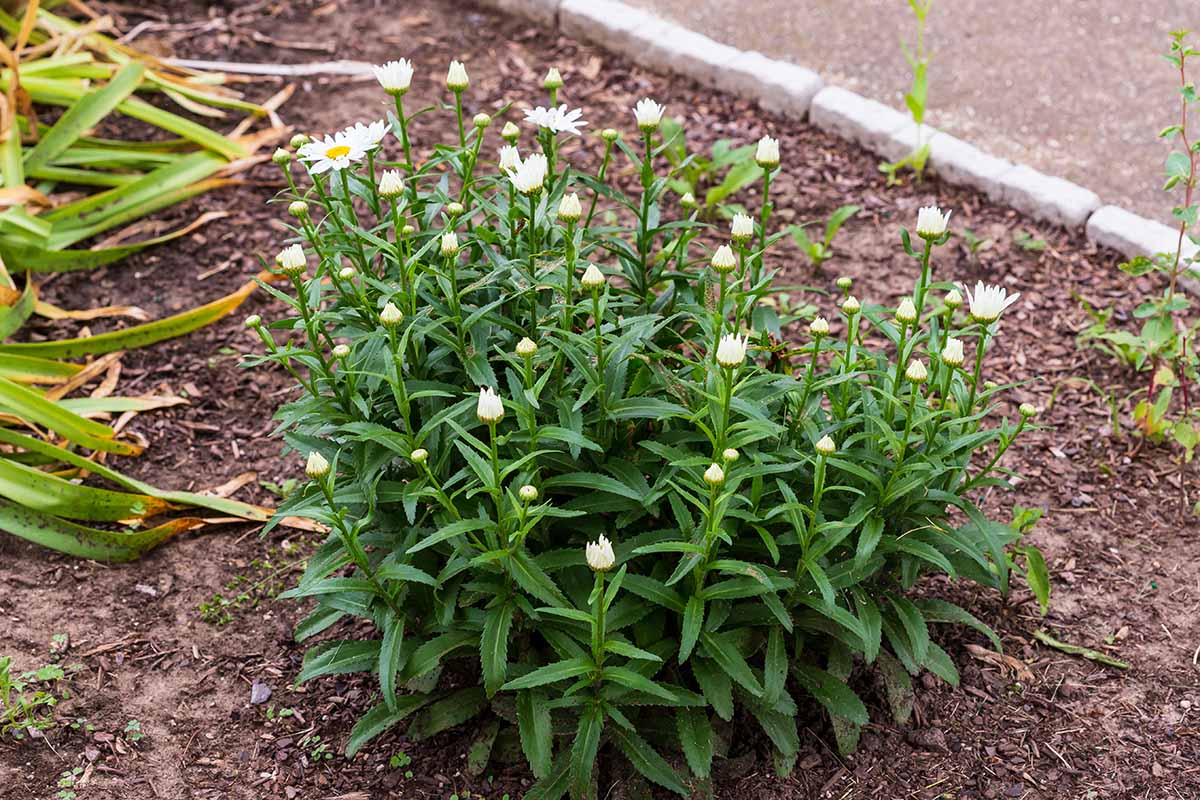
However, in two to three years, the daisy patch is likely to be a crowded place. There may not be as many flowers as there once were, and there may even be dead patches that don’t sprout foliage anymore.
In addition, a lack of airflow may be contributing to the development of fungal conditions like leaf spot, which is caused by Septoria leucanthemi.
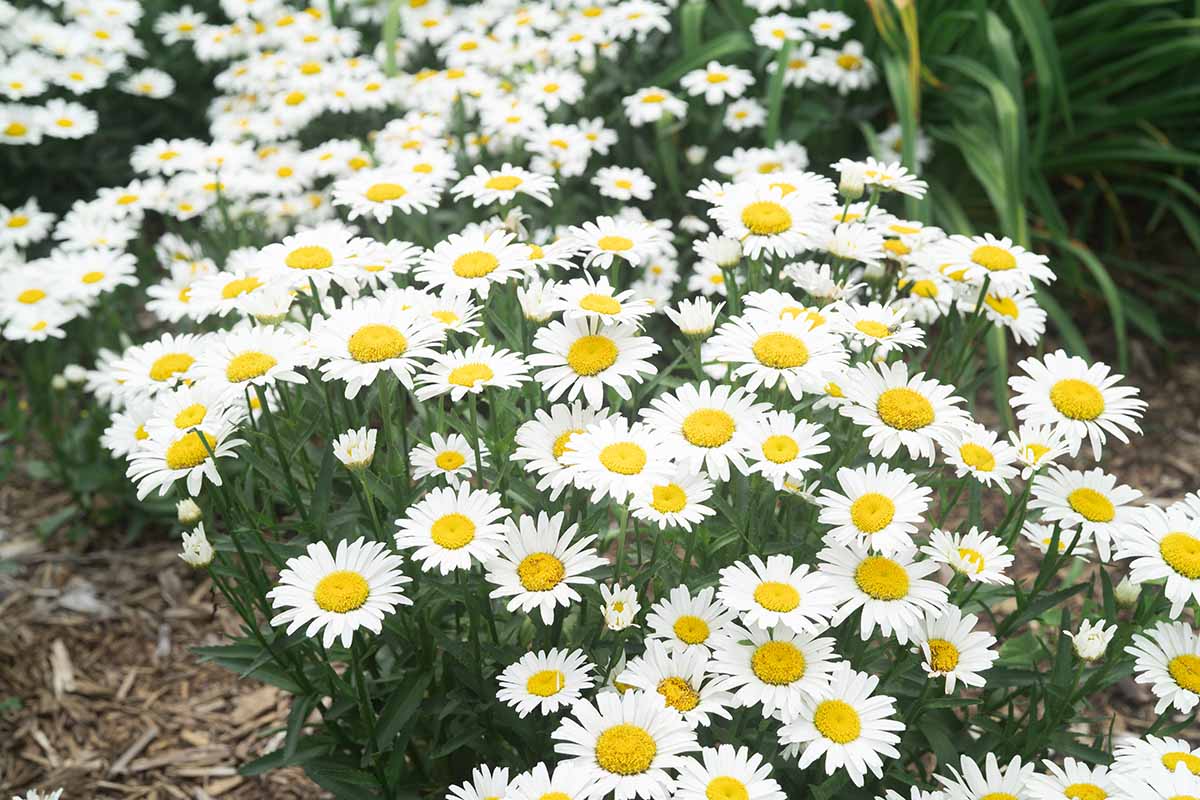
We can address these issues by dividing large clumps into two or more smaller ones. The process is a rejuvenating one that stimulates root growth, supports healthy foliage and optimal blooming, and improves airflow for fewer fungal issues.
It also allows gardeners to transplant the divisions to other areas of the landscape and to share them with friends.
Timing Is Critical
The best time to divide perennials is during dormancy when they are not actively growing. There are two time options:
- Post-bloom in the fall, at least one month before the first average frost date.
- Pre-sprout in early spring, after the last frost date, and before shoots appear.
In the fall, it’s easy to locate dry, brittle stalks, and transplants have plenty of time to establish roots before the ground freezes.
If you plan to divide in early spring, mark the location of your daisies while you can still see them. Be sure to dig rootstock up before it sprouts to avoid shocking the plants and adversely affecting their growth.
If you inadvertently disturb sprouted rootstock, these divisions may fail to produce flowers in the current season.
Also, note that a late-season frost may kill transplanted divisions.
Given the two options, I prefer to divide in the fall, and it’s likely that you will, too.
In addition to fall and spring, circumstances beyond our control sometimes require us to disturb flora when it is not dormant. Examples include construction or utility work in the yard.
In these circumstances, do what you have to do, but know that the stress of moving an actively growing plant may cause a failure to bloom in the current year.
The Division Process
We know the advantages of dividing and have a timeframe for action. Now it’s time to get down to the mechanics of the job.
Clumps of mature daisies are well-rooted in the ground, so you’ll want to use a long-handled garden fork for the task, and wear sturdy garden gloves.
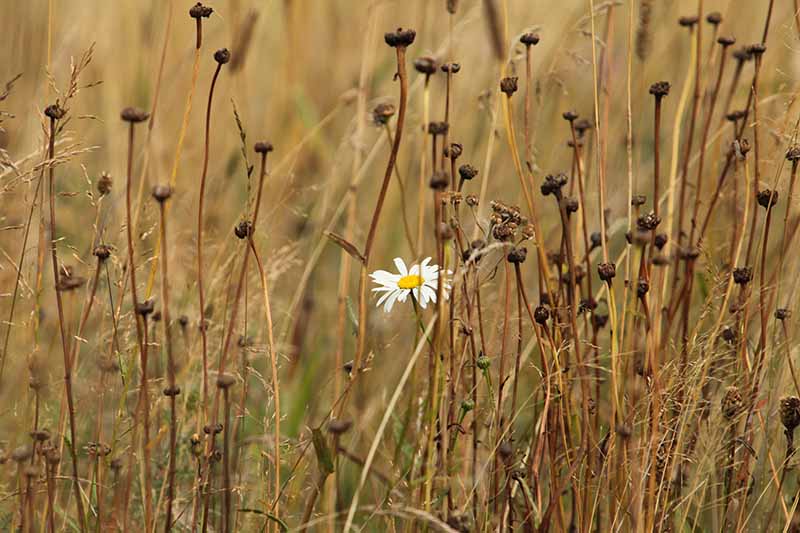
Make sure your Shastas are dry and brown, signaling dormancy.
Notice how the clumps of daisies are seated in the soil. The place where the stems meet the roots is called the crown. You will need to set your divisions at the same depth.
Use clean pruning shears to cut the dry foliage to a height of about two inches to avoid damaging the crown.
Place your foot on the fork.
Push the tines into the soil at a distance of six to eight inches from a clump of flower stalks.
Push the entire length of the fork into the soil and beneath the clump to lift it slightly.
Pull the fork out and repeat the process around the clump.
After loosening the entire clump, lift it from the ground and lay it on its side.
With gloved hands, gently remove enough soil to expose the crown.
Use clean garden pruners to cut through the crown one or more times. Each division should contain a piece of the crown with several stems and roots attached.
You may find that the rootstock at the center of the clump is dead, a common phenomenon as perennial flora ages. Discard it if it snaps into dry bits or has a slimy feel. Keep only those crown portions that have rubbery roots that bend without breaking.
Return a portion of the clump to its original location.
Transfer the rest to other landscape areas where there is full sun and well-draining soil of average to moderate fertility.
Before planting, work the soil to a depth of at least 12 inches until it is friable, or crumbly and loose.
Set each division at the same depth it was in the original placement.
Tamp the soil to secure it and water well.
If you relocate multiple divisions, allow 18 to 24 inches of space between them for good airflow and room to achieve mature dimensions.
Apply a two-inch layer of mulch over the replanted crowns to insulate them for the winter.
Let Your Shastas Shine
Digging up tired perennials extends their lives by promoting healthy root growth, resulting in lush foliage and abundant blooms. It also improves airflow to inhibit fungal diseases.
It’s time to take out your garden planner and write a reminder to yourself to divide your Shastas every two to three years in either fall or early spring.
When vibrant masses of this summertime classic light up your gardens by day and shimmer beneath the evening moon, you’ll be thrilled that you did.
Are you growing Shasta daisies? Let us know in the comments section below!
If you enjoyed this article and want to read about other members of the Asteraceae family that bloom late in the growing season, we recommend the following:


I love Shasta daisies!
I have a patch that has grown beautifully since planting with lots of room and beautiful blooms. It was planted In 2018. This spring it is not coming back in . Maybe a few shoots on the outside of the patch. I was hoping to let this grow and multiply as much as it wanted to.
Is it because I should have tried to split/thin it already?
Thanks
Hi Beverly –
It sounds like the center of your Shasta daisy died over the winter. Some plants die because of repeated freezing and thawing that causes rotting.
We usually cut Shasta daisy stems down to a height of about two inches after the first frost. Then we apply about two inches of mulch over the crown for winter insulation and improved drainage.
You can dig up the clump, salvage healthy portions, and discard the rest. Our guide to growing Shasta daisies should help you get back on track.
Thank you for this helpful article. I have a very overcrowded patch that flower but go all floppy!
Hi Davie –
We’re glad you found the article informative. Happy gardening!
In San Francisco it has bloomed all year for two years now, it is a reduced bloom between December and April, but there are continuous new blossoms. The clump quadrupled in size over two years, I’m going to break up the clump into a long bed right against the house on the south side this weekend for maximum effect. There are the large flowers that stand about 24+/- inches tall. I’m working on a neighbor’s yard that hasn’t been cared for much of the past 40 years, so I have to proceed cautiously as it was totally overgrown, and they… Read more »
Hi Ronald –
It sound like the Shastas are in a location that is meeting all of their cultural requirements and they are doing exceptionally well. Reassure the neighbor that dividing will benefit them as it prevents overcrowding, improves airflow, and inhibits prolonged leaf wetness and susceptibility to fungal diseases.