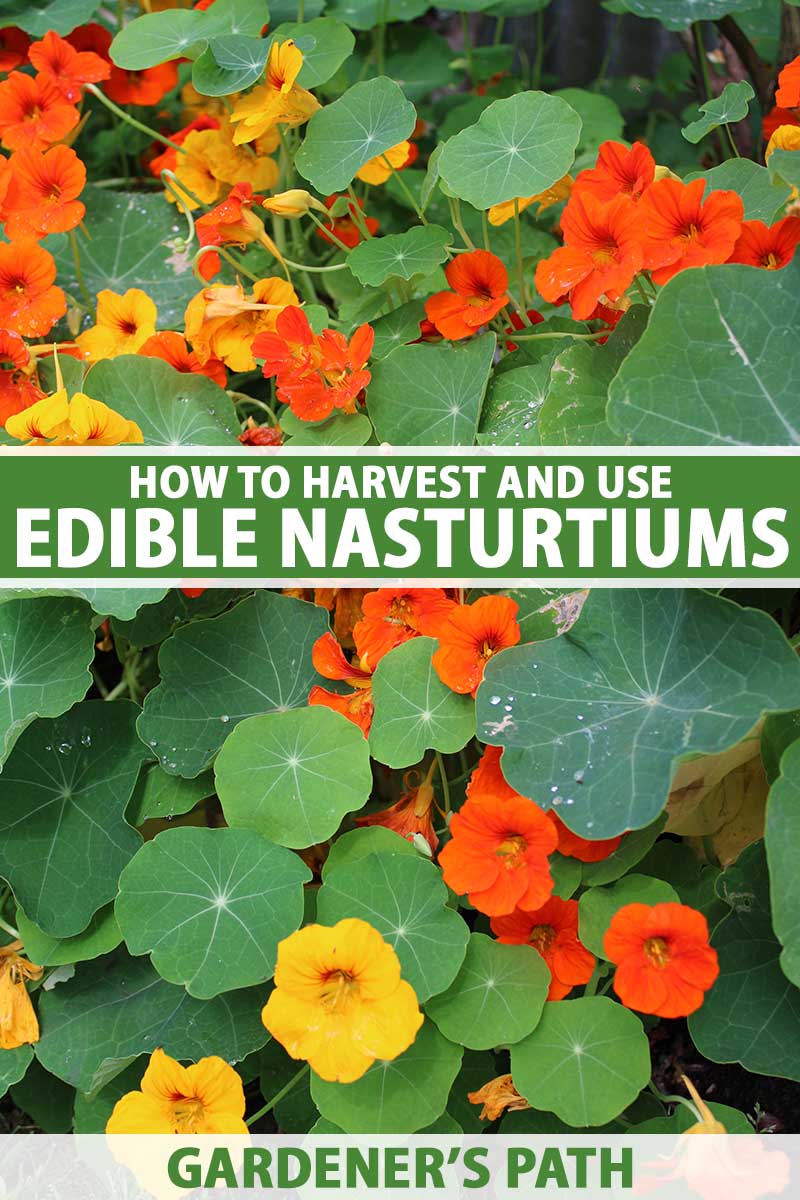
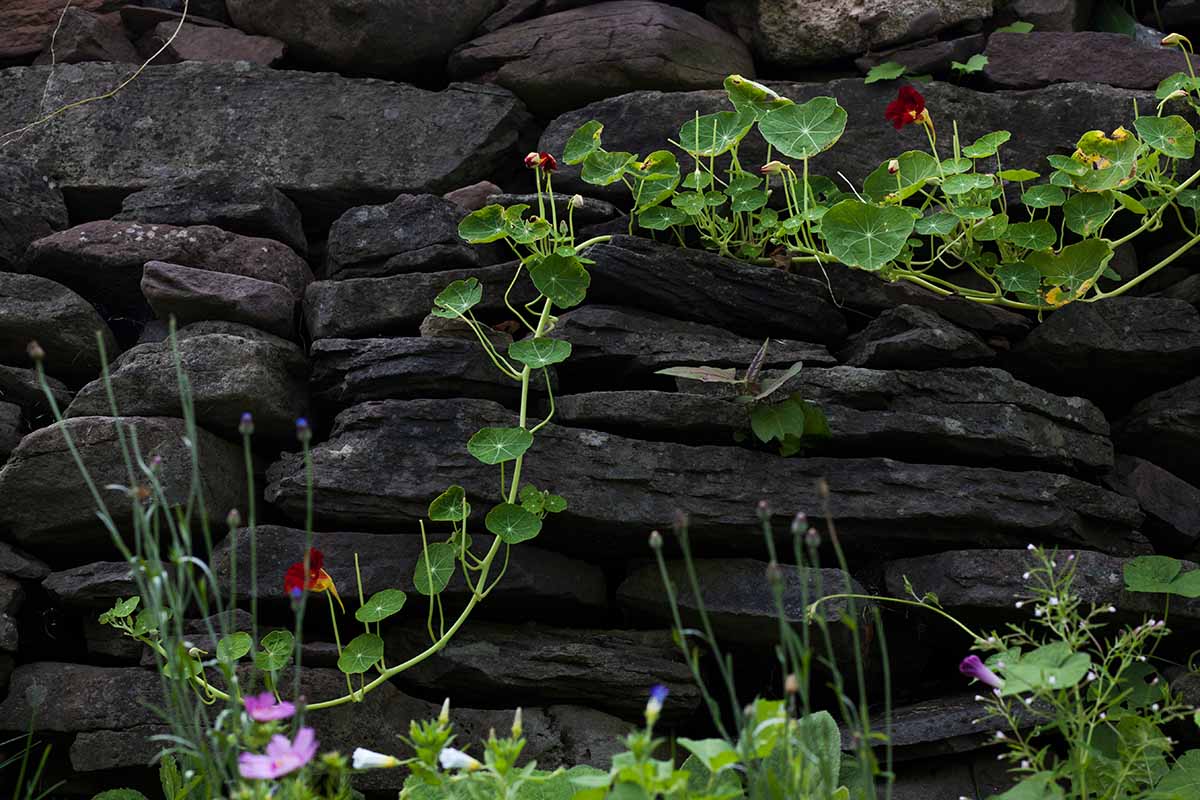
I love a two-for-one deal! That’s what I got when I realized the cheery nasturtiums (Tropaeolum majus) I’d been growing for decades were also edible, and that’s what you’ll get too!
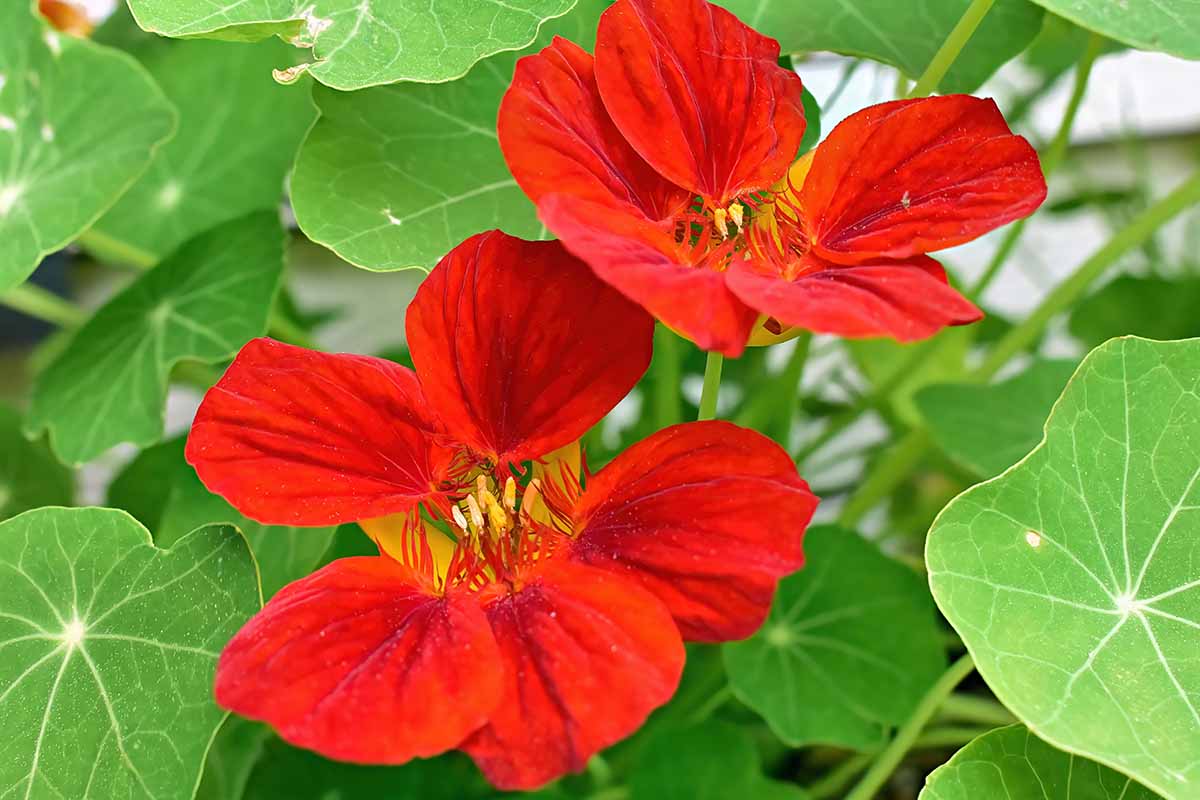
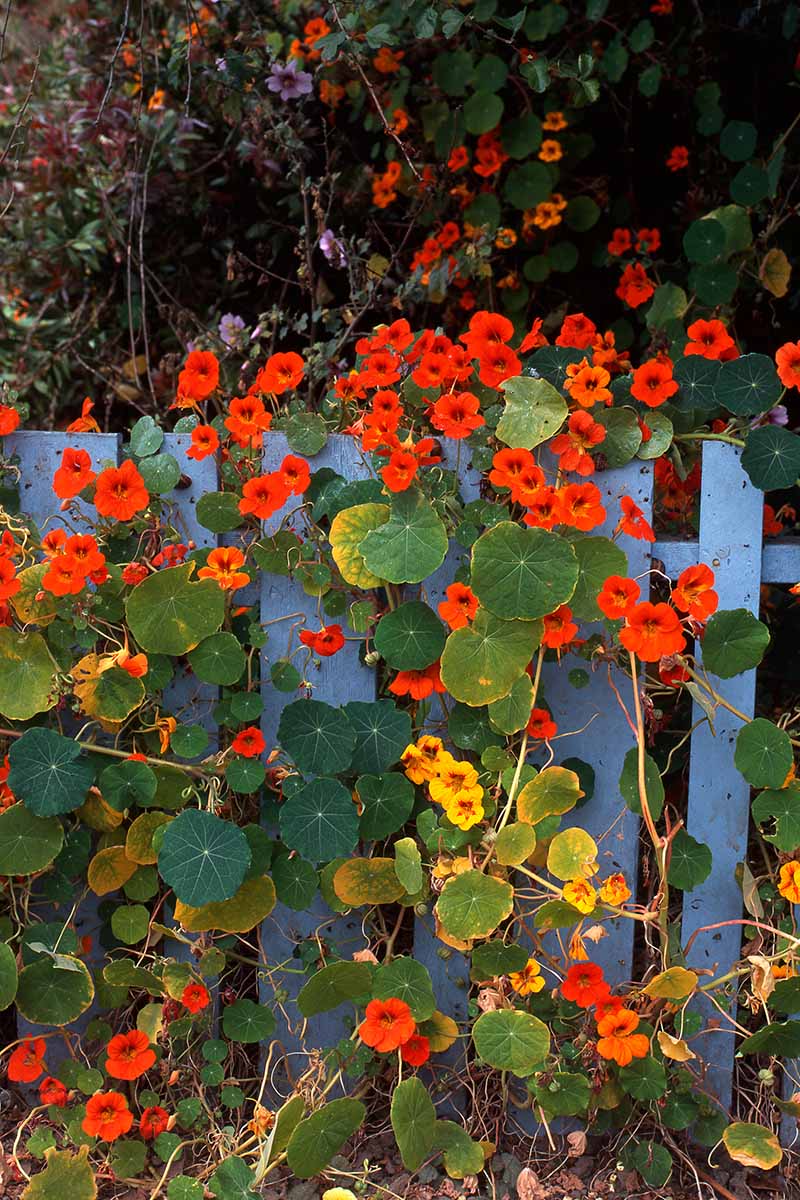
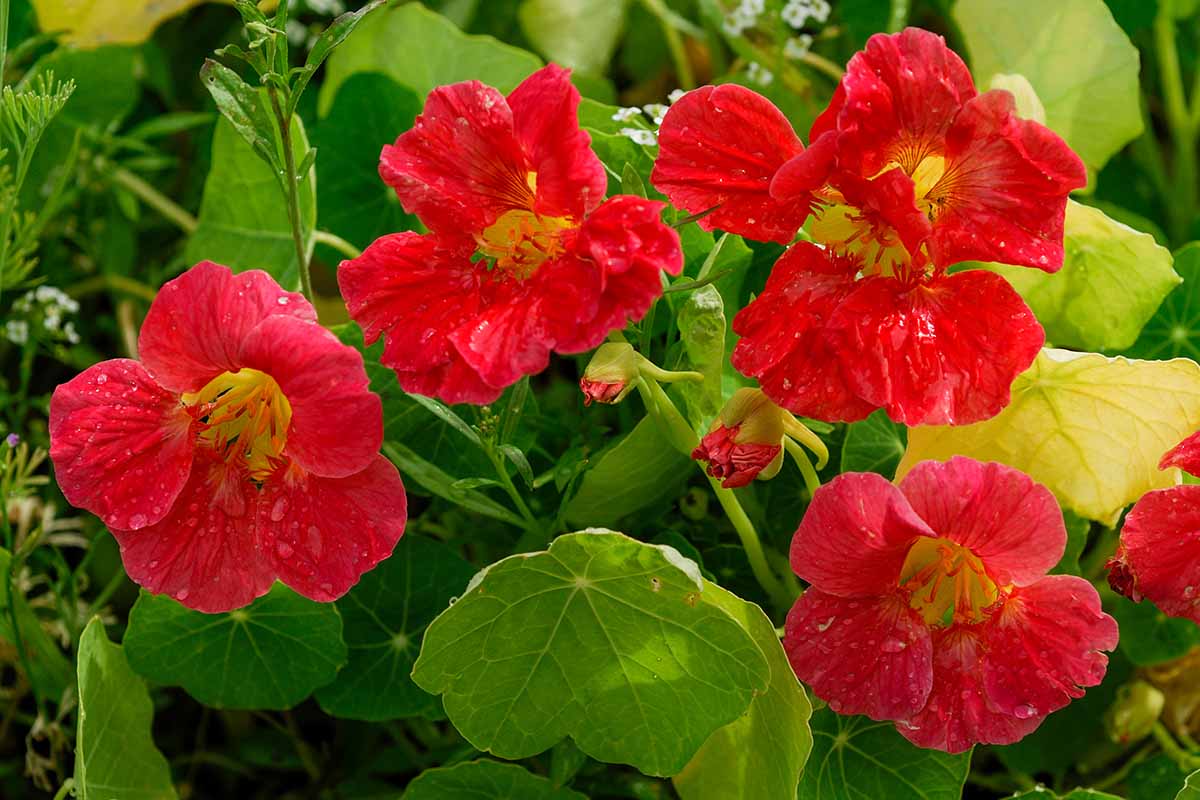
I’ve always enjoyed the brilliant color of nasturtiums in a flower border, particularly the bright red types. I often rely on the easy-care annuals for creating little nosegays tucked into vintage bud vases for decorating odd corners of the house, like my office.
We link to vendors to help you find relevant products. If you buy from one of our links, we may earn a commission.
But in the past few years, I’ve also grown these popular flowers in a way that lets me harvest plenty of the blooms and leaves to eat.
I start casually, occasionally popping a flower or a small leaf into my mouth as I graze from my vegetable garden on late spring evenings.
The peppery flavor particularly complements fresh snow peas or crispy romaine lettuce.
As more of the flowers begin to bloom, I go into serious harvest mode.
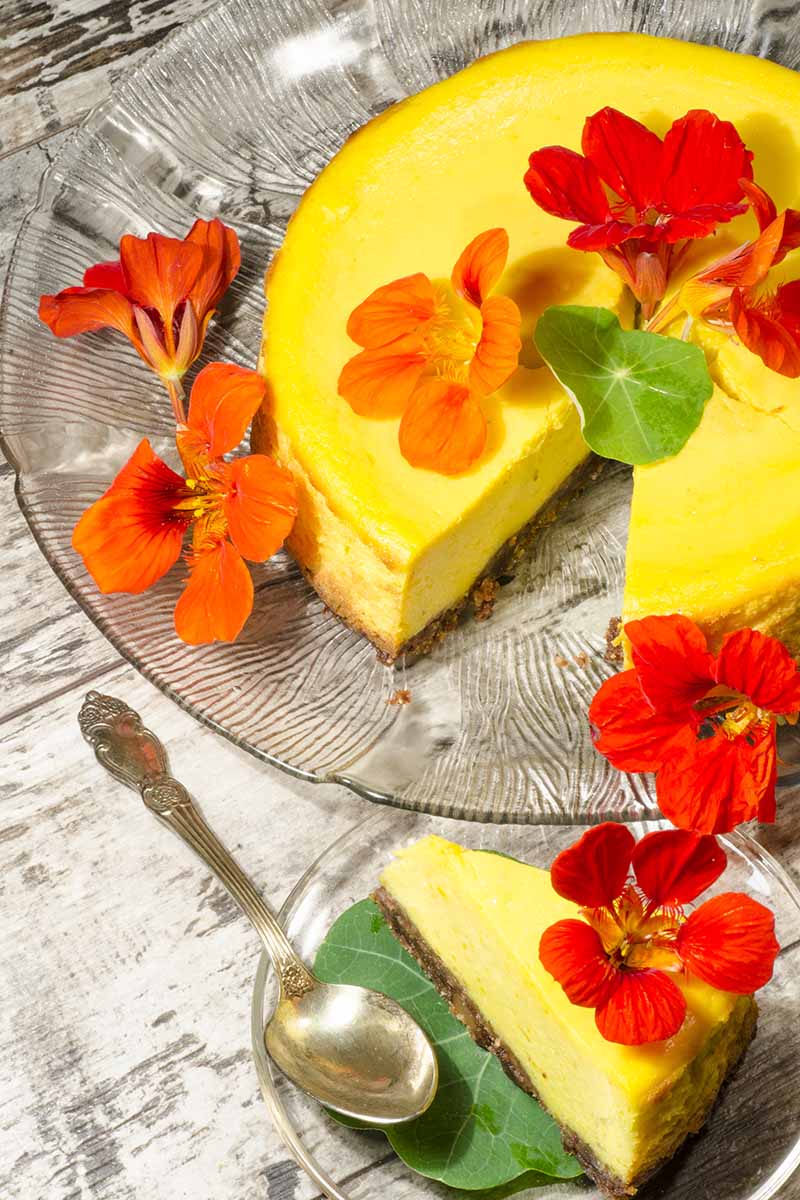
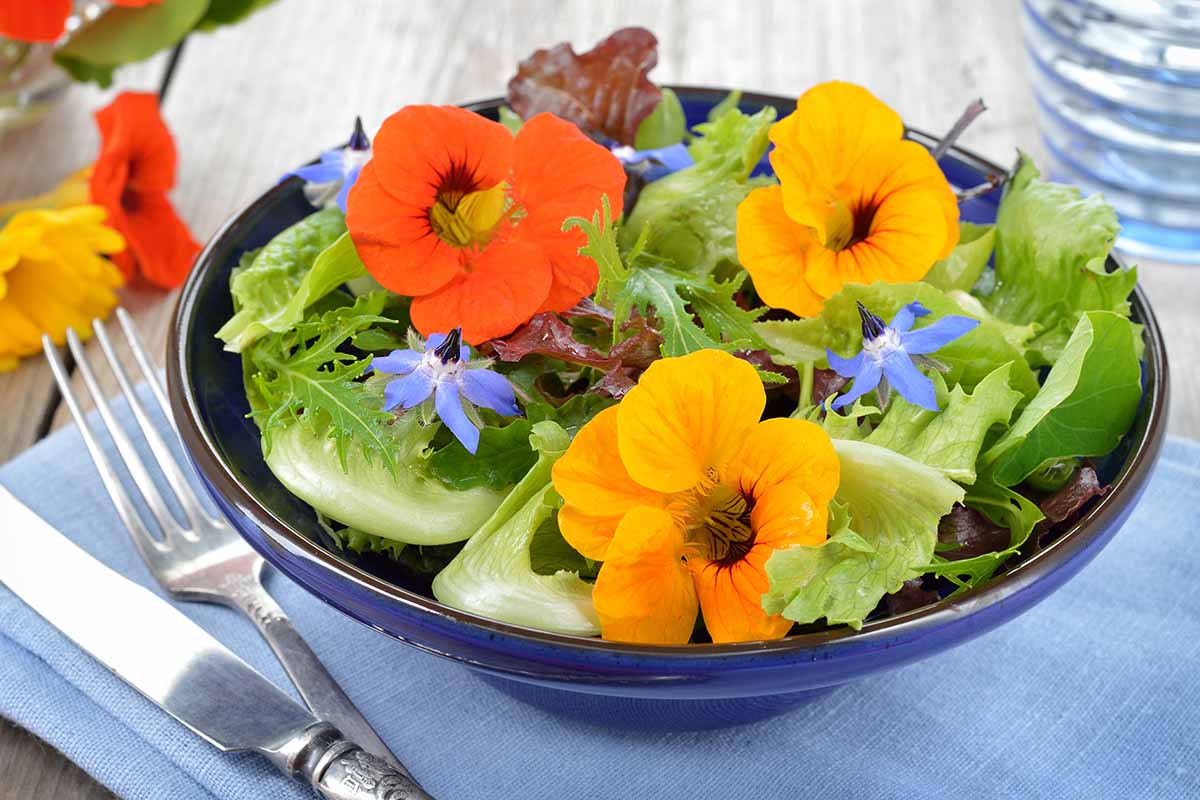
I clip a small handful of leaves to add pizzazz to plain romaine salad, chop cups of the orange and red petals to scatter over pizza slices, and use small mounds of whole pastel-colored blooms to top celebratory cakes.
I’d like to share what I’ve learned about the best ways to assure an abundant harvest of the blooms and the best time to pick edible nasturtium buds and flowers.
I’ll also delve into ways to eat the stems and leaves, and to preserve the green seed pods as faux capers.
I think you’ll find the process is as easy as growing nasturtiums for their decorative appeal alone. Here’s what I’ll cover:
What You’ll Learn
Pre-Harvest Strategies
There are two approaches to growing nasturtiums to eat.
You can occasionally snip off one or two of the leaves, stems, or blossoms like I do, to consume on the spot.
And you can also simply pick a few leaves, buds, or blooms at various times during the growing season to toss in salad or maybe use as a garnish atop savory dishes or confections.
When you’re just eating a bit of the nasturtium plant here and there, you can be quite casual, as long as you know the nasturtiums grown in your garden have not been sprayed with any chemicals. Enjoy!
But there’s a second approach, where you make a concerted effort to grow more substantial amounts of these particular annuals for culinary use.
Want to improve your odds of bringing in a sizable harvest of edible blooms, leaves, and immature green seed pods, with a few tried-and-true strategies?
Here are some steps to take and issues to resolve pre-harvest:
Eat a Sample
I would never discourage someone from growing nasturtiums since they’re so pretty, inexpensive to grow from seed, and easy to care for.
And they provide numerous benefits as companions to vegetables in the garden as well.
But if you’re going to grow dozens of these plants so you can have abundant edible leaves and flowers, it’s a good idea to make sure you like the taste!
Nasturtiums are part of the Tropaeolaceae family, and the leaves taste a bit peppery and sometimes a bit wild-tasting, like a thin cabbage leaf – though they’re not brassicas.
The flowers also have that brassica flavor, but with a velvety texture and a more delicate taste – more like a tender young radish.
Before you commit to growing a bunch of them, make sure you like that flavor.
If you can, sample a bloom or a leaf from a farmers market or neighbor, or the plants you’re already growing.
If taste testing in advance isn’t an option, start small, planting just a few until you’re sure the flavor profile is to your liking.
Or, go ahead and plant enough to yield a bumper crop, while recognizing that you may end up with beautiful bunches of flowers that don’t have a taste that’s to your liking.
Not a bad fallback position, is it?
It’s also possible the taste of the pickled green seed pods won’t appeal to you. Be sure to make just a small sample to start with if this is something that interests you.
And if those don’t work out for you, you’ll still have the option of letting the pods turn brown so you can save the seeds to plant next season or share with fellow nasturtium lovers.
Grow Without Pesticides
I mentioned that you need to make sure any random leaves or flowers you pop in your mouth have been grown without pesticides. This is crucial when you’re aiming to cultivate nasturtiums for the express purpose of eating them.
There’s a corollary here, too. Not only should you grow any edible plants without using harmful chemicals, you’ll also need to anticipate whether you can grow these annual flowers to maturity without the benefit of those types of pesticides.
If you’ve historically had no option but to spray vegetables or have a history of insect pests in your garden, you may want to opt only to grow the nasturtiums in containers indoors, or skip this particular culinary gardening project altogether.
Select a Suitable Variety to Grow
There are two distinct sizes of nasturtium plants.
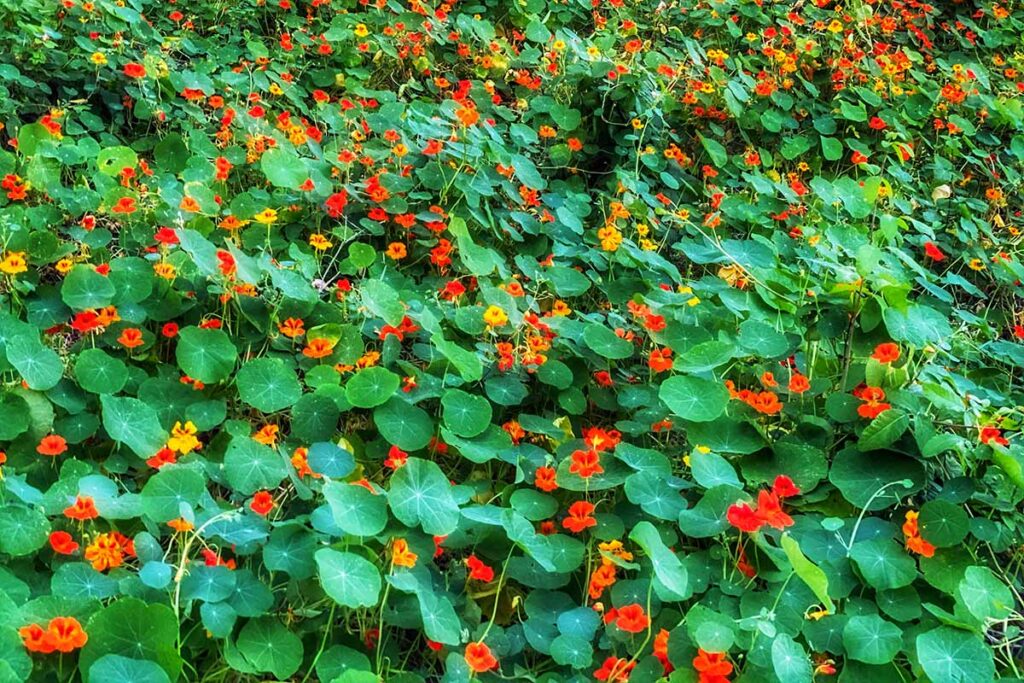
The vining types can grow quite tall, even seven or eight feet, and require trellising. Of course, they’ll produce far more edible blossoms and leaves than the other type, the compact or dwarf varieties.
Here’s the thing: If you have the option, you may want to select the bigger varieties so you’ll have a larger harvest of edible blooms, leaves, or seed pods.
But the vining varieties need space and trellises to thrive. If you can’t meet their requirements, they won’t produce a lot of leaves or blooms – and they might not even live long enough to produce flowers at all.
In that situation, you’d be better off with a more modest harvest from the smaller plants.
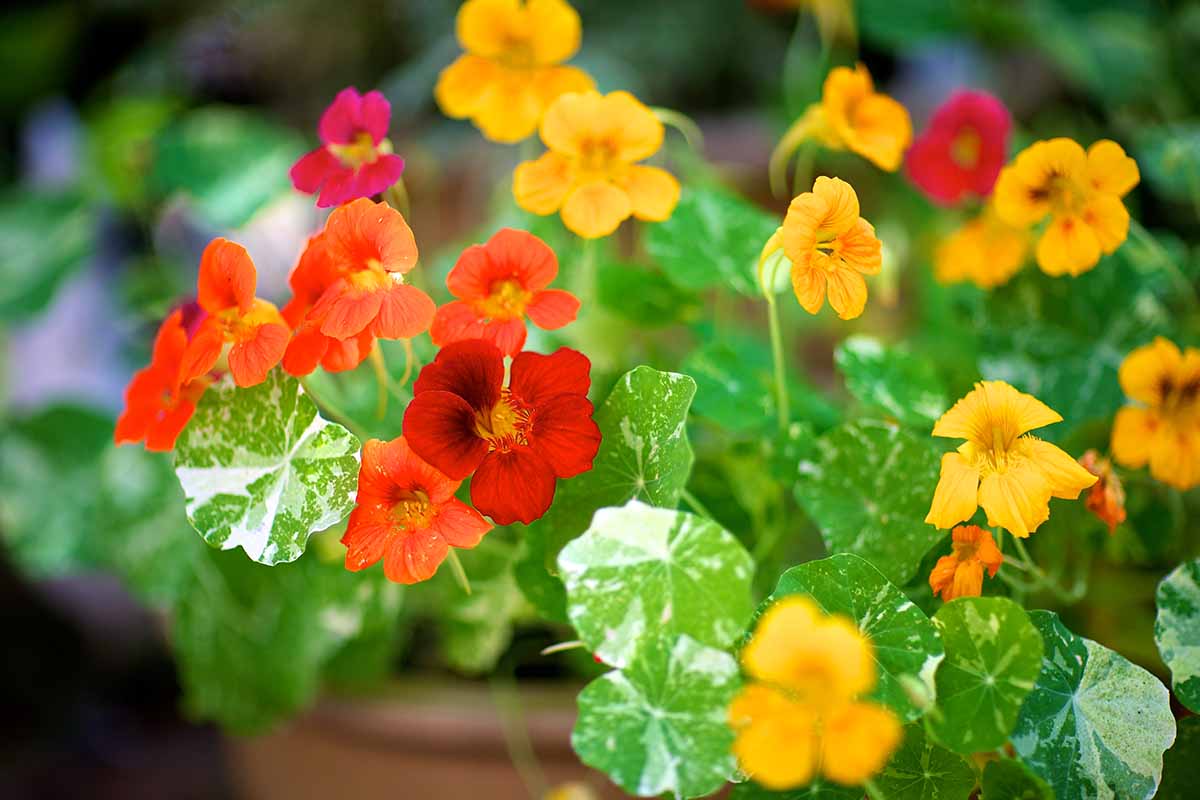
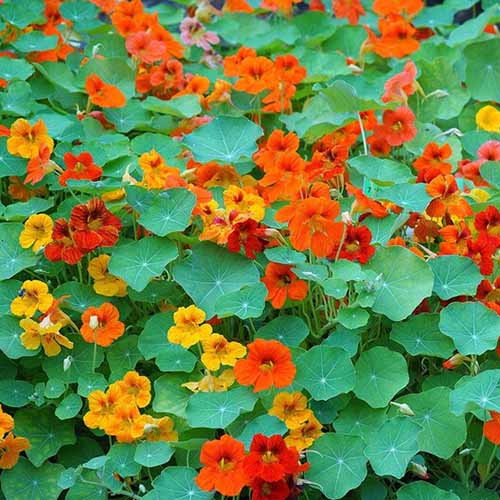
Happily, there are lots of varieties to choose from in both the vining and compact categories, and many different colors are available.
For example, ‘Tom Thumb’ will grow to just 10 inches tall, and spread eight to 12 inches or so. You can grow this cultivar in containers or among taller plants, like squash.
‘Tom Thumb’ seeds in a mix of colors are available in various-size packets and in bulk from Eden Brothers.
If you do opt for the more productive vining type, consider the tall nasturtium seed mix that’s available in packets and bulk sacks from Eden Brothers.
This variety grows seven feet tall and each plant produces dozens of leaves, blossoms, and many more green seeds than other types throughout the growing season.
Time the Harvest
The older a nasturtium leaf gets, the more pronounced its peppery flavor becomes. The leaves also get tougher the longer they stay on the vine.
To assure the most nuanced flavor and tender texture, start seeds early in the spring so you’ll be able to harvest fresh, new leaves with plenty of time left over for the plants to bloom and provide an abundant harvest of blossoms.
You’ll want to harvest the flowers before the arrival of the hottest summer weather, for sure. When they become heat stressed, the blooms can taste overly pungent, or the plant may take a break from producing flowers at all.
To be certain you can enjoy blooms with a mild flavor, pay attention to the “days to maturity” listed on your seed packet. Remember, you can always start these annuals indoors to get a jump on the blooming season.
Plant Enough
If you’re planning to pickle the green seeds as “poor man’s capers,” make sure you’ll have enough to make a batch. You’ll be amazed at how fast a four-ounce jar of those spicy delicacies can disappear.
Each flower leaves behind a naked fruit that holds three tender green seeds.
It takes a week or two for the flowers to fade and form these, so plant in plenty of time to pick them before a killing frost.
If you’re aiming to harvest several cups of those immature pods, you’ll need to sow enough plants to yield first the blooms and then the requisite number of fruits.
Consult our guide to growing nasturtiums for more detailed directions for propagation.
Trellis the Vining Types
Be sure to provide support when you grow vining types of nasturtium. That will keep the edible leaves and blooms off of the ground, and it will also help to keep the plants healthy and producing.
The reason I’ve included trellising as part of the “pre-harvest” strategy is that you’ll want to provide the support right after you transplant starts, or once outdoor seedlings have formed a set of true leaves.
If you try to add a trellis or fence after the plants are larger, you run the risk of pulling up plants or otherwise damaging the roots during installation.
How to Pick Nasturtiums to Eat
Now for the tasty portion of the project: Harvesting the different edible parts of your nasturtiums!
The first edible to harvest is the foliage, which you can snip with scissors.
Some gardeners grow nasturtiums just to use as microgreens, which means you would sow them thickly and then cut them at the soil line when they reach at least a couple of inches tall. But remember that these plants will not continue to grow and produce flowers.
Pick leaves when they’re small. It’s your choice whether to cut the leaves off the plant with the stalks attached, or just sever them individually.
Cut at most a third of the leaves (or leaves and stems) at one time, so the plant has enough foliage to photosynthesize for its food.
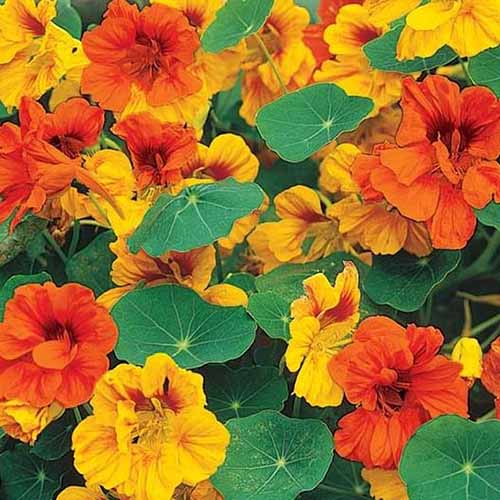
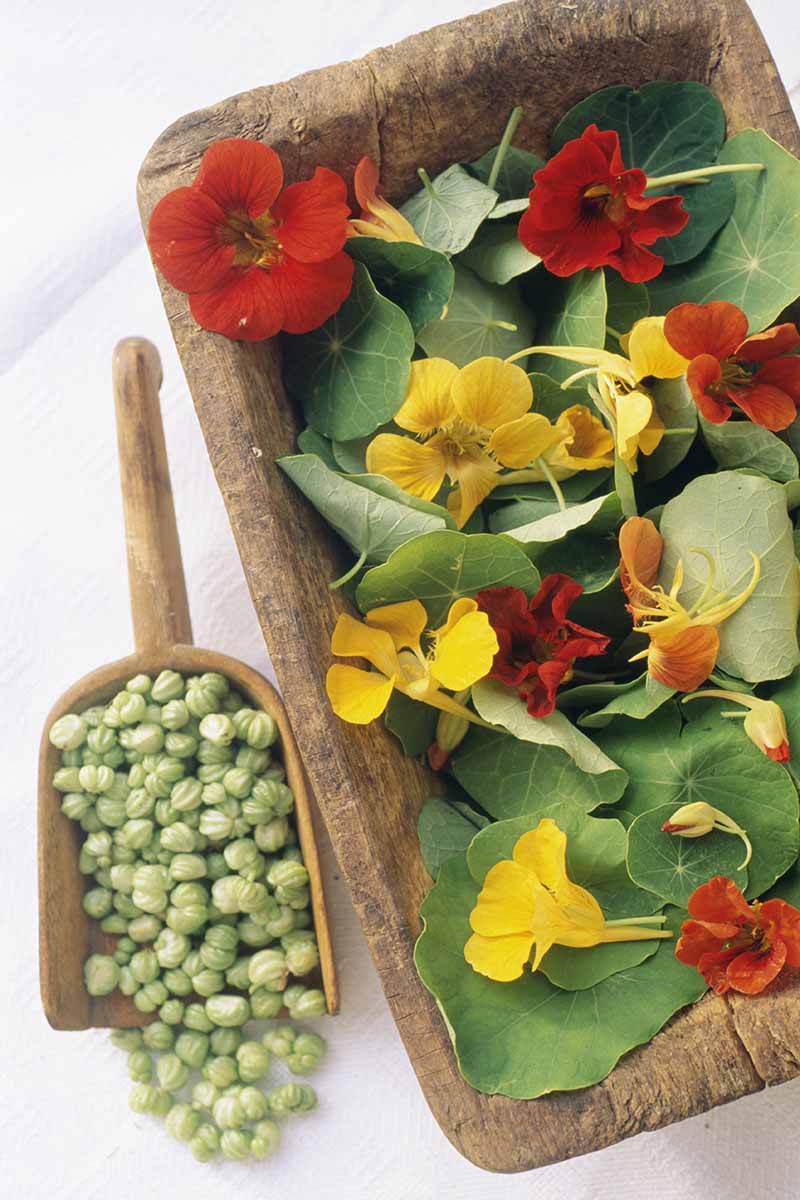
Both the firm buds and newly opened blossoms are also edible and provide a pop of color.
The buds offer a more concentrated flavor. The flowers can be consumed whole or chopped, or the petals may be separated to use as a garnish.
Use clean scissors to clip buds or blooms right below the point where they’re attached to the stem.
It’s okay to clip the closed buds while they’re still damp, but if a flower is fully unfurled, wait for the petals to dry after a rain for the best texture and try to use them right away.
While it will encourage further blooms to deadhead the faded flowers, they’re too limp to eat. If you do cut the spent petals, send them to the compost, not your salad bowl.
To harvest the immature seed pods, snip them while they’re still green.
Instead of tugging them off with your fingers and risking pulling up the plant, snip the pods from the stems using scissors.
Washing and Storage Tips
After you pick leaves or stems, you can store them for a few days in the fridge just as you would newly picked lettuce. Wait to wash them until you’re ready to eat them.
For more information about harvesting lettuce, see our guide.
It’s a good idea to store nasturtium separately from more delicate leafy greens, because they will develop a very strong, hot flavor after a couple of days.
That unpleasant taste can disseminate to all the greens in the same container in short shrift, leaving them all with a hot, unpleasant scent and taste.
As for the blooms, don’t blast them with water from the sink or hose. Instead, if you’re not happy with their level of cleanliness or suspect they’re harboring insects, gently swirl the blooms in a bowl of cold water after picking them.
Then dip them out with a mesh strainer or your clean fingers, and let them drip dry on a paper towel or clean dish towel. Chop them or use them whole.
When you need to store the blooms before using, they’ll keep for only about a day in the fridge.
Place them on top of a towel and gently slide them into an open zipper-top plastic bag, and then place the bag flat on a refrigerator shelf. The bag should be big enough so it doesn’t touch the blooms.
The green seed pods you plan to pickle may need a quick rinse in cool water, but once you’ve done that, begin pickling them immediately.
Like most of the other vegetables you pickle, green nasturtium seeds should be processed as quickly after you pick them as possible.
More than a day of delay could cause them to lose their firm texture. And they spoil even more quickly if you store them in the fridge when they’re even a little damp.
So treat them with care, and harvest them when you know you’ll have time to begin the pickling process. Just don’t wait too long, or you’ll end up with those hard brown seeds that aren’t suitable for eating.
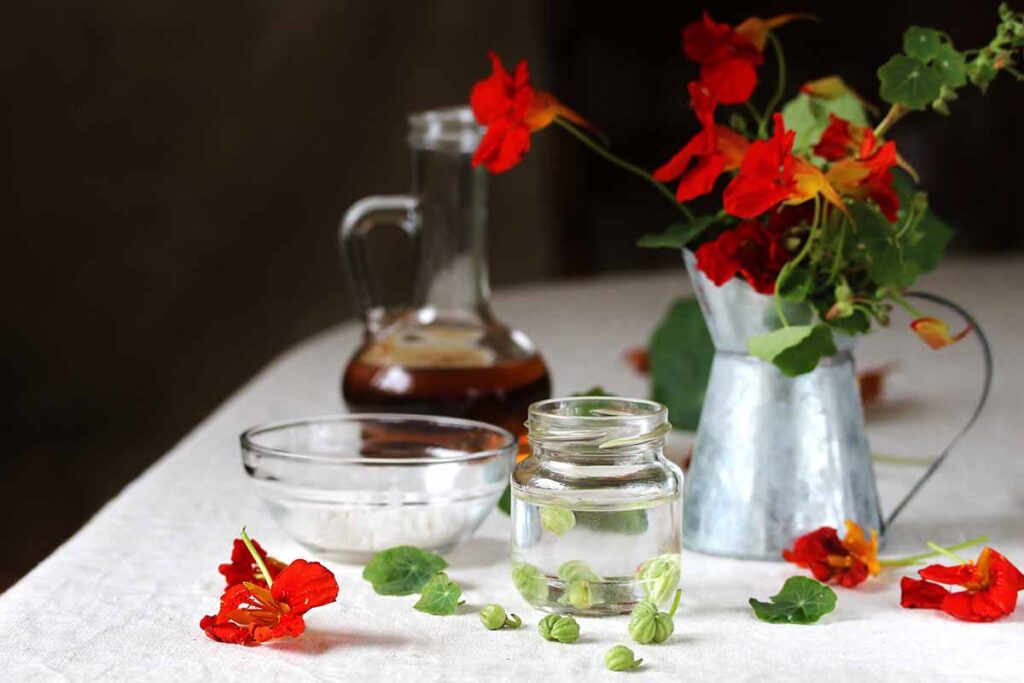
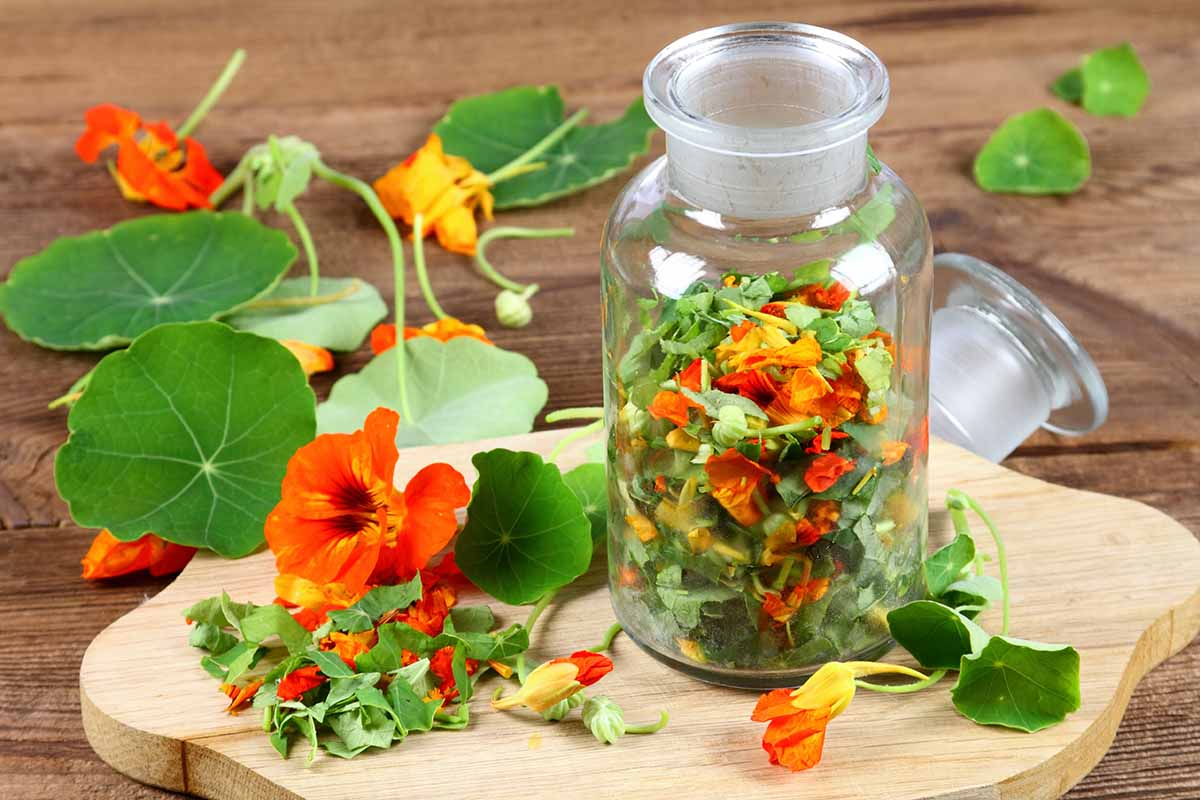
Make Faux Capers from Nasturtium Pods
I first came across the idea of pickling green nasturtium pods in a historic recipe collection known as “Mrs. Gardiner’s Family Receipts,” written in the 1760s.
This fine lady wisely recommended gathering what she called nasturtium “berries” after the blooms are “gone off” but before they become brittle or brown, and then preserving them by steeping them in a cold brine for three days before topping them with a hot pickling liquid.
In more modern times, the pickled pods are often called “false capers,” “California capers,” or “poor man’s capers.”
Mind you, capers come from an unrelated plant family, Caperaceae. But when you pickle the plump green pods of nasturtiums, they do serve as a credible substitute for capers, and are much less expensive.
Plus, they look beautiful in clear pickle jars displayed on open shelving.
To find out how to grow and care for the caper bush, see our guide. But if you’d prefer to make the nasturtium-based faux capers, the directions haven’t changed much since Mrs. Gardiner’s day.
For four half-cup jars, you’ll need about two cups of the fresh green pods with any random stems or debris removed. Rinse them lightly, and let them drain in a colander.
These often grow in clusters of two or three. Gently pry them apart before proceeding to pickling.
To minimize the peppery taste, you can soak the pods in a salt brine for three days. Otherwise, skip this step and proceed with pickling. You can experiment to see what you like.
Start by stirring one cup of cold water with one and a half tablespoons of pickling or kosher salt in a pint-size jar until the salt dissolves, to make a brine.
Add the green pods, cover with a piece of cheesecloth, and set the jar in a dark, out of the way area of the kitchen. Adding a jar weight if you have one, or placing a cartouche on top, is a good idea to keep the seeds submerged. Leave the pods in the brine for 24 hours.
Rinse and drain them, create a second batch of the salt brine, and then repeat the process once a day for two more days. Let the seed pods soak for 24 hours each time before rinsing and draining them.
The soaking seeds will release a sulfuric scent, but that’s all part of the process, so don’t fret about it.
Once you’ve completed the final rinse, it’s time to pickle the pods in a hot vinegar-based brine.
Divide the soaked nasturtium pods among four half-cup jars, and add a small bay leaf to each, along with a sprig of fresh thyme.
In a small saucepan, stir a tablespoon of granulated sugar and a tablespoon of salt into half a cup of white vinegar and half a cup of water. Bring the mixture to a boil over medium-high heat. Stir to dissolve the salt and sugar.
Use a funnel to pour the hot liquid over the pre-soaked, drained pods, covering them and leaving a half-inch of space at the top of each jar.
Screw lids on top, and refrigerate. Start tasting in about a week, and enjoy when the flavor is to your liking the same way you would use true capers.
If you’d like your faux capers to be shelf stable for at least 12 months, consider hot water bath canning.
For more information on water-bath canning basics, consult the guide on our sister site, Foodal.
Keep the Plants Producing
There are a few steps that can help you extend the harvest season for each of the edible portions of nasturtiums.
For one, you can keep the plants watered well so they’ll continue to form healthy foliage you can pick.
They’ll need at least an inch of supplemental water each week in the warm months if they don’t receive ample rain.
Remember that container-grown nasturtiums need more frequent watering since their roots can’t seek out moisture beyond the walls of the planter.
For more flowers, cut the blooms consistently to eat, or deadhead them after they fade if you’re not inclined to harvest the green seed pods or mature seeds for later planting.
Once the pods start forming, the plants divert all their energy to producing seeds and quit forming tasty new leaves or flower buds. Snip them off before they start turning brown if you hope to prolong the harvest.
Noshing on Nasturtiums
Growing nasturtiums to eat puts very little pressure on a gardener. Even if something goes wrong before you can harvest, or you simply lose momentum, there are so many other benefits to growing this plant.
The vines, bushes, and flowers are beautiful in the garden and landscape, and the blooms may be brought indoors to enjoy as cut flowers. They repel insect pests and draw pollinators and other beneficial insects.
So while I certainly hope you’ll have a healthy harvest, you’ll be winning from the time these annuals get big enough to sport their appealing circular foliage, or the blooms begin to open – whether you eat them or not.
Do you have anything to add in the way of tips or questions? The comment section below awaits, so feel free to chime in.
And if you’re looking for more helpful tips for growing this popular annual, you might enjoy reading these nasturtium guides next:

Thanks for the idea about making “capers”. Fun. I too have loved the peppery taste of nasturtiums. Another of God’s provisions.
My questions is has anyone ever tried to preserve them with blanching and freezing the leaves for freezing? Thanks.
Hello Ginger! I will never forget reading about pickling nasturtium buds at a historical website that featured a recipe for them from the 1800s. This was in the 1990s and I was amazed at how up-to-date the recipe tasted. I love when older ideas come back into vogue and appreciate your kind remarks. As for the blanching and freezing, I tend to think of the flowers the way you would fresh herbs. I do freeze them, but only as part of herb butter or pesto, or in ice cubes to use in cold beverages at festive gatherings. Freezing just the… Read more »
Is there anything i can make with dried nasturnium flowers and leaves?
Hello Kate. I think with a little experimentation you will find many enjoyable ways to cook with dehydrated nasturtium flowers and leaves. First off, though, you may want to separate them when you use them to cook with since the flavor is more pronounced in the leaves. One idea is to crumble them into garlic butter for a splash of color and added spice. Some folks grind dried nasturtiums in a mill or use a mortar and pestle, and then work them into coarse ground kosher salt in a ratio of one part nasturtium to two parts salt. These herbaceous… Read more »
You can probably keep the blossoms fresh linger by cutting them with a ling stem and putting a bouquet of them in water.