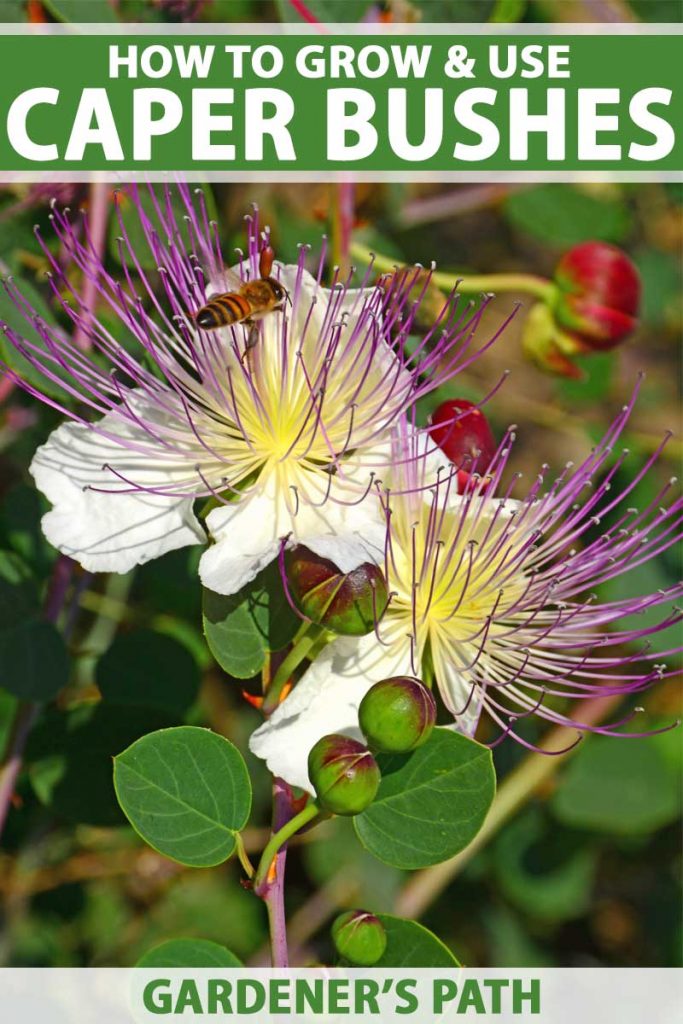
Capparis spinosa
I’m always interested in growing plants that offer a solid ROI. And while plants that offer a lovely flower or an unusual leaf shape in exchange for my work in cultivating them are nice, even better is a plant that rewards with something I can put on the dinner table.
And the caper bush fits this bill to a T. Edible flower buds that can be grown for food or beauty? I’m in!
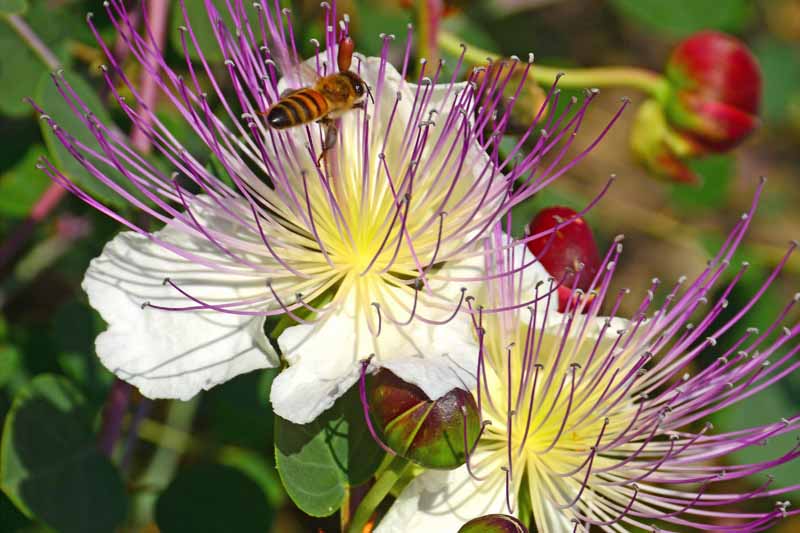
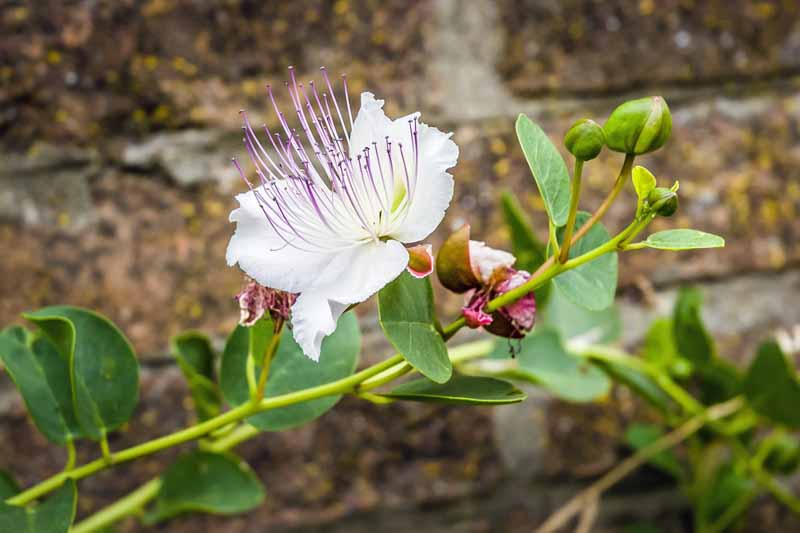
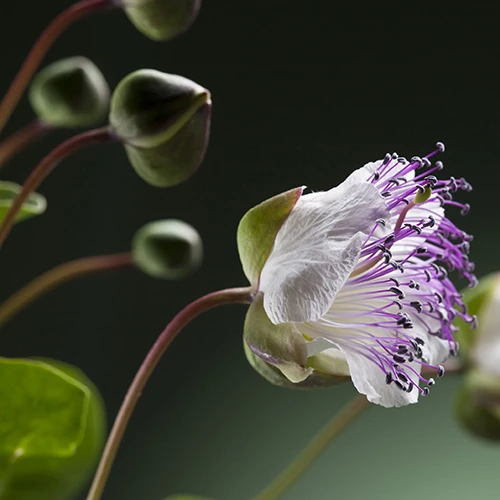
The tragic dichotomy of growing this plant, however, is that in order to harvest its delicious fruit, you rob the plant of its equally spectacular fragrant and white to light pink blooms, which are 2 to 3 inches across and feature numerous, dramatically long purple-pink stamens.

We link to vendors to help you find relevant products. If you buy from one of our links, we may earn a commission.
The flowers last about 16 hours, but open successively.
The solution is to plant twice as many shrubs as you might otherwise need. Let half bloom, and harvest the capers from the other half. Or you can let the flowers bloom, after which they will produce a caper berry.

Let’s learn more about growing this plant, which is also called Flinders rose.
What You’ll Learn
What are Capers?
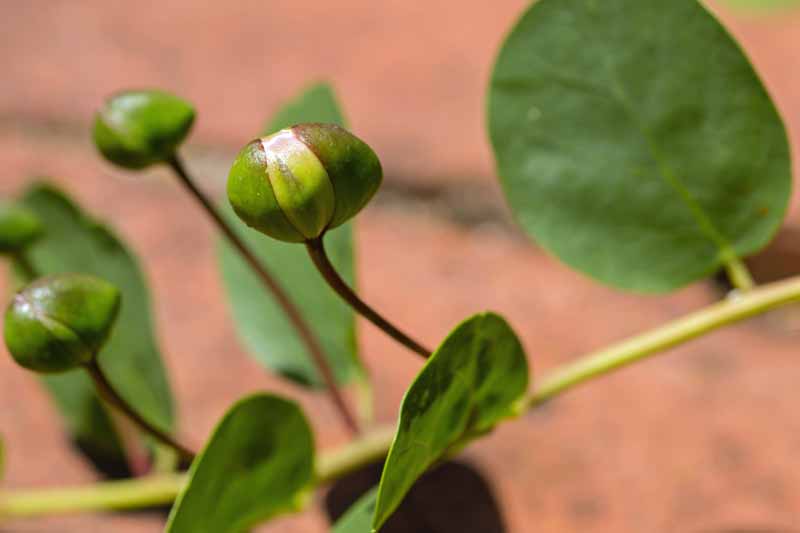
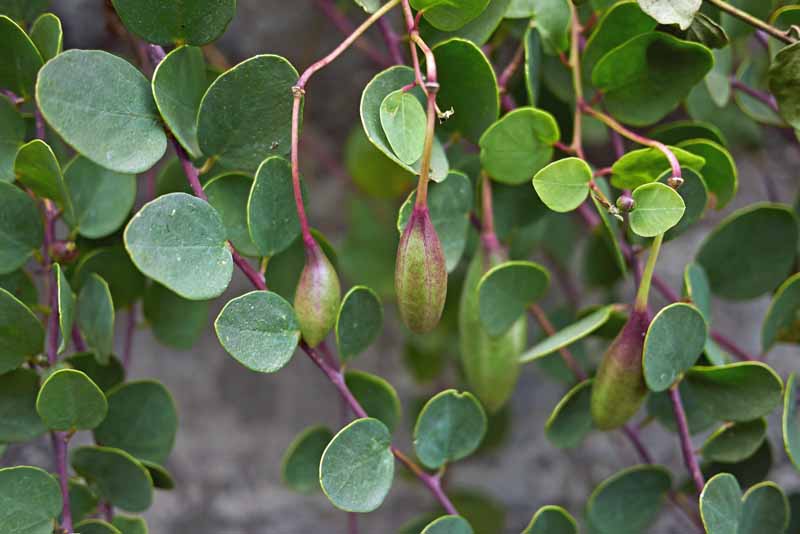
Capers are the edible flower bud of the many-branched caper bush, which also produces edible berries. Both are pickled before they are eaten, as they are very bitter when raw. Other parts of C. spinosa are used in medicines and cosmetics.
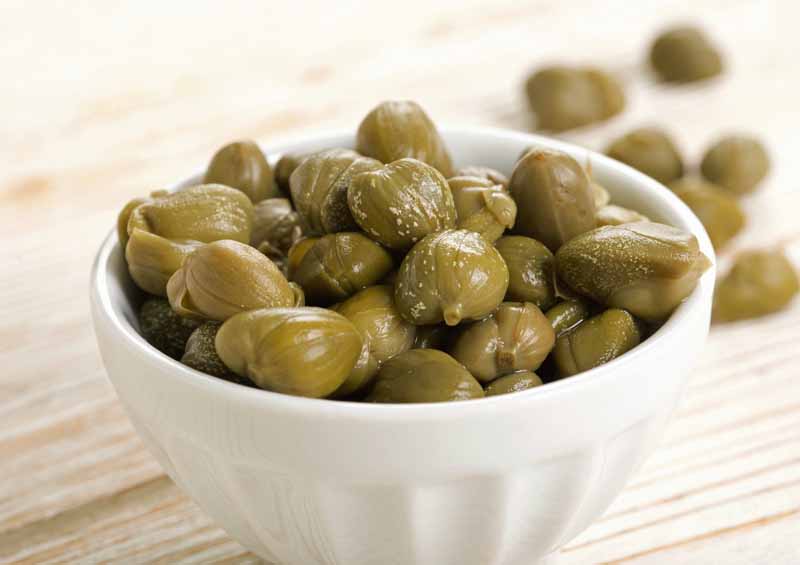
Olive-shaped C. spinosa berries are larger than caper buds, which are more roundish. Both, when pickled, have a piquant, tangy flavor, though the flavor of the buds is more intense. The berries are also starchier.
These pickled bits of goodness are typically used as a seasoning or condiment. They are especially delicious with fish and other oily or rich foods. The berries are sometimes served in cocktails.
Cultivation and History
Native to the Mediterranean, C. spinosa plants require dry heat and lots of sun to grow. They will not survive temperatures below 18°F. In their native environment, they are evergreen. In the caper bush diaspora, however, they may lose their leaves over winter.
In parts of the country where it gets cold, it’s best to grow C. spinosa in a container and let it overwinter indoors.
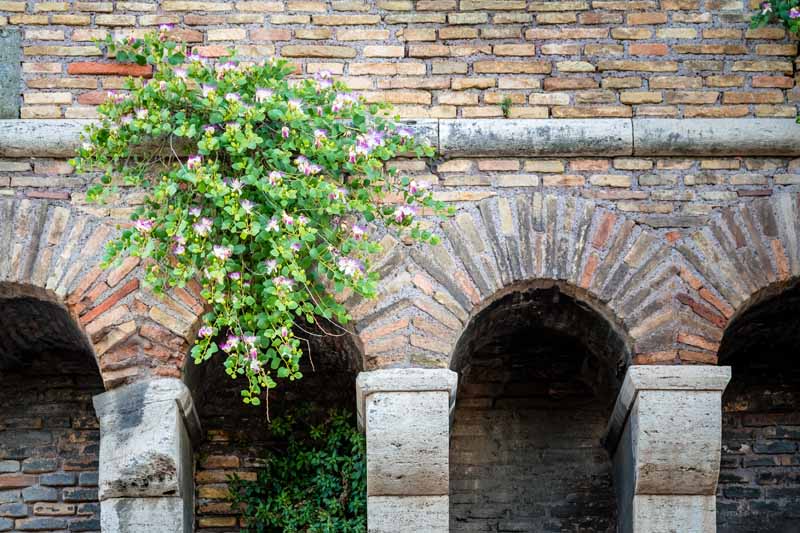
Caper bushes can grow three to five feet high and spread four or five feet wide. They like well-drained, rocky soil similar to that favored by another beloved Mediterranean food plant, olive trees.
They like masonry so much, they can be seen growing on the stone walls of ancient buildings throughout Italy!
Cultivation in the US isn’t rampant, although gardeners in the southwest and in parts of California have had some success.
The climate where I live in Central Texas is often compared to that of the Mediterranean, but local experts that I consulted are unaware of a booming caper bush-growing phenomenon in our area. I might just have to start one!
Propagation
C. spinosa can be tricky to propagate, but here’s some information on the most commonly used methods:
From Seed
Seeds are best sown when fresh. If this is not possible, the seeds require cold stratification to germinate, and even with the best care, germination can be sporadic and lengthy — as long as three months.
If seeds are not fresh, follow these steps:
- Drop seeds into a quart jar filled with warm water (110°F-115°F).
- Allow seeds to soak for 12 hours – no need to maintain the water temperature. It’ll cool to room temperature, and that’s fine.
- Remove seeds from water, wrap in a moist towel, place in a plastic bag, and refrigerate for 65-70 days.
- Remove from the refrigerator and soak again, as in step 2.
- Prepare 6-inch clay pots or a deep planting tray with a mix consisting of 50 percent planting mix, and 25 percent each of perlite and sand.
- Plant the seeds ¼ to ½ inch deep; water well and keep in a warm (70°F-85°F) place in part or full sun.
- Keep soil moist during the germination period, which should start within 3-4 weeks, and continue for as long as three months. Keep in mind that all seeds may not germinate at the same time.
- If seedlings become too crowded in the growing container, use scissors to cut off the smaller, weaker seedlings. Don’t pull them up, or you risk damaging the root systems of the healthier seedlings.
- When seedlings are 3-5 inches tall, transplant each to a one-gallon container filled with the same planting mix as used for the seeds. Take care not to disturb their root systems.
- Water well immediately and cover each container with a plastic bag. If it’s spring or summer, place the container in a shady spot. If it’s winter, put the container in a warm (70°F-85°F) area.
- After one week, cut off the top of the plastic bag so the seedlings will be gradually exposed to the natural environment.
- Enlarge the opening after another 10 days.
- After another week, remove the plastic bags and place the plants in a shaded area.
- If transplanting to the ground, do so in early spring after the last frost. If planting in a larger container, do so when your plant is 6-8 inches tall and appears healthy.
From Cuttings
- Collect 3- to 4-inch cuttings from stems of the plant that are at least ¼ inch wide.
- Insert a pencil into a container of potting mix. Remove the pencil, creati a hole.
- Immerse the cut ends into a rooting medium for 15 seconds, and then carefully insert into the holes you created with the pencil.
Keep in mind that your young plant won’t produce flowers for two to three years.
How to Grow
- If planting outdoors, choose a site that has very good drainage and no flooding.
- Water C. spinosa frequently during its first two years of life. After that, the plant is fairly drought tolerant.
- Fertilize with 21-0-0 or 16-16-16 two to three times during spring and summer.
- Don’t prune your young plant for the first three years. Thereafter, prune to the ground in November or December.
Growing Tips
- Good drainage is critical.
- Water for two years, then let it be.
- Fertilize when plant is young.
Cultivars to Select
In the US, you won’t find a huge variety of caper bushes for sale. One thing to look for is whether the variety you are considering has thorns, as is typical of the plant, or is one of the more newly developed spineless varieties.
‘Senza spina,’ for example, is an Italian spineless variety, whereas ‘spinosa comune’ is an Italian type that does have thorns.
If you’re looking for a live plant, you might be able to find them in the spring at your local nursery.
If you’re feeling adventurous and would like to try growing from seed, Eden Brothers carries seeds in small packets or in bulk.
Managing Pests and Disease
Insects
In the US, you may see weevils, which can be treated by sprinkling diatomaceous earth around the base of your plants.
As of this writing, other insect pests that may affect capers are limited to the Mediterranean. Growers in Italy, Malta, South Africa, Spain, Argentina, and Turkey may be bothered by shield bugs such as Bagrada hilaras, which has been also spotted in California and Arizona. Check out this article to find out how to get rid of these pests.
A number of species of flies, too, are known to bother plants growing in Italy, Malta, Algeria, Libya, Egypt, Pakistan, Tunisia, Jordan, and Indonesia. For these pests, try fly paper or insecticidal soap to get rid of them.
Other pests may include butterfly and moth caterpillars which can be treated with Bacillus thuringiensis (Bt) or beneficial nematodes.
Disease
These bushes may be troubled by fungal infections, which can be treated with a fungicide.
Cucumber mosaic virus (CMV) has been known to spread to caper bushes via aphid infestations, but thus far, this has been limited to the Anatolia region of southern Turkey.
Harvesting
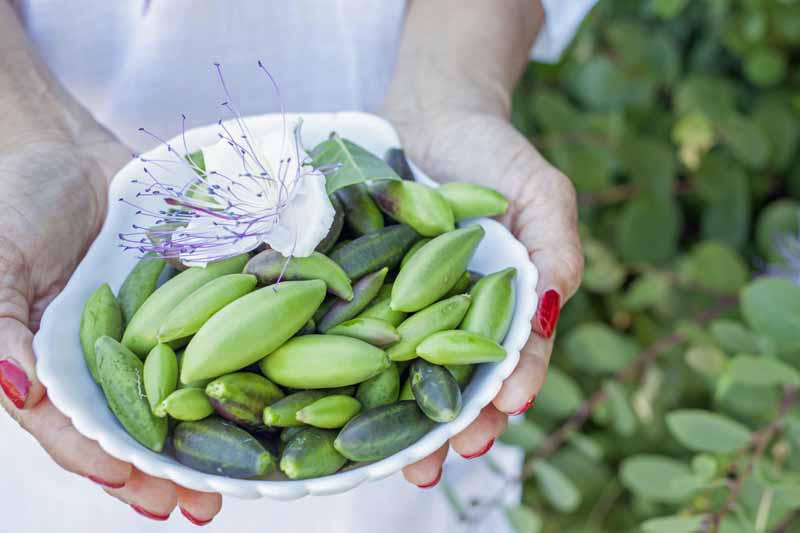
The immature, tight flower buds are ready to pick when they are dark, olive green, and at least 6 millimeters wide (about 1/4 inch). You can also harvest them as they get larger, up to about 14 millimeters (a little over 1/2 inch), after which they’ll start expanding into their flower form.

The smaller they are, the more desirable, and therefore, the more expensive. Each size has been given a label, as follows:
- Non-pareil: up to 7 mm
- Surfines: 7-8 mm
- Capucines: 8-9 mm
- Capotes: 9-11 mm
- Fines: 11-13 mm
- Grusas: 14+ mm
Pick them by hand in the morning when they’ve reached the size you desire. If your plant has thorns, be sure to wear gloves to protect your hands.
Preserving
Alas, unlike many other garden fruits such as tomatoes, capers cannot be eaten raw.
Well, they can be, but they’re a bitter mouthful.
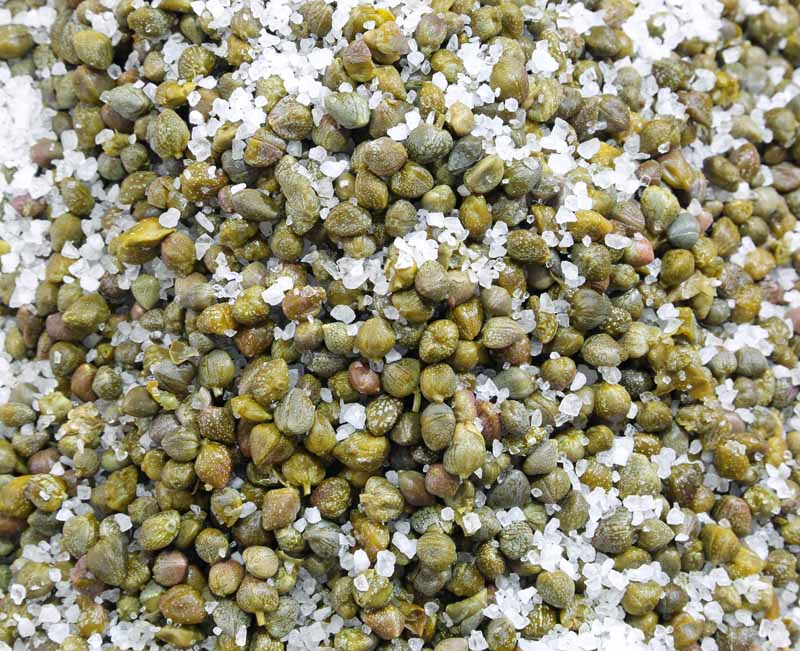
Much like olives, you can preserve capers with salt or with vinegar. For either, you’ll start by carefully picking through your harvest, removing stems and loose debris. Rinse thoroughly in a colander. Soak the capers in clean water for three days, changing the water every day.
To Preserve in Salt:
- Dry the fruit with a dish towel.
- Layer the capers in a small jar. Add several capers, then a teaspoon of coarse sea salt, and repeat. Screw on the jar’s lid and shake up to distribute the salt. Remove the lid and replace with one layer of a paper napkin or cheesecloth. Use a rubber band to secure the covering.
- Place the jar in a place where it will get airflow, but not in direct sunlight.
- Every day, drain the liquid that accumulates, and add another teaspoonful of salt.
- After about a week, or when the capers stop producing liquid, transfer to a clean jar and top with a lid.
- Store on a shelf in a cool, dark place for up to a year. Rinse the salt off before use.
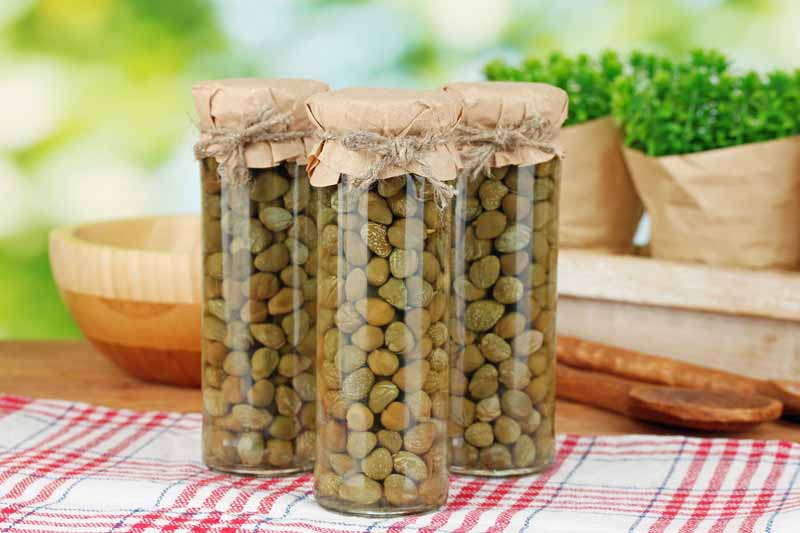
To Pickle:
- To preserve one cup of capers, thoroughly mix a solution of 1 cup apple cider vinegar, 1 cup water, and 2 tablespoons coarse, non-iodized salt until salt dissolves.
- Place the capers in a jar, pour the solution over the top, screw on the lid, shake gently, and store in the refrigerator. They’ll be ready to eat after about one week, but will be even tastier after a month.
Incidentally, the leaves are edible too, sometimes eaten raw but other times pickled.
Quick Reference Growing Chart
| Plant Type: | Perennial | Flower / Foliage Color: | Multi-color blooms with purple, cream, yellow |
| Native to: | Mediterranean | Maintenance: | Low |
| Hardiness (USDA Zone): | 8-11 | Tolerance: | Drought |
| Season: | Late spring, summer | Soil Type: | Rocky |
| Exposure: | Full sun | Soil pH: | 7.5-8 is optimal, tolerates 6.1-8.5 |
| Time to Maturity: | 2 years | Soil Drainage: | Well-draining |
| Spacing: | 2-3 feet | Companion Planting: | Sage |
| Planting Depth: | 1/4-1/2 inch (seeds) | Uses: | Edible landscaping, mass plantings, herb garden |
| Height: | 2-3 feet | Attracts: | Bees, butterflies, hummingbirds |
| Spread: | 3-6 feet | Family: | Caperaceae |
| Water Needs: | Low once established | Genus: | Capparis |
| Pests & Diseases: | Weevils, butterfly and moth larvae, fungal infections | Species: | spinosa |
Recipes and Cooking Ideas
Now we get to the best part. The eating part. How about we start with a classic Greek salad? This one calls for chopped tomatoes, onions, and cucumbers, in addition to capers.
And for the main course, consider Homemade Einkorn Ravioli with Sundried Tomato, Capers and Ricotta.
Another main course option is Chicken Piccata, a classic use of these tasty orbs.
Or, Just Grow Nasturtiums
This plant is not widely grown in the US and I think we should change that, don’t you? Just look at those beautiful flowers! Why not add this beauty to your landscape and create a conversation piece? Your neighbors will be green with envy.
After this plant becomes established, it’s easy to care for, and drought tolerant. You can pick the flower buds or leave them. Just be sure to bring it indoors to overwinter, unless you live where temps don’t drop below 18°F.
Are you willing to take a chance on something new and interesting — on a plant that gives back in the form of tiny green globes of goodness?
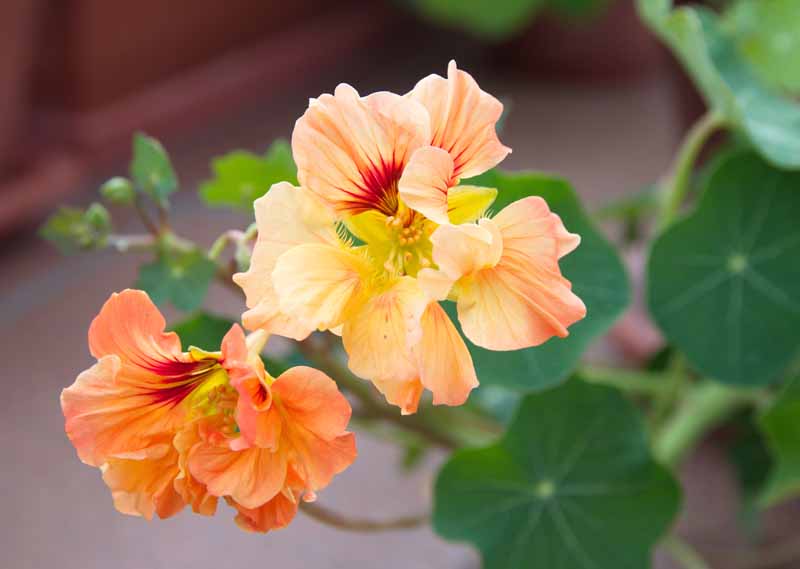
Oh, I have to let you in on a secret, now that we’ve been through all this together. Nasturtium seeds are said to have a similar taste to that of capers. So if a caper bush isn’t in your future, consider growing nasturtiums instead.
Perhaps you’ve already grown a caper bush? Share your experience in the comments section below.
If you’re looking for other flowering plants with edible blossoms or buds, consider these:
- Borage (Borago officinalis)
- Pot marigold (Calendula officinalis)
- Lavender, various types
- Pansies (Viola tricolor)
© Ask the Experts, LLC. ALL RIGHTS RESERVED. See our TOS for more details. Product images via Outside Pride. Uncredited photos: Shutterstock.


I have several capers planted in full sun, in a light mix that drains well. Here in Novato, California summer daytime temps are routinely in the 85-100 F range. They get light, but regular water. I have not fertilized. The adjacent olive trees, roses and strawberries are doing fine. My older plants do not grow and my new ones are dying back. What the heck do I do? I am unable to attach photos.
Norbert Feyling
Thanks for reading, Norbert. When you say “regular” water, how often are you watering them? I water mine (in a pot) about once a week, and our temps are high 90s-low 100s. Are yours in full sun?
As stated in my first posting, they are in full sun. The capers are in pockets in a concrete block wall facing East by South East. The sun hits them about 7 a.m. and they are in full sun until about 4 p.m. They are planted in a combination of cactus mix and drainage rock according to the instructions from the nursery. They have very good drainage, with a .5 gallon per hour dripper for each plant. The timer gives the drippers 15 minutes every other day, every day when temperatures get above 85. I am aware that, once established,… Read more »
Have you successfully raised other plants in concrete blocks? I have never used them as planters because of the chemicals they can leach. I’ve read that they can leach lime, especially, changing the pH of the soil. Also, if they are not newly purchased by you, it’s hard to say where they’ve been, etc.
I also wonder if they’re getting too much water. As I said, mine gets a solid 1-minute squirt once a week, and is doing well.
The chemical leaching concerned me when I first built the walls of Verdurastone some years ago. but my strawberries are rampant, the roses have been quite happy and the olive and apple trees planted on this hillside are doing quite well. The capers are on a top row in fresh mix, so I think the blocks are not the problem. I tried cutting the water way back and lost several plants last year. I am truly baffled, which is why I have reached out and I do appreciate your time and trouble.
Oh goodness. Well, I am stumped. I will give it some more thought.
Thanks Gretchen! Great article, and what I needed to answer my zone question. I’d love to help you foster the Central Texas caper boom! By the way, what is the soil pH in the Hill Country, generally? I’m in the limestone hills of Kerrville. I went to a local creek gravel bar, and scooped some sand and gravel to mix with the clay-like topsoil… My little plant (I call her Persephone) has grown about an inch in the last 2 weeks. She was in a 4″ pot that I bought online. I am drizzling her daily, and she’s on a… Read more »
Hi Karen,
Thanks for sharing your caper growing experience with us!
Capers aren’t supposed to be too affected by insect pests at this time in the US, so let’s hope that something took a nibble of your plant, decided that caper wasn’t on the menu and then moved on.
Let us know how Persephone does! I’m very envious of you and Gretchen being able to grow your own capers!
Hi, Gretchen and Karen Cook–if you are still reading this discussion! I’ve been in Kerrville for nearly 5 years now and I want to join the Central Texas caper boom. Is Persephone still around? What kind of caper is it?I like strange plants and my grandmother’s maiden name was Capers, so I think I need one (or more)! where did you get the plant?
Can I pickle or cure the berries the same way as the buds?
Hi Tristen,
Yes, you can treat the berries the same was as you would the buds for pickling or curing.
I actually prefer the berries to the buds – more to bite into!
Can caper bushes be grown in central Ohio, perhaps 8n a large planter?
Hello Kathryn Lilley! If you’re willing to tote it inside when the chill weather hits, and have the indoor space and light for it, growing a caper bush in a container can work! Do keep in mind that for the first few years it will need ample water, which can be tough to keep up with on a container plant. I think the novelty and beauty might be worth it, though, and I know you Ohio gardeners are used to a little extra hard work to keep things blooming. Good luck, and please check back if you decide to try… Read more »
I’m planted a caper in a large pot in August 2019 here in Austin and it has grown but…… not very much. It doesn’t look unhappy and its definitely larger so I have no idea why its never taken off. There’s not much on the internet about soil tips other than hot and dry and leave it alone. 🙂 I’ve yet to see a flower on it. I brought it inside during the snowpocalypse but it died to the ground anywhere, however, it is has fully grown back now to its former drawf-ish size. We’ll see if it ever flowers!… Read more »
Hi Brian! So nice to see something that made a complete comeback after the snowpocalypse! As for its future growth, while I’m sure your caper bush would prefer fertile ground next to a rock wall in a sun-drenched Italian setting, it should be cool with the container. To get it to grow more quickly, you may want to up the water, since it is in its first couple years of life. Also, see about giving it some fertilizer. As mentioned by Gretchen, above, the ideal is 21-0-0 or 16-16-16 a couple times during the spring and summer. Last, and this is… Read more »
I just purchased another caper berry plant this wknd. The wholesale grower told me it needs to be planted in a 20 gallon pot. Is that correct? The plant is only about 3” tall right now. The previous caper berry plant I just lost was 6” tall and grower said it died because the pot was too small, but it doesn’t make sense to put such small plants in a 20 gallon pot.
Thank you!
This does seem quite large for a small transplant, but I think the advice the grower gave you is sound. Capers have sensitive roots, so they should be disturbed as little as possible to avoid shocking the plant. A larger pot can help you to avoid having to deal frequently with rootbound plants, as every time you transplant, you run the risk of disturbing the roots. But you will have to water sparingly only as needed, more when you first plant, and tapering off gradually. Make sure to select a container and potting medium with very good drainage. This will… Read more »
I live in Cyprus where caper bushes are very common. I love waiting for the flowers to bloom in the evening. They are just spectacular.
Beautiful! Thanks for sharing, Jackie!
How to collected seed caper from seed and germination?
Growing capers from seed is difficult to do, unless they’re freshly harvested from a mature plant and sown immediately. See the section on propagating capers from seed above for propagation instructions! To save your own seed, wait until the seed pods are fully mature on the plants, and harvest them just before they split open.
I love nasturtiums! They’re beautiful and I like to pickle the fresh seeds. The leaves are a great addition to salads as well as the flowers. They attract cabbage butterflies so be on the lookout for caterpillars. Nice plant to grow.
Excellent recommendation, Ann! Also known as “poor man’s capers,” the seeds of these plants may be easier to obtain for many gardeners than true capers. Nasturtiums make a wonderful addition to the edible garden.
Hello, I have a lot of capers here in Morocco. My problem is that I sell the crop at a very low price because there is a documented company that I deal with. Unfortunately, as for the abundance of the product, it is a lot.
Hello Anass. I am sad to hear that you can’t parlay a better price for your caper crop. But I admit, having so many capers at your disposal sounds wonderful. I wish you the best in all your growing efforts.