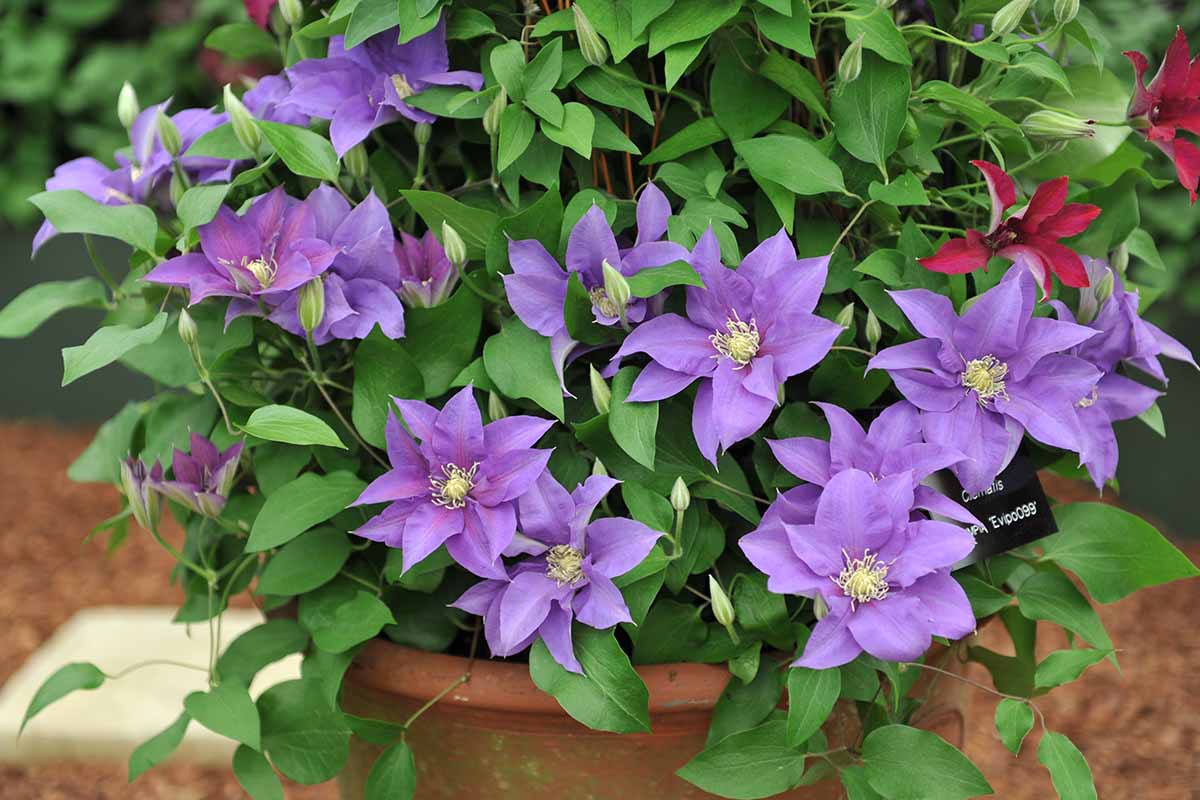


Pop quiz: which perennial, flowering vine is super hardy; offers large, spectacular blooms in a rainbow of colors that open from last frost to first frost; and is right at home in a container?
That’s right – it’s clematis!
No doubt you’ve probably seen one beckoning to the pollinators around a neighbor’s mailbox or dazzling in the summer sun along a trellis or fence.
The Clematis genus belongs to the Ranunculaceae family, also known as the buttercups.
It may be tough to see a link between the squat, humble buttercups that you probably mow over in the summer and the striking blossoms of this climbing vine, but trust me – somewhere along the line, they’re related.

We link to vendors to help you find relevant products. If you buy from one of our links, we may earn a commission.
There are hundreds of known species, and most are native to Asia. Because of their beauty, they’ve been cultivated throughout the Northern Hemisphere for hundreds of years.
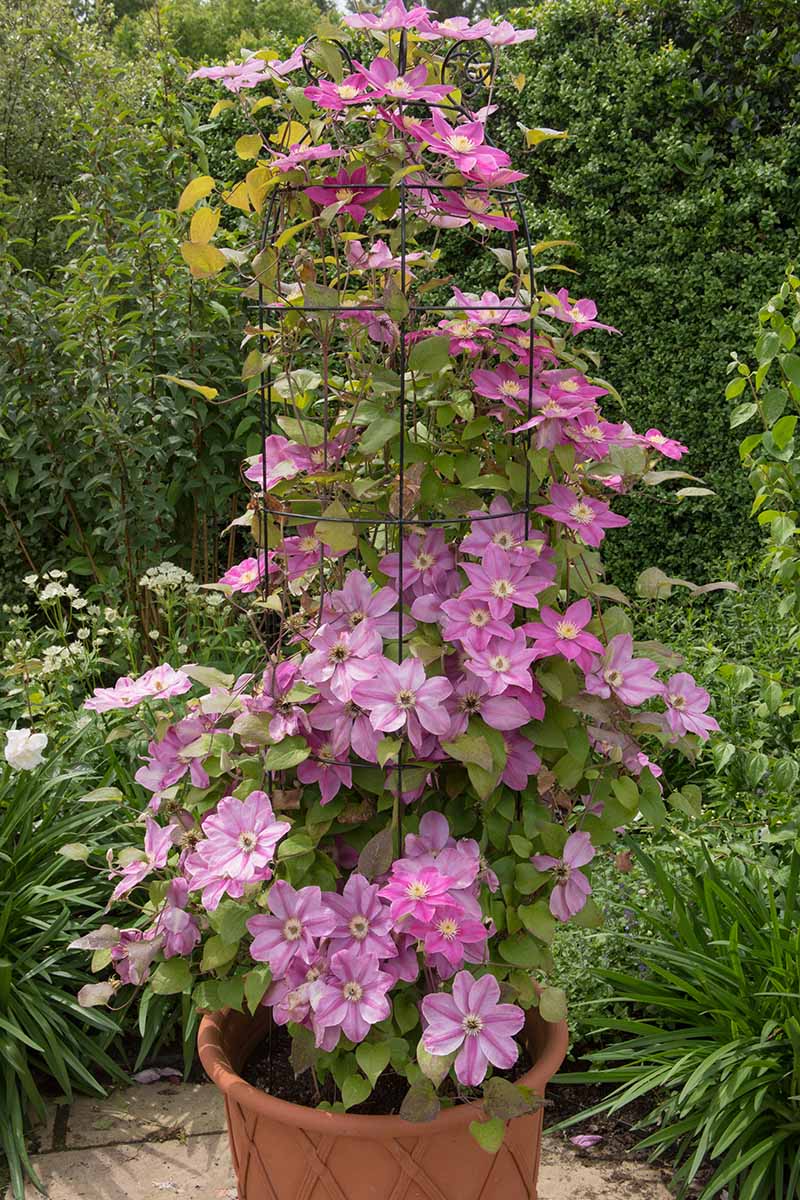
These vines are prolific climbers that will fill out a trellis, fence, or other structure with their dense mat of foliage and stunning blooms, but be warned – they can become very heavy over time, so be careful with deciding which structures you will allow them to grow on.
Aside from the large, gorgeous blooms they produce, a major part of their appeal is their hardiness.
These vines can tolerate conditions in USDA Hardiness Zones 5 to 9, with some varieties that are able to withstand cold temperatures in Zone 3.
Bear in mind that container-grown specimens may need some winter cold protection in the northern zones as their roots are more vulnerable to freezing conditions than those growing in the ground.
Another important issue to note is size – there’s a wide range between species, with some topping out around three feet in length and others sprawling to over 20 feet. Keep this in mind when choosing a variety to grow.
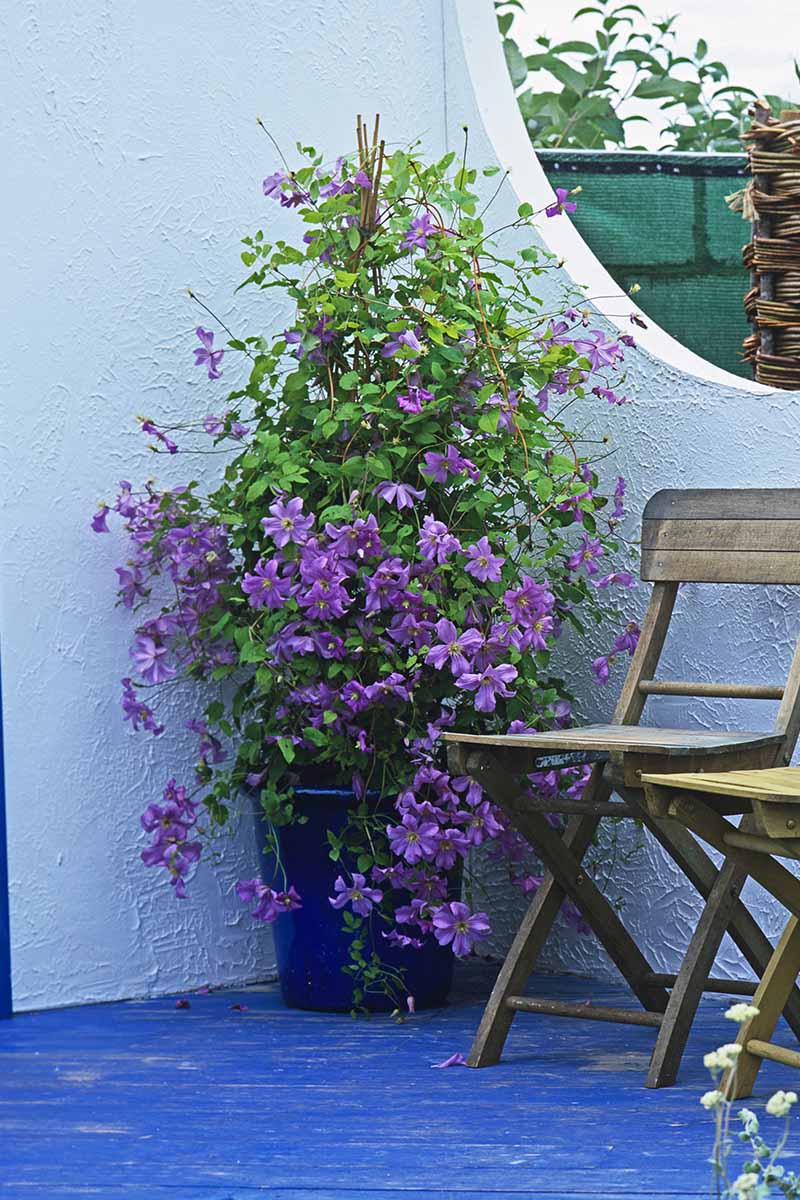
So, what is the appeal of container planting? And what does it take to grow a stunning specimen in a pot or planter? Let’s take a look.
Here’s what we’ll cover up ahead:
What You’ll Learn
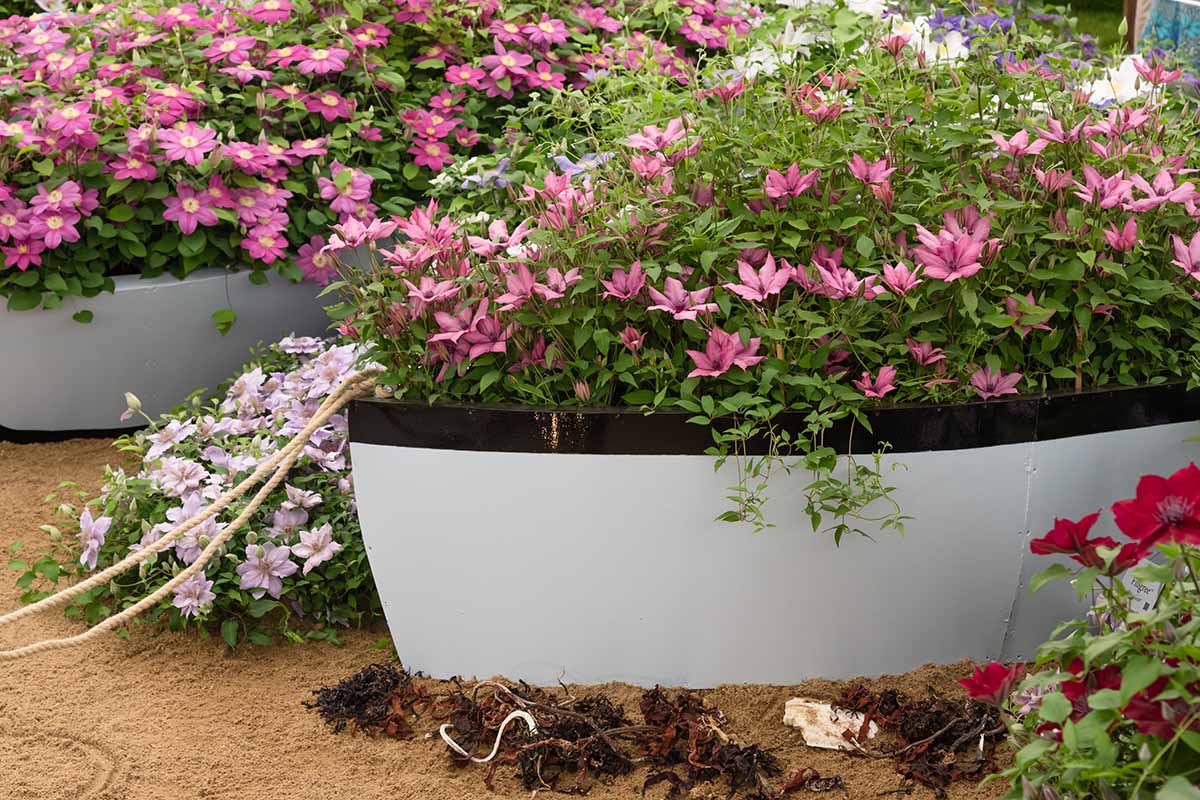
Why Choose Container Growing?
The first, most obvious reason is fairly common – perhaps you rent a property rather than owning, and you’re not permitted to dig up the yard or you don’t want to have to leave your vine behind if you move out.
With a potted specimen, mobility comes in handy. Not only can you take it with you, but you can move it into a garage, shed, or protected area if extreme cold poses a threat.
Too much shade in the current location? Overhead obstruction diverting rainwater away? Simply move it, pot and all, to a more suitable spot!
Easy containment is another benefit, with roots staying neatly put in their pot where they can’t spread into the ground unchecked. With a creeping vine such as this, that’s useful in preventing potential overgrowth.
Droughts happen, and in times when water is somewhat scarce, it’s much easier to keep a small container of soil watered rather than fighting nature to keep in-ground specimens moist through dry spells.
Of course, depending in part on the type of soil you’ve used and the container material, pots can dry out more quickly than the ground, so frequent watering may be a necessary task on your container gardening checklist.
Finally, as your plant grows, you can not only provide fresh soil more easily, but you can also repot periodically to give the root system the best possible environment. This is particularly helpful if your plant experiences a soilborne disease or infestation.
If the prospect of choosing a proper container leaves you feeling a little confused, read on to learn what to look for.
Which Container Is Best?
First things first: the vessel you choose should be approximately three to four inches wider than the root system to begin.
Appropriate sizing is crucial, as too large a pot can lead to oversaturation, and one that’s too small can choke the roots and stunt the vine.
The size of the root ball will increase year after year until you’ll ultimately need a container that is at least 18 inches deep and 12 inches wide. Some varieties may need an even larger vessel.
Moist soil is a necessity but soggy, waterlogged substrate is a no-no.
Because of this, clay pots with good drainage are the best choice as they allow for transpiration that can wick away excess moisture. During dry spells, just keep in mind that these will need more frequent watering.
Avoid using plastic or resin pots as they can keep the soil too wet for too long of a period, which can invite pathogens that can lead to disease.
How to Prepare Your Container
If you’re reusing a planter, be sure to sanitize it prior to planting. Pathogens, pests, and their eggs can sometimes persist from one inhabitant to the next.
Sanitizing is as simple as preparing a solution of nine parts water to one part household bleach and submerging the pot for 15 to 30 minutes. I prefer to use a waterproof storage tote to hold the solution to allow for full submergence.
After soaking, rinse thoroughly to remove all of the bleach – you don’t want to introduce it to sensitive roots. Allow the container to dry thoroughly.
Next, choose your potting medium. Soil that is rich in organic matter is preferred, but it can also be rather dense, so two parts soil plus one part compost or aged manure, and one part perlite or coarse sand, works best to allow for aeration and drainage.
A mix that includes coconut coir is also suitable, but be sure to drench it well and allow it to drain to rinse any excess salts away.
Once the soil is in place, it’s time to add the specimen of your choosing.
How to Grow
If you’re purchasing your clematis from a nursery or garden center, you’ll most likely find fairly established one- to two-year-old plants for sale.
They’re generally available in spring and summer in most areas, although they can be planted in the fall as well. Cool conditions are best for transplanting, to avoid shock.
Purchasing a plant of this age cuts out some of the initial waiting period, as clematis can typically take two to three years to become established and begin to flower if grown from seed.
If you decide you’d rather start from seed or cuttings, learn how to do so in our comprehensive guide to growing clematis.
When buying established plants, look for healthy, robust specimens. Check for signs of disease or infestation such as discoloration, die off, or deformities. Look at the roots through the drainage holes in the pot – if they appear slimy or dark, they may be suffering from root rot.
Signs of good health include developing buds; green leaves free of spots or curling; new growth at vine ends; and a perky, upright shape. Keep in mind that transplanting while plants are in bloom is not recommended.
You may also see dormant bare root offerings, which can be a good choice if you’d prefer not to take a chance on bringing pests home from the nursery.
Planting
Start by soaking bare roots in warm water for an hour or two to rehydrate them prior to planting.
If you’ve purchased potted plants, fill your vessel with soil and make a hole that’s about the size of the current container.
You can press the nursery pot into it to get an idea of the depth and width that you’re going for, but be careful not to compress the medium too much when you do this.
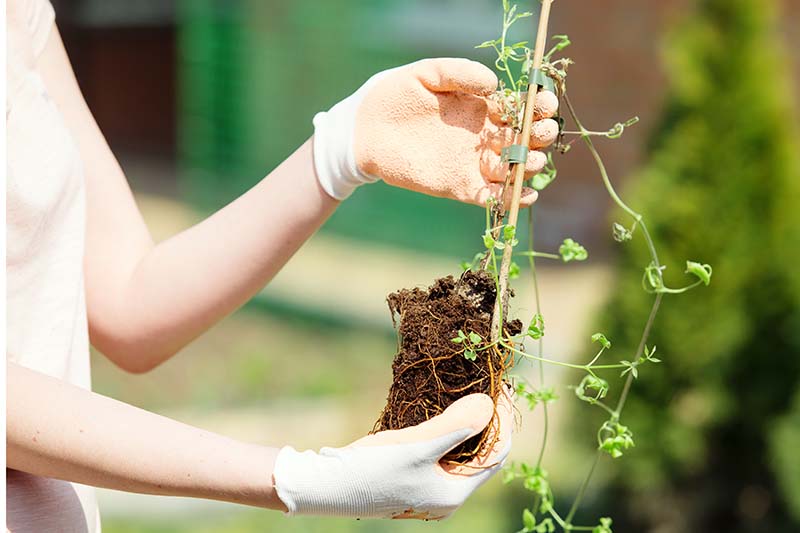
Carefully turn the plant out of the nursery pot and handle the delicate roots gently.
If you plan to remove most of the old potting medium to freshen it up a bit, do so carefully and place it in the new soil, backfilling around it. In either case, the roots should be positioned about two to three inches below surface level.
Bare roots should be buried about two inches or so beneath the surface of the soil with the pruned end facing upward.
Once the plant is in place, soak the soil well and allow any excess water to drain off.
Choose a spot outside that offers full sun for at least six hours per day. Partial shade through part of the day is tolerable for most species, but full shade is not.

Take note, however, that more than about eight hours of harsh sunlight can fade or burn blossoms and leaves.
It’s important to keep the root system cool and moist, and provide adequate shade to keep your plant out of the hot sun.
For younger plants that haven’t filled in yet, you can add about two to three inches of chipped or shredded bark mulch around the base to provide shade and retain moisture. Avoid pushing mulching materials up close to the stem.
Be sure that the spot you choose offers protection from strong winds but allows for adequate airflow, as dense foliage can fall victim to powdery mildew and other ailments without ventilation.
A trellis or other sturdy structure should be provided for climbing. But be aware that these vines produce thin tendrils that grasp rather than stems that twist or root in place, so the structure should be made of thin materials such as wire or canes.
You may need to help the young shoots to take hold by gently winding them around the structure at first and tying them loosely with twine for additional support.
Watering
Check on the moisture situation daily by feeling the surface of the substrate with your fingers. If the top inch feels dried out, water well with about one inch of water per week in the absence of rain.
Be sure that excess water is draining off to avoid waterlogging, which can lead to root rot.
Growing Tips
- Choose a vessel that is at least 18 inches deep and 12 inches wide, and plan to repot as needed.
- Provide six to eight hours of full sun per day, but keep the roots cool and shaded as much as possible.
- Be sure to keep the soil moist but not wet; check moisture daily and offer one inch of water per week in the absence of rain.
- Repot every two to three years to refresh the soil and avoid allowing the roots to become constricted.
Pruning and Maintenance
Avoid pruning at the base of the vine to allow it to fill in and create a canopy over the soil surface.
Your vine will likely produce new shoots for one to two months after the last frost, and bloom from early to mid-spring until the first frost in regions that experience cold winter weather, depending on the variety.
Most species go dormant in temperatures consistently below 45°F.
Many species growing in regions where dormancy occurs bloom in cycles throughout the growing season, and typically produce blossoms two times.
For the first two to three years, the ends of the new stems should be pinched or snipped off at 18 to 24 inches to allow energy to be diverted to building the root system and setting buds. Again, appropriate pruning once they’ve become established depends in large part on the variety.
There are three groups of clematis: those that don’t require consistent pruning, those that need some pruning, and those that require hard pruning.
Learn more about the differences in the types of clematis and how to keep them trimmed to perfection.
Winterizing
Even though most species tend to be very cold hardy, some need protection from harsh, cold winter weather – and this is particularly true for potted plants, as they have less insulation around their root systems than those grown in the ground.
Watering, wrapping, and mulching are helpful ways to protect your vine through the winter. For complete information on winterizing, see our guide to clematis winter care.
Repotting
Eventually, you’ll need to size up that container for most varieties, but even those that remain compact prefer a refresher every two to three years.
If you’re repotting to move up to the next size, wait to remove the plant until the new container is prepared. Turn it out carefully when you’re ready to move it.
If you’re refreshing the soil in the same pot, remove the plant from its container and wrap the root system in cloth for protection. In both instances, do a visual check of the roots to make sure they look healthy.
Signs of root rot, such as a slimy texture or discoloration, should be addressed prior to repotting. Trim away any damaged or rotting roots and submerge the whole root ball in a solution of one part hydrogen peroxide to three parts water for several hours, or overnight.
If there are signs of girdling, or a tightly constricted root system, gently separate the roots by pressing downward carefully from the bottom up to separate them prior to repotting.
Empty the old potting medium and scrub out any that remains, using a brush and some soapy water. If you’ve seen signs of infestation or disease, soak the pot in a solution of one part bleach to nine parts water for 15 to 30 minutes, and then rinse it thoroughly. Allow it to air dry before refilling.
A new container should be prepared as previously described, using fresh potting mix. Make a hole as wide and deep as the root system and replace it, backfilling around it with additional soil. Press the soil with your hands to firm the top, and water your clematis in well to settle the medium.
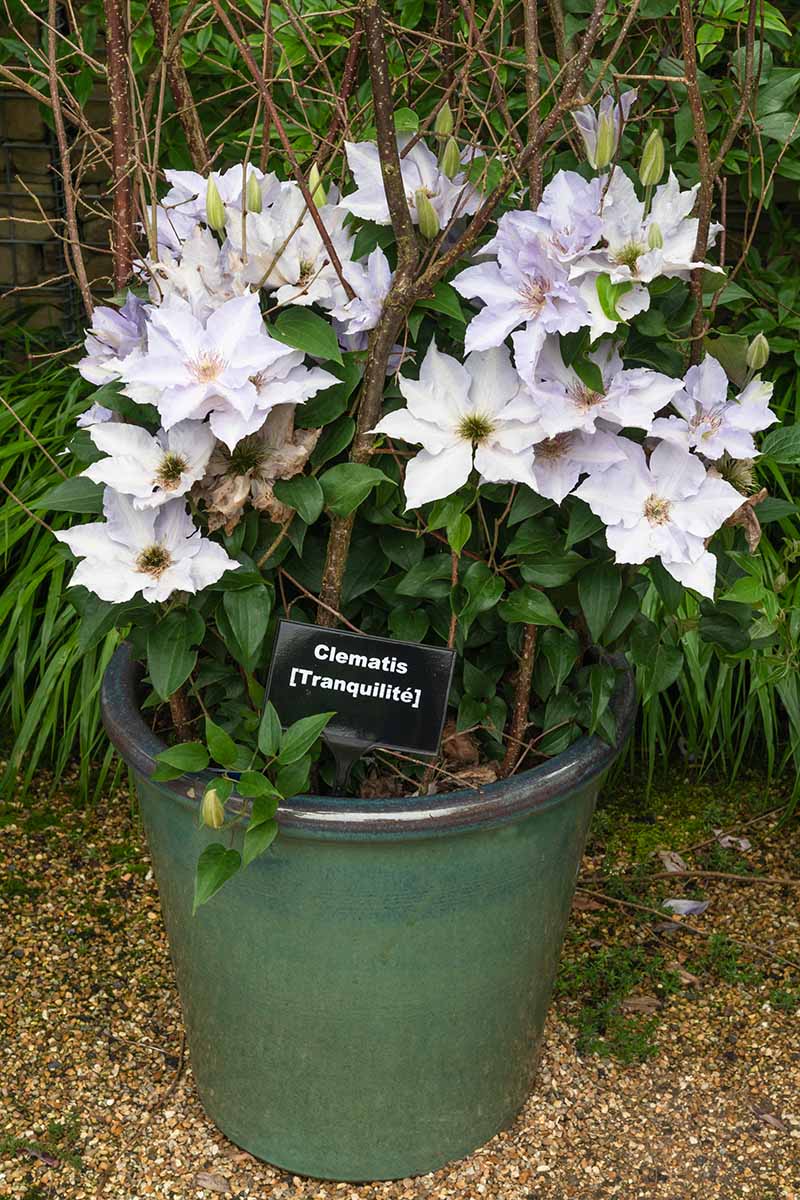
Cultivars to Select
There are hundreds of varieties to choose from, but some are better suited than others to container-growing. The following selections might make nice additions to your space.
Blue Light
‘Blue Light,’ aka ‘Vanso,’ reaches six to eight feet at its mature length, and it will easily become the focal point of your patio or garden with its incredible, blue-violet, full double blooms.
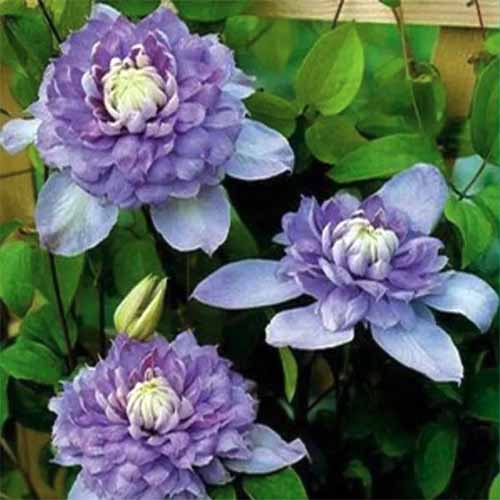
You can’t help but notice these amazing blossoms as they’re not only unique in form, but often more than six inches in diameter! This cultivar is cold hardy and suitable for growing in Zones 4 to 9.
You can find ‘Blue Light’ in #1 containers from Nature Hills Nursery.
Pink Fantasy
Another lovely container option that only grows six to eight feet tall, so it’s perfect for growing on the deck or patio, ‘Pink Fantasy’ has pale pink flowers striped with darker rose down the center of each petal, and it’s pink at the center as well.
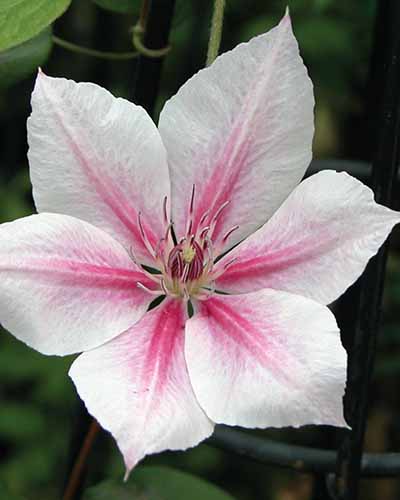
This variety blooms on the current year’s growth, so plan to prune accordingly. It’s also suited to Zones 4 to 9.
Plants are available from Burpee.
Guernsey Cream
‘Guernsey Cream’ is a vigorous bloomer that remains compact, reaching just six to eight feet at max length. Not only is it the perfect size for a potted specimen, it also bursts with ethereal, creamy blossoms as large as your hand!
‘Guernsey Cream’ is both heat and cold tolerant, and suitable for growing in Zones 4 to 9.
You can find plants in #1 containers from Nature Hills Nursery.
Pests and Disease
Even though clematis vines are fairly robust, they can still become hosts to pests or disease.
Just as with many other ornamentals, aphids, scale insects, caterpillars, and thrips can cause some damage. Slugs and snails may also make an unwelcome appearance.
Diseases such as powdery mildew, clematis slime flux, and wilt can also take hold in certain growing conditions. Always be sure to water at the soil level to avoid splashing pathogens onto the leaves and inundating the foliage with moisture that may fail to dry quickly.
Addressing an infestation is easiest when you catch it early, so look for signs of discoloration, die-off, stunting, or chewed foliage, and don’t wait to take action!
Watering appropriately – without providing too much or too little – and pruning for proper airflow are also key aspects of care to prevent disease pathogens from taking hold.
The Queen of Climbers
You can probably see now why clematis vines are so frequently chosen to grace so many yards and gardens, and why they make the perfect choice for container-growing in small spaces.

Which variety do you have in mind? With so many to choose from, will you go with flowers in your favorite color, or something to contrast with the patio furniture or other plants that you already have?
We’d love to see yours and hear about your experiences with these stunning vines in the comments below – show us your showstoppers!
And, if you’re looking for more information on clematis, check out these articles next:
One of the best and most comprehensive articles I’ve come across about caring for clematis. Thank you for such a detailed guide. Fantastic! I was just looking for pot size requirements but instead I hit the jackpot. I’ll be bookmarking this site for sure.
We’re so glad, Sharon! Thanks for reading!
Can you grow clematis inside? Would like to try it.
Hi Cathy, the short answer is no. At least, not easily. Most clematis need seasonal temperature shifts to grow, which means they need to be allowed to dieback in the winter during cold weather. There are some evergreen types and you might have more luck with these. If you can provide full sun and some shifting temperatures from summer to winter, you can grow them indoors. Look for cultivars that are happiest in warmer climates, like Zones 8 and up.