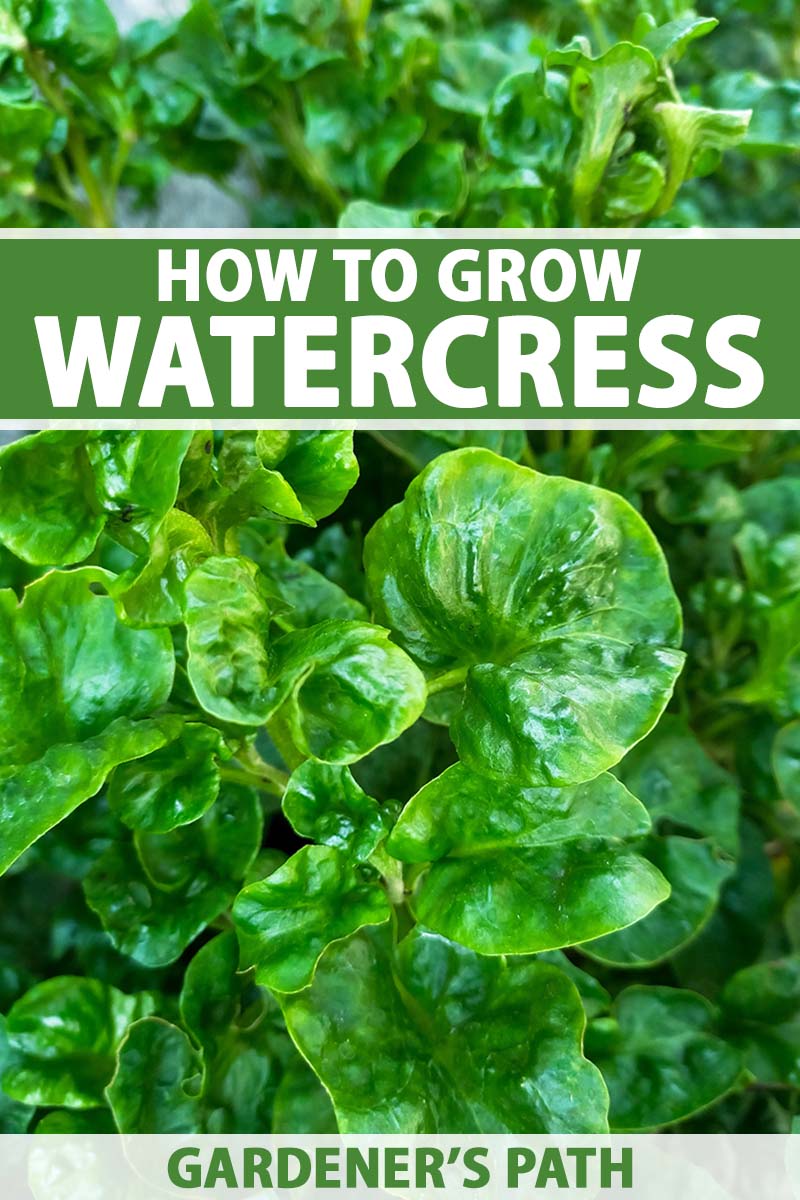
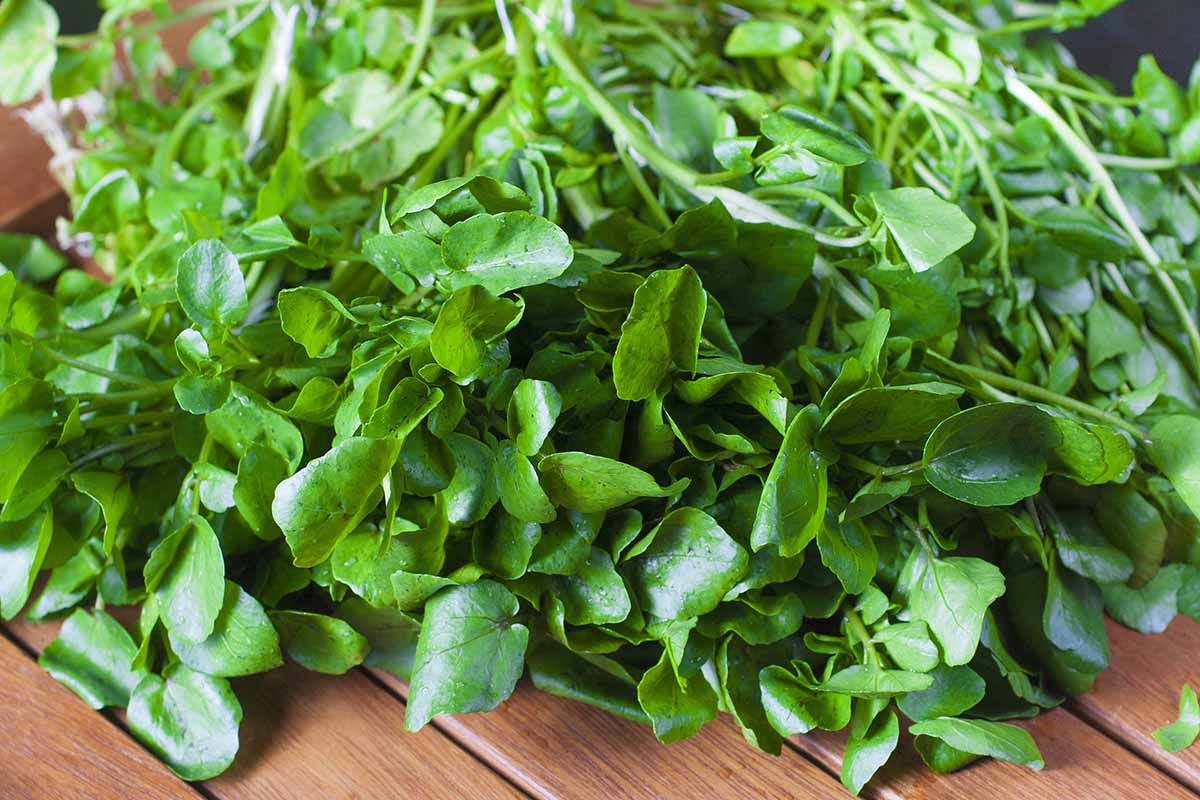
Nasturtium officinale
Some people have a sweet tooth, and treats like brownies and ice cream call to them. Others, like me, have a spice tooth.
We like lots of chilis in our food and for our salad greens to bite back.
If you fall into the peppery spice-lover camp, watercress should be front and center in your gardening arsenal.
Actually, even if you don’t love spice, it should still feature prominently. The greens lose some of their pep if you cook them, while retaining a bright, green, fresh flavor.
We link to vendors to help you find relevant products. If you buy from one of our links, we may earn a commission.
Watercress is an aquatic plant, so we will, of course, cover hydroponic techniques for growing it in this guide.
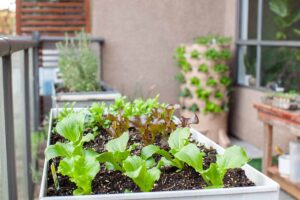
But it also grows well in soil, provided you give it enough moisture. And it makes a smart indoor or outdoor plant, so apartment-dwellers and homesteaders alike are covered.
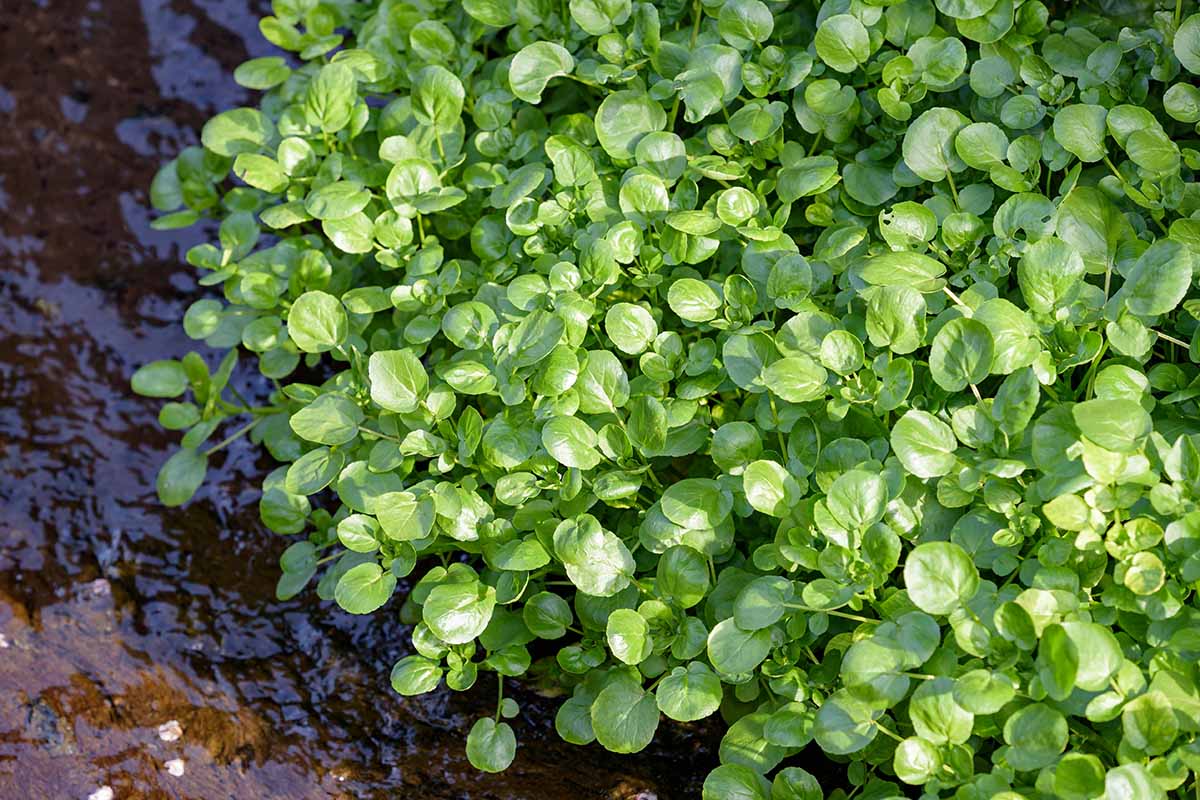
Although it’s an upright grower in water thanks to its hollow stems that allow it to float, watercress will also creep along the ground, making it a marvelous edible ground cover in partially sunny areas.
Hardy in USDA Zones 6 to 9, anyone can grow this leafy green as an annual, though it’s technically a perennial. Ready to join the watercress party?
Coming right up, here are all the things we’ll cover:
What You’ll Learn
Let’s dig into the history of watercress first.
Cultivation and History
Watercress is a brassica and it enjoys the cool conditions and ample moisture that most brassicas do.
Despite the botanical genus name Nasturtium, it isn’t closely related to nasturtium flowers, which are Tropaeolum species. And don’t confuse watercress with cress (Lepidium sativum) or upland cress (Barbarea verna).
While we’re talking about names, this plant must be a double agent or something because it has a ton of aliases. It’s also known as eker, biller, bilure, rib cress, brown cress, teng tongue, long tails, well grass, and yellowcress.
Native to Europe, it has naturalized in North America, where you’ll find it growing long streambeds or in moist areas like the forest floors of the Pacific Northwest.
This spicy green has been cultivated by humans for a long, long time for the leaves and stems. Each compound leaf boasts up to a dozen leaflets. These can be eaten cooked or raw.
Historically, we know that ancient Egyptians, Greeks, and Romans used the chopped leaves as a substitute for black pepper.
Hippocrates used watercress as a blood medicine, and ancient Romans prescribed it for curing mental illness.
In 1808, we have the first records of modern-day commercial cultivation when horticulturalist William Bradbery grew some in Kent, England.
The leafy green had a real surge in popularity in the late ‘90s and early 2000s in the US. People in England were ahead of the curve, where this plant has enjoyed wide popularity for a long time.
The pungent flavor appeals to those who like mustard and peppery flavors. This taste was actually developed by the plant as part of its defense system against herbivores.
When the leaves are disturbed, oils containing glucosinolate and myrosinase are released, and we perceive this as a spicy flavor.
The plant forms small white flowers followed by seeds, which freely sow themselves around the garden.
In Europe and Asia, concerns about liver flukes (Fasciola gigantica and F. hepatica) have caused some people to avoid foraged watercress.
Even some commercial crops have been contaminated. All the more reason to grow your own, right?
Watercress Propagation
Most people propagate watercress by purchasing some seeds and putting them in the ground or in containers, and that’s a great way to go about it.
But if you know someone with plants already, you have a secret weapon available to you: propagation via cuttings.
A few lucky people will be able to buy started plants locally, but honestly, starting yours by sowing seed or rooting cuttings is so easy that there’s no reason to pay extra!
From Seed
When you’re ready to plant, lightly broadcast the seed over a tray, container, or bed.
Containers should be filled with a water-retentive, well-draining potting mix like FoxFarm’s Ocean Forest potting mix.
It’s composed of all kinds of good stuff, like bat guano, fish meal, moss, sandy loam, and forest humus.
FoxFarm Ocean Forest Potting Mix
You can pick up a one-and-a-half cubic foot bag at Amazon, though, to be honest, I’d personally buy the stuff by the truckload if I could.
Otherwise, amend the bed with some well-rotted compost to loosen it and add water retention and nutrients.
Then, sprinkle soil on top to just cover the seeds no deeper than an eighth of an inch. You don’t technically need to cover the seeds at all, but some people struggle to keep them moist without a little coverage.
If you want to be a bit less wasteful with your seed, rather than broadcasting, grab a toothpick, moisten the end, dab it in the seed packet, and gently press a seed into the soil spaced every six inches.
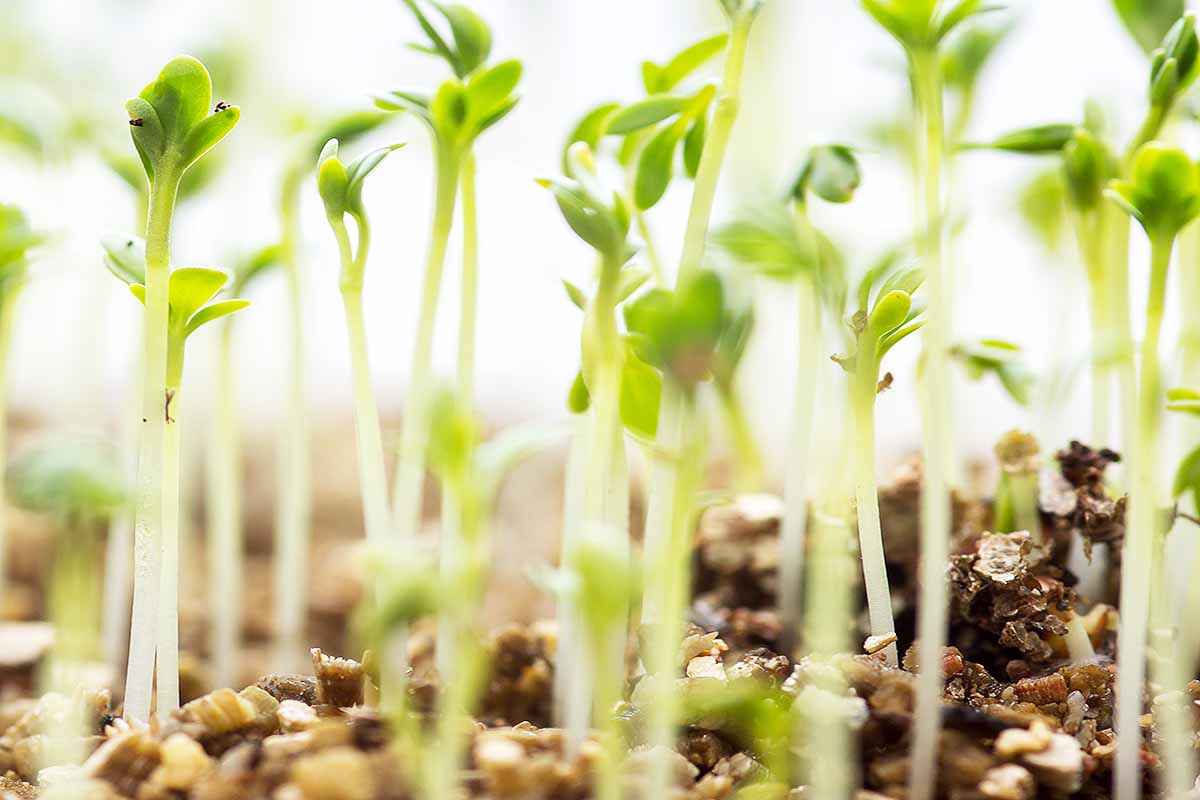
Keep the soil moist but not sopping wet as the seeds germinate, which takes a week or two.
As the seedlings pop up, thin them to six inches apart if you’ve used the broadcast method.
Once the seedlings are two or three inches tall, harden them off if you started them indoors, and transplant them into their new home.
Hardening off is a relatively simple process that involves taking the plant in its container and setting it in the area where you will be growing it permanently. Leave it there for an hour and then bring it back inside.
The following day, leave it there for two hours. Make it three on the following day, and so on, until you’ve reached a full week. At that point, your plant should be acclimated.
From Cuttings
Watercress sends out little roots anywhere a leaf node touches the ground, or clean water.
So a stem that has been lying against the earth will have lots of small white roots if you pull it up and examine it.
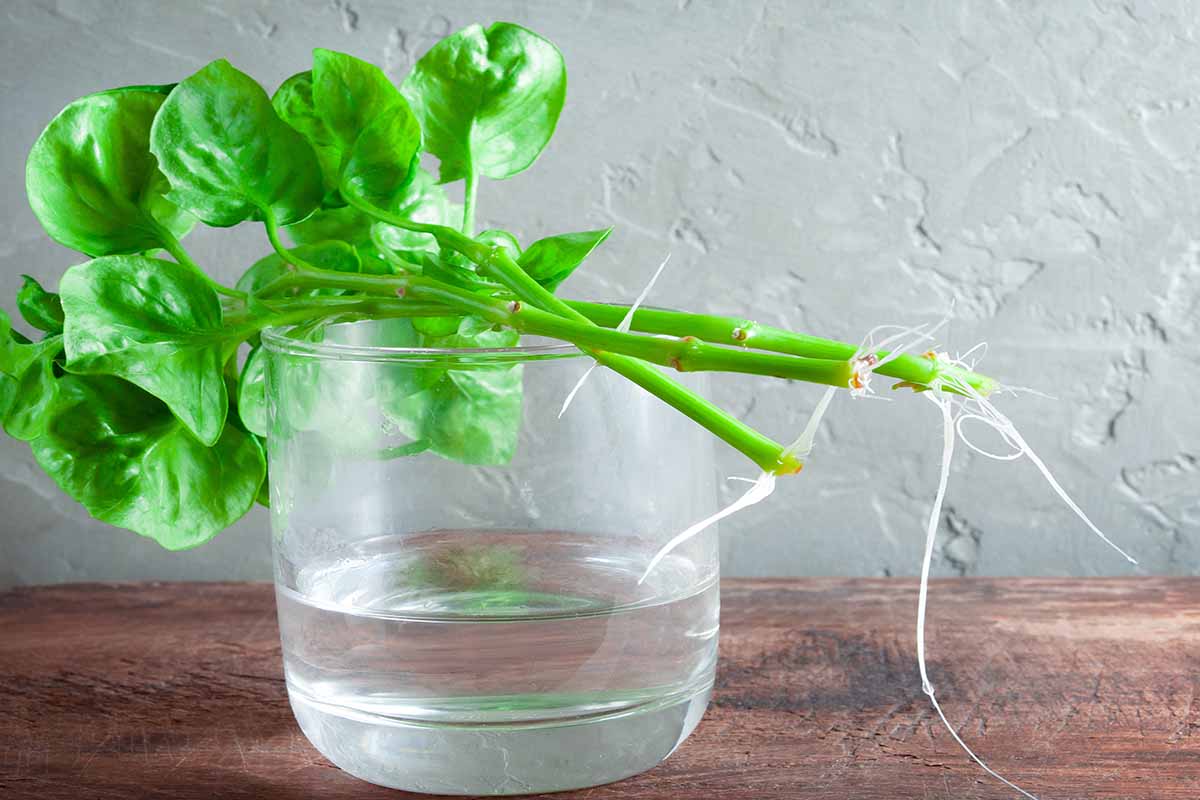
You might even see these roots if you buy a bag of watercress at the grocery store.
That should tell you that this plant is a breeze to propagate by taking cuttings. You can even plant the rooted watercress bunches from the store if you wish!
Use a seed tray for horizontal cuttings or a four-inch pot for vertical ones, fill your chosen container with soilless potting medium, and moisten it well.
Soilless potting mediums are water-retentive and nutritious without having any of the potential pathogens that can harm young cuttings.
A good seed-starting mix is a perfect choice. Something like Tank’s Pro-Lite Seeding & Potting Mix is ideal. It’s made with compost, coco coir, and perlite.
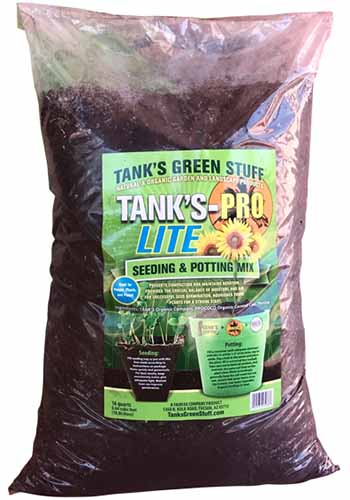
Tank’s Pro-Lite Seeding & Potting Mix
Grab a 16-quart bag at Arbico Organics.
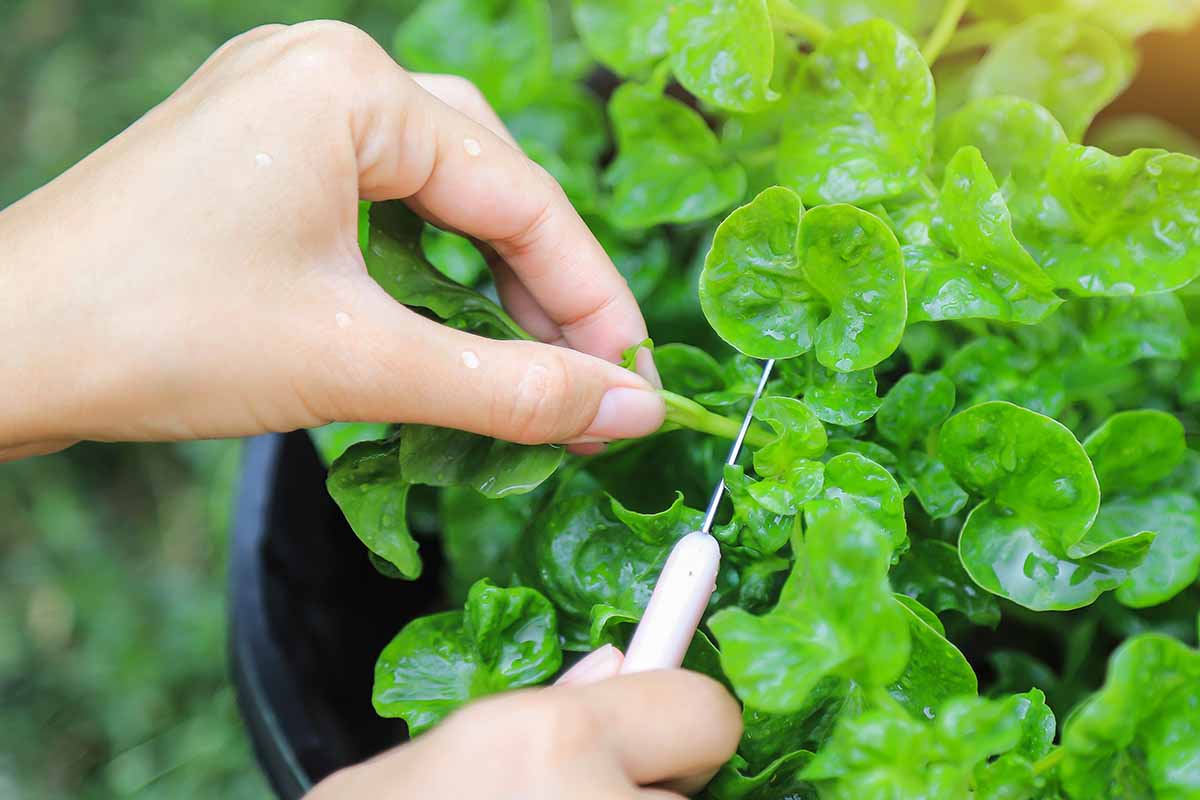
Take a four-inch piece of stem with several leaf nodes, using a clean pair of scissors. Pull off all of the leaves except for the top one at the very tip.
Lay the cutting horizontally on top of the soilless potting medium, or stick it vertically into the medium so that at least one leaf bud is buried.
Place the container in an area with direct sun or supplemental light for at least six hours per day and keep the medium moist. Once you see new growth forming, you’ve got yourself a healthy rooted watercress plant.
Transplant it to its new location using the steps outlined below.
Transplanting
Whether you started seeds, rooted cuttings, or you purchased a live plant, you’ll need to take it out of that growing pot and put it in the ground or a larger container at some point.
To do this, prep the area if needed by working in lots of well-rotted compost, sphagnum moss, and loam, or a product containing these ingredients. You want to work this into the soil at least six inches deep.
Dig a hole the same size as the growing pot and gently remove the plant from its container. Lower the plant into the hole you made and firm the soil up around it.
Water well and add more soil if it settles too much after watering.
To move the plant to a larger container, fill a container at least one size up from the existing pot and put a layer of potting soil in the bottom.
Remove the bunch from the existing pot and gently lower it into the pot. Place more soil around it to firm it up. Water and add more potting soil, if needed.
How to Grow Watercress
In a perfect world, watercress needs cool, running water, full to partial sun, and temperatures around 65°F.
In the real world, where most of us live, this is a tall order. Lucky for us, watercress can grow just fine without the running water and will tolerate brief lows of 23°F and highs up to 100°F.
Commercial growers who cultivate watercress must have running water available, but smaller quantities can be grown in soil.
The trick is to create a rich, loose, loamy bed. Unless you are blessed with this kind of soil already, you have to do what the rest of us mere mortals do and create it.
To do this, dig down six inches and as wide as you intend to cultivate your greens. Fill this area back in with equal parts well-rotted compost, sphagnum moss, and loam.
As an alternative, you can fill raised beds or containers with a potting mix that fits the bill. My personal go-to is FoxFarm’s Ocean Forest potting mix, mentioned above.
A soilless medium will also work if you’re using containers.
The richer the soil, the milder the flavor of your harvest, so keep that in mind. If you like to take your taste buds on a ride, aim for loose, well-draining soil that isn’t rich in nutrients.
You know these plants like water since they can grow in a good amount of it, so keeping the soil moist is going to be key. Having said that, if you prefer a tougher, spicier leaf, you can let the soil dry out a bit more.
Aim to keep the soil at least as moist as a wrung-out sponge, but even a bit soggier is fine. Once you start seeing water pool on the soil surface, you’ve gone too far. Watercress likes a lot of moisture, but it doesn’t like standing, stagnant water.
When growing in the ground or a potted growing medium, don’t bother fertilizing. Again, these plants do better without a bunch of fertilizer, and too much will reduce the flavor quality.
They do, however, prefer slightly alkaline soil and water, so feel free to adjust yours accordingly, though this isn’t strictly necessary.
When growing, be mindful of whether or not watercress is considered a noxious weed in your region.
If it is, you might be required to confine it to containers and take steps to avoid seed spread. Some states, like Illinois, list it as invasive and cultivating it is prohibited.
Growing in Water
For those who opt to grow their watercress in water, you can transplant the seedlings when they’re two or three inches tall.
Find a spot in a stream bed no more than an inch deep, preferably in a bend or some other area that is fairly still but where water circulates.
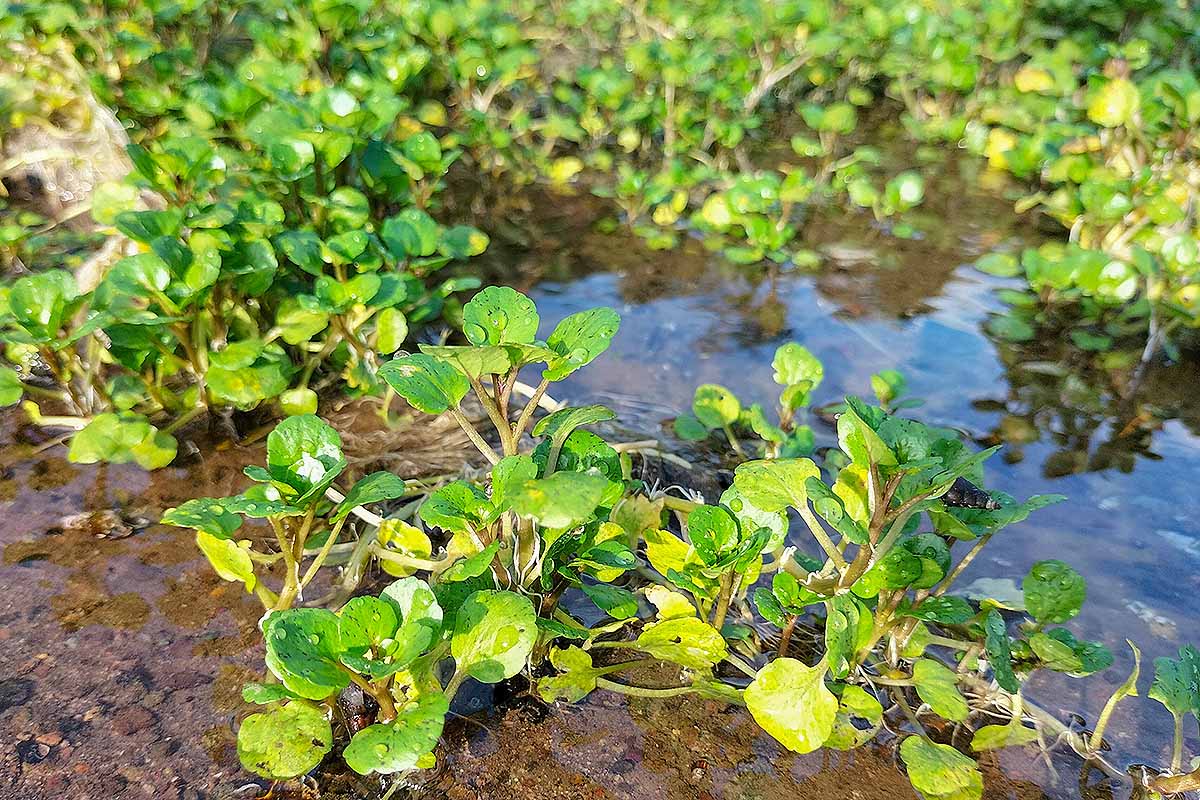
It’s fine if the water level drops to the point where the watercress plants are near the water but not in it, but the level shouldn’t ever completely submerge the plants.
They also lend themselves nicely to growing in rafts, or in nets in ponds with moving water.
Remember, watercress grown in unsanitized water might contain unwelcome pathogens like giardia or liver flukes.
If you aren’t sure about your water source, either grow in-ground or a container, or always be sure to cook your watercress before consuming it.
Hydroponic Growing
Hydroponic growing is beyond the scope of this article, but we will cover some of the basics to help you grow watercress if you already have a hydroponic system set up.
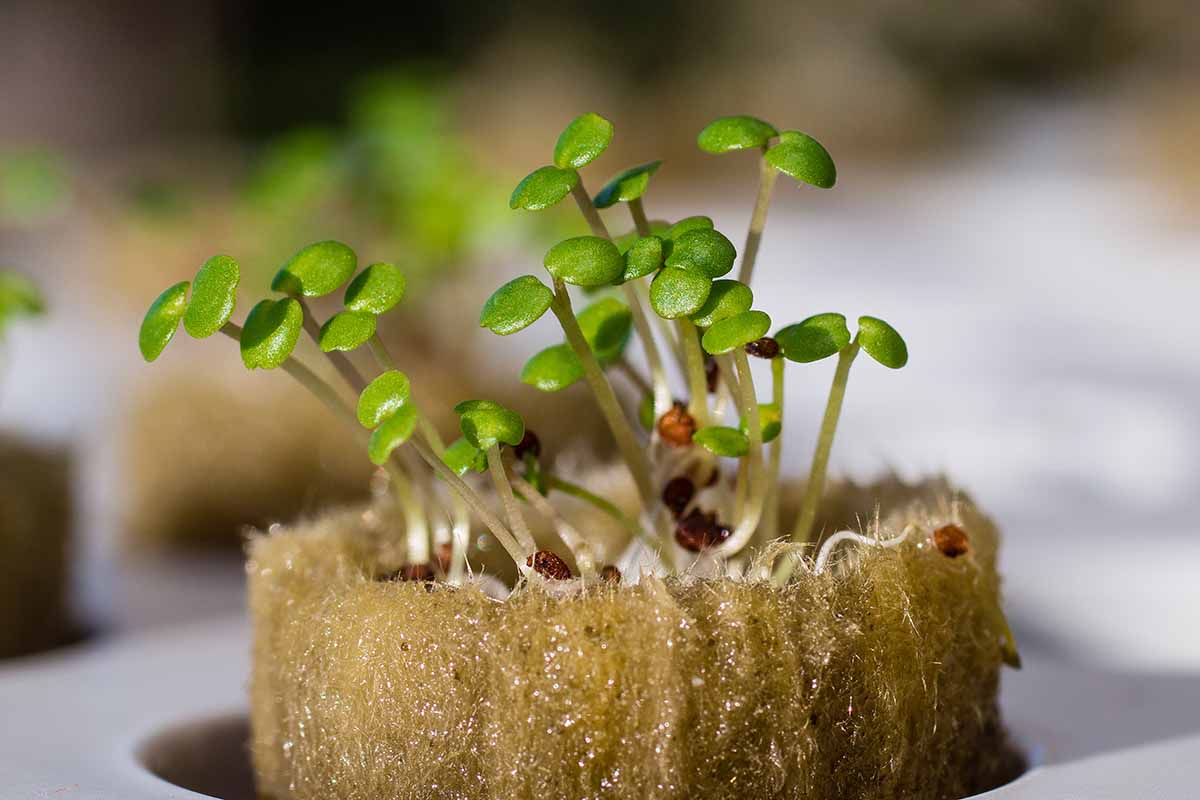
Start your seeds or cuttings as described above, using a soilless medium or hydroponic plugs. Rock, stone wool, or perlite are perfect options.
Place the seeds and starting medium into the hydroponic system.
Provide 12 hours of light per day with the lights placed about six inches above the plants. If you notice leggy growth, move the lights closer. If you see tan, burnt spots on the leaves, move them further away.
Use a hydroponic fertilizer recommended for lettuce or other leafy greens.
Monitor your water to keep the electrical conductivity (EC) level between 1.5 and 2.0.
You can always go with a simple system like AeroGarden’s Harvest system.
It comes with a built-in light, a touch control panel, and six pods for growing. Grab one at AeroGarden.
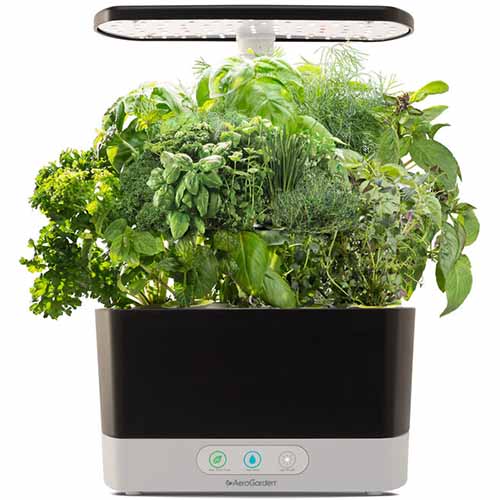
And be sure to read our review of the Aerogarden for more information.
Growing Tips
- Provide loose, well-draining soil.
- Watercress prefers cool temperatures around 65°F.
- Stressed watercress plants have a spicier flavor.
Maintenance
Don’t you love a plant that requires no maintenance?
While you can fuss over your watercress and remove any yellow or brown leaves, you don’t need to do anything to maintain this plant.
Be sure to clean and monitor hydroponic systems as needed, if using.
Where to Buy
Watercress is popular enough that you can find seeds pretty easily. Most well-stocked nurseries will carry seeds or transplants.
Just be mindful when shopping that you’re picking up N. officinale and not one of the other many plants with “cress” in the name.
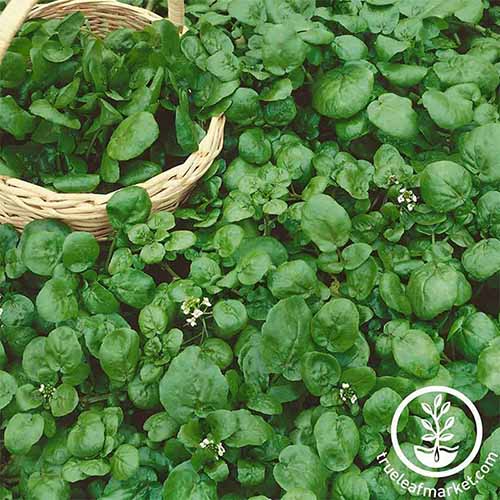
True Leaf Market carries seeds in gram, quarter-ounce, one-ounce, and four-ounce packets.
Managing Pests and Disease
Thanks to the peppery flavor, herbivores generally ignore watercress!
Sadly, insects don’t. And one type of insect may even bring a devastating disease along with it.
Let’s talk about the pests you might encounter first, and then touch on the chief potential ailment.
Insects
While most pests will generally avoid watercress, slugs and snails will feed on yellow leaves, which can also be a sign of disease.
I say let them have at it, but if you’d rather keep them away, use your favorite snail bait.
Whiteflies will also hang out under the leaves and feed on your watercress. You can wash these off with soapy water.
If you’re very unlucky, your plants might be visited by watercress leafhoppers (Macrosteles severini).
While the pests themselves aren’t all that awful, they may bring aster yellows along with them.
Once they feed on the plant, it’s too late to stop an infection from taking place, so preventing leafhopper infestations is key.
Part of this involves removing any brassica weeds like shotweed, aka hairy bittercress (Cardamine hirsuta), and wild mustard (Brassica kaber), from the area. Netting is also useful.
Disease
There’s really just one disease that you need to watch for, but it’s a big one.
Aster yellows causes leaf chlorosis or yellowing, and the new shoots might develop a witch’s broom growth. The plants will also be extremely stunted.
There’s nothing you can do once the plant is infected other than remove it so the disease doesn’t spread to other brassicas.
Learn more about identifying and preventing aster yellows in our guide.
Harvesting
You can start picking the leaves anytime they reach a size you like.
Don’t pull out the whole watercress plant unless you’re done with watercress and want to try something else. Instead, clip the leaves near the soil. New ones will grow back.
You can technically eat the roots, though I can’t imagine you’d want to.
They’re extremely bitter, and not in a good way. But those leaves and stems have the piquant flavor that many of us find appealing.
Eat the leaves right away as they don’t store well at all.
You can get a day or two out of them if you put them in a plastic bag and stick them in the produce drawer in your refrigerator, but you should cook or eat them as soon as possible.
Recipes and Cooking Ideas
Watercress makes a lovely garnish or addition to salads, and that’s how it’s been used for decades. But it offers so much more versatility.

I love to stuff pita bread with the leaves and some sort of protein. I think the flavor holds up really well to stronger additions such as lamb or curried chicken.
But really, watercress is fantastic in any sandwich, like this sauteed mushroom and thyme pine nut butter sandwich from our sister site, Foodal.
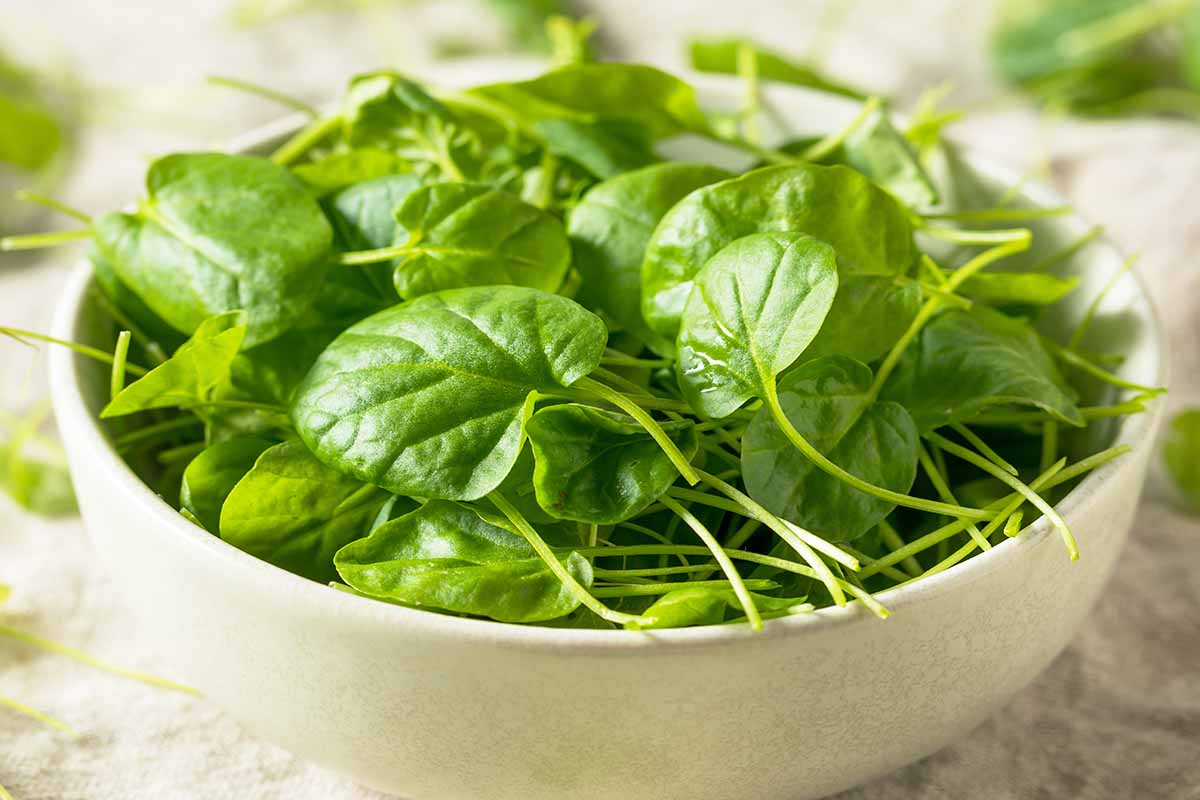
I also think watercress makes a nice substitute for spinach when you want a little more of a flavor kick. Besides eating it fresh, think omelets, stir-fries, and pasta.
When I’m looking for ways to use up a bunch of watercress, I like to make soup or stir-fry the leaves with garlic.
After making a big batch, I can stick these in the fridge for a week and eat them at my leisure.
Quick Reference Growing Guide
| Plant Type: | Cruciferous herbaceous perennial | Water Needs: | High |
| Native to: | Europe | Maintenance: | Low |
| Hardiness (USDA Zone): | 6-9 | Tolerance: | Wet roots |
| Season: | Spring, fall, winter | Soil Type: | Rich |
| Exposure: | Full to partial sun | Soil pH: | 6.0-7.5 |
| Time to Maturity: | 60 days | Soil Drainage: | Well-draining |
| Planting Depth: | 1/8 inch (seed) | Companion Planting: | Nasturtium |
| Spacing: | 6 inches | Avoid Planting With: | Alliums, brassicas, succulents |
| Height: | 12 inches | Order: | Brassicales |
| Spread: | 9 inches | Family: | Brassicaceae |
| Growth Rate: | Fast | Genus: | Nasturtium |
| Common Pests and Disease: | Leafhoppers, slugs, snails, whiteflies; aster yellows | Species: | Officinale |
You Literally Can’t Find a More Nutritious Vegetable
A little while ago, the CDC ranked fruits and veggies by their nutrient density. Guess which one came in on top?
Yep, watercress. They called it the top “powerhouse” vegetable with a 100 percent nutrient density score. That’s way above other popular options like beet greens (87 percent), kale (49 percent), and carrots (22.6 percent).
If you’re looking for something good for you, there isn’t a better choice than watercress out there.
But if you aren’t so worried about nutrients and mostly care about flavor, you still can’t go wrong with watercress.
How do you plan to grow and use yours? Let us know in the comments!
Man can’t live on watercress alone. Isn’t that how the saying goes? Anyway, you might want to complement your meal with some of our favorite leafy greens. If so, here are a few worth considering: