

I hate to be the one to break this to you, but you may have been wasting a delicious opportunity to harvest homegrown leafy greens.
Do you grow radishes? Did you know you can eat the greens as well as those crispy, spicy roots? The trusty spring and fall veggie garden staple, Raphanus sativus, produces edible leaves in the early stages of its growing cycle.

We link to vendors to help you find relevant products. If you buy from one of our links, we may earn a commission.
You can harvest them at full-size along with the red, white, or Easter-egg-hued roots that are such a delight for home cooks.
Or you can skip the root harvest altogether and focus on growing radish sprouts or microgreens instead.
The latter harvest option can provide baby leaves to use much like baby kale or spinach, for salads, braising, or stir fries.
Coming up, I’ll share which sizes of radish greens taste best, and how to tell if the plants are too big to eat. I’ll also go over how and when to pick this bonus crop.
Ready, set, radish! Here’s the lineup:
What You’ll Learn
Are Radish Greens Edible?
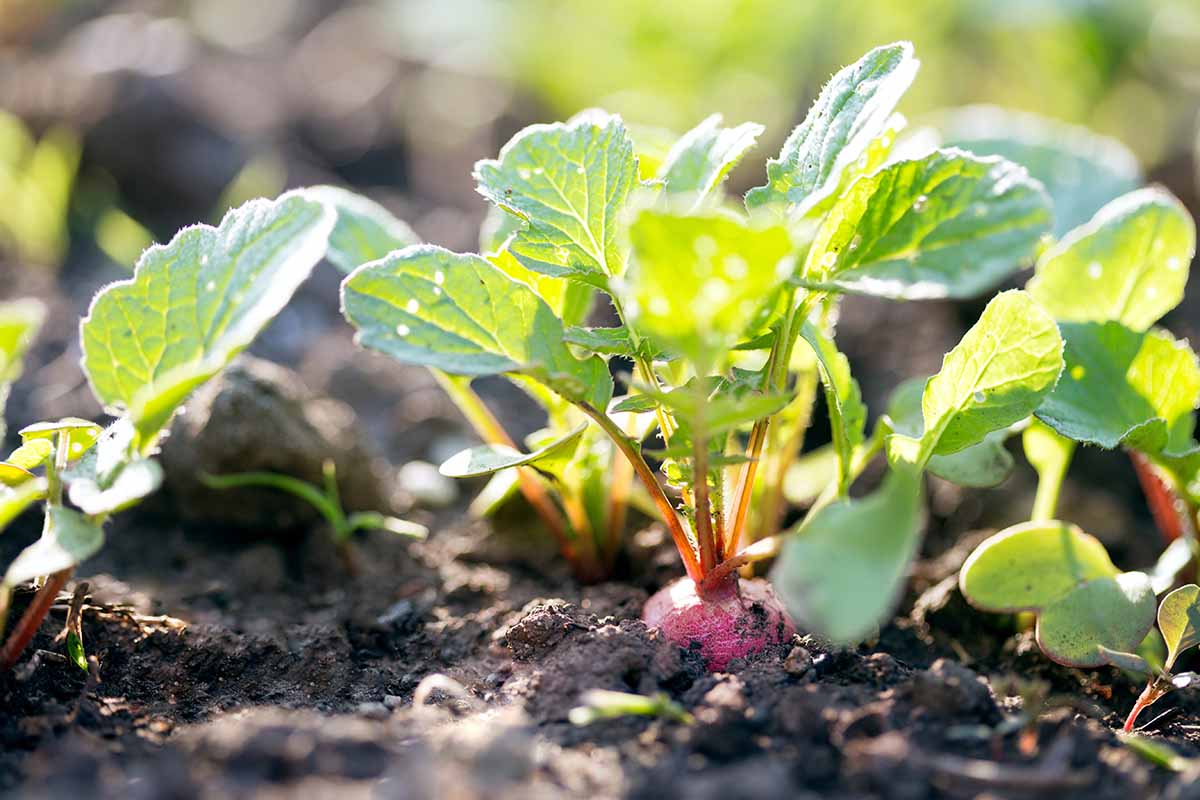
If you’ve never noticed before that radish tops look much like other leafy greens you might grow in your garden, give them a gander.
Not only do the leaves and stalks resemble some types of mustard or turnip greens, the leaves have a similar flavor profile – earthy and a bit spicy.
Spring-sown crops produce roots that mature in 21 to 35 days. Their greens are technically edible at every stage of growth, but they taste best when harvested before they develop a hot flavor due to aging or exposure to prolonged heat.

They’re a bit like the traditional radish crop that way!
The spring varieties produce microgreens and baby leaves suitable for adding to a mesclun mix for salads, or for cooking like spinach when they’re a bit larger.
You can also eat the green tops from the winter varieties that thrive in autumn.
These may take months to mature but keep your timing in mind: their greens are only tasty and tender for the first 30 days or so after planting, or until they reach five or six inches tall.
After that, they tend to develop a strong, hot, cabbagey taste and the stalks get too tough to chew, even after cooking.
Happily, the steps you take to cultivate crispy, fresh roots also benefit the greens. This includes giving them ample water, keeping them weeded, and growing a variety that will mature in your area ahead of the onset of hot weather.
Pick up more tips on growing and caring for radishes in the home garden in our guide.
For fast-growing varieties, you have the option to harvest the roots and tops together, or you can pick a few while the roots are still developing. For the types that take months to mature, you can pick the leaves a few at a time when they’re still fairly tender.
Or, you can grow either type of radish solely to produce microgreens or sprouts, rather than letting the plants mature fully.
Here’s how to handle the harvest for each scenario:
How and When to Harvest
Whether you’re aiming for a 2-for-1 harvest of both roots and greens, or a super-quick crop of sprouts or microgreens, you can look forward to good eating without a lot of effort.

Follow these directions for harvesting radish greens at each stage of growth:
Sprouts
Radish seeds are a popular choice for sprouting, and these can be ready to eat just three or four days from the time you begin.
Find full growing instructions in the Sprouting 101 guide from our sister site, Foodal.
In general, to sprout the seeds you’ll need a wide-mouth glass jar and a mesh or cheesecloth cover, or a commercial kit.
True Leaf Market sells stainless steel sprouting jar lids and five-tray seed sprouters that are perfect for this project.
The process involves soaking the seeds overnight in the covered container, rinsing the seeds, and letting them drain.

Stainless Steel Sprouting Jar Lids
You then set the container on its side on a stable surface in an area of your house that’s dark and in the 60 to 70°F range.
Or, if you’re using a kit that involves a tray or trays, you leave the container upright.
You repeat this once a day, rinsing and draining until the seeds sprout, which usually takes three or four days.

Once they have their first set of cotyledons and are about an inch long, you set the jar in sunlight for a couple of hours, which allows the sprouts to photosynthesize and gain some color. Then they’re ready to drain and eat.
You can store drained sprouts in an airtight container for six or seven days before you eat them.
Ordinary garden seeds are just fine for sprouting, or you might like to choose one of the seed mixes or varieties in unusual colors that are available commercially.
The ‘Red Arrow’ cultivar, for example, produces light red sprouts, which look great on the plate whether you’re eating them atop your avocado toast in the morning or garnishing the plates for an al fresco meal on your patio.
‘Red Arrow’ sprouting radish seeds are available in various packet sizes and one- and five-pound sacks from Eden Brothers.
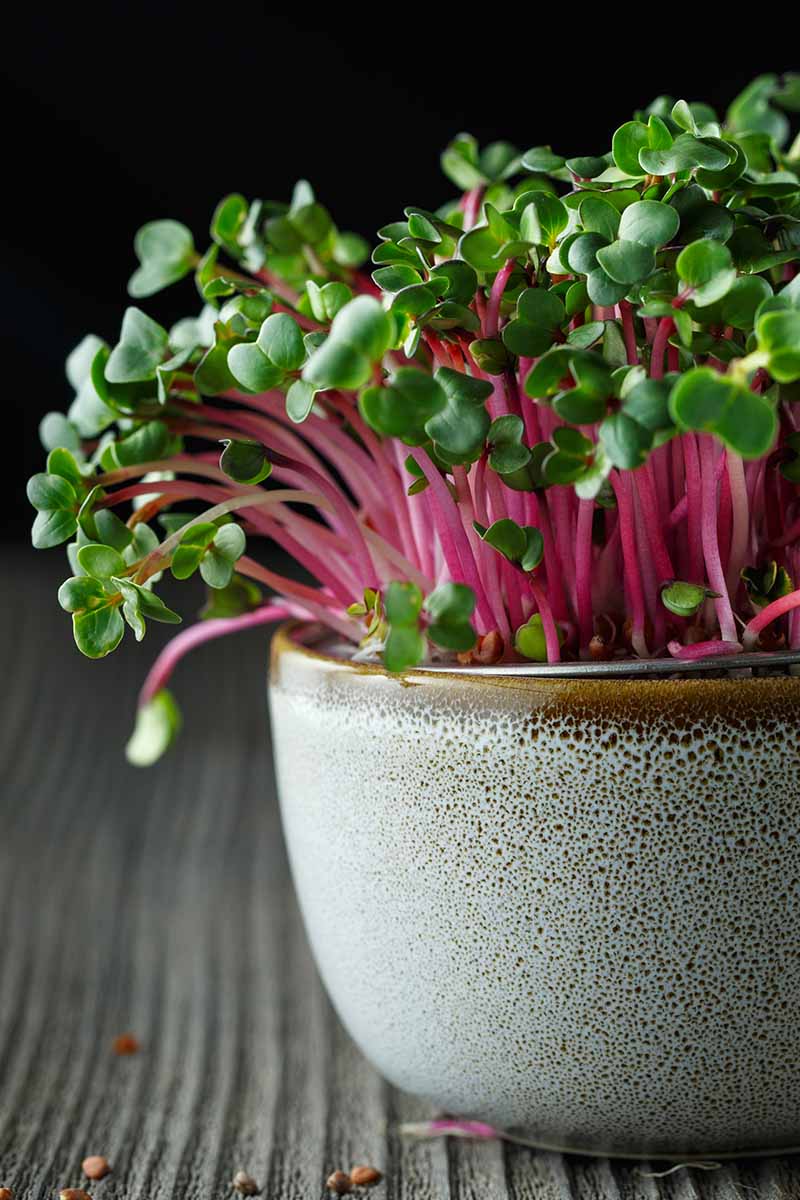
Microgreens
When you plant radishes to harvest as microgreens, you won’t make any attempt to let them form substantial roots. Instead, plan to pick the young greens just after they form their first set of true leaves, usually at one and a half to two inches tall.
At this size, they’re mildly spicy and may sport a streak of color at the bottom, depending on the variety.

Use clean kitchen shears or a sharp knife to cut the microgreens at the soil line. Don’t handle them too much or they can get mashed and the texture will suffer.
Instead, cut them quickly. Then use your fingers to lift them into a zip-top storage bag or directly onto your cutting board or prep surface if you’re going to eat them right away.
These microgreens will last for about five days in an airtight container in the vegetable crisper. Wash them before serving, not ahead of storing.
If you’ll be eating them fresh in a salad or as a garnish, make sure to let them dry, too, either using a salad spinner or by gently spreading them on a clean, dry tea towel. Dry microgreens will hold dressing better, and they won’t make your dish watery.
Check out our guide to learn more about planting microgreens.
Baby Leaves
Picking the baby leaves offers the most substantial green harvest, but this also requires the most attention to timing.
As radish plants get larger and those glorious, tasty roots start to plump up, the leaves become increasingly woody and tough.
To pick leaves at their most tender, shoot for harvesting the greens just as the roots start to form radishes. You’ll be able to see their widening girth from the soil line.

You can experiment with your own tolerance for leaves of varying levels of spiciness or a pithier texture. My rule of thumb for picking the baby leaves is to harvest them after they have at least two sets of true leaves and are at least an inch and a half tall, but before they’ve reached four inches tall.
They’ll have a tender texture and just a mild spicy flavor at that point, but quickly become too harshly flavored and chewy to eat raw if they get larger.
When they’re a couple of inches tall, they’re still tender enough to serve as a component of a spring mix in salads. Because they have a sharp taste, you’ll want to pair them with another salad green that’s milder, like crisphead or oakleaf lettuce.
This is also a matter of preference, but I opt for a combination of one part young radish leaves to four parts of lettuce for my spring salads. Any more of the radish and their heat may overwhelm the other greens, or the flavor of the dressing.
You may also notice some varieties developing prickly hairs on their leaves as the plants grow larger. Cooking takes care of the texture in this case, and you won’t notice it in smoothies, but those ticklish hairs may be off-putting when you add the greens to salads.
Keep in mind, being able to harvest the greens is an add-on benefit to growing radishes, not an alternative if you’ve let the roots get too big or warm weather has turned them hot and dry.
In general, even properly sized radish greens are fit only for the compost if the plants are so old or the weather is so hot that the roots have become inedible.
If you are planning a root harvest later, cut just a couple of outer leaves from each plant at the baby stage, leaving the inner core to sustain further root development.
Use a sharp knife and make the cut about half an inch above the soil line.
Four or five days later, you can sever a few more leaves from each plant, and keep repeating the process up until you pull the roots, usually when they’re 21 to 30 days old.
When you’re able to keep the tops bug-free and in good shape until you pull the mature radishes, you can harvest both crops at once.
Just make sure to cut the leaves from the roots immediately after pulling, or the roots may start to wither before you can eat them.
You can store the leaves in a plastic zip-top bag in the vegetable crisper for up to a week.
Wash and spin them dry before adding them to salads. You can skip the drying if you’re cooking them.
Cooking Ideas
From foraging for a couple of microgreens to snack on while wandering the springtime garden to sauteeing a mix of spinach and four-inch radish leaves, there are numerous ways to enjoy the harvest.

I heartily endorse using radish sprouts as an ingredient in one of the salads recommended in this article on eating a salad a day from our sister site, Foodal or in their recipe for a sprouts, avocado, and cheddar sandwich.
The microgreens add zing to salad, panini, or fish tacos. You can use them to garnish creamy soups, savory stews, or deep dish pizza, too.
A handful can also substitute for a portion of the greens in Foodal’s recipe for beet greens pesto. You might enjoy braised or roasted radishes as an alternative to the beet patties in this dish as well.
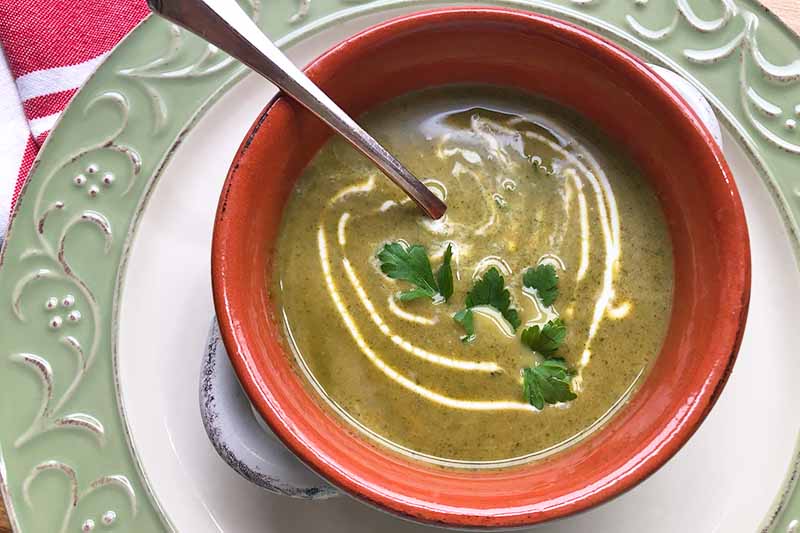
Consider using the baby leaves in place of a cup of the kale in Foodal’s recipe for green healing soup, or as part of a green smoothie.
Baby greens also pair well with the collards in Foodal’s take on creamed collard greens.
A mixture of half of each type of leafy greens works well here, but remember to add the R. sativus portion towards the end of cooking. It only needs a few minutes to become soft and velvety.
Some stellar home chefs cook radish roots and their greens in one saute. I appreciate the results, especially if the family has grown salad-weary in early spring.
You do need to cook the roots a bit longer than the leaves, though, so start them first.
I usually top, wash, and quarter the radishes and stir fry them in a mix of olive oil and butter for four or five minutes over medium-high heat.
I then chop and add the clean greens in the last three or four minutes of cooking, stirring them just until they’re bright green and wilted.
I season this side dish with salt and pepper and a squeeze of lemon, and eat it immediately!
If I have time, I might saute a chopped onion with the radish roots or add a bit of fish sauce with the greens. But the simplest version of this side dish is delicious, too, especially eaten in the early days of spring when homegrown veggies are so rare.
This Radish Harvest Is Tops!
Compared to most vegetables you could grow in your garden, radishes are low labor and inexpensive.
And yet, in a matter of days or weeks, they produce both greens and roots that are fresh and tasty harvested at their flavorful, tender best.

Have you had the pleasure of nibbling a few fresh leaves of homegrown R. sativus, or tossing a handful into a pot of braised mixed greens?
The comments section below awaits your input, whether you have gardening experience to share or questions to ask.
And if this coverage was helpful, read these radish guides next:

Thanks for an informative article with beautiful photos.
Do you think radish greens would work in Zuppa Toscana instead of kale?
Hello Elle and thanks for reading. I do think radish greens would work in Zuppa Toscana instead of kale. They’ll have more bite than kale, though, so maybe just substitute them for part of the greens? If they’re all you have on hand, though, I say go for it, but maybe use a smaller amount of radish greens than you would kale, say two-thirds. Good luck, and you’re inspiring me to go look up a Zuppa Toscana recipe before my radishes sprout…