There are four keys to success when it comes to getting the most value for your money from garden hand tools:
First, purchase the best you can afford from reputable vendors. Poor-quality items are not only a safety hazard; they don’t last. Second, use each item as intended by the manufacturer.
We link to vendors to help you find relevant products. If you buy from one of our links, we may earn a commission.
For example, if you need a dibber or weeder, don’t push the point of your pruners into the soil simply because they are handy. Improper use may result in injury and/or damage to equipment.
Third, it’s crucial to maintain tools so they are clean, sharp, and in good working order. This is our article’s topic.
Here’s what we’ll cover:
What You’ll Learn
Let’s get started!
Cleaning Tips
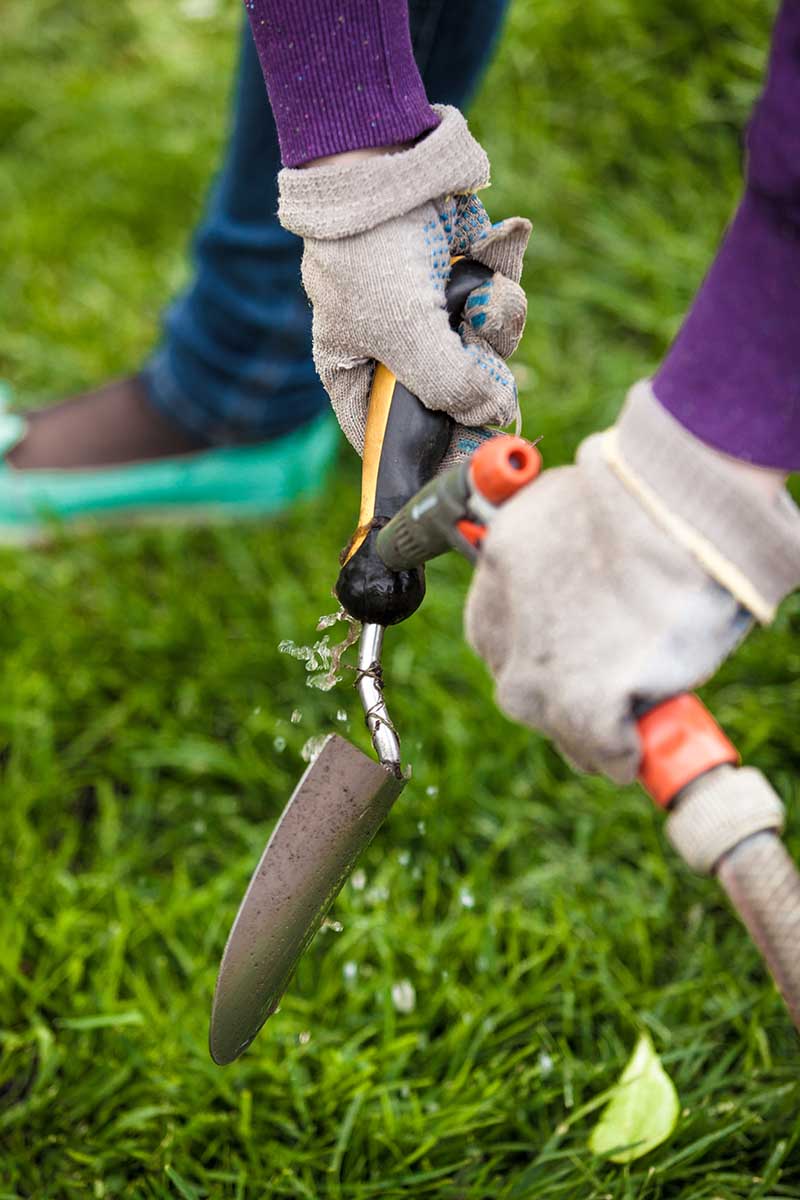
Keeping equipment clean goes a long way toward making it last. It’s essential to take a few minutes to rinse off the soil and air dry before storage.
Use a rag or scrub brush for persistent dirt to prevent it from clinging, harboring bacteria, and promoting rusting.
When you use tools on plants known to be infested with pests or infected by pathogens, be sure to sanitize them.
Here’s how:
Wearing rubber gloves, mix nine parts water and one part laundry bleach in a bucket.
Swish the business ends of soiled tools around, taking care not to submerge wooden handles. Use a rag dampened with the bleach-water solution and wrung out to wipe the handles before letting the implements air dry.
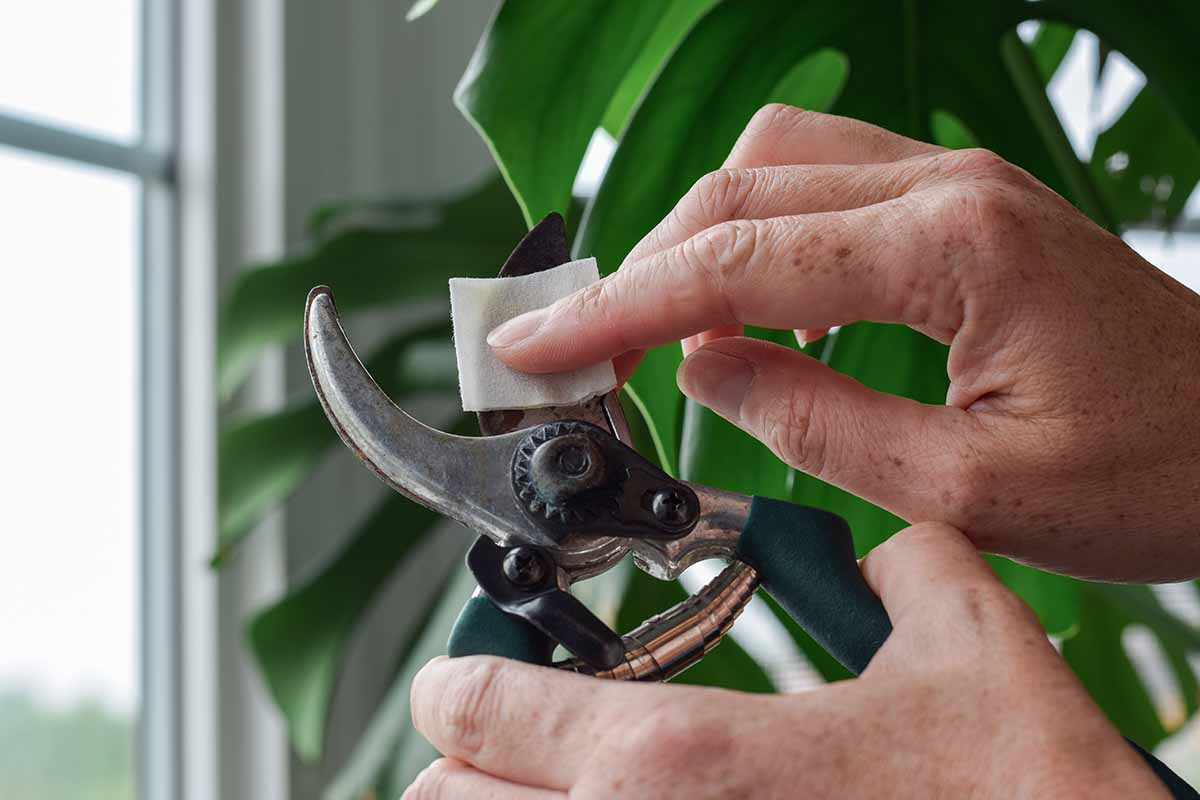
To sanitize knife, lopper, pruner, and saw blades, use 70 percent isopropyl rubbing alcohol on cotton wool for larger jobs and individual pre-moistened prep pads for small ones to avoid spreading pathogens through the garden and keep blades gunk-free.
When you do the final clean of the year, rub all wooden handles with linseed oil.
If the wood is already dried out or has many scratches or worn areas, you can use a mixture of 75 percent linseed oil and 25 percent turpentine for efficient penetration. Use a rag to rub the oil into the wood.
During storage, the oil dries and inhibits future damage from sun, moisture, perspiration, and wear and tear.
To treat and maintain the blades or steel parts, save some used motor oil and pour it into a large bucket of sand. Plunge the steel parts of your tools into the bucket and work them up and down.
The sand’s abrasive action removes rust and polishes the steel, while the oil penetrates to lubricate the working parts and inhibit future rusting.
Repair or Replace?
Season’s end is the time to evaluate the condition of your tools and see what needs to be repaired or replaced.
Look for loose and missing bolts, nuts, and screws.
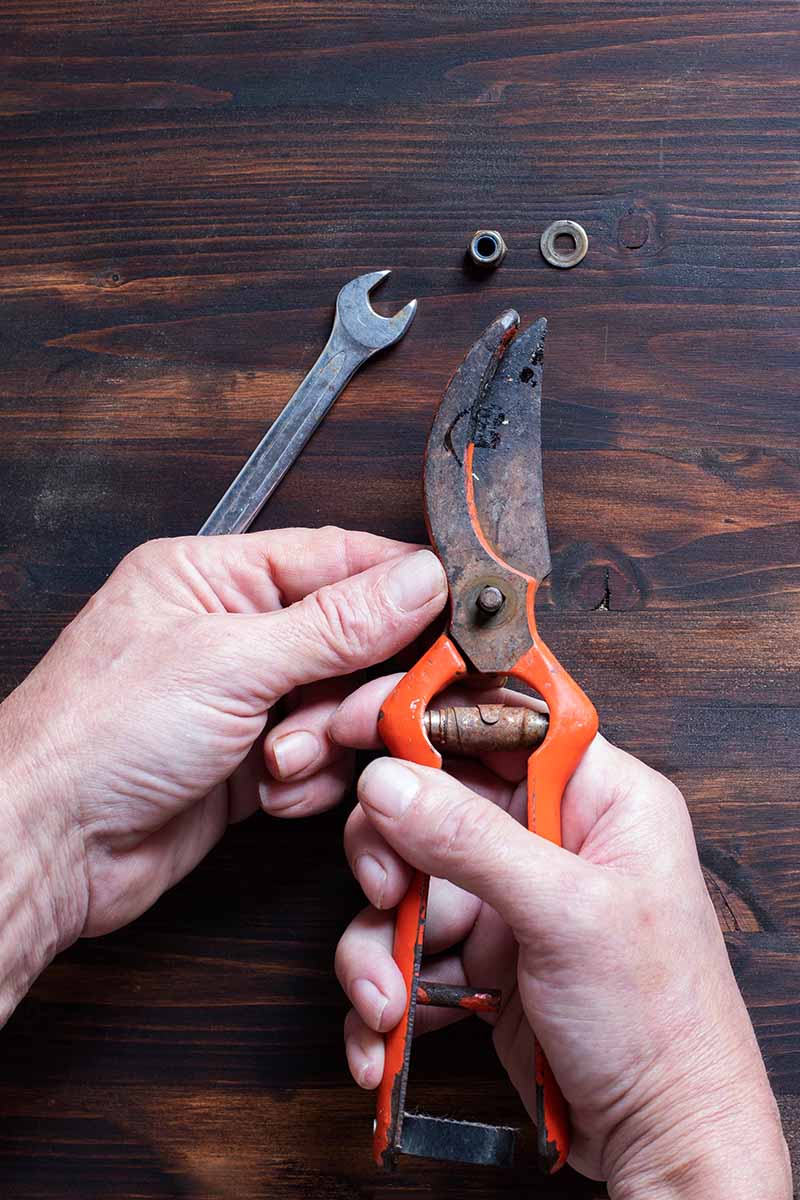
The manufacturers of many products offer specialized adjustment tools and replacement parts.
For example, Felco-2 pruners have a special one for adjusting screw tension. Be sure to consult the manufacturer’s instructions before heading to the home center.
Occasionally you may need to replace a broken or damaged handle, but getting the handle separated from the steel socket may be a problem.
To remove a stuck handle, place it in a bucket of water with the water level covering the wooden part that fits into the steel socket, then allow it to soak for 24 hours to make the wood swell.
When you remove the implement and let it completely dry, the wood shrinks and you can remove the handle easily.
Rub the end of the new handle with linseed oil before inserting it into the steel socket.
For an unvarnished handle, rub the entire length with more linseed oil. Then work the steel business end into the bucket of oil and sand for a quick polish, and you’re all set.
Sharpening Techniques
Because they are easy to sharpen, it’s never worth wasting time trying to use a dull hoe or spade to cut through tough roots or or break up compacted soil.
All you need for the job is a 12-inch mill file.
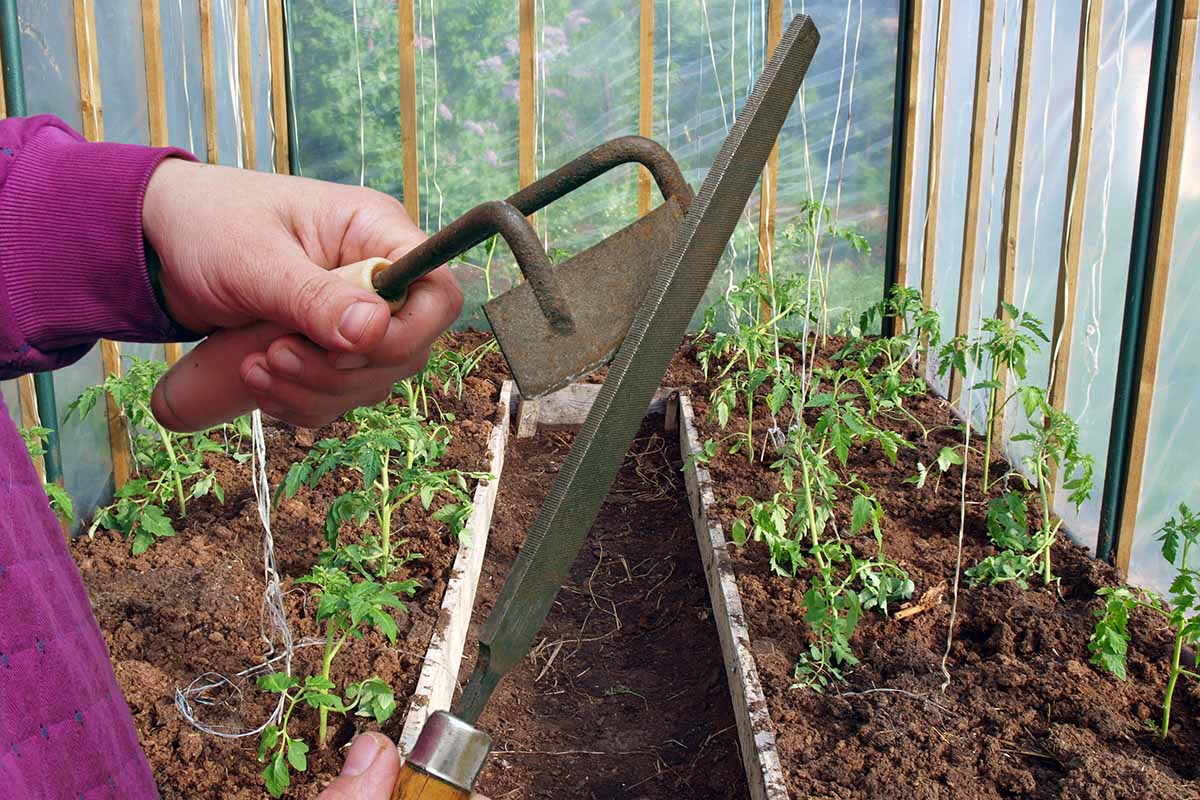
Use a mill file to sharpen your hoes, spades, and shovels.
To sharpen a hoe, study the bevel of the edge on the blade. Then place the mill file at one end of the bevel and push it away from you, moving across the bevel toward the cutting edge.
Be sure to hold the file against the bevel so you follow the correct angle. Stop after a few strokes and look at the shiny area where the file has removed some of the metal.
The nicks and burrs should now be smooth. If not, continue, but remember that a hoe is a thick blade and not knife thin, so don’t overdo it.
To sharpen a spade, take the mill file and place it on the back of the blade or the side of the spade that is facing you when you put your foot on it. Then proceed as you did with the hoe.
Use the same technique for a trowel. A few strokes of the file toward the cutting edge will thin it enough for smooth gardening.
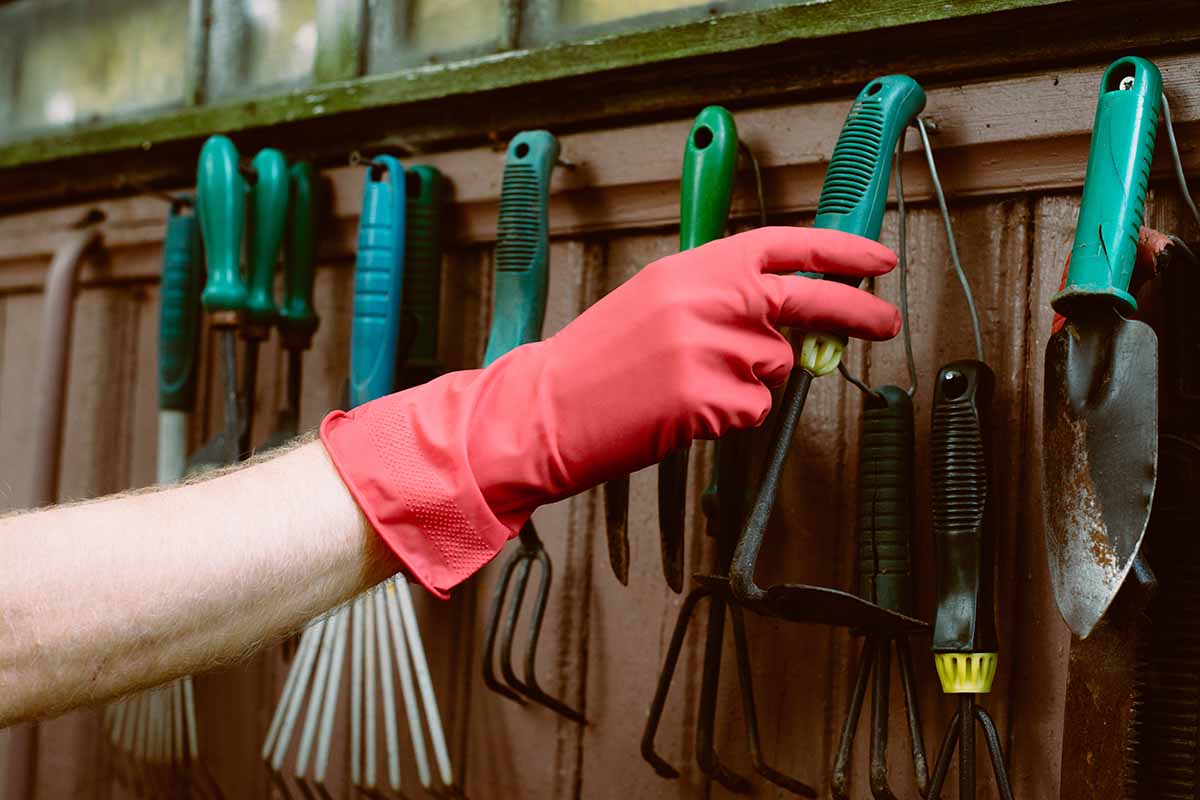
Storage Solutions
Quality tools can last a lifetime when they are stored correctly.
Avoid leaving implements outdoors for extended periods to prevent exposure to rain that can rust metal and rot wood, and the sun that can dry wood out.

Store implements in a dry shed or garage. Suspend them from a wall using nails or hooks in a peg board, with the blades and working parts facing upward.
Leaning hoes and shovels against a wall or piling them on the floor is ill-advised because it promotes contact likely to cause nicking, scratching, and warping.
Be sure to use the sheaths that often come with items like pruning saws and hori-hori knives, as they offer another layer of protection during storage.
Make the Time
The garden is a busy place. From the moment the ground thaws, we work the soil, plant seeds, fertilize, water, and weed.
Then there’s pest and pathogen control, deadheading, harvesting, and mid-season sowing for one more crop before season’s end.
And finally, we clear away the debris, mulch the beds, and head indoors where it’s warm and cozy, dreaming of next year’s seed catalogs and what we’ll plant.
It’s time to take out the garden planner and add “clean and repair tools,” as this task is as necessary as all the rest.
Remember to rinse and dry implements after each use, sanitize as needed, and clean, repair, and sharpen them all before winter storage.
In addition, take the time to clean garden gloves, shoes, and protective sleeves per manufacturer recommendations for a fresh start each year.
How do you care for your equipment in the postseason? Do you have any tips to share in the comments section below?
If you found this article helpful and want to discover more garden gear tips, check out the following articles next:
Since all of these garage organization ideas are great… why not use all of them?… I posted the article to Pinterest too!
DO NOT use used motor oil for anything in the garden. It contains contaminants. Instead, use mineral oil (or baby oil) or paste wax or lanolin spray. Also, for rust treatment I use phosphoric acid (sometimes called “prep and prime”). Vinegar will neutralize light rust, but must be kept in contact for a longer period, typically 30 minutes.