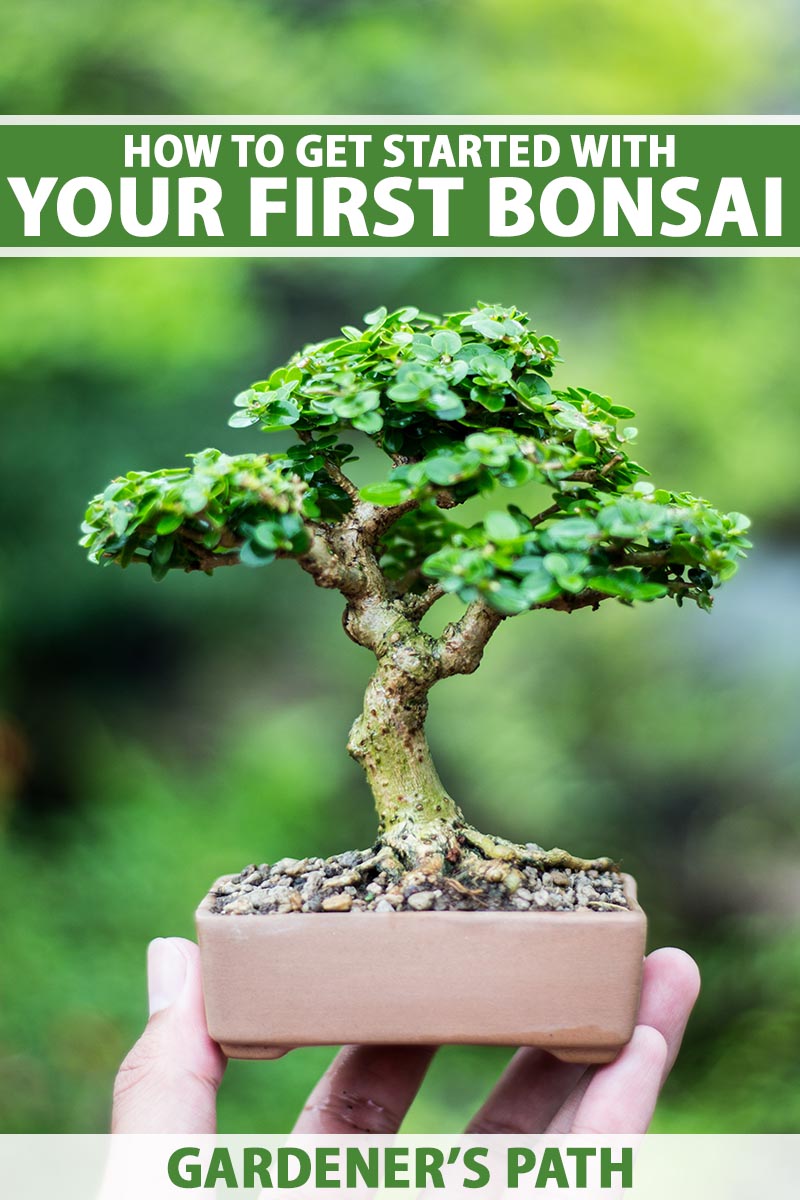
Whether you’re looking to dip your toe into the big world of bonsai or you just nabbed a cute little tree on impulse at the store, you’re probably wondering how to handle your first plant.
At its most basic, bonsai is a beautiful example of the intersection of art and horticulture. It’s both about raising plants and creating an artistic tableau that captures the brilliance of nature in miniature.
It’s easy to look at one of those hundred-year-old, award-winning trees and feel overwhelmed by the whole prospect. But don’t be.
Just remember that you’re working with a plant, as you would in other types of gardening, and it doesn’t have to be more complicated than that. If you have the spirit of an artist combined with a green thumb, all the better.
We link to vendors to help you find relevant products. If you buy from one of our links, we may earn a commission.
This guide will break everything down to its most basic parts so you can jump in without feeling like you’re in way over your head.
Even if this is your first go at bonsai – or even your first attempt at raising plants of any kind – this guide is perfect for beginners, and we’re here to help.
Here’s what we’ll discuss:
What You’ll Learn
If you are totally new to bonsai growing, you might want to check out our introduction to the art. It lays out all the basic concepts and explains the history behind this ancient art.
Feeling ready? Here we go!
A Bit About Bonsai
Bonsai as an artform has been around for hundreds of years, brought by monks from China to Japan, where it was transformed into the practice that we recognize today.
One of the earliest examples in Japan comes from the 1300s, though it was likely being practiced there long before that.
This technique isn’t about cultivating dwarf trees, but rather, it involves growing full-sized specimens in small containers and keeping them tiny through containment and pruning.
Most species grown as bonsai must be treated as regular trees, meaning they need to be outdoors and should experience a period of dormancy.
That said, there are a few species that you can keep inside for part or all of the year.
Best Species to Start With
When selecting a plant to start your journey with, you need to consider whether you can keep the tree outdoors or if it will be kept indoors.
As we said, some trees need a dormancy period that includes colder temperatures and less light, so they can’t be kept exclusively inside.
If you want to keep your plant indoors, go for a species that is commonly grown as a houseplant. These are often better for beginners anyway, because they are more tolerant of being kept in containers indoors.
A lot of people opt to start with plants that aren’t necessarily trees, but rather, woody shrubs that can be trained into a small tree-like shape.
These are usually easier to grow and they mature more quickly, so you can start practicing your technique without the risk of upsetting a temperamental species or ruining a shape that will take years to fix.
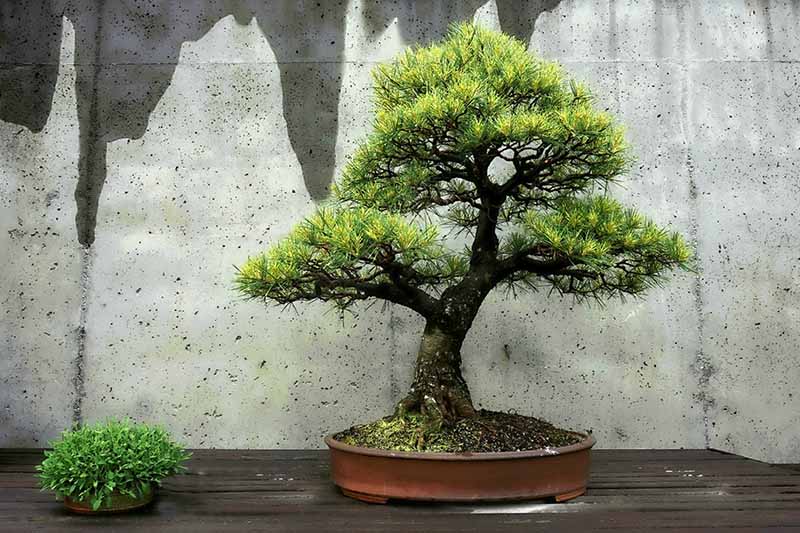
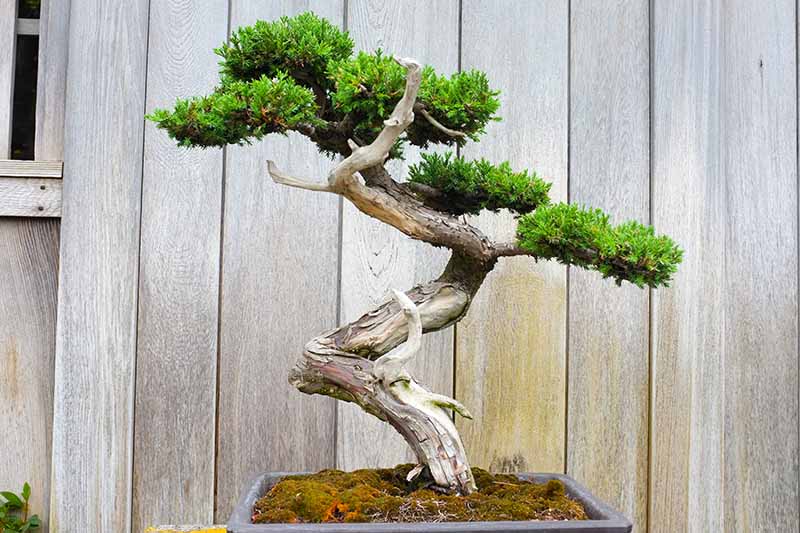
When picking a plant, look for something that has interesting bark. If you picture an older bonsai, you never see one with a smooth trunk.
That’s because slower-growing trees in nature typically have chunky, textured bark, while fast-growing trees have smooth trunks.
As iconic as they are, I don’t recommend maples, pines, flowering cherries, or cedars for beginners. Fruit trees, birches, redwoods, and ginkgo trees are a bit challenging, as well.
You’re welcome to give them a try. This is an art, after all, and there are no set rules. But if you want something a bit more forgiving, consider one of the following to begin:
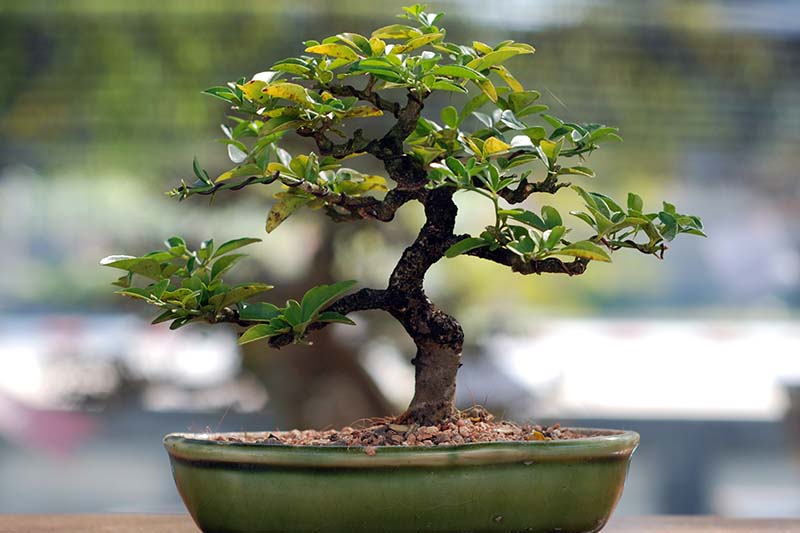
Chinese Elm
When I started practicing bonsai, I killed my Chinese elm about a dozen times. At least, I thought I had.
Every time it seemed to be done for, it made a comeback.
This species is an excellent option if you want a classic-looking bonsai that can handle some abuse. I think of it as a bike with training wheels. It’s got your back until you’re ready to start riding on your own.
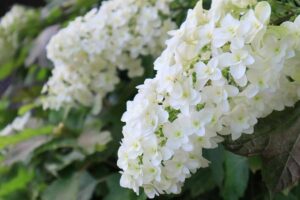
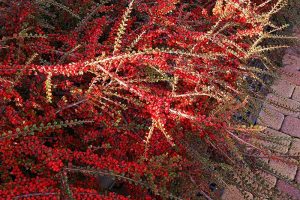
Cotoneaster
The same toughness that makes cotoneaster a reliable garden specimen is also what makes it a great beginner bonsai. You won’t be sacrificing beauty for hardiness, though.
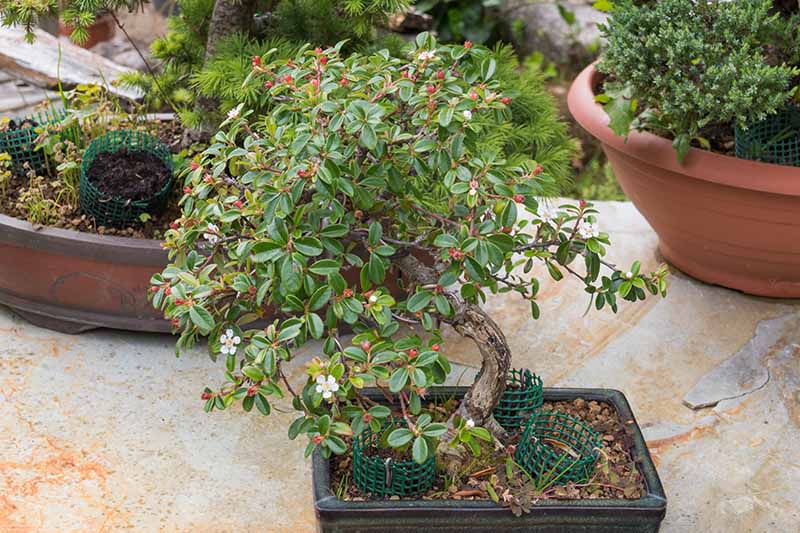
The glossy leaves, white flowers in spring, and red berries in fall and winter are beautiful.
Dwarf Schefflera
The lovely umbrella tree is another nice option for beginners and it does well indoors. In fact, it’s often grown as a houseplant.
This was my first bonsai and it’s still kicking after more than two decades, plus many, many errors on my part.
I’m supposed to fertilize bonsai? You can’t leave them in a hot car? Well, now you tell me…
Hopefully, that tells you how tough this one is.
Ficus
Ficus is the first tree that I typically recommend to people looking to give the art of bonsai a try.
There are hundreds of types to choose from, and they can grow indoors – though most do better if they spend a few months outdoors during good weather.
Be sure to choose a plant that has small leaves, such as narrow leaf (Ficus nerifolia) or banyan fig (F. retusa). A large-leafed ficus won’t work.
Fuchsia
I think fuchsia is underutilized by beginners. It can be grown indoors or out, it grows quickly, and it is long-lived. The biggest challenge is keeping it watered.
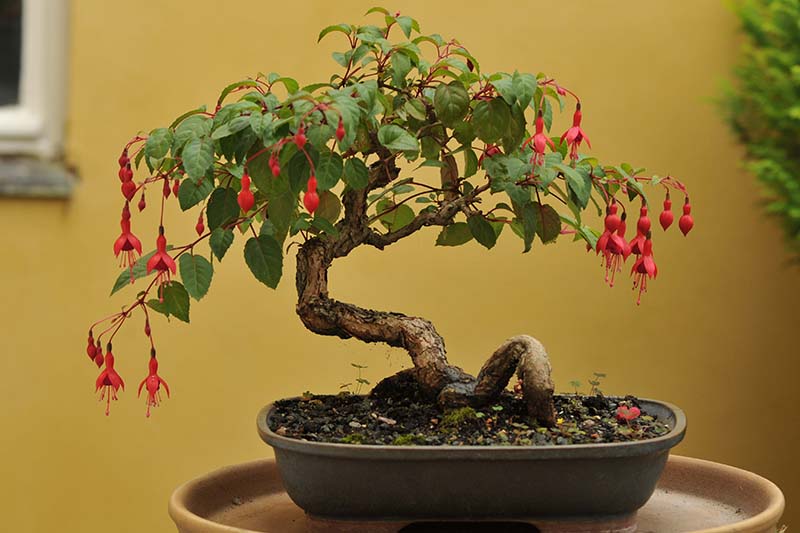
Look for a cultivar or hybrid with small leaves and flowers. You can read more about fuchsia varieties here.
Jade
Dwarf jade plants are naturally small, can be grown indoors, and even blossom in the right conditions.
They grow fairly fast, so you can achieve the look of an older plant much more quickly than if you opted for something slow-growing like a juniper.
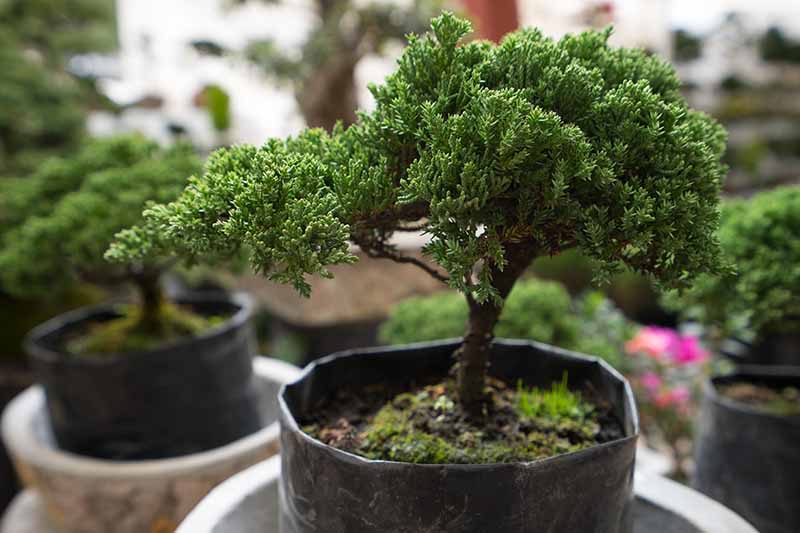
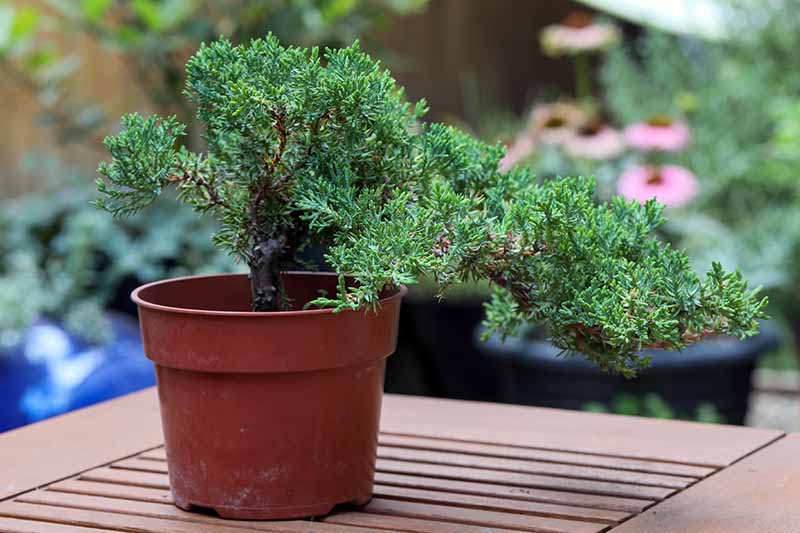
Juniper
Juniper is an excellent tree for the beginner because it’s incredibly tolerant of dry soil and drought conditions. It grows slowly, which some people consider a bonus because that means less work and maintenance.
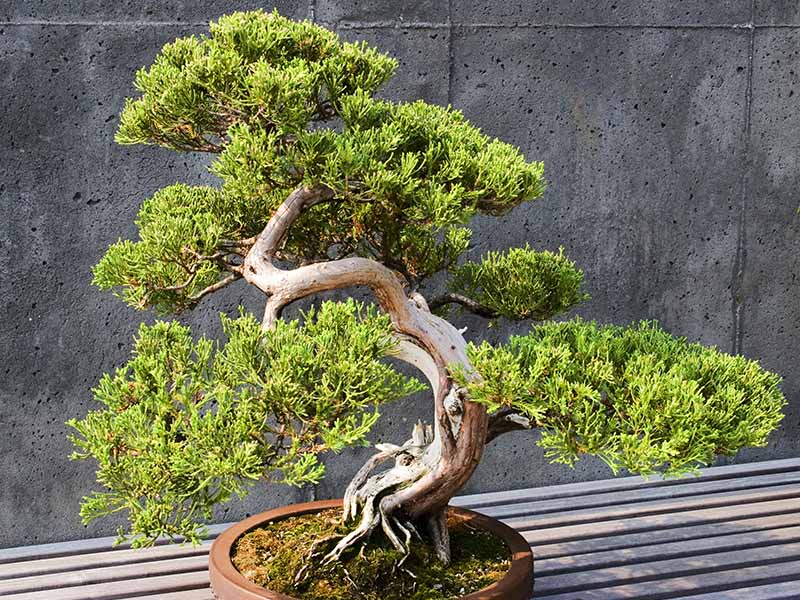
However, it should be kept outside year-round. Don’t believe the tag if you buy a juniper labeled as an indoor plant. It’s not, despite the fact that some nurseries advertise them this way.
Lavender
Lavender will never grow a massive trunk, and these plants have a shorter lifespan than true trees, but choosing lavender is an excellent way for beginners to practice caring for and shaping bonsai.
You can achieve the look of an old tree without decades of training and care.
I find it’s a good plant for practicing techniques like pruning and wiring because it grows quickly. You don’t have to wait years and years to see the impact of your choices.
Read more about growing lavender in our guide.
Rosemary
Wait, isn’t this just a garden herb? Rosemary is one of the best plants for beginners, believe it or not. If you’re eager to practice shaping and want to see quick results, this is a perfect plant to start with.
It grows fast, is tolerant of drought and poor soil, and its woody stem becomes gnarled and aged-looking much, much faster than an actual tree.
If you want to dip your toe into this technique without the commitment, pick rosemary. These plants don’t live as long as some of the more traditional options, but they are a great place to start.
Learn more about growing rosemary here.
Where to Obtain Your First Bonsai
Once you’ve settled on a species, you have a few options for obtaining your first bonsai. Your decision depends on your budget and how involved you want to be in the process from start to finish.
On the pricier end of the scale, many retailers and nurseries sell started bonsai. You can find some younger plants that aren’t too expensive or you can purchase older bonsai, but these will be expensive.
A second option that sits somewhere in the middle of the cost scale is to buy a seedling of the species that you want to grow.
This is a bit more challenging because you will likely need to trim down the root ball to place it in a container, and you’ll need to do more shaping and pruning.
However, if you keep an eye out, you can find seedlings that are already in pretty good shape to start with. Junipers are a particularly promising option, so look around the next time you’re at a nursery.
Finally, you can grow your own plant from seed, or cultivate it by rooting a cutting or air layering. This is the most challenging option, because you are entirely responsible for the health of the plant starting with propagation.
If you go this route, start the plant in a larger container for the first few years, rather than a bonsai pot.
You probably won’t be able to style your tree – other than training the trunk – for several years using this method, unless you go with a woody herb like rosemary or lavender.
I don’t recommend that you purchase the pre-made bonsai that are available at home goods stores or in kiosks at the mall.
These are not usually prepared properly (see: rocks glued to the surface, for example) and will likely fail in the long run. Begin with a good foundation.
Start with the Soil
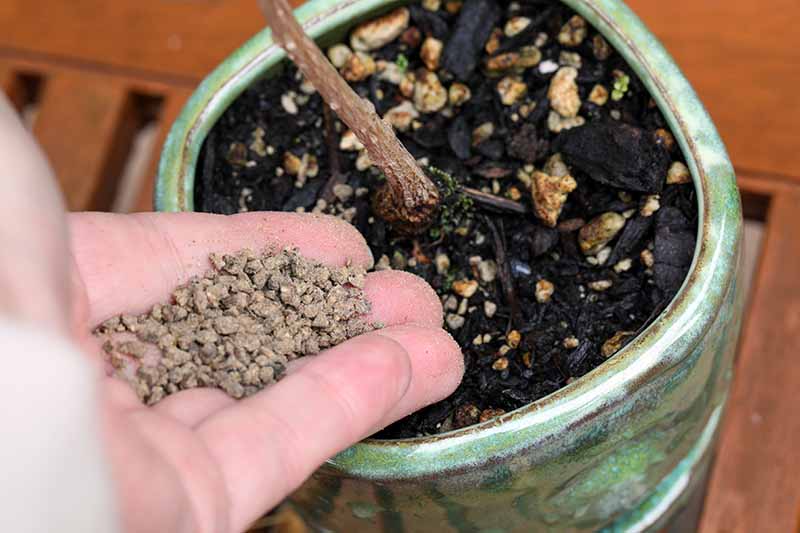
First things first, sort out your soil.
The soil is arguably the most important element that you have control over. A tree can forgive a little too much shade or not quite enough moisture, but with so little soil available to anchor and nourish these plants, you have to get it right.
When you obtain a plant, you don’t really know what the existing soil composition is. But the substrate that you use is a living thing. It acts as a host not only to your tree, but to the microorganisms that help to keep it alive as well.
Whether you bought a started bonsai already in its container or you are potting your own, remove as much of the existing soil from around the roots as possible.
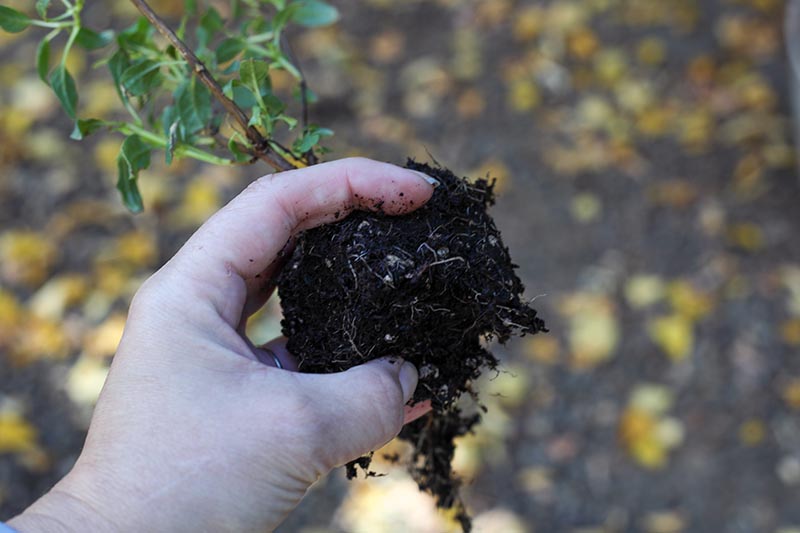
The easiest way to do this is to remove the plant from its container and gently brush and knock away the soil. You can also use a gentle stream of water to wash away any dirt.
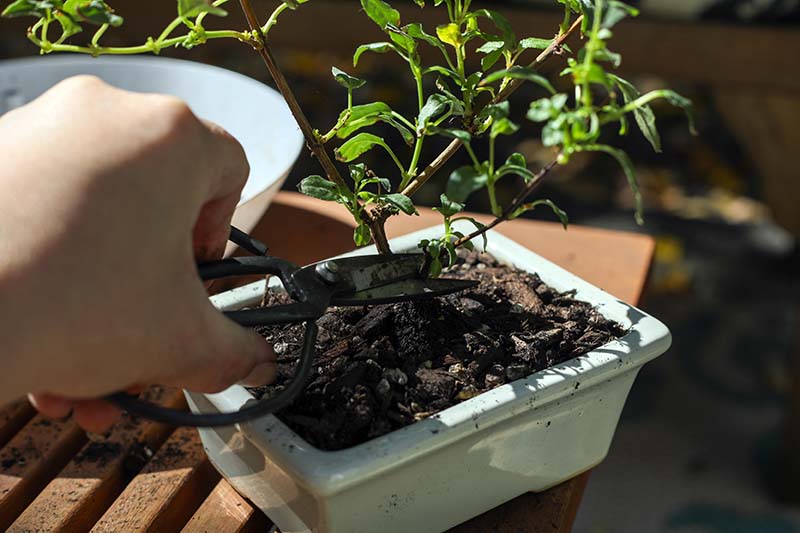
Trim away any dead, diseased, or broken roots.
Now, repot it in a fresh potting medium, assuming you’re putting it back in the pot it came in. If you are moving your plant from a nursery pot into a bonsai container, move on to the next section of this article.
It’s easiest to buy a premade substrate, but you can make your own if you want. The latter option gives you ultimate control over how you raise your plants, and it’s more affordable.
If you’d rather purchase a pre-made substrate, online retailers such as Bonsai Boy are an excellent resource because they’ve done all the hard work and research for you.
For instance, Bonsai Boy carries an all-purpose soil in two-pound bags that is carefully balanced to meet the needs of most bonsai plants.
Gently pour the substrate around the roots. Don’t compress the soil around the roots as you fill in around them, just gently push it in place using a chopstick or your fingers.
Be sure to bury the root collar or root crown, which is where the roots meet and the stem or trunk forms. All trees and shrubs have a root collar.
Lightly tamp everything in place.
Now you know what you’re working with, which means you don’t have to worry about the soil being too compacted or carrying diseases.
Plus, you’ve gotten rid of any decorative rocks that were glued to the surface of the soil, if you bought a plant that came with those or received one as a gift.
Many retailers glue rocks to the surface of the soil both for looks and to hold everything in place. You definitely don’t want these in your container.
While we’re on the subject, also be sure to remove any moss that was placed at the base or around the trunk of the tree.
Repot
Many people buy their first tree pre-potted in a bonsai container. If you didn’t, you’ll need to repot your chosen plant.
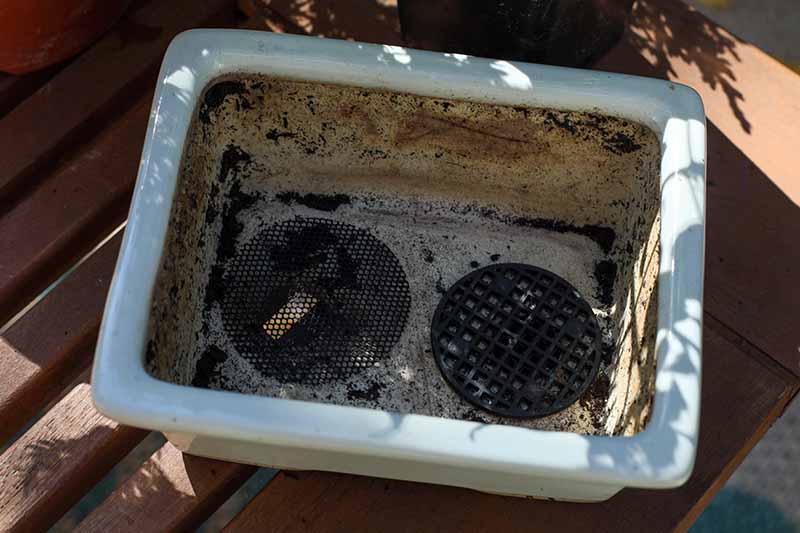
Prepare your container by putting a screen over any drainage holes.
You can purchase metal or plastic pre-made screens, like the ones that are available at Bonsai Boy, or you can buy window screen material at a home goods store and cut it to size.
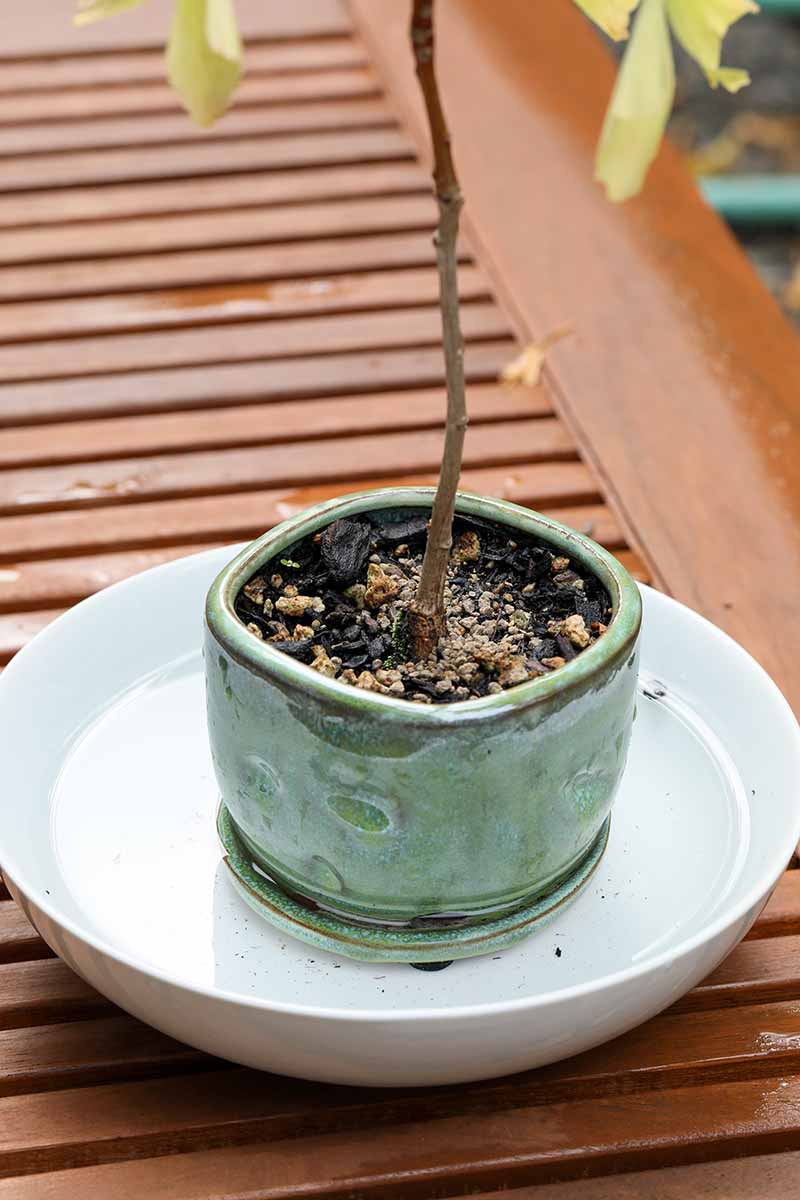
Add a thin layer of the fresh soil medium to the bottom of the pot.
After you have removed the soil from the roots and trimmed away any bad roots as described above, spread the roots out and place the plant in the container.
Do all the roots fit without being smashed or crowded in? If not, trim away some of the smaller roots, or trim the excess length off of longer ones. Never remove more than a third of the roots at one time.
The goal is to have all of the roots fit without being smashed or compacted.
Be careful to position the plant exactly where you want it, whether that is centered or off-center.
It’s difficult to move your plant once you’ve put it in place, and each time you remove it from the substrate, you will kill most of the fine root hairs. These take time to regrow.
Add potting medium to the base of the plant, pushing it in between the larger roots with a chopstick. Once you’ve filled the container, water it to settle the substrate and add any additional soil as needed.
If you removed a third of the roots, trim away some of the crown too, if possible. You don’t want to overwhelm the plant with more branches than the reduced roots can support.
If trimming right now will ruin the shape of your tree, it’s no problem. Just be extra diligent about watering. We’ll go over this in more detail below.
Choose a Location
Unless you have a plant that can be grown indoors year-round, your bonsai needs to be outside.
A lot of people work under the misunderstanding that because they are growing a full-sized tree like an elm in a pot, it can be kept indoors like a houseplant. But an elm can’t survive inside, whether it is full-sized or tiny.
Many beginner bonsai species are also commonly grown as houseplants.
Jade, golden or Hawaiian umbrella, flowering myrtle, serissa, ginseng ficus, Norfolk pine, hibiscus, money tree, and jasmine are common. If you pick one of these, you can keep your plant indoors.
If you choose a plant that needs to be outdoors, make sure it can survive in your climate. Find out what USDA Hardiness Zone your chosen species is hardy to before you commit.
If you live in the coldest zone that your species can tolerate, you will need to put it in a sheltered spot, bury it in the ground (pot and all), or cover it in pine boughs to keep it insulated through the winter.
Light exposure requirements depend on the species, but most plants require full sun or partial sun.
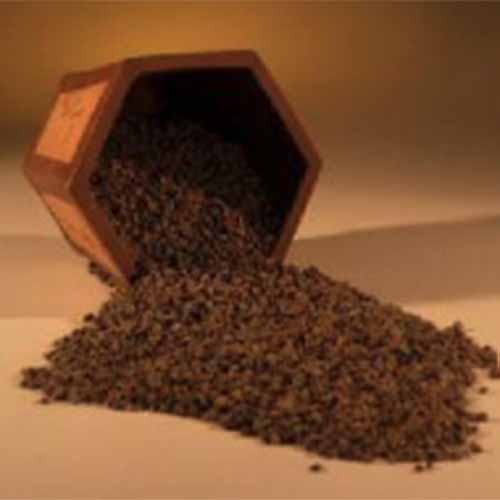
Add Fertilizer
Fertilizer is vitally important to keeping your bonsai alive and thriving.
Your tree can’t send out roots to find more food like a tree in the wild can. Fortunately, many manufacturers make bonsai-specific food that is controlled-release so you can set it and forget it.
Bonsai Boy sells a four-ounce bag of slow-release pellets that make the job of feeding your little work of art easy.
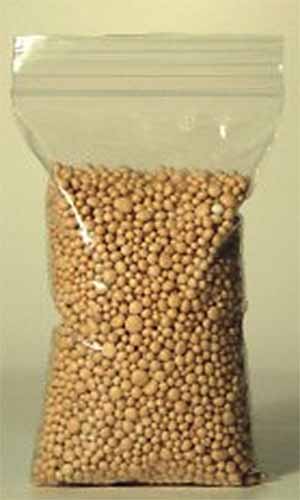
Slow Release Fertilizer Pellets
If you go this route, your biggest challenge is to figure out the right amount to use. Too much, and you can cause unwanted growth or even poison your plant. Too little, and it will fail to thrive.
Be sure to follow the manufacturer’s directions closely.
Water
It’s just as easy to kill your tree by overwatering it as it is to put its health at risk by underwatering. Some plants can handle a bit of drought, while others will give up the ghost right away.
The easiest way to water is by bottom watering. Fresh soil wants to wash away as you pour in water on the top, whereas bottom watering adds moisture without washing away soil.
Otherwise, slowly water at the soil level, not on the foliage. Let the water sink in for a few minutes and then add a little more.
The frequency with which you’ll need to water depends on the species you are growing. Junipers can go longer between watering than fuchsia can, for instance.
Keep in mind that outdoor-grown plants will receive water via rainfall as well, unless they are growing in a totally protected area, and pots typically dry out faster than the ground.
Focus on the Roots
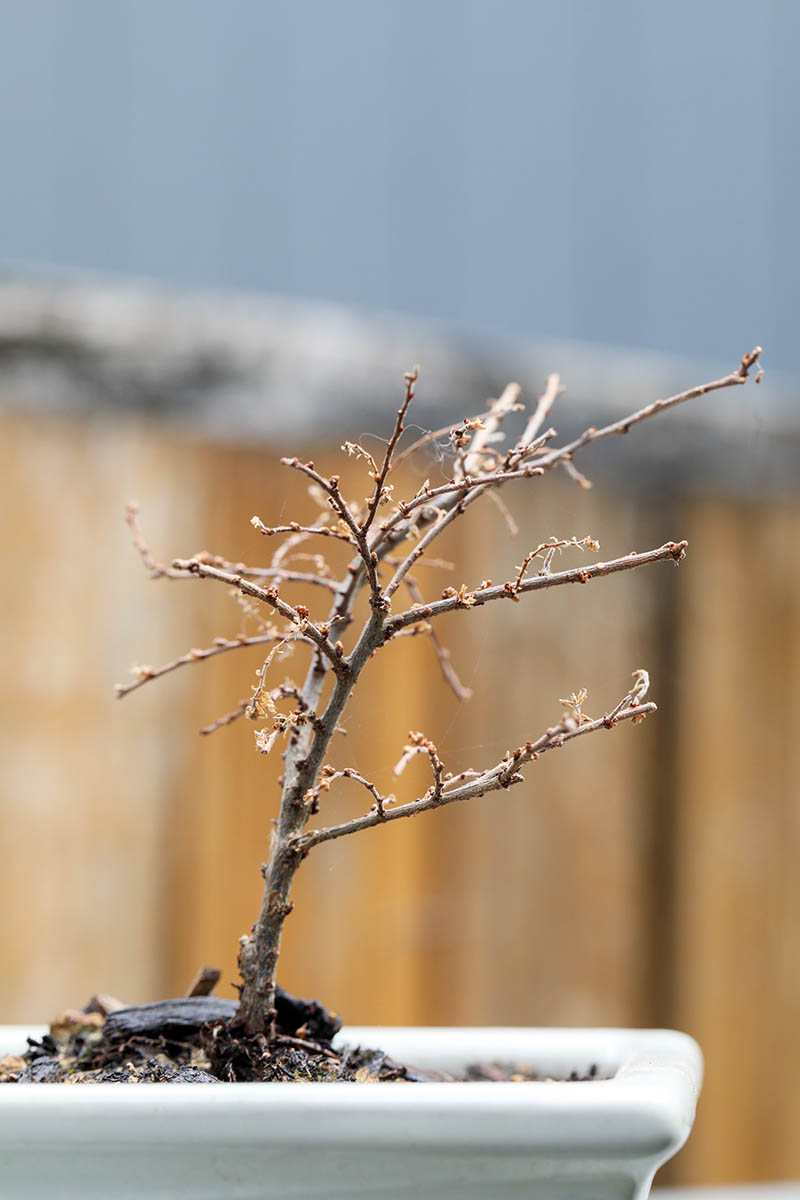
I know, it’s easy to become all-too-focused on the foliage of your plant. You’re excited to prune and train the branches so that they create the shape you envisioned, but for the first few years, it’s best to focus on the roots.
The roots are your plant’s foundation. Without a healthy root system, your bonsai will never become the perfect display you’ve dreamed of.
That’s not to say that you can’t start shaping your tree. Just don’t do it at the expense of what’s happening below the surface.
Once you put it into its new substrate, remove any flowers or fruits. Now, it will get busy growing new root hairs and firming up its foundation.
To help it along, you want to remove any adventitious roots that the plant formed during times of stress.
Adventitious roots form higher up on the trunk, usually just above the root collar, when the roots below ground are stressed. Think of these as an emergency backup system.
Now that you’ve given your plant good soil, sunlight, food, and water, those roots aren’t necessary.
Scrape away the top layer of substrate and look for any adventitious roots. Prune them away.
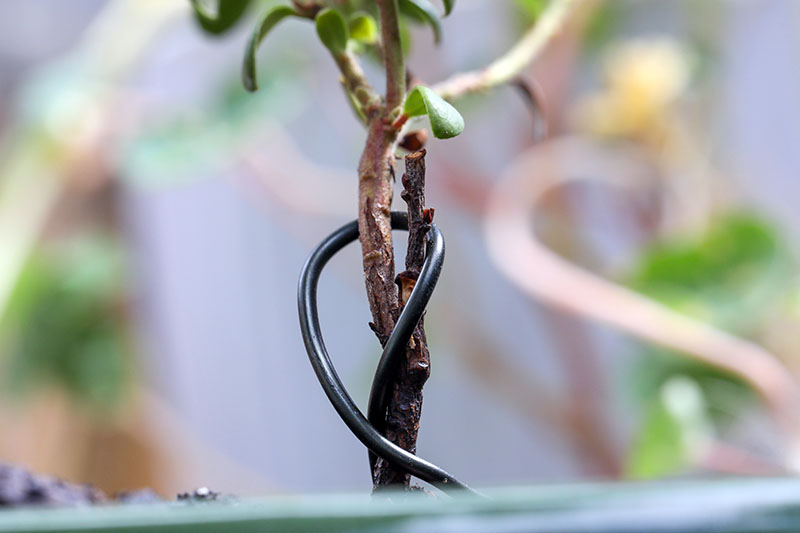
Now you can put a wire in place to hold the trunk upright if it is leaning or crooked. We’re not trying to shape the tree just yet, we’re only trying to provide the trunk with some direction and support.
This also provides the roots with some extra support, since a trunk and canopy that are leaning can stress the roots and even lead to breakage.
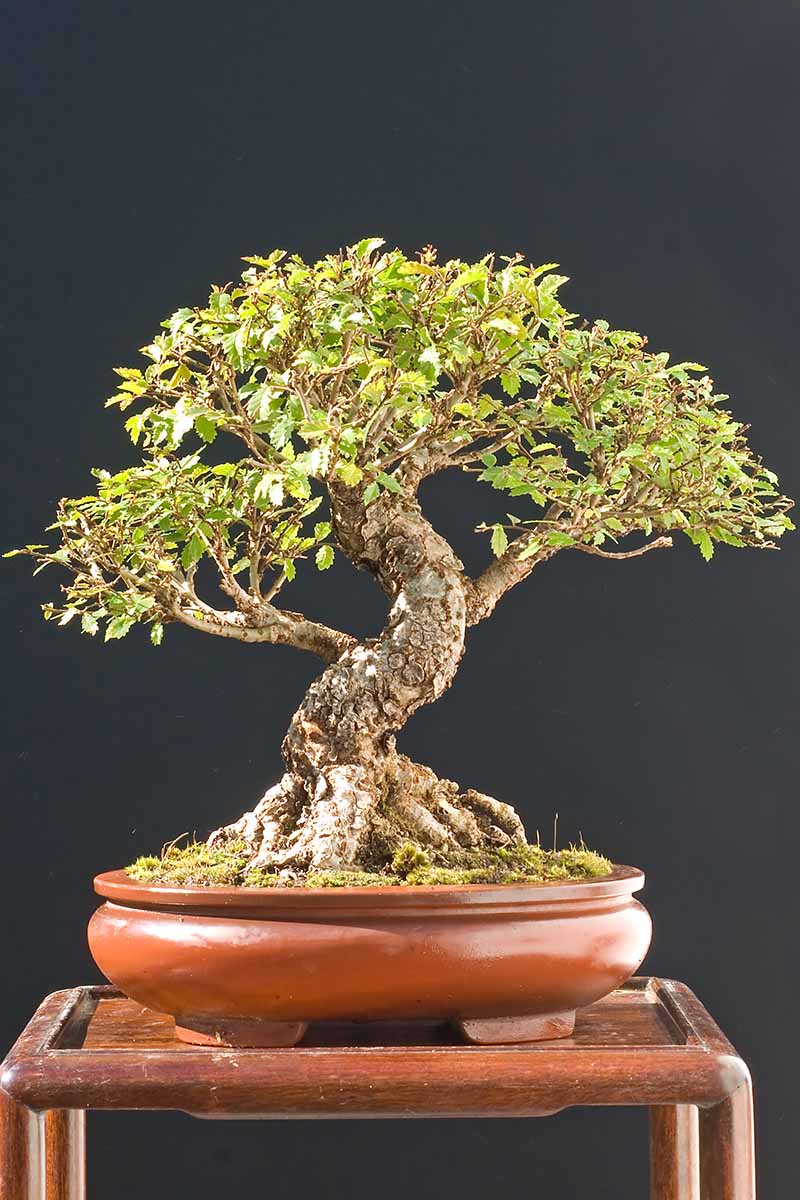
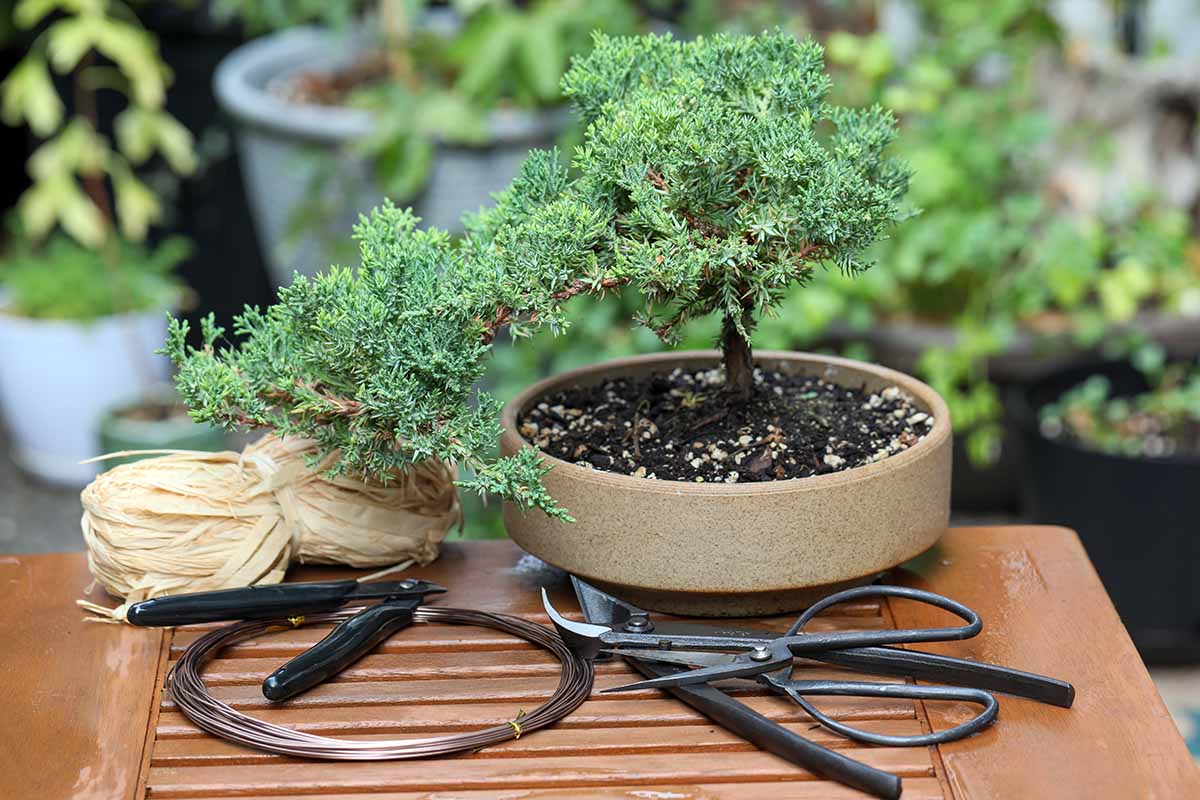
Shaping
Now we’ve arrived at the fun part: shaping.
Assuming you’ve given your plant a year or so to adjust to life in its container, you can start shaping. Remember that plants started by seed or cuttings need a few extra years to grow.
There are a few key elements to pruning that you should keep in mind.
First is that you ultimately want it to look like you never pruned the plant at all. A sharp pair of concave pruners will make this easier, and you might want to practice your pruning techniques on a less important plant before you start on your bonsai.
Then, envision what you ultimately want your plant to look like. This will be dictated in part by the existing shape of your tree, but there is a lot of room for creativity.
My best advice is to look at pictures online or in a book, or view in-person specimens at your local Japanese garden for inspiration.
You’ll also need to start wiring your bonsai to train the branches into the shape you desire.
Remember, the point of creating a bonsai is to make a snapshot of nature in miniature. The tree should look just like it would in nature… only smaller.
Head to our guide on pruning techniques for more information on how to prune and shape your tree.
Managing Pests and Disease
The pests and diseases that you might encounter usually depend on the species that you are growing, and whether your plant is indoors or outside.
But aphids, for example, are a common issue both indoors and out that can plague a large variety of plants.
Regardless of the variety you’ve selected and its placement, there are a few general practices that can help to keep problems away.
The first is to always clean your tools between use. A one-part bleach to ten parts water solution is an effective sanitizer.
The second strategy is to be mindful of watering. Overwatering is like opening the door and inviting fungal problems right in. Underwatering will stress your plant and make it more susceptible to the impacts of insects and diseases.
Keeping your plant healthy through appropriate watering and feeding is a smart way to help it fight off any pests or diseases that may try to hang out.
Make Your First Bonsai a Success
I know the art of bonsai can seem overwhelming. There is so much to know, and seemingly so little room for error.
But trust me, you can do it. This is just gardening with an artistic side. Have fun with it.
Don’t forget to show us the results of your work! Come and share photos in the comments section below so we can all be inspired.
If you felt like this article was helpful and you want to expand your bonsai world, take a look at these guides next:
As a ‘wood be’ (spelled to mean both amateur and desiring to become), I thank you for your enlightening insights. Since I am a very aged senior citizen (age 80) I am seeking some instant, and hopefully gratifying results.
Your direction will be appreciated and I will encourage my sons to continue that which I start. I have not found any sites that you encourage, if I am in error please provide guidance.
Sincerely and anxiously awaiting your reply.
Pastor Don
Hi Don, welcome to the world of bonsai! If you’re looking for a few species that will give you some (almost) instant gratification, try out boxwood, cotoneaster, weeping willow, Chinese juniper, laurel fig, rosemary, lavender, or wood apple. The herbaceous species like rosemary don’t live as long, but they grow extremely quickly.
Hello! a lot of things I have learned by reading your article. Thank you for sharing a nice article
Thank you for this very informative article. I have a 30-year-old bonsai ficus indoor plant that has been dropping its leaves. Today, while re-potting it, I noticed that the bonsai soil was very wet, with no root ball and very few tiny roots. I am not ready to let this old plant die. Shall I treat what little I have left as a cutting? Should I prune away all the dead branches? Please tell me your thoughts.
Hi Jeanne – don’t give up! Ficus are quick to drop their leaves so I wouldn’t worry about that too much just yet. The roots are a definite concern. I would remove as much of the soil as possible and spray the roots thoroughly with copper fungicide. Then, repot in well-draining soil. Prune away all of the dead branches and even some of the live branches so you have just a few healthy branches left. Right now you don’t have a lot of roots to support the top of your plant so you want to reduce the above-ground parts. If… Read more »
VERY INFORMATIVE
Great article! Love the wording style! I can’t wait to get busy on my little collection! I have a few different cuttings and a few seedlings in dormancy, plus some seeds in stratification and some other seeds in a grow pod! Fingers crossed!
A question if i may- I have a small Braeburn apple tree. Is this a suitable candidate to take a cutting from? And if so when would be a good time to take one? I’m interested to try air layering
Hi Pete, thank you so much for the kind words. A ‘Braeburn’ would make a beautiful bonsai! We have a guide on growing fruit bonsai trees if you’re interested.
To answer your question, yes, a ‘Braeburn’ can be propagated through cuttings and air layering. Go ahead and do an air layering or cutting in the spring. Cuttings are easier but there’s no reason not to go the air layering route. Let us know how it goes!
First time I have seen and read a detailed article about my love Bonsai :-), I always wanted it for so long but didn’t find it in my city, then finally found one about 3 months ago and bought it right away its a Juniper Bonsai, now he got so many dead (yellowish) spiky leaves and lots of green ones as well.My main worry is about the water, how often I need to water this guy? It is in the window ( inside of the house) which gets direct sunlight most of the day, is this location fine? should I… Read more »
Hi Amir, welcome to the world of bonsai! Let me answer your questions one by one: When it comes to water, less is more. Water only when the soil has dried out completely. If you can touch the soil and feel any moisture, your plant doesn’t need more water. The yellow leaves are a sign for concern (assuming you don’t have a cultivar that grows yellow foliage). Inappropriate watering is often the culprit, but location can be a problem, too. That leads me to my next point. Junipers must live outside for a majority of the time. They won’t survive… Read more »