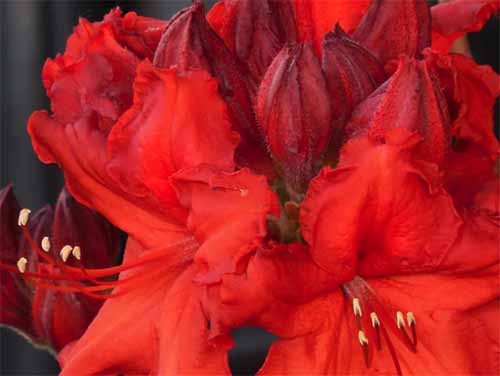
Rhododendron spp.
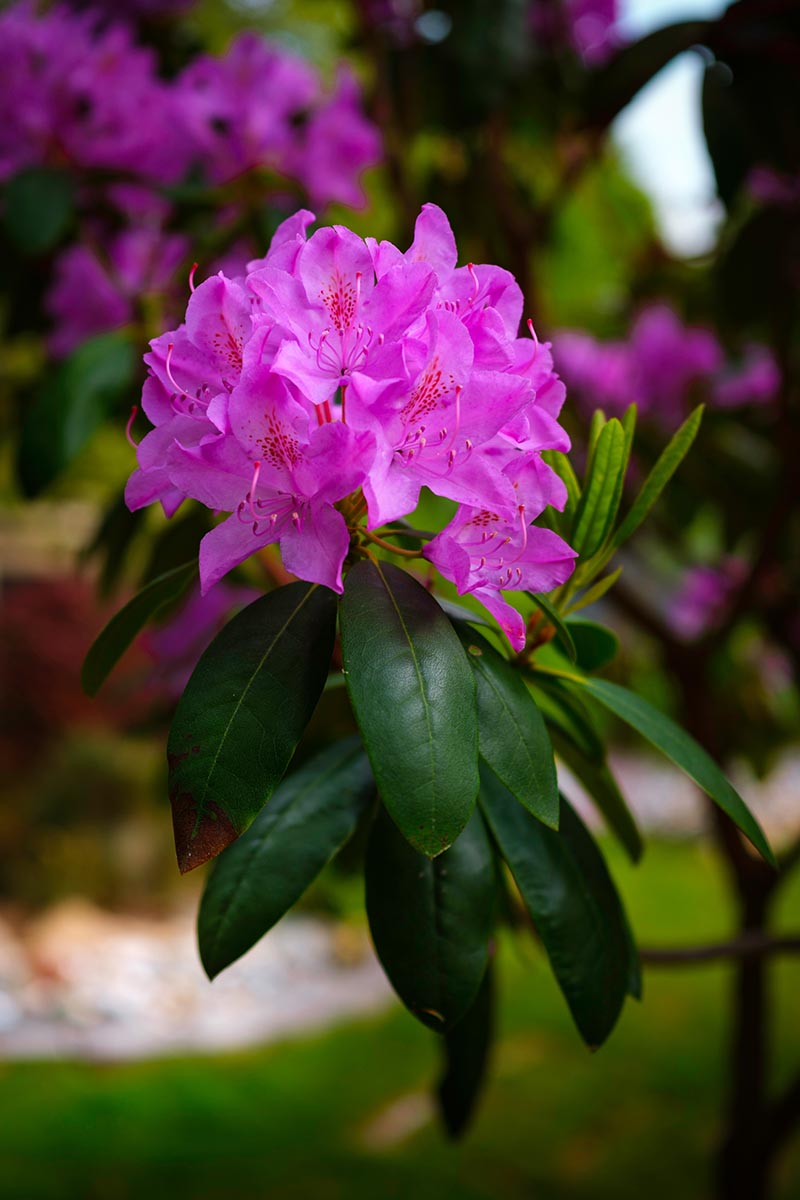
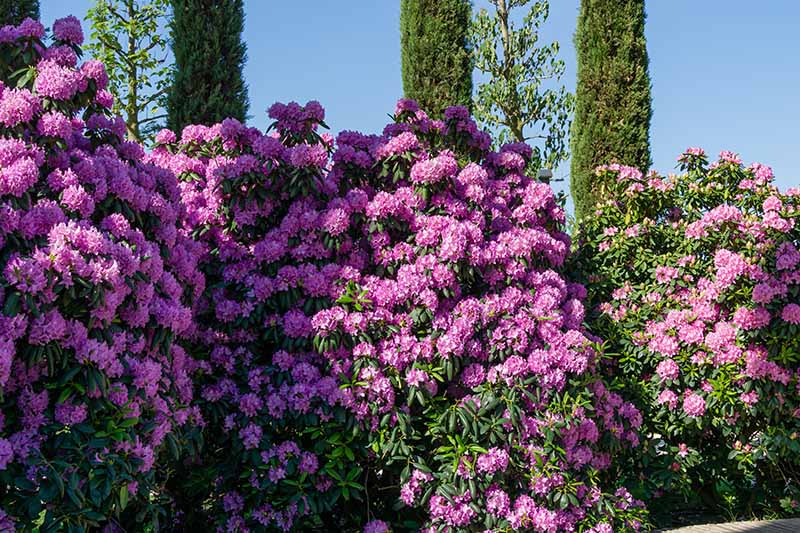
There’s a reason why rhododendrons are so popular. The riot of color that a well-placed plant can produce is replicated by few other shrubs out there. But beyond that, they come in a massive range of sizes, leaf shapes, and growth habits as well.
There are rhododendrons for shade and some for full sun. Some do well in hot, dry locales, while many others are perfectly content in soggy, cool soil. In other words, there’s a rhodie for pretty much everyone.
We link to vendors to help you find relevant products. If you buy from one of our links, we may earn a commission.
When it comes to versatility, rhododendrons have it made. There’s just one catch. They need acidic soil. However adaptable they might be, that’s one thing they won’t compromise on.
Fortunately, there are ways for even those with the most alkaline soil out there to grow rhododendrons. No one should be without their stunning display.
To help you achieve your floral dreams, this guide will help you through the challenges and joys of growing these marvelous plants. Here’s what you can expect, coming up:
What You’ll Learn
There’s a lot to love about rhodies – and a lot to know about raising them, so let’s jump right in.
Cultivation and History
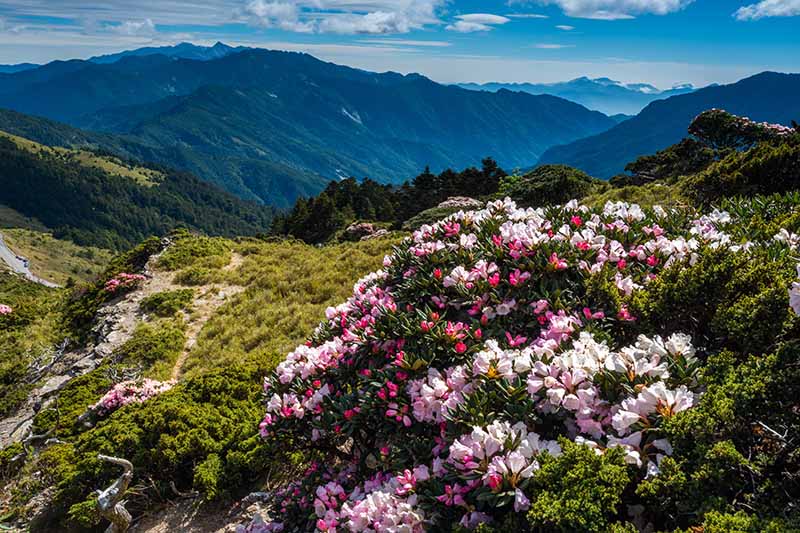
Rhododendrons are found growing wild around the world in various places including China, Japan, India, Nepal, Korea, Europe, and North America.
They grow in areas from the Arctic to the tropics, from Canada to Mexico, which should tell you that these are some incredibly versatile plants. The largest concentration of wild rhododendrons is found in southwest China.
Rhododendrons have been around in the wild for centuries, but they started to appear in modern records during the 1500s and 1600s.
Flemish botanist Charles L’Ecluse is credited with the first botanical classification of a rhododendron (R. hirsutum), which he identified in the Alps during the 16th century.
We know that they were cultivated in China in the 1600s and James Cunningham, a surgeon with the East India Company, was the first recorded amateur collector from the West. He began picking up specimens during his assignment in China in 1698.
Missionaries and other travelers visiting China continued to collect specimens from that period on and brought cultivated plants to Europe and the US. People also began cultivating and growing European and North American species.
Today, there are thousands of Rhododendron species within the genus and thousands of cultivars, ranging from tiny plants with petite flowers to massive bushes with proportionally large blossoms and leaves.
A single rhododendron can grow up to 40 feet wide and 30 feet tall, as the massive ‘Old Cornish Red’ cultivar in Britain demonstrates.
Groups of wild plants can grow so large and thick that they’ve earned the name “laurel hell,” “rhododendron hell,” “laurel slicks,” or “yaller patches.”
In the Appalachian region, R. maximum can grow so dense and aggressively that it has taken over the understory of thousands of acres of woodlands. If you ever find yourself tangled up in a yaller patch, take pictures! From what I’ve seen, it’s beautiful (if a little disorienting).
Flowers emerge in the early summer and last for weeks, and all species are evergreen. There are a few species that are repeat bloomers.
They spread via suckers and seeds, and they reproduce so well that some species are considered invasive.
That’s why it’s a good idea to do a little research before you place your plant in the ground. R. ponticum, for example, is a beautiful, if invasive pest in some regions in the US, EU, and UK.
The entire plant is toxic to humans, cats, dogs, livestock, and horses. While the toxins can be deadly, some people have managed to make odd use of them.
The honey made by bees from certain species of rhododendron flowers has earned the nickname “mad honey.”
It contains a neurotoxin that can bring on hallucinations, to the delight or dismay of the person ingesting it. In high enough doses, it can also cause seizures and death (to the delight of no one).
We don’t recommend ingesting any part of the plant, nor the honey made solely from it.
Before we go any further, let’s clarify one thing: rhododendrons aren’t azaleas (though azaleas are rhododendrons). Clear as mud? They are closely-related plants in the same genus. Azaleas are certain species in the Rhododendron genus (subgenera Tsutsusi and Pentanthera).
Rhododendrons (hybrids, as well as subgenera Azaleastrum, Choniastrum, Hymenanthes, Rhododendron, and Therorhodion) are larger overall with thicker, bigger leaves and larger flowers than azaleas.
Rhododendrons have fewer stems, more stamens, and the leaves are smooth, not hairy. Azaleas bloom earlier and have a wider range of colors.
Azaleas can be deciduous, but rhodies never are. Both famously require acidic, somewhat shady growing conditions.
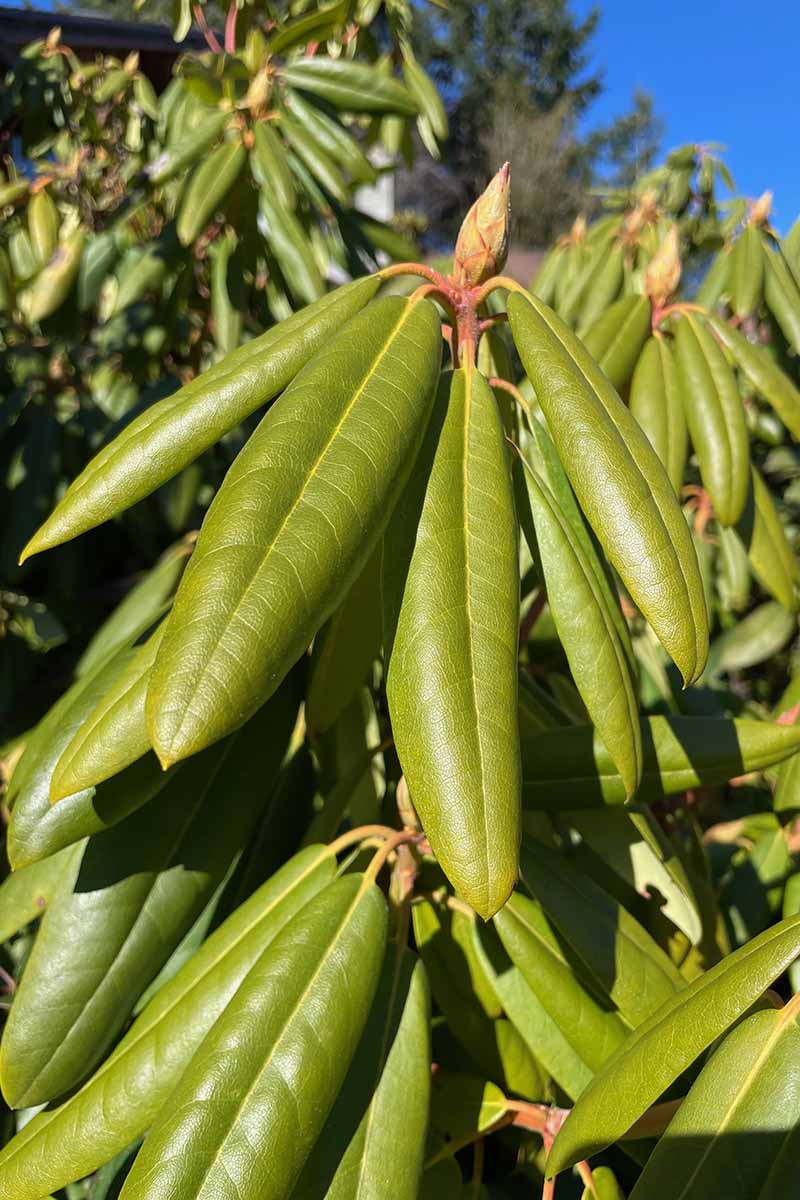
Rhodies can have smooth or rough bark. You can grow either in the same way, but it helps to know which you’re growing because there are some differences, which we will talk about up ahead.
When botanists refer to rhododendrons, they mean both azaleas and rhodies, but here we are just talking about the latter, the true rhododendrons.
These plants can grow in USDA Hardiness Zones 5 to 8, but there are some that can do well in Zones 4 and 9, as well.
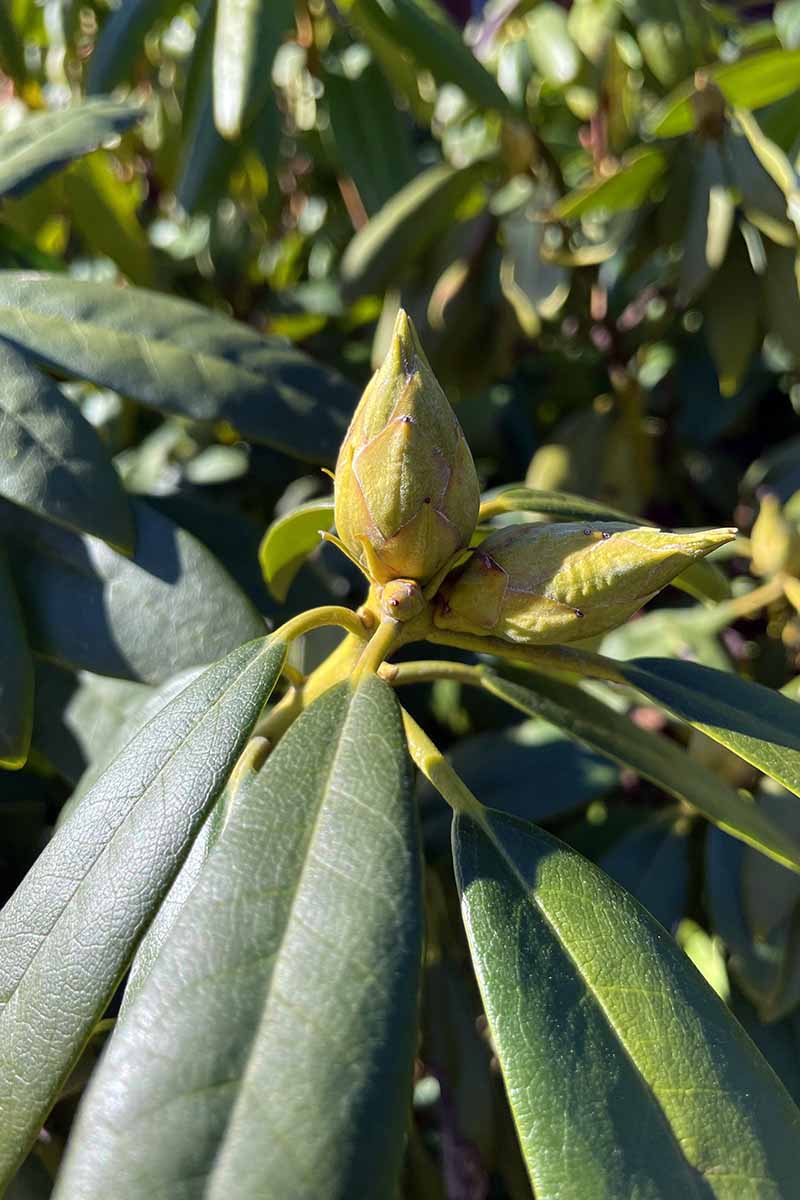
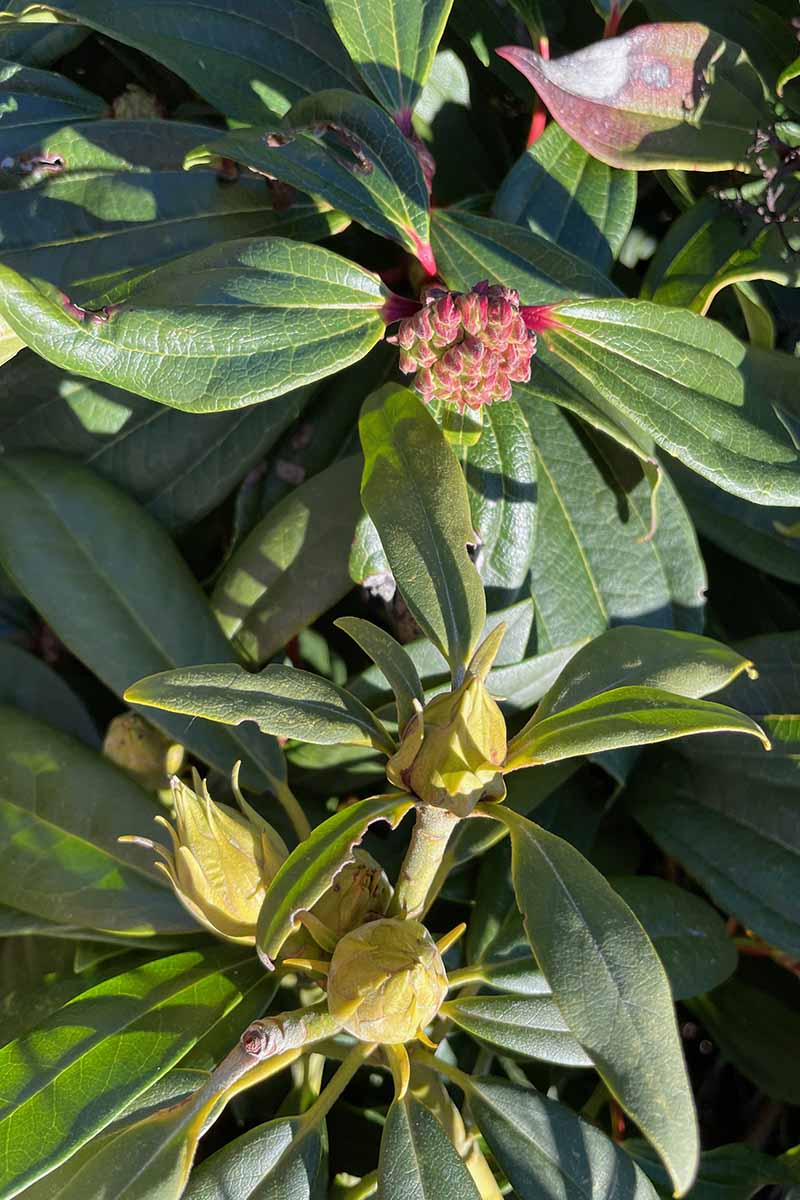
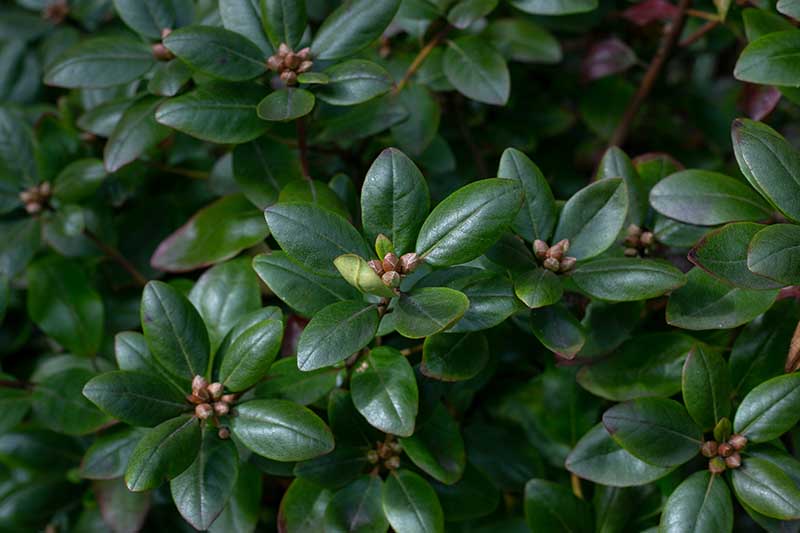
Rhododendrons start blooming in spring, and I always get excited when I see the buds start to swell in the late winter. I know that spring and that majestic floral display is right around the corner!
Propagation of Rhododendron Shrubs
Rhodies propagate easily from seed, cuttings, and layering, depending on what your goals are and which type you choose.
From Seed
You can grow rhododendrons from seed, but you must use the species types. You can’t grow hybrids or named cultivars true from seed. Seeds should be planted in January or February and kept on a heat mat.
Fill five- or six-inch pots or a seed tray with a seed-starting medium.
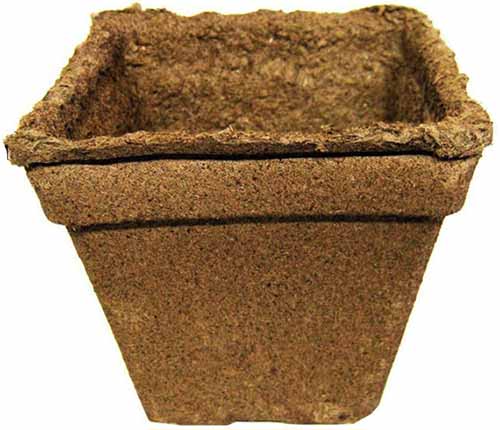
I like to use biodegradable starter pots like CowPots, and you can grab packages of 60 or 192 pots at Arbico Organics.
Any water-retentive seed-starting medium will do, but I’m a fan of Tank’s Pro-Lite Seeding & Potting Mix.
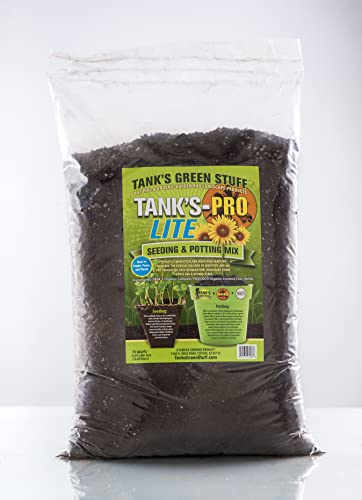
Tank’s Pro-Lite Seeding & Potting Mix
You can find 16-quart bags available from Tank’s Green Stuff via Amazon.
Place two or three seeds in each container on the top of the mix, but don’t cover the seeds. Water well with a spray bottle to thoroughly saturate the soil.
Once the seeds are in the soil, the work really begins. You can’t let the medium dry out at any point. If the medium does dry out, the seeds (or young seedlings) will die.
That means visiting with your spray bottle at least once a day. You’ll also want to place plastic or a cloche over the containers to help seal in moisture.
Place the containers under grow lights or in a window where the seeds will receive at least eight hours of sunlight per day. Sixteen hours of light under a grow light is even better.
Expect to see germination in 10 days to three weeks, depending on the plant. After a week or two, you can remove the cloche or plastic cover. Then, in four to eight weeks, the plants should have developed two true leaves.
Once this happens, you can transplant if the weather is appropriate and the last projected frost has passed. If not, continue to grow in the containers indoors.
Keep the soil moist at all times throughout this process. Remember, dry soil is a death sentence for your seedlings.
Once you’re ready to plant, harden off the seedlings over a period of 10 days or so.
Place the plants outside in an area where they will receive direct light with protection from any wind for one hour. The next day, add an hour. Continue to add an hour each day until the plant is sitting outside all day long.
Keep the soil moist at all times. Once you transplant, you can gradually start reducing the water over a few weeks so the surface dries out slightly between waterings.
From Cuttings
Propagating from cuttings is ideal if you want to grow hybrids and cultivars.
Take heel cuttings in the early morning during the late summer, or ideally in the fall.
The goal is to remove young, new growth that is just barely starting to harden. This type of wood is less likely to rot and roots readily, whereas softwood is prone to rotting and hardwood doesn’t root well.
Look for a stem that has at least two leaves. Remove any flower buds or spent flowers, and any leaves beyond the top two.
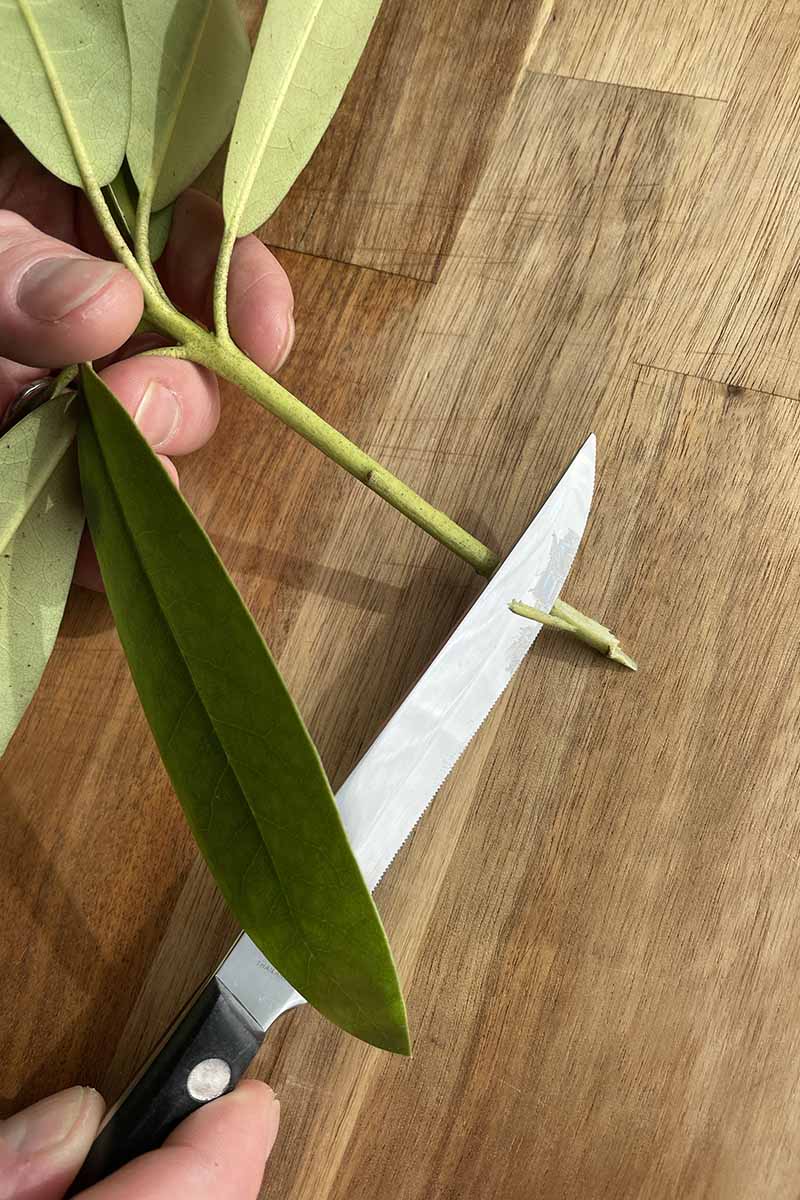
Slice off the thin outer green part on the bottom inch of the stem on one side to expose the interior and encourage rooting.
Dip the stem an inch deep into a rooting hormone such as Bontone II Rooting Powder, which you can grab at Arbico Organics.

Bonide Bontone II Rooting Powder
Use an equal mix of peat moss and vermiculite, perlite, or rice hulls to fill a six-inch container. This is one time when peat moss is a good choice, despite its environmental impact, because it has the acidic characteristics that rhododendrons love.
Water the medium until it is wet but not soaking.
Place the cutting an inch deep in the growing medium and cover the pot with a cloche or plastic bag. Then, put the cutting on a heat mat to encourage root growth. Keep the medium moist, but not wet, and spray inside the cover once a day.
Within six weeks, you should see root formation. Give the cutting a gentle tug. If it resists, roots have formed.
If not, keep watering and misting for another week or two. If the cutting hasn’t rooted at that point, it’s time to toss it. You can plan to start again next year.
If your cutting has rooted, treat it as a transplant.
By Layering
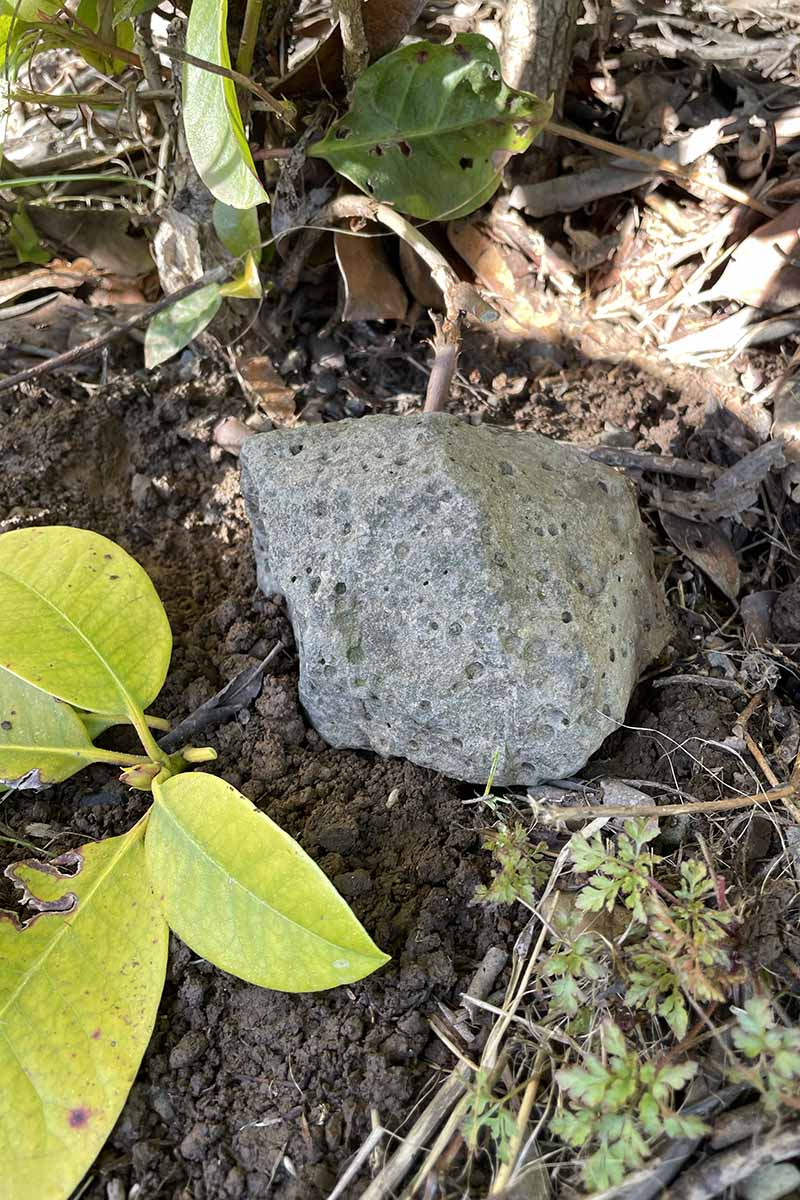
Rhododendrons layer well. During the late summer, select a low-growing branch and pin it to the ground with a rock or piece of wire pushed into the soil.
Remove any leaves in the section that you pin to the ground. Then, water and feed the section as you do for the rest of the plant. There’s really no more to it than that.
It can take up to three years for a layered branch to root, especially for the smooth-barked types, so be patient.
Check once every year to see if roots have formed by removing the rock or wire and giving the branch a gentle tug. If it resists, you have roots. If not, just pin it back down and keep letting it do its thing.
If you don’t see roots within four years or so, it’s probably not going to happen. Try again with a different branch.
Once roots have formed, simply clip away the side of the branch closest to the bush and dig up the new plant. Clip the branch on both sides near the ground using pruners to remove the excess growth and release the section from the parent plant.
Then, dig up a section of earth about nine inches in circumference around the rooted part, and four inches deep. Plant as you would a transplant.
Transplanting
You can find transplants at pretty much any nursery, but I’d encourage you to visit the American Rhododendron Society to find your local chapter.
Most local chapters have a yearly plant sale where you can not only find affordable options, but you’ll be able to nab plants that do particularly well in your area.
Plus, you can usually get some helpful advice from knowledgeable growers that know the specific needs of plants grown in your climate.
Transplants should be placed in the ground in the fall or the spring. Dig a hole that is twice as large and just as deep as the container that the plant came in.

If you don’t have the perfect soil, work in lots of well-rotted compost before digging the hole. Focus on amending the soil laterally rather than deep down.
You can never amend the soil in an area that’s too wide, but try to work the soil at least four times as wide as the diameter of the original container.
Take care not to plant too deep. This can smother and kill your rhododendron over time. The roots should be right near the surface.
Do not remove any of the soil around the roots when you remove the plant from the container. Rhododendrons need lots of mycorrhizal fungi around their roots to help them thrive, and the more you mess with the existing soil, the more you’ll kill off these beneficial fungi.
If you plant a rhodie that was grafted, take care to be absolutely sure that the graft point is well above ground. By the way, almost all grafted plants have scions attached to R. ‘Cunningham White’ rootstock.
The tag on the plant might tell you if it was grafted, or you can look for a knobby joint about an inch or so above the crown.
How to Grow Rhododendron Bushes
While they’re famous for their ability to grow in shade, rhododendrons can also handle full sun and everything in between.
You will typically see more numerous, larger, and longer-lasting blossoms on plants in partial to full sun, depending on the cultivar. In fact, buds won’t break on plants that are in too much shade, but you can still enjoy them as some nice greenery in your garden.
In areas where the weather can become hot in the summer, protection from any afternoon sun is necessary.
In a perfect world, you’ll put them somewhere they’ll have a few hours of sun in the morning, a few hours of shade in the afternoon, and a few hours of sun again in the evening. Dappled or filtered shade works well, too.
Protect them from wind. The perfect spot would be on the eastern side of a mature tree in the shade of oaks and pines where they could get morning sun, dappled shade during the day, and protection from wind.
Slopes are ideal because the drainage is usually good in these areas and the plants are protected from wind, which can cause leaf burn.
Don’t plant them near black walnuts, because they’re sensitive to juglone.
They need acidic soil, and do best in humus-rich, well-draining earth. That said, they can survive in sandy or clay soil, as well. You might sacrifice some of the floral display, though.
The soil pH needs to be between 4.5 and 6.0. If the soil isn’t close to this pH already, you will need to grow your rhododendron in a container or a raised bed filled with lots of pine bark. There are compact hybrids that are perfect for pots.
If you need to use potting soil, look for something labeled “ericaceous,” which is formulated for acid-loving plants. You can find ericaceous fertilizer as well, by the way.
You’ll need to adjust the soil if it’s too alkaline. Sulfur is an excellent option to lower pH. Use three and a half pounds to adjust the pH of 100 square feet of average, loamy soil dug six inches deep from a neutral pH of 7.0 to an acidic 5.5.
Note that results may vary, however, if your soil is comprised of more sand or more clay than average loamy soil. Do this at least a few weeks before planting. Adjusting the pH can be a process of testing and adjusting as you go.
Never use aluminum sulfate because it can eventually cause the death of your plants. Elemental sulfur is a natural element that is present in soil, and that’s the product you want to look for.
Aluminum sulfate is a sodium-based product, and while it has its uses, it isn’t right for rhodies.
If you need to amend your soil, consider planting in large groupings with other acid-loving plants. It’s easier to group plants with similar needs from a planting and maintenance standpoint.
If you have a single specimen, you’ll be constantly battling to amend the soil to keep the single plant healthy.
Rhododendrons have shallow, delicate roots. Heavy mulch can be helpful, but don’t let the mulch build up around the stem. A smothered stem, whether in soil or mulch, will kill your plant eventually.
Shredded pine bark, pine straw, or composted oak leaves work best. Use a layer of about two to four inches and extend the mulch beyond the drip line.
I can tell you from experience that rhododendrons can handle a ton of water, but it is possible to overwater them. Chronic overwatering or extremely poor-draining soil will kill your plant. But so can underwatering.
Just remember that rhododendrons grow wild in places like the Pacific Northwest. That should tell you how much water they need – quite a lot! Young plants need more water than established ones.
If they don’t receive the water they need, these plants may fail to form buds. You’ll usually see the leaves rolling and browning at the tops if your plant is too dry.
Taper off irrigation during the fall to help harden up the bushes for winter weather. That said, the soil should be moist a day or two before the first freeze arrives to protect the roots.
During the majority of the growing season, don’t let more than the top half-inch of soil dry out. In the month before the first expected frost date, allow the top inch to dry out.
Then, offer a good, deep soaking when the first freeze is expected within the next day or two.
Growing Tips
- Don’t allow more than the top half-inch of soil to dry out during the spring and summer.
- Apply several inches of mulch to protect the roots and retain water.
- Give the plants shade during periods of afternoon sun.
Pruning and Maintenance
The best part of rhododendron maintenance? No deadheading necessary! Your plant will bloom prolifically and for an extended period whether you prune it or not.
You can deadhead if you don’t like the look of spent flowers on your plant. And you should also remove any dead branches.
In the summer, remove the dead flower bunches to encourage a larger display the following year. Don’t remove any spent blossoms from August on, though.
If you want, you can prune rhododendrons to keep them compact. You can even cut them back dramatically and they’ll be fine. Rough-barked types can handle tougher pruning than smooth-barked types.
Repot every few years if growing in containers, especially if you’re using a soilless potting medium, which tends to compact fairly rapidly.
The plants will shed older leaves during the late spring and summer. Don’t panic, this is normal. As long as the leaves aren’t diseased and your plant doesn’t lose more than a quarter at once, things are fine.
During the winter, a prolonged freeze or heavy snow can cause leaves to curl and droop, but rhodies are thermotropic, and they’ll pop back up.
Leaves may also drop if the temperature falls below about 17°F. The plant will likely survive, so long as the freeze isn’t too prolonged, but you’ll need to wait for spring for the leaves to return.
Frost and snow can also cause some burning or damage to the leaves. These will typically drop off in the spring and be replaced with healthy foliage.
The foliage will become yellow if plants don’t receive the iron they need.
This can be a problem caused by inadequate fertilizing, but it’s caused more often by poor drainage, damaged roots, or alkaline soil. Add iron to the soil to help the yellowing leaves recover and then work to improve the drainage or soil pH, if you can.
If buds fail to form or break, this can be due to a number of things. Too little or too much water, or too much fluctuation between heat and cold in the winter, are common culprits.
Splitting bark is caused by rapid fluctuation between warmth and freezing.
There’s nothing you can do to prevent it other than wrapping the entire plant in cloth each time the weather fluctuates, and it may kill some of the branches. Fortunately, rhodies are so resilient that you can trim away the split areas and the plant will fill back in.
Fertilize in May and June, but not from July on. Fertilizing in the summer forces new growth, which can be damaged or killed when cold weather hits.
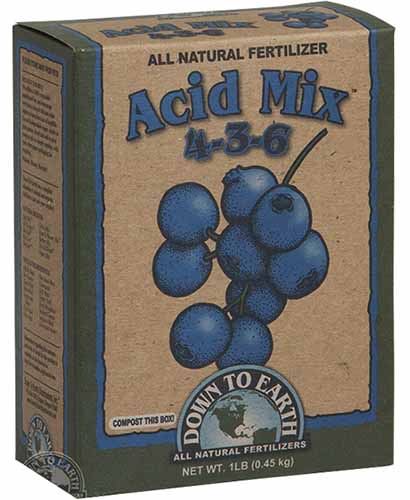
The fertilizer needs to be mild and you don’t want to work it into the soil, as this can damage the roots. Down to Earth’s Acid Mix is perfect for rhodies. It’s available at Arbico Organics in one- or five-pound boxes.
Regularly replace the mulch around the plant and hand pull weeds – don’t till or dig them out. You’ll also need to check your soil pH annually if your soil isn’t naturally acidic.
The pH will start to creep out of range over time and you’ll need to re-apply sulfur to keep it acidic.
Rhododendron Cultivars to Select
It’s an impossible task to recommend one cultivar or even one species that will work for everyone. That’s part of what’s great about rhodies.
They’re so incredibly diverse that there’s an option for nearly any garden, but that makes narrowing the options down a bit of a challenge.
When you go to select a cultivar, talking to your local chapter of the ARS will help immensely. Here are the factors to take into consideration:
- the location where your plant will grow
- your local climate
- the amount of available space
Rhodies are considered mature at 10 years, so research the mature height and width of the particular plant you’re considering.
Here are some exceptional options that are worth a look:
America
‘America’ was bred in the Netherlands in 1902 using ‘Parsons Grandiflorum’ and an unnamed second parent, and it’s an extremely cold-hardy option.
It likes lots of sun and grows to about six feet wide and four feet tall. The flowers are purplish-red.
Augfast
‘Augfast’ is a dwarf plant that stands out with its lavender-blue flowers.
It never grows more than three feet tall and wide, and is one of the earliest to bloom.
Janet Blair
‘Janet Blair’ has an open growth habit with medium pink flowers.
It grows about six feet tall and wide and is tolerant of dry conditions, so it’s perfect if you live in a drier climate.
Nancy Evans
‘Nancy Evans’ is a popular hybrid with bright yellow and salmon flowers. It blooms so prolifically that you can hardly see the leaves for all the blossoms.
This cultivar grows to about four feet tall and wide, and she’s a mix of R. x ‘Hotei’ and R. x ‘Lem’s Cameo.’
Nova Zembla
‘Nova Zembla’ is both cold- and heat-hardy, with masses of bright red flowers on a five foot tall and wide shrub.
Plants are available in one-gallon pots from Home Depot.
Managing Pests and Disease
Rhodies don’t suffer from as many problems as their friends the rose, but they still have a handful of issues that may try to come between you and that beautiful floral display you’re looking for.
Herbivores
Oh, deer. Deer dig rhododendrons. Fortunately, other herbivores such as rabbits, voles, and moles don’t seem interested.
Deer
Deer reportedly love rhododendrons, though I say “reportedly” because they don’t come near mine.
They’ve got better stuff to eat, like the veggies in my raised beds, the compost in my pile, and the hostas under my trees. My neighbors all reported the same thing in the very informal survey I took.
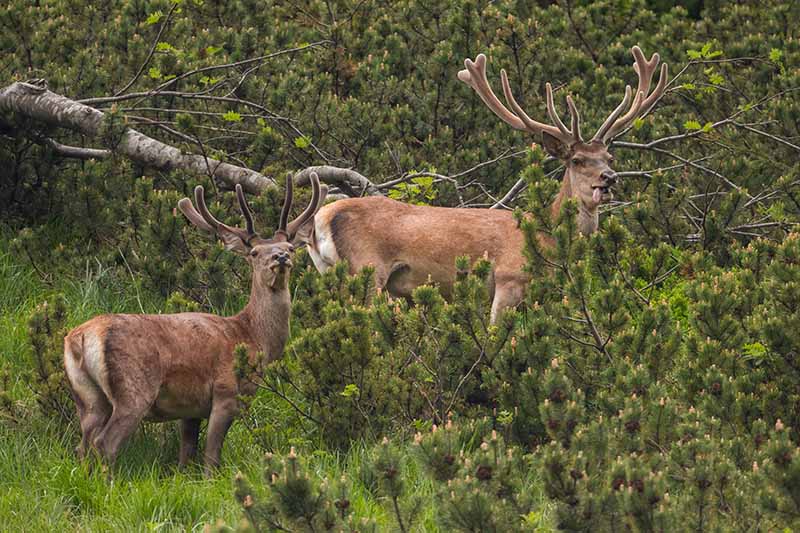
But I’ve known people who can’t keep hungry ungulates from treating their rhodies as an all-you-can-eat buffet.
Until you figure out whether the deer in your ‘hood have a taste for your particular species, it’s best to take some preventative measures, particularly with young plants. Read our guide to controlling deer for more info.
Insects
Insects aren’t the biggest challenge with growing rhododendrons, but they can spread disease, which can become a much more challenging issue.
Aphids
Aphids (Macrosiphum rhododendri) won’t kill your rhodie, but they can distort new leaf growth. Unless you’re out looking for them, though, you might not even notice that they’re around.
They’re usually pink or green, wingless, and three and a half millimeters long.
If you don’t see the bugs themselves, you might notice a sticky coating on the flower buds and leaves. If you see exoskeletons stuck in this honeydew, they’ve already come and gone, so treatment isn’t necessary.
But if you see live insects, you may choose to treat them. Don’t stress yourself out about it, though. They won’t kill your plant and they don’t feed on too many other landscape shrubs.
Our guide to controlling aphids can shed more light on the situation.
Black Vine Weevils
When I purchase a plant, I’m always super excited to put it in the ground to enjoy it. But sometimes I forget to do the important prep work like checking the roots for pests or disease. Don’t make that mistake with rhodies.
Black weevils (Otiorhynchus saleatus) like to hitch a ride from the nursery to your garden on the roots or in the soil of purchased plants. Once they’re in your garden, you’re in for a rough time.
While nurseries have gotten better about preventing these little jerks, they can still be a real pain. So while you want to do your best not to disturb the roots of your rhodie before planting, don’t be afraid to use a chopstick to poke in there and look for any movement or signs of worms.
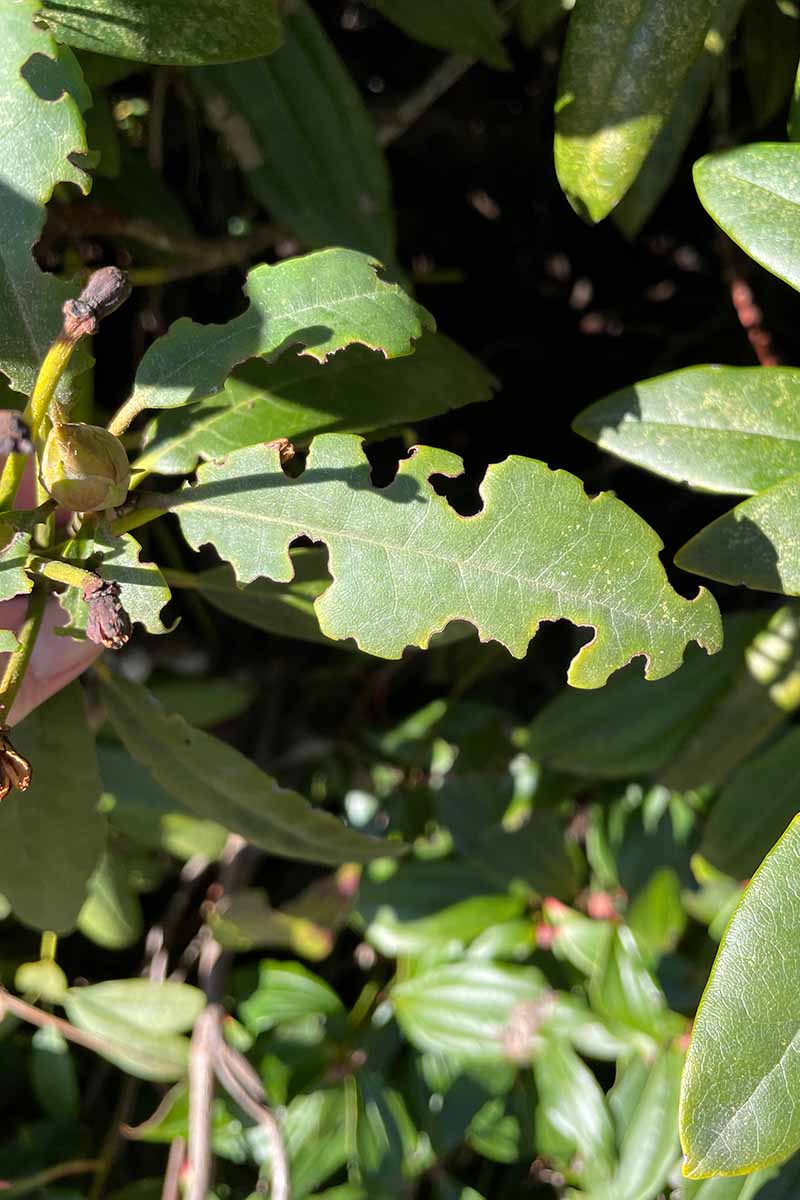
Unfortunately, even if you prevent them from sneaking into your yard, they may find a way to your garden anyway. If they do, the adults can eat the foliage of your plants ragged. They notch the edges of leaves before moving in to eat even more.
The larvae munch on the roots and stems. Beyond looking bad, this can make moving water and nutrients throughout the plant difficult.
Grab a flashlight and examine your rhodies at night to look for the adults. They’re black, gray, or reddish-brown and under half an inch long, with pitted backs and fine yellow hair.
The grubs live underground during the winter and emerge as adults in the spring. Usually, you’ll see the little notches they form on the lower leaves before moving up as the adults crawl their way up the plant.
It’s easiest and safest to control these pests by killing the larvae with beneficial nematodes. You mix these tiny powerhouses into the soil with water and let them do their thing.
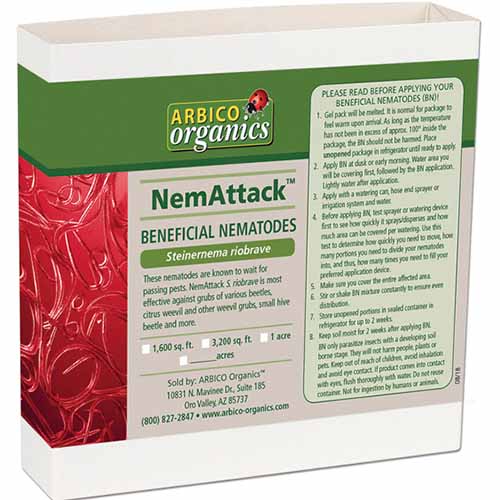
NemAttack Beneficial Nematodes
Arbico Organics can make you the proud parent of five million Steinernema riobrave nematodes, should you need them.
Failing that, break out the pesticides.
A spray containing pyrethrins like Monterey Take Down Garden Spray is usually effective. Treat the plant during the late spring and all summer, following the manufacturer’s directions.
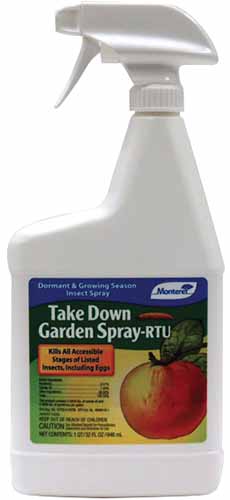
Monterey Take Down Garden Spray
If you’re seeing signs of weevils, pop over to Arbico Organics to nab some Monterey Take Down in 32-ounce ready-to-use or 16-ounce concentrate containers.
Leafhoppers
Rhododendron leafhoppers (Graphocephala fennahi) suck the sap from your rhodies, but that’s not why they’re bad. Or at least it’s not the only reason. They also spread the fungi that cause bud blast, and you don’t want your plants to have that disease.
I think the adults are kind of pretty. They’re medium green with narrow red bands extending down their wings. Their heads are yellow and they’re about a third of an inch long.
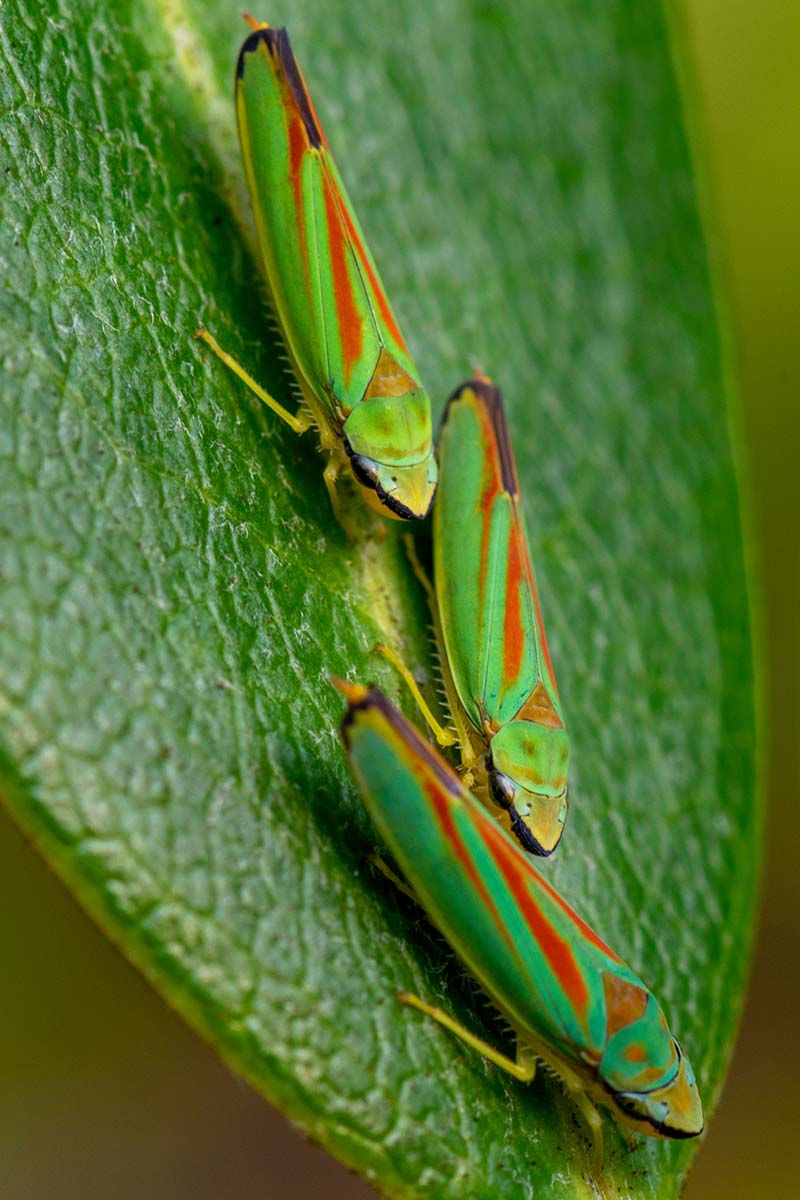
They feed on the sap of the plants from midsummer on, and the easiest way to control them is to simply pick them up and plop them in a jar of soapy water.
I make it a habit to always go out with a bucket of soapy water when I walk my garden so I can toss in any annoying critters I find as I’m strolling about.
You can also hang a bird feeder near your plants to encourage birds to visit – and perhaps pick up a leafhopper or two while they’re there.
Disease
There are just a handful of diseases that are likely to strike, and while they usually won’t kill your plant, they will ruin your floral display.
Bud Blast
A disease caused by Seifertia azalea fungi, bud blast is spread by leafhoppers, and it’s not fun to see your plants suffering with this one. It makes the buds on the plant turn brown or silvery before they die, and that means no flowers!
The good news is that it’s rare for every bud to be impacted, so you’ll still have a lovely floral display, just a smaller one than you would otherwise.
There’s no cure, so the only thing you can do is either remove a badly infected plant, or trim away any infected buds to reduce the chances that the fungus will spread.
Leaf Spot
Leaf spot (aka anthracnose) is a fungal issue caused by Glomerella cingulata that generally won’t kill your plants but it can make them look ugly. It causes foliage to drop and unsightly black and yellow spots appear all over the leaves.
The best ways to deal with leaf spot are to prune away infected branches, reduce the amount of nitrogen that you give your plants, and ensure that they are growing in well-draining soil. Healthy plants are rarely troubled by this issue.
Root Rot
Root rot or Phytophthora rot is caused by the water mold Phytophthora cryptogea. It’s the worst disease on this list because it can actually kill your plant in the worst-case scenario.
More often, it causes slow growth and wilting, even when the soil is appropriately moist, and leaves the plant susceptible to other issues.
Plants that are in shady areas, placed too deep in the soil, or growing in poor-draining soil are particularly susceptible. Treat the soil using a copper fungicide once every six weeks for as long as symptoms are present.
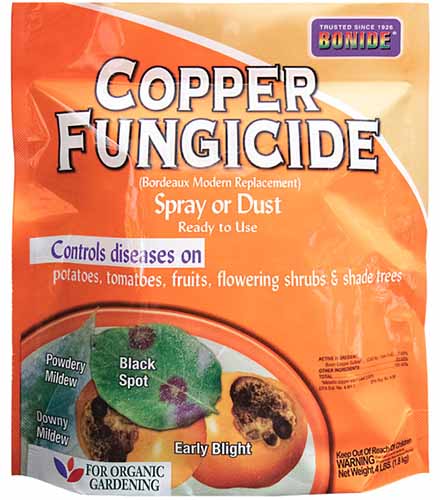
Bonide Copper Fungicide Dust can be mixed with water and applied to the soil. Arbico Organics carries this handy option for your gardening toolkit in one-pound or four-pound containers.
Best Uses for Rhododendron Flowers
Rhodies serve multiple purposes in the garden. They make an excellent accent or work as mass plantings.

You can use them to create a wall, as a foundation planting, or for some color in a partially shady spot. And smaller cultivars work well in containers.
Quick Reference Growing Guide
| Plant Type: | Woody flowering shrub | Flower/Foliage Color: | Carmine, blue, lavender, orange, pink, purple, red, white, yellow/green |
| Native to: | Asia, Europe, North America | Maintenance: | Moderate |
| Hardiness (USDA Zone): | 4-9 | Tolerance: | Frost, some shade |
| Bloom Time: | Spring, summer | Soil Type: | Organically-rich, loose |
| Exposure: | Full sun, partial sun, partial shade | Soil pH: | 4.5-6.0 |
| Spacing: | 2-10 feet, depending on cultivar | Soil Drainage: | Well-draining |
| Planting Depth: | Surface sow seeds, transplants at the same depth | Companion Planting: | Azaleas, pines, oaks, wildflowers |
| Height: | Up to 30 feet | Avoid Planting With: | Black walnut |
| Spread: | Up to 40 feet | Uses: | Beds, borders, specimen, containers |
| Growth Rate: | Moderate | Family: | Ericaceae |
| Time to Maturity: | 10 years | Genus: | Rhododendron |
| Water Needs: | Moderate-high | Subgenus: | Azaleastrum, Choniastrum, Hymenanthes, Rhododendron, Therorhodion |
| Common Pests and Disease: | Deer; aphids, black vine weevils, leafhoppers; bud blast, leaf spot, root rot | Species: | Aberconwayi, arboreum, augustinii, bureavii, calostrotum, decorum, elliottii, keiskei, niveum, ponticum, pubescens, thomsonii, wardii |
Make Rhodies Your New Garden Crown Jewel
When you see a healthy rhododendron in full bloom, it’s not a sight you’ll soon forget. They’re positively stunning.
In order to have the full effect, however, you need to give these plants exactly what they crave. The right exposure, some acidic soil, good drainage with lots of water, and some yummy plant food will have your rhodie in full display.
Once you have your new beauty in the ground, come back and let us know in the comments which kind you ended up selecting and what location you live in, so your fellow rhodie lovers can share the fun.
If this guide made you feel like you could confidently raise beautiful plants, you might want to check out a few of our other guides to flowering shrubs next:
This is one of the best overall care articles I’ve come across! Comprehensive but to the point. Answered all my questions. The tips on propagation are a great bonus. Thank you!
Thank you so much; that makes my day!