Castanea spp.
Chestnuts are a group of hardwood, deciduous trees, native to the temperate regions of the Northern Hemisphere where they thrive in USDA Hardiness Zones 4 to 8, with some variation in range depending on the species.
Starchy, sweet, and flavorful, these nuts have been beloved by eager eaters for thousands of years, and cultivated as far back as 2,000 BCE.
And there are plenty of good reasons for this nut’s popularity. Bursting with flavor and packed with nutritional benefits, the chestnut is also incredibly versatile.
You’re probably familiar with at least the concept of chestnuts roasting on an open fire, but have you heard of chestnut flour, which can be used to make cakes, pasta, bread, and other delights?
Or chestnut paste, a wonderfully rich and healthy alternative to chocolate hazelnut spread that’s perfect in a crepe?
We link to vendors to help you find relevant products. If you buy from one of our links, we may earn a commission.
This nut provides a perennial substitute for wheat-based products that’s also environmentally friendly.
Wheat is not the most environmentally sustainable crop, thanks to its intensive production which typically includes regular tilling and pesticide applications, though it forms the foundation of many of our diets.
This gluten-free alternative could help to provide the change you’re looking for. And it gets even better!
Thanks to their beautiful, rot-resistant wood that is used for everything from fence posts to house timbers, chestnuts are abundantly useful to woodworkers when they have reached the end of their lives as attractive ornamentals and sources of food in the landscape.
The chestnut really is a gift that keeps on giving.
Now that I’ve convinced you that chestnuts are wonderful, the only question is, how can you go about growing and caring for these trees yourself? Read on to find out!
Here’s everything that’s coming up:
What You’ll Learn
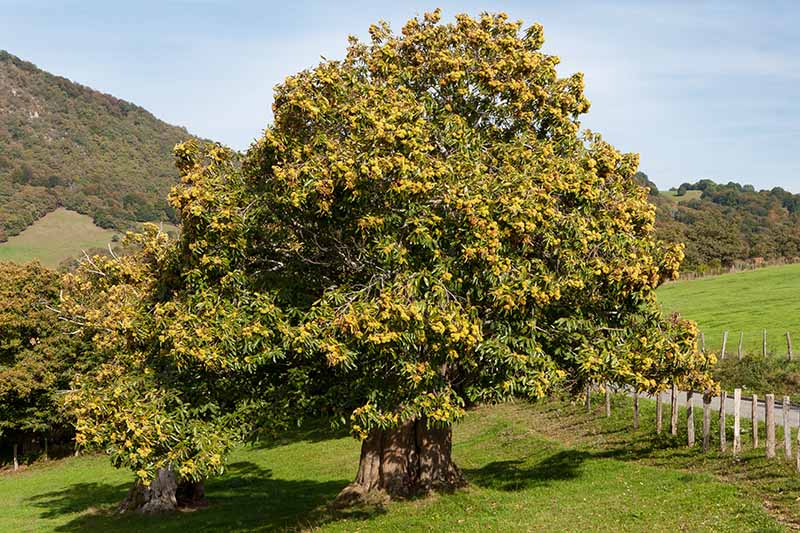
What Is a Chestnut?
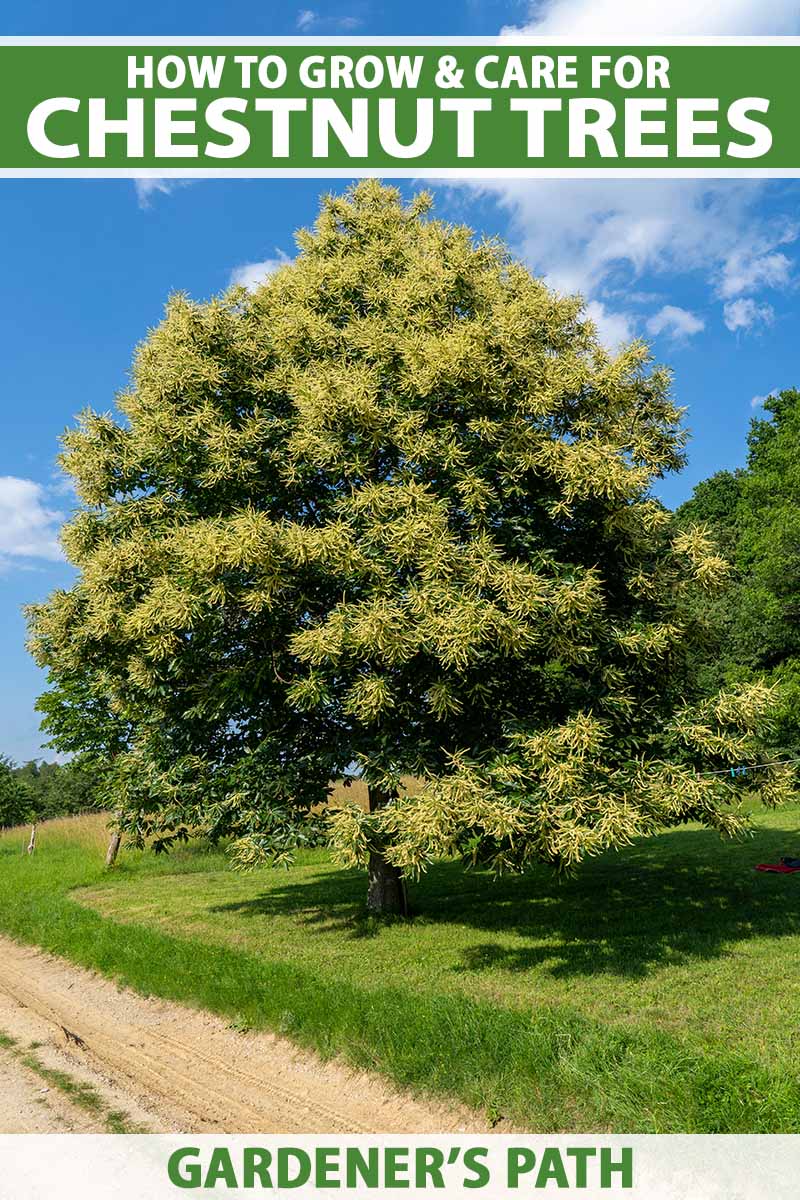
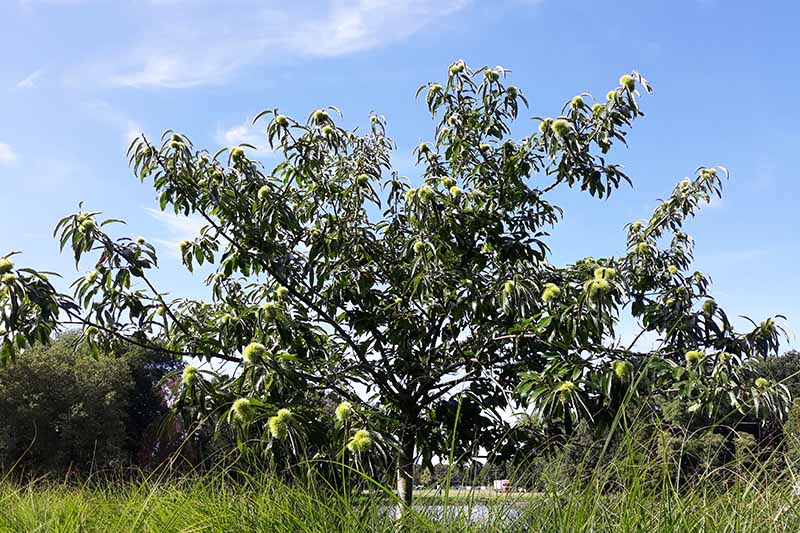
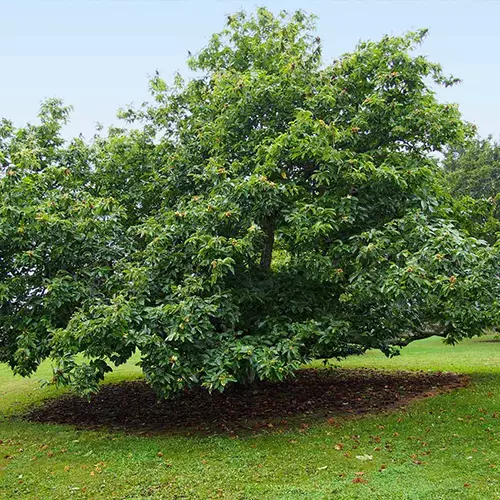
Belonging to the beech family, Fagaceae, which also includes oak trees, chestnuts are stately specimens that offer ornamental value as well as edible nuts for the home gardener’s enjoyment, delighting the local wildlife as well.
With bark that develops deep furrows as it ages, some species have a more shrublike habit, while the varieties most commonly cultivated are tall and upright.
The American and European species typically have a single leader, while the Chinese and Japanese species have more wide-spreading canopies and are often multi-leadered.
The nuts are high in carbohydrates but low in fat, a good source of dietary fiber as well as vitamin C and various B vitamins, as well as copper, manganese, and potassium.
Before diving in, there are a few considerations to keep in mind before you start growing your own chestnut trees.
First, they can be huge – the tallest species can reach an impressive 100 feet in height – so make sure you check the height and spread of your selected species or cultivar before you plant, and determine where you’ll plant with care.
Another important consideration is that a single tree on its own will never produce any nuts, as these species require another tree nearby for cross-pollination. If you want your tree to produce a crop, there needs to be a second compatible pollinator growing within 200 feet.
Chestnuts can vary in overall appearance depending on the species, which we’ll cover in a bit more detail below – so keep reading!
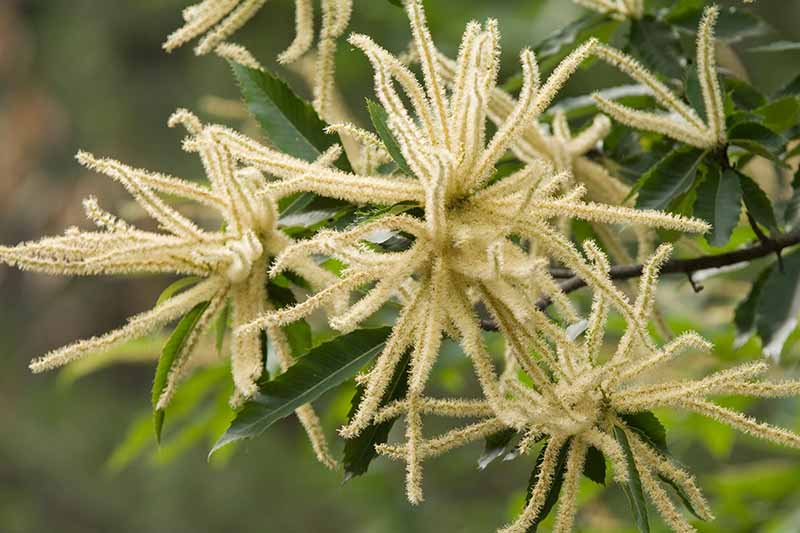
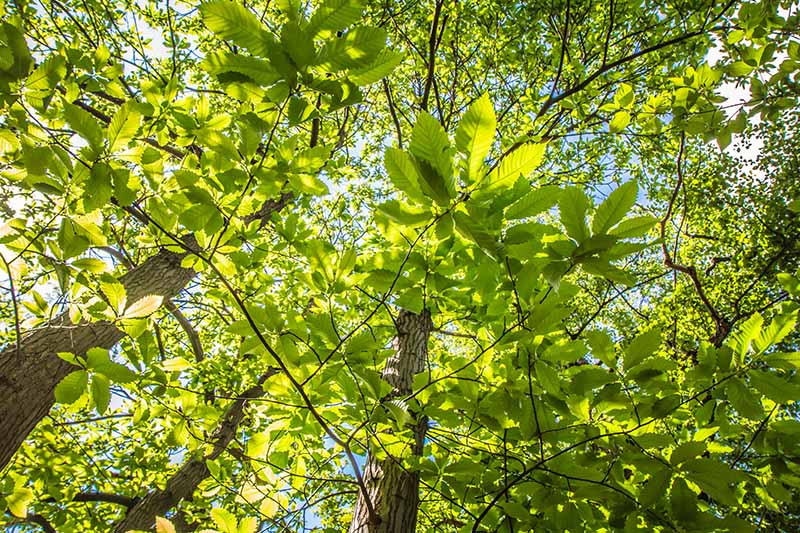
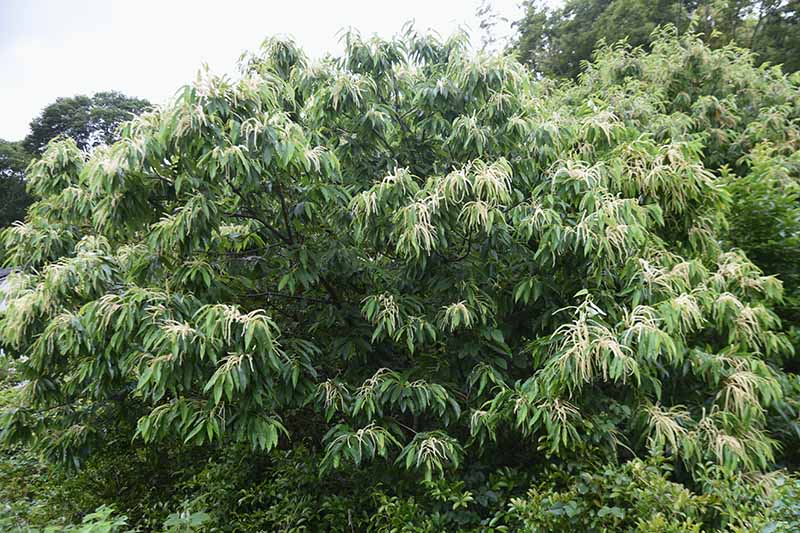
With green leaves that turn yellow in autumn, male and female flowers in the form of long yellowish catkins bloom in the late spring or summer, producing nuts when the female flowers are pollinated that are ready to harvest in the fall.
Don’t confuse horse chestnuts (Aesculus spp.) with the sweet varieties, because these are not edible.
It’s an easy mistake to make if you’re out foraging – and an unwelcome surprise to find out 10 years down the line if you’ve planted nuts that you misidentified! The nuts these trees produce are similar in appearance to sweet chestnuts, but they are mildly poisonous.
Note that some dislike the scent of the flowers, particularly those of the European variety, and the spiny burrs that contain the nuts tend to create quite a mess when they fall in autumn – so choose your planting location wisely.
Cultivation and History
As I said above, chestnuts, or Castanea species, have been cultivated since at least 2,000 BCE.
Thanks to the fact that these nuts are packed full of nutritional benefits and have a high calorie count for their size, they have served as an important food source for humans for ages.
Until the early 20th century, the US had a booming chestnut industry. Americans were completely nutty for these nuts! The American chestnut, or C. dentata, was the most popular variety.
However, chestnuts have had a tough run of things since then.
In 1904, a parasitic fungus arrived from Japan, and this proved to be a hard nut to crack for these American trees when they were overwhelmed with blight.
The disease was devastating, killing an estimated four billion trees. I don’t know about you, but my heart breaks hearing this! Some regard this blight as the most devastating environmental catastrophe in American history.
For a while, the chestnut industry took a hard hit in the US.
But all was not lost for this beautiful tree! The chestnut industry in the US was saved by blight-resistant Chinese cultivars and Chinese-American hybrids, which are also perfect for food production, so Americans (and people throughout the rest of the world) are still able to enjoy this nutty treat.
Though the nut dropped somewhat out of fashion for a while in the West, it’s experiencing a revival now – so it’s the perfect time to start growing them!
Propagation
So, what’s best – growing from seed, or planting seedlings or saplings?
Well, both work well for this tree! The choice really depends on how you prefer to do it, and how quickly you’d like to bring in your first harvest.
Generally speaking, growing from seed is easier and, depending on how you choose to do it, can be less labor intensive than planting seedlings or saplings – although planting a grafted sapling may mean you can pull in your first harvest more quickly, and that your plants have added disease resistance and specific qualities pertaining to size and other characteristics.
Starting from Seed
To grow from seed, one option is to choose to let your future trees go it alone and plant the seeds outdoors in fall, allowing the nuts to follow their natural processes and spend winter underground, ready to pop up come spring.
Although this is by far the simplest approach, these nuts prove an irresistible treat for rodents, especially squirrels, so they are lost more often than not before they manage to sprout.
For this reason, it’s worth considering taking a more hands-on approach to growing your chestnuts, in which case you’ll need to cold stratify your seeds yourself.
To do this, it’s best to store your seeds in moist peat moss, using half to three-quarters of a dry gallon of peat moss for every 25 nuts. If you’d prefer not to use peat moss, the nuts can also be stored in sand, sawdust, or vermiculite.
Soak the peat moss for 10 to 15 minutes in warm water before alternating layers of peat moss and chestnuts in gallon-size resealable food storage bags.
About one inch of peat moss for every five nuts is a good rule of thumb to follow, although it’s important not to overfill the bags, and to leave a little breathing room for your nuts as well.
It’s best to poke about 10 or 15 holes in the bag for aeration, which helps to prevent rotting. Using a toothpick works just fine for this.
And of course, if you aren’t planning to start a whole orchard, you can prep fewer seeds in a smaller amount of your choice of medium. Be sure to use a smaller resealable bag as well.
The bags should then be placed in the refrigerator, away from apples and pears which produce ethylene, and ideally stored at 32 to 34°F, towards the top of the refrigerator or wherever the coldest part of yours tends to be.
They should never be stored in temperatures lower than 28°F.
Check periodically, about once a week, for any signs of rot. Any that are rotting should be removed immediately to prevent the rest of your seeds from being spoiled.
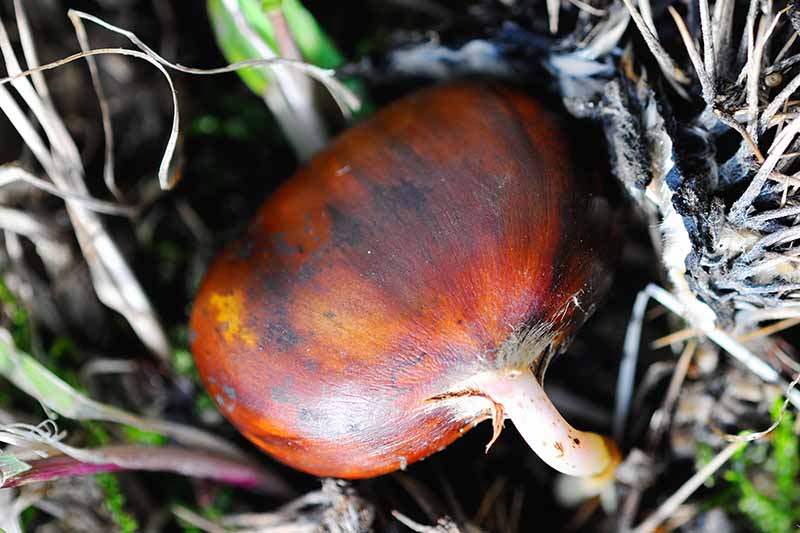
You should start seeing radicles emerging – the first signs of growth that emerge from the seeds after successful germination – within about 60 days, although this can sometimes take up to 90 days. Each seed produces one radicle.
So, you’ve successfully cold stratified and sprouted your nuts. What’s next?
Well, you have two options here. This first is to directly sow your seeds into the ground.
If you choose this option, your seeds should be planted when the weather begins to warm, around mid-March or later, depending on your growing zone.
Plant in shallow holes roughly three inches deep, then cover with potting mix. The seeds should be planted with their root shoots directed down, or on their flat side if there is no root yet.
Keep in mind, however, that this option also comes with the danger of pesky rodents snacking on your lovingly stratified seeds.
To avoid this, you can either choose to put a wire cage or basket over the planting area, or you can choose to start them inside in pots instead before transplanting them out later in their lives.
The latter is often the preferred course of action, as it’s usually more successful, and helps to protect the young trees from disease as well as pests.
If you choose to start your baby trees off in pots instead of direct sowing, it’s best to plant them in the winter, and place your pots on a sunny windowsill or somewhere where they are protected but receive a lot of sun.
When planting, choose containers that drain well. Pots of about 12 inches in depth and four inches in diameter are best, in order to accommodate the long taproots.
Another option is to use seed-starting cells that have an opening at the bottom to naturally “air-prune” the roots, such as these, which are available on Amazon.
Rootrainers Seed Starting Trays
Air-pruning, combined with the ridges in the sides of the cells which direct roots to grow downwards, help to prevent the seedlings from becoming root bound.
When this occurs, the roots are constricted, and subsequently damaged prior to transplanting into larger containers or outdoors.
A well-draining soilless mix is best for starting seeds. Try a combination of equal parts peat, perlite, and vermiculite. You’ll want the mix to be moist at planting time, but not soaking wet.
Make sure you don’t plant the seeds too deep. Make a hole three to six inches deep in the potting medium, and then fill it in with potting mix.
About one-half to one inch from the surface, place the nut, and then cover it with the soilless mixture.
By the time you plant, most of the seeds will have sprouted already, so make sure you plant them taproot down.
If some of your lovingly stratified seeds haven’t sprouted already, place them in their pots with the flat side of the seed facing down.
Sometimes the taproots are very long. Handle them gently. Some gardeners will recommend that you clip them, but I wouldn’t. This is the tree’s most important root, and tampering with it early on can seriously weaken the plant.
After planting, make sure you keep the potting medium moist but never wet – they can’t stand this.
Something to bear in mind is that if you start your seedlings off in a nice and cushy indoor environment, you’re going to have to wake them up to the harsh realities of the world at some point.
You’ll want to do this gently, so as not to freak them out too much.
Start by gradually exposing your plants to slight winds and sun outside to slowly acclimate them to their new conditions. You can do this by moving your seedlings to a spot under a shady tree or on a sunny porch.
Placing them under a 50 percent opaque shade cloth can also work. The hardening off process should last at least two weeks.
Top tip: It’s important to remove the remnant nut from the base of the hardened off seedlings before transplanting them outdoors. Otherwise, rodents will think it’s a perfect tasty treat just for them and dig it up!
Transplanting Seedlings and Nursery Plants
So, the big day has finally come and your baby seedlings are moving out! Or perhaps you have decided to forgo growing your trees from seed altogether, and have purchased saplings that are now ready for planting.
How can you make sure they have the best shot at life?
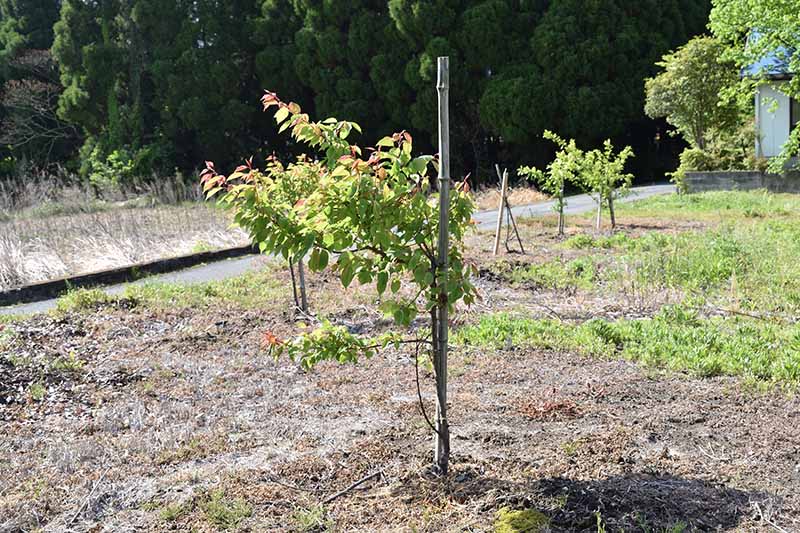
The best time to plant your baby trees out is in mid-May, after the last harsh frost. Seedlings are ready for transplanting when they are about eight inches tall, or when they are around four months old.
The most important condition that will contribute greatly to whether your tree will make it or not is all about location, location, location.
Chestnuts need to be planted in a sunny spot in sandy, loamy, deep soil with good drainage. When planted in soil with the proper conditions, these trees tend to be very tough and drought tolerant once they become established.
Dig a hole at least one and a half to two times as wide and deep as the root ball of the seedling or sapling you are planting. Be sure to aerate the sides of the planting hole, with a handheld trowel or a sturdy stick.
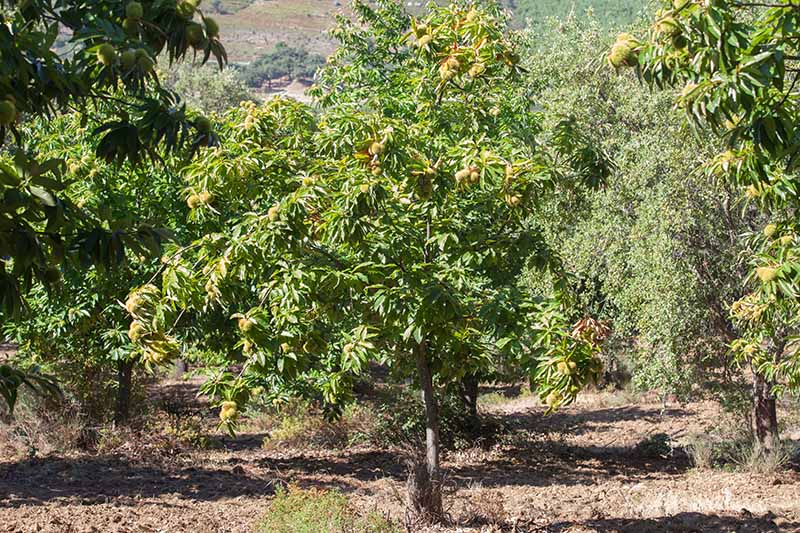
Recommended spacing depends in part on the variety you are growing, and whether you are planting in an orchard setting or a backyard.

A good rule of thumb is to allow for at least 30 feet of space between trees, and plant away from any structures.
It is vitally important to plant your trees so that only the roots are in the ground, and none of the trunk. The root crown, where the root and trunk meet, should be exactly level with the ground when you’re finished planting.
Planting any deeper is a big no-no, as this may cause your tree to rot.
If you purchased grafted saplings, ensure that the graft union is well above the soil line.
Fill in with soil and tamp to settle them in, so the trees are upright and steady. Water them in well.
To see your trees off to the best possible start in life, it’s also a good idea to do away with any pesky weeds when you first plant, and grass as well, leaving a radius of at least three feet around your trees.
How to Grow
Be sure to check your soil type and the pH level before planting. The most important factor for growing these trees is soil, which I’d argue also comes under the header of Location with a capital L.
All varieties require soil that drains well to thrive. Although they can technically grow in part-clay soil on slopes, they are much more at home in deep, sandy, loamy soils.
Planting on a slope may also help alleviate some drainage issues.

These trees thrive in acidic soil, with a pH of 4.5 to 6.5. If you’re not sure what the pH of your soil is, you can easily test it. Read our article on soil testing for more information.
Also, it’s best to choose a site with full sun exposure, which helps with growth, vigor, and nut production.
Unfortunately, your work is not over after transplanting. Like a teenager leaving home for the first time, your saplings are still in need of some love and guidance in their first few months of going it alone.
One of the main considerations after planting is irrigation.
Make sure to water your baby trees thoroughly immediately after planting, and then continue to irrigate throughout the spring and summer every two to three weeks, or more often as needed in the absence of rain.
However, it’s important to make sure that the ground is never soaked or waterlogged. This is a common concern if the soil is not as light and loamy as what would be ideal. For best results, water with about one gallon per tree per week.
It’s best to do this using drip irrigation or a soaker hose, so the trees receive a constant, small supply of water, rather than giving them the lot in one go. Using overhead sprinkler systems is not recommended, as this can leave plants prone to fungal disease.
Although young seedlings require regular irrigation, and more mature trees will also benefit from an extra helping hand through periods of drought, as long as they’re planted in deep soil of the appropriate type, mature chestnuts tend to be very drought tolerant.
Given that your trees are planted in the proper soil conditions, they will not typically need extra fertilizer.
However, if your conditions are less than ideal and you’re thinking of fertilizing your trees, liquid or granular fertilizers may be applied in the spring a few weeks after the leaves have sprouted.
The last application of granular fertilizer should be made by the beginning of July, and liquid fertilizer by the beginning of August.
One thing to be wary of is fertilizing your trees at the wrong time. Over-fertilized trees or those that are fertilized too late tend to be more susceptible to problems over the winter period.
Once your trees are established, you don’t really have to do much to treat your trees right.
However, if you are growing chestnut trees for nut production – and I bet you are! – you’ll need to provide a little extra TLC, and make sure to irrigate the trees regularly throughout the growing season.
Weeding is also very helpful for your trees, especially while they’re young, as weeds may significantly affect their growth since they compete for light and nutrients.
This is especially true when it comes to grasses, which sometimes produce chemicals that are toxic to other plants.
Mowing, mulching, using a tarp or plastic sheeting, or spraying with an organic herbicide to help control weeds around your trees will definitely “nut” go amiss. Keep a three- to six-foot radius clear from the base.
Be sure to avoid mowing or weed-wacking too closely to the trunks, as open wounds can invite disease.
Growing Tips
- Select a planting site with deep sandy loam that is well-draining.
- Plant in full sun.
- Provide sufficient irrigation until trees are established, but avoid overwatering.
- Weed well, and remove grasses growing immediately around the perimeter.
Pruning and Maintenance
Young trees will require pruning to maintain a central leader, and to encourage growth into a healthy and attractive shape.
You will need to prune to remove any low-growing branches from younger trees, and remove any secondary limbs with narrow crotch angles, as these will not be strong enough to support nut production, and they can hold water which may invite fungal infection.
We will cover this type of pruning in more detail in a forthcoming guide.
Pruning to maintain your trees’ shape beyond the first several years of growth should be done when trees are dormant in the winter.
It’s important to open up the canopy as needed, to encourage airflow, and to allow sunlight to hit the branches where nuts will form. Remove any branches that are growing inward towards the trunk or crossing.
In the summer, you can do some light pruning of mature trees to address any issues that have developed through the course of the year. Remove any dead or diseased branches.
Any suckers growing from the roots should also be removed.
Be sure to prune only on dry days, to prevent fungal disease from taking hold. Regardless of the season, removing broken branches should be done as soon as you notice them.

It’s also important to remember to avoid removing more than a third of the tree’s growth within a given year.
Trees may suffer sunscald, and this can appear as cankers in the bark. This can be managed with reflective paint that provides protection from the sun as well as disease pathogens.
The soil around chestnut trees can be mulched with a two- to three-inch layer of leaves or wood chips, just be sure to avoid piling mulch against the trunk. This helps to retain moisture, and keeps weeds down.
Compost can be added several times a year to improve soil fertility, or fertilizer can be applied just as trees are breaking dormancy in the late winter or early spring, if trees are showing signs of weak growth and yellowing leaves and are in need of a boost.
In the absence of rain during hot spells in the summer or periods of drought, even mature trees benefit from irrigation. Deep, slow watering will help to improve nut production, and maintain the overall health of your chestnuts.
Fallen nuts that are not harvested should be picked up at the end of the season, as they can harbor pests and disease pathogens.
Species to Select
Though other species exist in the Castanea genus, including the dwarf (C. pumila), Henry’s (C. henryi), and Seguin’s (C. seguinii) chestnuts, there are four major species that are commonly cultivated in home gardens and commercial operations.
These are the American (C. dentata), European (C. sativa), Chinese (C. mollissima), and Japanese (C. crenata) varieties. But I’d be remiss to leave out the all-important American-Chinese hybrid (C. dentata x mollissima)!
Let’s take a look at each of these, to help make your selection.
American
The American species, C. dentata, was once one of the most common trees in the eastern United States where it is native, and as such, it was synonymous with American culture up until the early 20th century, when chestnut blight decimated the population. It is best suited to Zones 4 through 8.
This magnificent tree grows rapidly and vigorously, and it’s capable of reaching 100 feet in height, and up to 10 feet in diameter for the trunk. Heights of 50 to 75 feet and a matching spread in the canopy are more typical.
Dentata denotes the toothed, oblong, lanceolate (or tapering to a point, and shaped like a lance) leaves of dull green, which grow six to 10 inches long and turn yellow in the fall.
Yellowish-white catkins bloom in late spring, but these are less showy than those of other species like the Chinese chestnut. Nuts of this variety are known for being particularly small.
Though this species was nearly decimated by the blight that arrived in the US over 100 years ago, it is making a comeback thanks to breeding initiatives such as those of the American Chestnut Foundation where members of their research team are working to save the species.
Though beautiful, planting American chestnuts at home is not currently recommended.
European
The European variety, or the sweet or Spanish chestnut as it is also commonly known, is native to the forests of western Asian and southeastern Europe, and has been cultivated in Europe for thousands of years.
It is best suited to growing in Zones 5 through 7, and grows quickly.
First introduced to the US in 1803, and slightly larger than its American counterpart, C. sativa typically grows to between 70 and 100 feet in height, with a trunk that’s often seven feet in diameter. Its canopy can spread 80 to 100 feet.

Sativa, a common moniker in botanical naming, denotes that it was cultivated by humans, as opposed to something wild. This variety produces sweet nuts which ripen in October, and are traditionally considered best when roasted.
Dark green, oblong, lanceolate, toothed leaves grow six to 10 inches in length, and turn yellow in the fall. Yellowish-green showy catkins bloom in early summer.
The European species is split into two broad categories – the large, sweet-flavored nuts called “Marroni,” and the less flavorful, smaller, more wild type called “Castagna” or “Chataignes.”
Though some specimens are still growing in the US today, naturalized in several eastern states, and particularly in the western part of the country where they are still grown commercially in a few areas, imports for planting are restricted. This variety is also susceptible to chestnut blight.
Chinese
Worldwide, the largest number of chestnuts are both produced and consumed in Asia. Like in Europe, this nut has been popular in many Asian cultures for thousands of years.
Native to China and Korea, C. mollissima typically grows to about 40 feet tall with a moderate growth rate, but it may sometimes attain heights of 60 feet.
This species has a broad crown that can spread 40 to 60 feet, and it is best suited to Zones 4 through 8. Nuts from these trees are noted for being particularly large, and tasty.
Dark green, oblong, lanceolate leaves with coarsely toothed margins turn various shades of yellow in the fall. Mollissima makes reference to the soft undersides of the leaves.
These grow to between five and eight inches long, and two to three inches wide. Fragrant, yellowish-white catkins bloom in late spring.
When cultivated close to other species – including C. crenata, the Japanese variety, as well as C. dentata and C. sativa – the Chinese chestnut readily cross-pollinates with them to form hybrids, which has proved interesting and useful because this variety is blight resistant.
However, European-Japanese hybrids pollinated by C. mollissima may exhibit a physiological disorder known as internal kernel breakdown, which ruins the quality of the nuts.
Chinese chestnut trees are available from FastGrowingTrees.com. These saplings are shipped at a height of two to three feet.
Japanese
C. crenata, the Japanese or Korean chestnut, is native to Japan. It grows to a height of 30 to 40 feet, with a canopy that typically attains the same dimensions.
Dark green, oblong, toothed leaves grow to three to seven inches in length, and turn various shades of yellow and bronze in the fall. Showy yellowish-white flowers bloom in late spring.
Crenata denotes a rounded, scalloped edge. This species is best suited to growing in Zones 4 through 8.
Since the nuts it produces are higher in tannins than those of the other species, with a more bitter flavor, this tree is often recommended for ornamental use. The nuts can also be more difficult to peel than those of other species.
European-Japanese hybrids also exist, but these are not resistant to blight.
American-Chinese Hybrid
Now, this is what you’d call a dream team. Breeders, in a desperate attempt to save the chestnut industry in America, started looking into blight resistant varieties and found that the Chinese species was a perfect candidate.
In the early 1950s, plant breeder Dr. Robert Dunstan received a shipment of budwood from a single living American chestnut found to be growing in Salem, Ohio, sent to him by James Carpenter.
He began grafting hybrids and this one offered the best of both worlds – the robustness and blight-resistance of the Chinese species combined with the beloved and nearly lost qualities of the American variety.
Today, C. mollissima and the hybrid C. dentata x mollissima are the most commonly grown varieties in America.
Also referred to as the Dunstan hybrid, C. dentata x mollissima is best suited to growing in Zones 5 through 8, though some growers expand this recommended range to Zones 4 through 9.
Reaching a height of 40 to 60 feet, with a canopy that spans 25 to 30 feet, the American-Chinese hybrid chestnut has dark green, oblong, toothed leaves that turn shades of yellow and bronze in the fall.
The creamy yellow catkins that bloom in late spring are noted for having an unpleasant odor, at least according to some.
Hybrid trees are available from Nature Hills Nursery. These are shipped in #7 containers, with a height of five to six feet.
Once you’ve chosen the species that’s right for you, you may want to narrow your search even further to pick a recommended cultivar. Read our roundup for suggestions.
Managing Pests and Disease
Chestnuts are susceptible to a range of diseases and pest problems. Let’s briefly cover the most common culprits.
Pests
Chestnut trees are no strangers to hungry nibblers, and some species that like to prey on these plants tend to cause more trouble than others, particularly if trees are already stressed, diseased, or otherwise weakened.
All manner of wild creatures from deer to squirrels, chipmunks to bears, wild turkeys, songbirds, and more would love to make a meal of your long-awaited harvest.
While placing wire cages around small trees for protection and installing fencing can help, these trees grow to be very large, and protecting them in the years to come to prevent visitors to your garden or orchard from enjoying a snack will eventually prove to be impossible.
The use of bird netting is not recommended, as our avian friends tend to become entangled in the mesh, and spray-on deterrents to keep the larger animals away require frequent reapplication.
Instead, try to be as proactive as possible about harvesting the nuts daily when they begin to fall, and share the rest with the critters before you do your garden cleanup at the end of the season.
Every plant in the garden seems to be vulnerable to the occasional aphid attack, chestnuts included.
Keep an eye out for (Myzocallis castanicola), the sweet chestnut aphid, but don’t be too alarmed – except in the case of particularly small and vulnerable or already stressed or diseased trees, a few aphids here or there won’t be able to do significant damage.
Next up, the Asian chestnut gall wasp (Dryocosmus kuriphilus) is a heavy hitter, noted as the most significant chestnut pest worldwide.
These tiny flying insects first arrived in the US in the ‘70s, and they have been found in more than a handful of states throughout the south and Midatlantic region since then.
The small white larvae hatch out of eggs laid inside the developing chestnut buds where they overwinter, before forming pinkish-green galls that may lead to bud drop and twig dieback.
Without flowers, you can’t have fruit, so these pests can lead to significant reductions in yields. Pruning trees that show signs of gall can help to keep an infestation in check, and resistant cultivars may be available.
Two-lined chestnut borers (Agrilus bilineatus) are also prone to being quite a bother, when their grubs bore tunnels under the bark of trees, girdling them and killing trees from the top down.
The adults are shiny black beetles with two pale yellow stripes down their backs.
Preventing infestation is best achieved by providing the best possible care to your trees, since these pests prefer to lay their eggs on chestnuts that are already showing signs of stress or disease.
Chestnut weevils (Curculio sayi and C. caryatrypes) are also ready to wreak havoc on your harvest, laying their eggs inside nearly mature nuts where their larvae will happily feast.
Be sure to practice good garden sanitation to nip an infestation in the bud, and pick up all fallen nuts as quick as you can to prevent the larvae from burrowing into the soil where they will overwinter.
Learn more about dealing with all of these garden foes in our guide to common chestnut pests.
Disease
Though few diseases commonly affect these trees, their effect can be severe. Be on the lookout for the following:
Anthracnose has a wide host range, and you’ll see it turn up in a variety of common garden plants. Keep an eye out for leaves with dry spots, curling or misshapen foliage, and leaf drop, as well as dying buds or twigs.
This fungal disease caused by Apiognomonia quercina is easily spread by wind and rain, and it can overwinter in cankers on wood as well as on leaves.
Dispose of affected material when you see it, and keep the garden free of infected leaf litter and debris.
The most notorious of all diseases to affect these trees, chestnut blight was common in the US throughout the first 50 years or so of the 20th century.
Just about every living specimen of American chestnut was decimated, and some of the European variety as well.
This is a fungal disease caused by Cryphonectria parasitica, and it tends to infect trees through wounds in the bark, often those made by insects. Branches become girdled with cankers and die, often very rapidly.
If you can positively identify this disease, remove and destroy all affected branches, and plant resistant varieties if you can.
Several different types of rot may also affect your trees, including nut rot, a fungal condition that settles in post-harvest and ruins the nuts, as well as Phytophthora root rot, a disease caused by a water mold that’s common in soil that does not drain well.
The pathogen responsible for the Irish potato famine was also a species of Phytophthora, and these fungus-like organisms do not mess around.
In fact, another species in the genus is responsible for another potentially devastating disease that may affect chestnuts, known as sudden oak death.
This relative newcomer to the US has gained a foothold in Oregon and California, and it affects a variety of hardwoods as well as various understory plants.
Cankers, leaf spotting, and twig dieback are common symptoms of this disease, though these can often be mistaken for other issues.
Infected nursery stock is a common culprit, and plants that you believe may be infected should be reported to your local extension agent to prevent further spread.
Learn more in our guide to common chestnut diseases.
Harvesting
Most varieties of chestnut only begin to produce nuts when they are between three and seven years old, although you may be able to get your first harvest as quickly as two years after planting if you select grafted saplings.
This might seem like a while to wait, but when you consider that some chestnuts can live for up to 800 years, including up to 50 productive years, I’d say they’re definitely worth the wait.
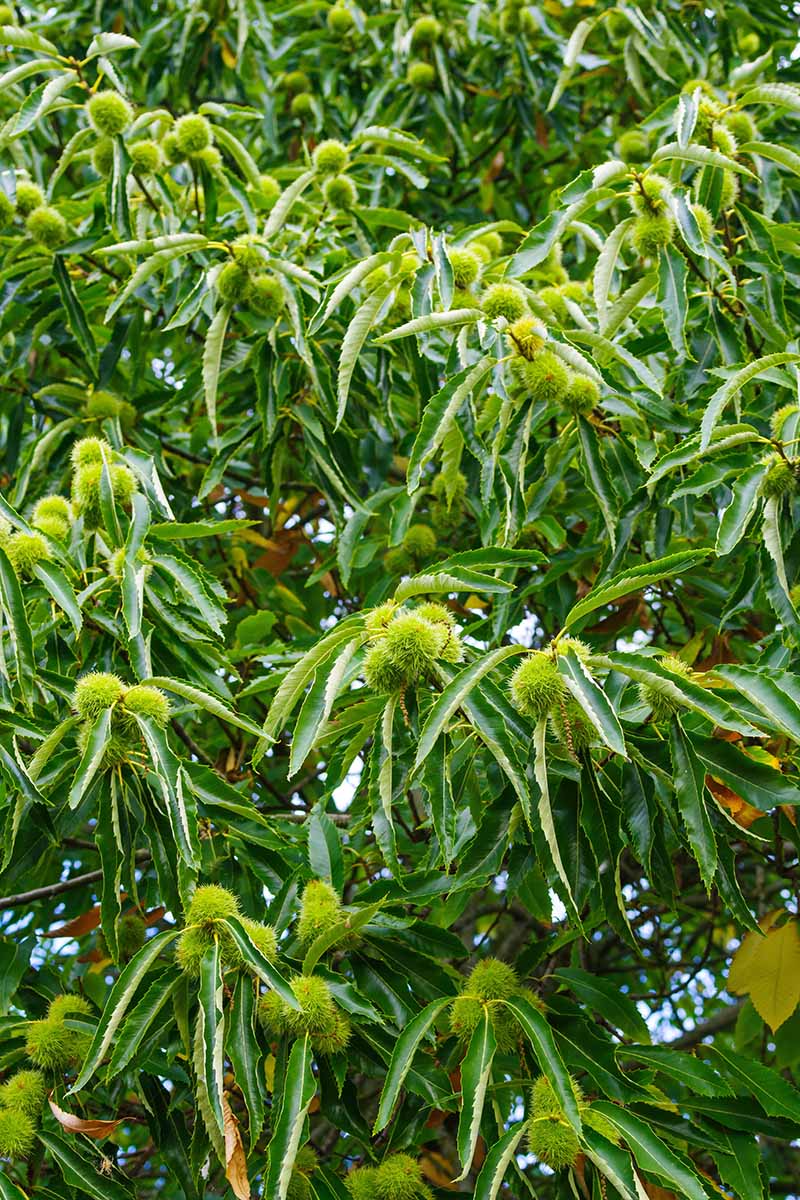
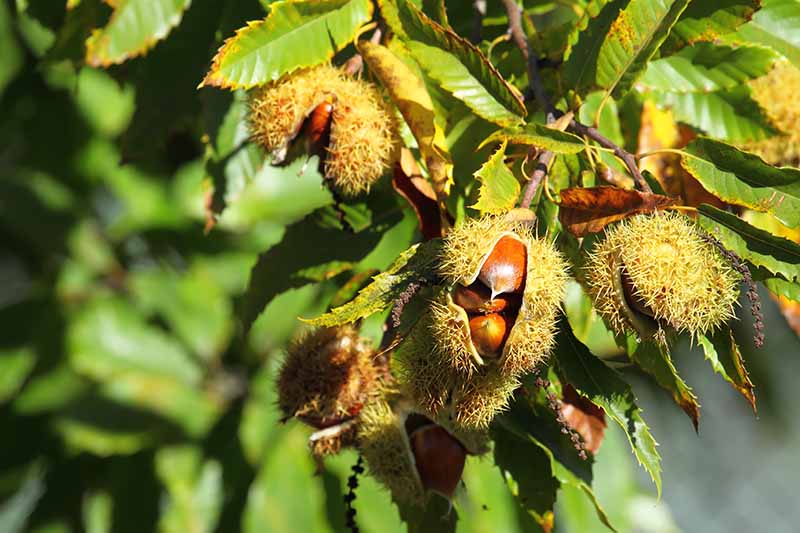
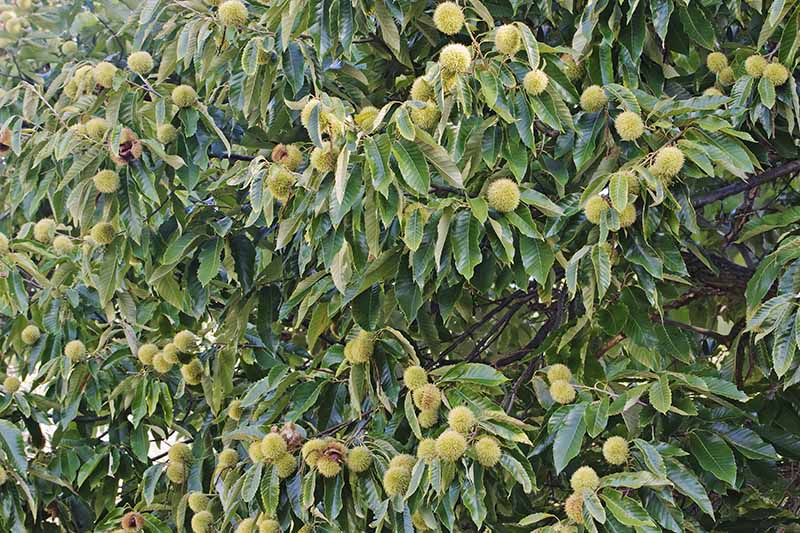
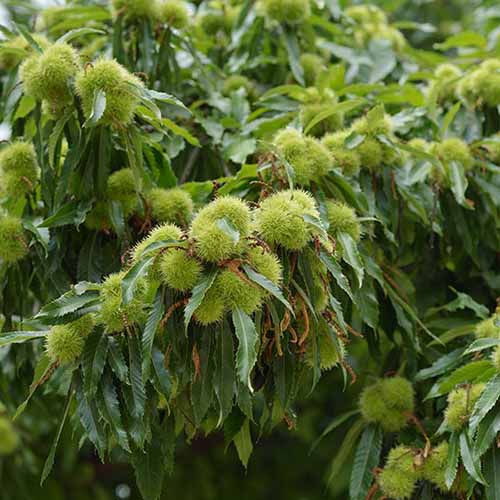
Nuts will begin to fall from the trees in early to mid-autumn, still protected in their large prickly husks, which will then start to dry and split open.
This is the moment when you should begin to harvest. If the hulls are still green or they haven’t split, they aren’t quite ready yet.
Though you might have some success shaking smaller trees to coax them to release more of their nuts, you’ll have a tough time doing this with a mature tree, as their trunks can grow to be up to ten feet in diameter in some cases.
Regular harvesting is recommended, so aim to visit your trees regularly to pick up the fallen nuts when they’re at their peak, before the squirrels and other wildlife get to them.
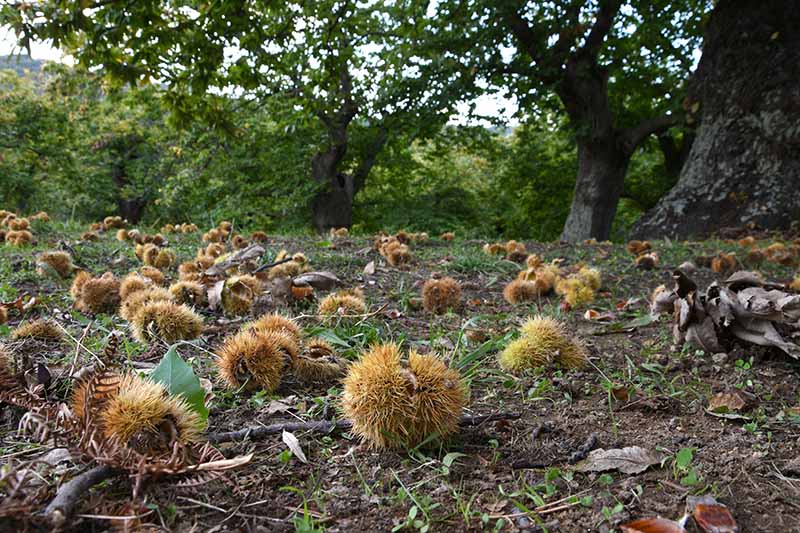
This can be a prickly affair, as most will not be completely free from their burr-covered husks, so it’s best to wear gloves. The hulls can be discarded, composted, or tossed in the fire pit.
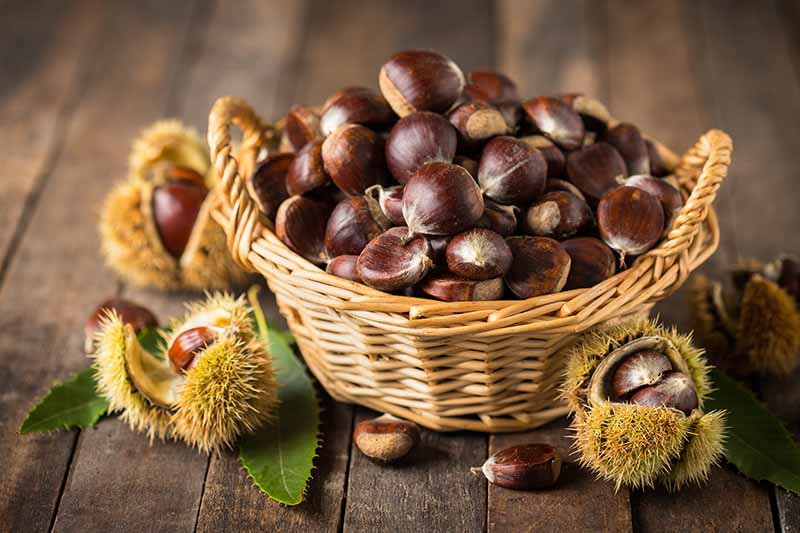
After removing the hulls, the nuts should be eaten, stored, or processed right away. Be sure to rinse them clean and dry them well prior to storage.
Storing and Preserving
Because of their high starch content paired with low levels of fat, chestnuts do not store as well as some other types of nuts.
Chestnuts in their shells can be refrigerated for up to a month, or frozen for up to a year if you don’t plan to use them immediately – but many aficionados do not recommend freezing, as it ruins their flavor at temperatures below 25°F.
Chilled curing can be done in the refrigerator at a temperature below freezing for about two weeks. While bland fresh off the tree, curing is recommended to improve their flavor.
Curing can also be done at room temperature, by placing the unshelled nuts in a single layer on baking trays or cooling racks, in an area away from heat registers or direct sunlight.
This typically takes anywhere from five days to two weeks, depending on the moisture content and size of the nuts.
The shells of cured chestnuts will soften a bit, and the nut meat inside should feel soft when curing is complete. If you press on the shell, it should give a bit.
The nuts can also be stored for several months in a cool, dry place in a box filled with clean sand, like what you might do with carrots.
Shelled or unshelled chestnuts can also be dried in a food dehydrator, and stored in a cool, dry place such as a cabinet for a few months.
These can be reconstituted in water before using, or dried chestnuts can be canned for longer storage.
Recipes and Cooking Ideas
Although you can eat them raw, these nuts are best enjoyed cooked, either boiled or roasted. One thing to remember is to pierce the shell and the inner membrane before cooking to prevent the nuts from exploding!
To roast or boil the nuts in their shells, you will need to score them first. There are a few different ways to do this, so you will need to figure out which works best for you.
Some make it easier to remove the nuts whole, while others are easier to accomplish but they may not produce the prettiest finished results.
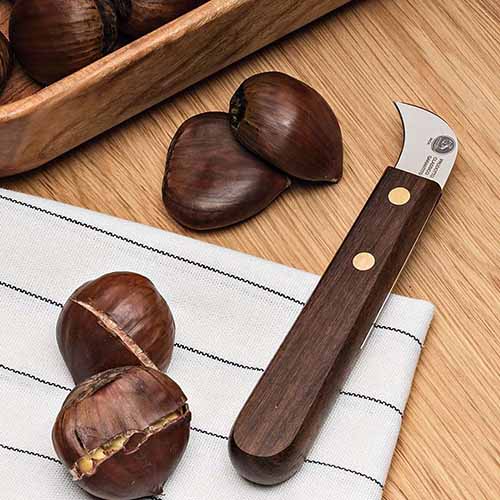
Some growers like to use a chestnut knife to cut a U-shape into the shells, like this one that’s available from Garrett Wade. Others recommend scoring an X into the flat side – but this can be slippery work.
If you plan to use your chestnuts to make a paste for use in baked goods and other recipes, go the easy route – place each nut flat side down on a damp dish towel, and cut a long slit into the other side that penetrates the shell and skin, but not the nut inside (if you can help it).
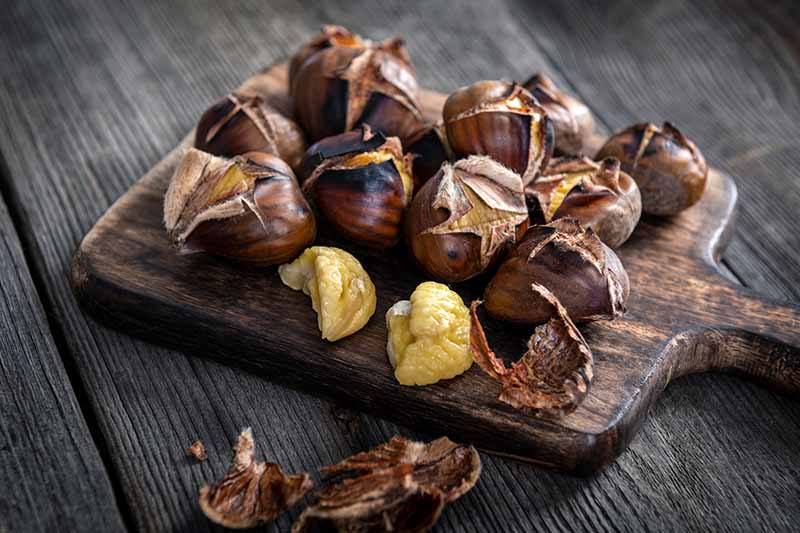
To roast, place the scored nuts on a baking sheet. Roast in a 400°F oven for about 20 minutes, or until the scored portion of each shell begins to peel away from the nut inside.
Peel them while they’re still hot. You can read more about roasting chestnuts on our sister site, Foodal.
To boil, place the scored nuts in a large pot of water to cover. Bring to a boil, then turn the heat down and simmer for 30 minutes.
If you wish to par-boil the nuts instead, for use in recipes that will require further cooking, reduce the simmering time to 10 to 15 minutes.
Check one to test for doneness, and set them aside in the pot of water until they’re cool enough to handle.
Using a knife, remove the shells and inner membranes, or simply squeeze the nuts out of their shells if you aren’t worried about keeping them intact.
If the inner membranes aren’t coming off easily, you can return them to the pot of water, and heat them up again for a few minutes before you try again.
Any chestnuts with dark spots on the nut meat or those that float should be discarded, as this is a sign of spoilage.
Roasted or boiled chestnuts should be used right away, or stored in the freezer.
Boiled chestnuts can also be preserved in sugar syrup, and roasted chestnuts can be dehydrated and then ground into flour.

For a delicious warming beverage that’s sure to make you feel cozy throughout the long, cold winter, try this recipe for chestnut hot chocolate from Foodal. Chestnuts also make a fantastic addition to savory stuffing.
Quick Reference Growing Guide
| Plant Type: | Deciduous nut tree | Tolerance: | Sandy soil, frost |
| Native to: | Europe, North America, Asia | Soil Type: | Sandy loam |
| Hardiness (USDA Zone): | 4-8 | Soil pH: | 4.5-6.5 |
| Season: | Fall | Soil Drainage: | Well-draining |
| Exposure: | Full sun | Attracts: | Bees, beetles, birds, butterflies |
| Time to Maturity: | 3-5 years | Companion Planting: | American persimmons, comfrey, garlic, paw paws, strawberries, yarrow |
| Planting Depth: | 3 inches (seeds) depth of root ball (transplants) | Order: | Fagales |
| Spacing | 10-20 feet | Family: | Fagaceae |
| Height: | Up to 100 feet, depending on variety | Subfamily: | Quercoideae |
| Spread: | Up to 60 feet, depending on variety | Genus: | Castanea |
| Water Needs: | Moderate | Species: | Crenata, dentata, mollissima, sativa, and hybrids |
| Common Pests: | Aphids, Asian chestnut gall wasps, deer, bears, two-lined chestnut borers, rodents, weevils | Common Diseases: | Anthracnose, chestnut blight, nut rot, phytophthora root rot, sudden oak death |
In a Nutshell
Providing shade, forage for pollinators, and food for humans and wildlife, adding a few chestnuts to your landscape is worth a go if you have the space for it.
Give your trees a good start, irrigate and prune as needed, and you’ll be richly rewarded with basketfuls of nuts for years to come.
Have you tried growing chestnuts in your backyard already? Have any top tips that you want to share, or questions? Let me know in the comment section below!
And for even more options to start your own nut orchard at home, read these articles next:
Thank you for the informative article. I grew up in central PA and remember seeing remnants of old American Chestnuts in Michaux State Forest. Please double check the graphic shown in the “Starting from Seed” section. I think that is a horse chestnut seedling. With best regards, Al
Good eye, Albert! This image has been removed from the article. I imagine the American chestnuts across the region must have been quite majestic, in their day. Thanks for reading!
Hi, I have immature seed pods falling from my tree, what will stop this?
Sorry for the very delayed response, Sharon. Strong wind can sometimes cause nuts to drop before they’re ripe, and various environmental conditions, pests, and disease may cause premature dropping as well if the nuts are not viable. Do your trees appear healthy otherwise?
It might be too late now but if the nuts are still at the milk stage, next time, you might want to make some Nocino.[Nut liquor]
I don’t have walnuts but I’m making it with ripe walnut meats that I bought and so far, it looks very promising.
Can you tell me Japanese chestnut grow from seed, How many year start fruit?
Chestnuts grown from seed can take about three to seven years to start producing nuts.
I have a question about my chestnut trees.
What can we help you with, Nelson?
I have two chestnut trees that are approx. five feet tall in 2-1/2 gal. pots. Is it ok to plant them now or should i wait untill next spring? i live in Ohio.
In Ohio you’re either in USDA Hardiness Zone 5 or 6. Planting in spring is generally the best time, after the last frost, though you may want to dig the holes now while the ground is still workable. You can plant trees in the fall, but it’s best to do so at least six weeks before the first frost so they have time to get established. In your area, it’s already too late in the year. Some growers will build a wire mesh cage around potted trees and fill it with leaves for protection in the winter, after the plants… Read more »
I have only 1 Chestnut tree & it produced nuts this year. I got it last year. I thought it had to have another tree to pollinate.
Perhaps another tree is growing nearby! Chestnuts rely mainly on wind pollination, but pollinating insects can transfer pollen from one to the next as well.
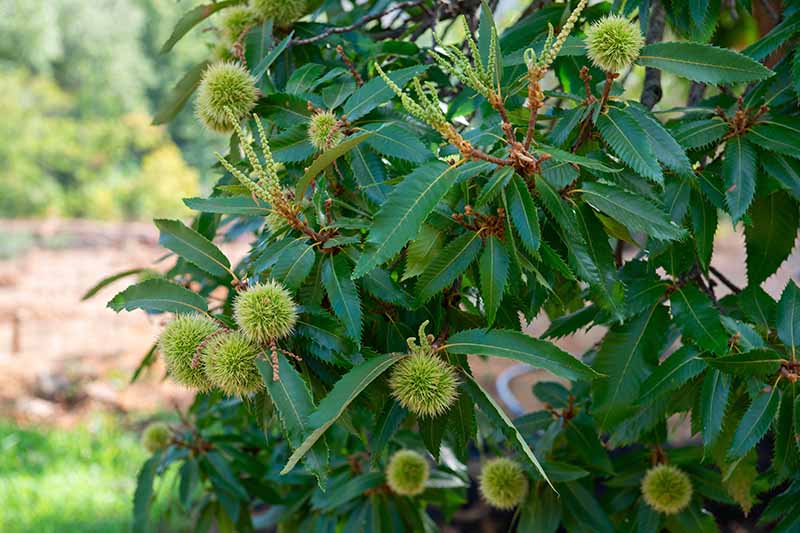
Can you tell me if this is an edible chestnut?
Hi Tammy, here is your picture, for some reason it didn’t attach properly the first time!
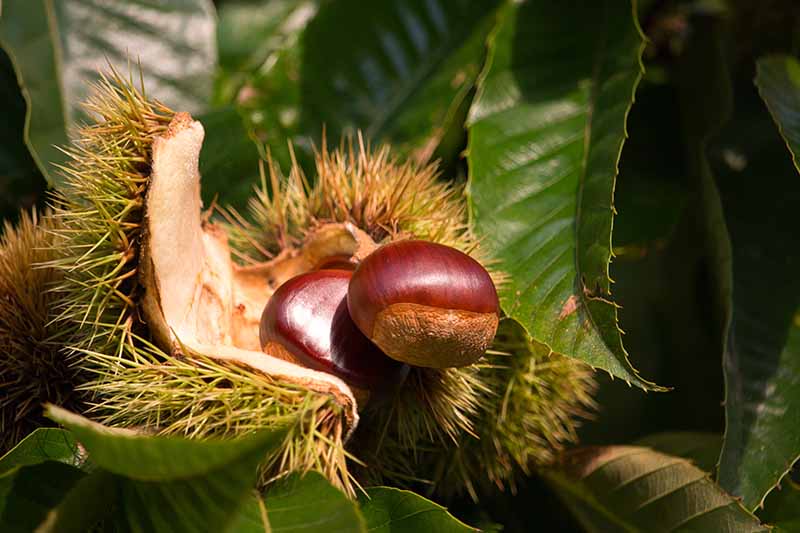
Yes, this appears to be an edible chestnut. Yours has long, simple leaves growing individually with (presumably multiple) nuts produced within spine-covered, bristly brown burrs. Poisonous horse chestnuts produce foliage in palm-shaped clusters of five to seven leaflets, and the larger, more round nuts grow individually or sometimes in pairs within burrs that are thicker and green, covered in shorter spikes that are more widely spaced.
Be sure to always err on the side of caution and wait to positively confirm the identify of a plant before consuming it or using it in medicine.
i am trying by making a bonsai from chestnut tree, here in abudhabi
is it worthy / recommendable.
Hi Nadeer, as much as I adore a beautiful chestnut bonsai, these trees need cooler temperatures than those in Abu Dhabi. They need about 500 hours below 40°F to survive and produce nuts.
We started growing and selling A. Chestnuts about 20 years ago. Early on we had more than we could sell so it seemed a good time to start our own seed orchard. We had about 200 trees and not enough space for them so they went in on a 10′ x 10′ grid. Where they took well they are severely crowded. Is it better to cut down most of them or take our chances with the tight spacing?
Overcrowding won’t serve your seedlings well. Can you transplant into individual containers?
“In the early 1950s, plant breeder Dr. Robert Dunstan received a shipment of budwood from a single living American chestnut found to be growing in Salem, Ohio, sent to him by James Carpenter.”
Does anyone know what became of that blight-resistant tree that was discovered in Salem, Ohio?