Many people know you can propagate a fuchsia plant from cuttings, but have you ever eyed your fetching flowers and wondered if you could propagate more by sowing the seeds?
Well, you can!
You know those little pods that are left behind after a flower falls off? Those are actually the plant’s berries – technically called ovaries – and they contain the plant’s seeds.
Just keep in mind that you probably won’t create an exact replica of the existing plant. That’s because most fuchsias are hybrids, and they won’t grow true if you use this method.
We link to vendors to help you find relevant products. If you buy from one of our links, we may earn a commission.
No matter, you’ll still undoubtedly produce a gorgeous plant that will not only add color to your yard, but that you can also eat!
Up ahead, here’s what we’ll go over:
What You’ll Learn
Let’s go!
Using Seeds vs. Cuttings
Almost all the fuchsias you see at the nursery or home stores are hybrids.
That means if you save the seeds from them and plant one, the new plant that grows might not look like the one it originally came from.
That’s okay, you might end up with something just as interesting. But I wanted to give you a heads up in case you were hoping to exactly reproduce a particular specimen that you particularly love.
You can do that, by the way, but you’ll need to propagate your plant through stem cuttings instead.
How to Pollinate
Even though all types won’t grow true using this method, you can still have a measure of control over the characteristics of the plant you produce.
How so? By manually cross-pollinating two fuchsias that you like.
To do this, isolate the plants if you have multiple different hybrids or species, either with covers or by putting them indoors or in a greenhouse.
You don’t want them to accidentally cross-pollinate the old-fashioned way, through visiting bees and other pollinators.
Use a toothpick to gently remove the pollen from the anthers of a flower on one plant, or gently snip off the anthers themselves.
Apply the pollen to the other fuchsia by brushing the ends of the anthers or the toothpick to the stamen of an open flower.
Allow the flower you pollinated to produce a berry, and then harvest and save it as described in this guide.
Keep in mind that some fuchsias are sterile. They either won’t produce berries, or the berries they produce won’t produce seeds.
If you’re hoping to hand pollinate, be sure to read up on your particular species, hybrid, or cultivar.
When to Start Saving
Seeds start forming shortly after the plant starts flowering. In fact, once blossoms form, the berry bonanza is right around the corner!
Depending on where you live and what species, cultivar, or hybrid you are growing, that means you can start saving in the spring, throughout the summer, or even into the fall.
Watch for flowers to start turning brown or dry, or dropping off the bush. When that starts happening, it’s almost time to harvest the berries and save the goodies inside.
How to Harvest the Pods
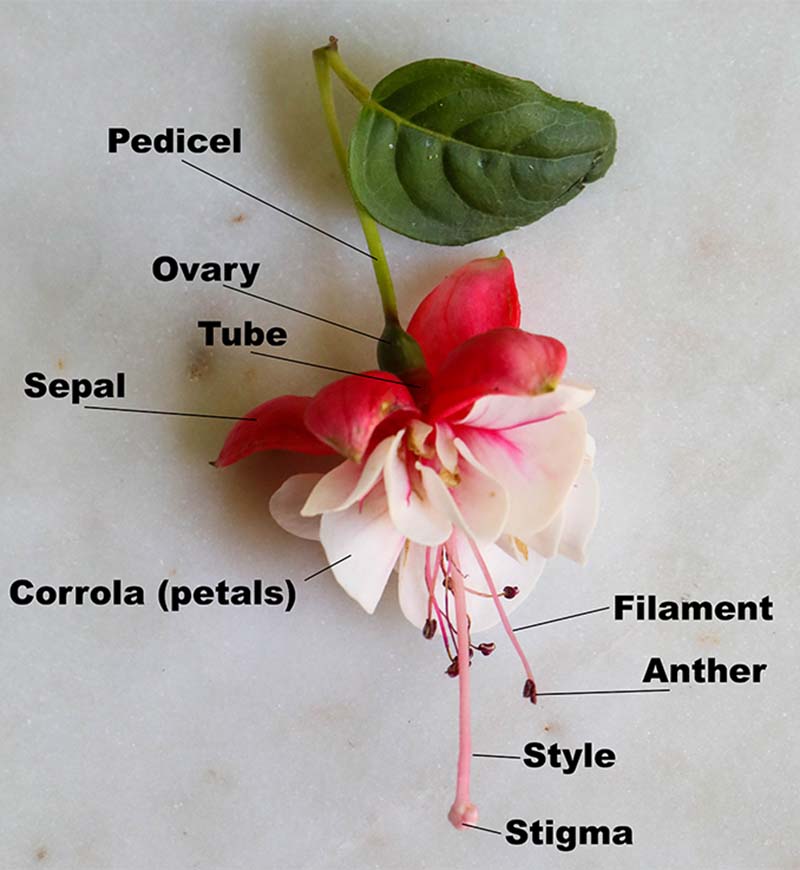
First, a little anatomy lesson.
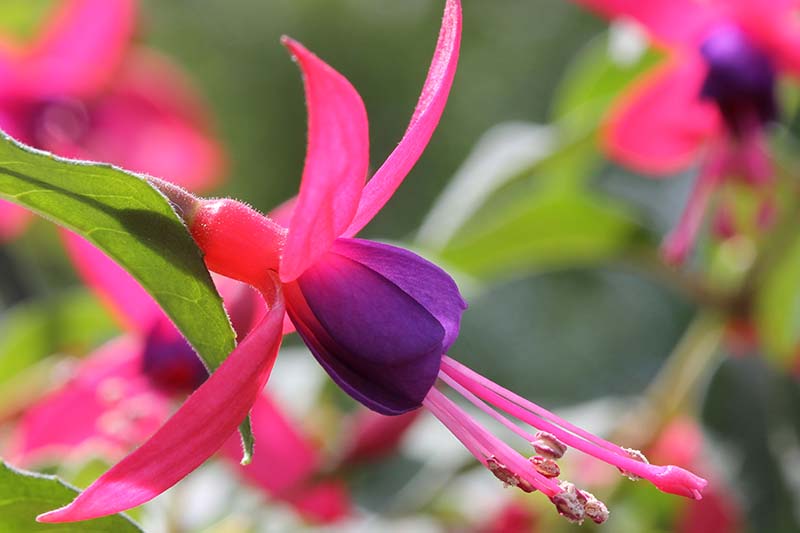
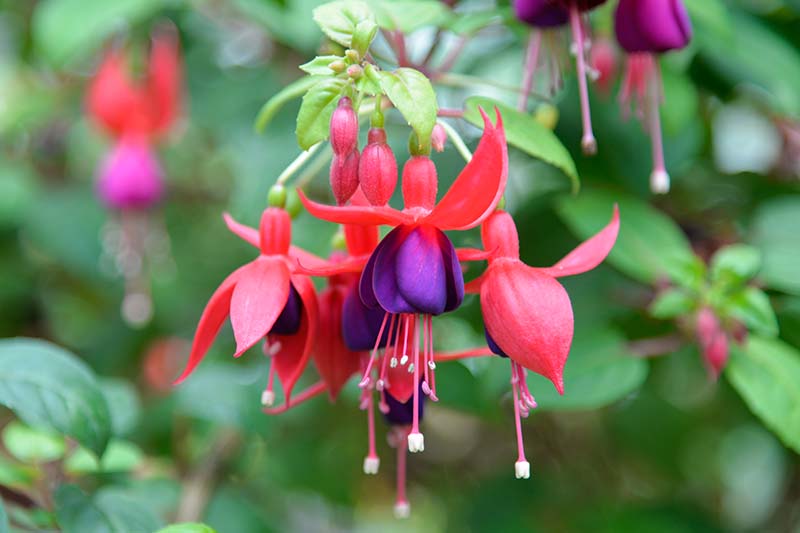
When you look at a flower, you’ll see a long stem holding it securely onto the rest of the plant. That’s the pedicel, and it’s attached to a little bulb at the base of the flower. This is the ovary, where the seeds are forming inside.
Below that is the flower, including the tube (which is attached to the ovary), the sepals (outer petals), and the petals or corolla. Coming out of the inside of the petals you’ll see the filaments, anthers, style, stamen, and stigma.
Instead of deadheading your plants, let the flowers fall off naturally. When they fall, the ovary stays behind. If the flower was pollinated, it will start to grow larger, plump up, and will usually change from green to red or purple.
Not all fuchsias start out with green ovaries, so you will need to keep an eye on the size as well as the color. Some start out red and turn a darker red, for example.
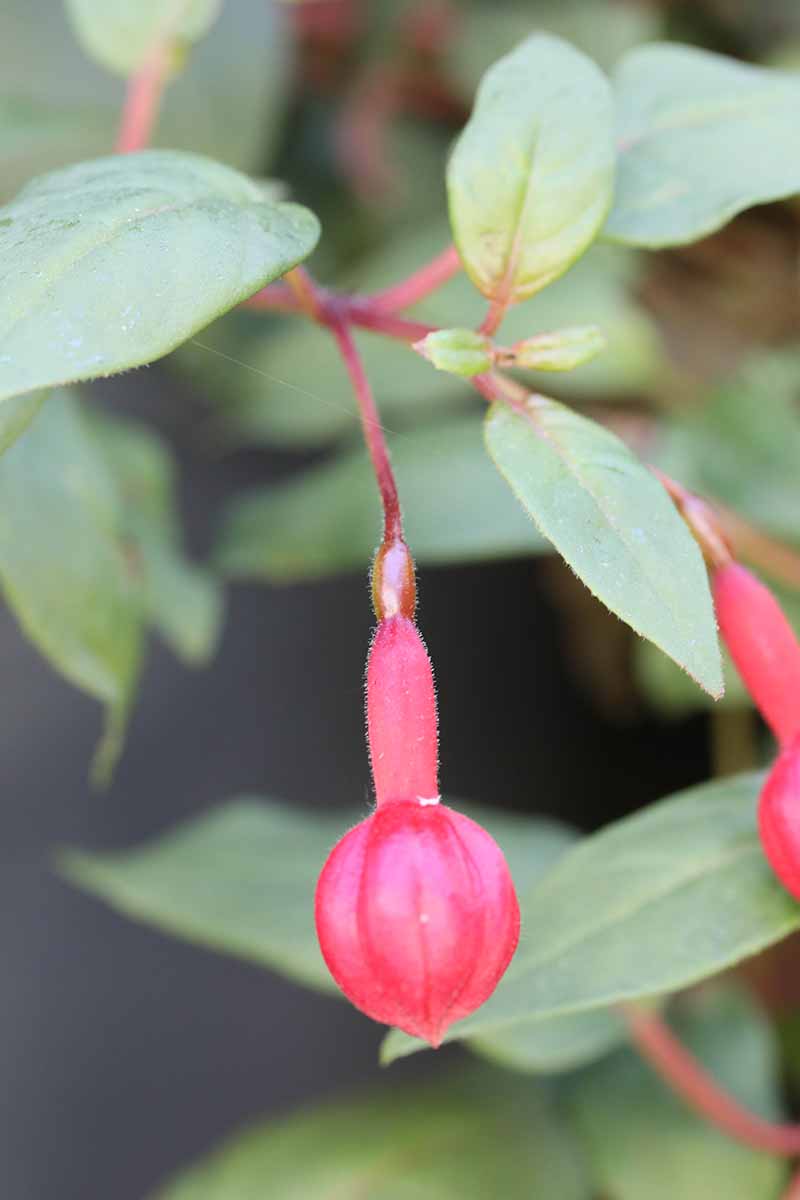
This hybrid, pictured below, starts out greenish-red, turns green, and then transitions to a dark red when it’s ripe.
Others stay green and just become darker green.
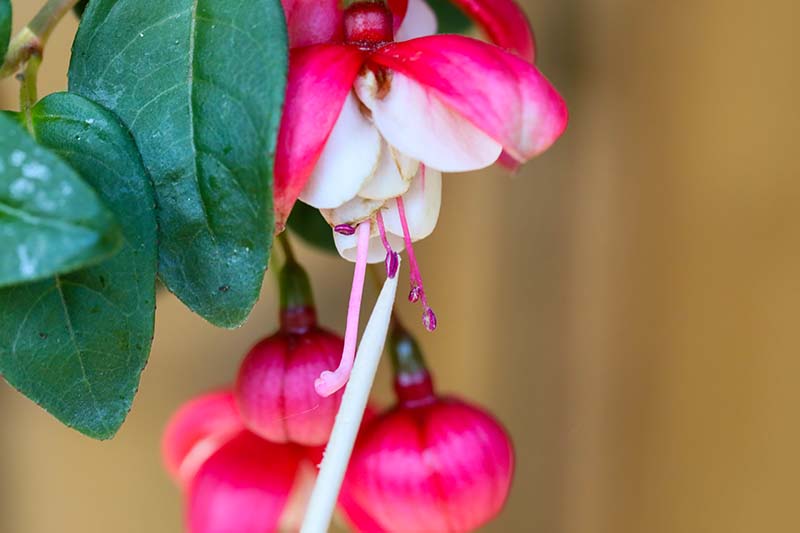
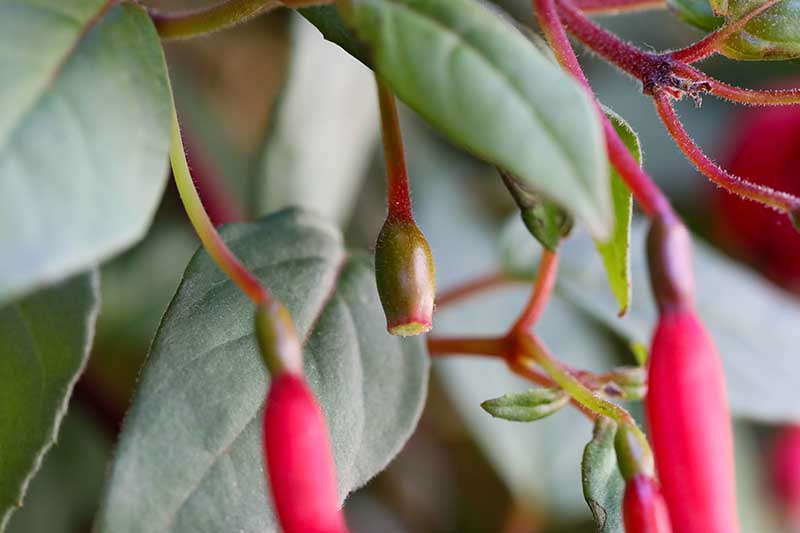
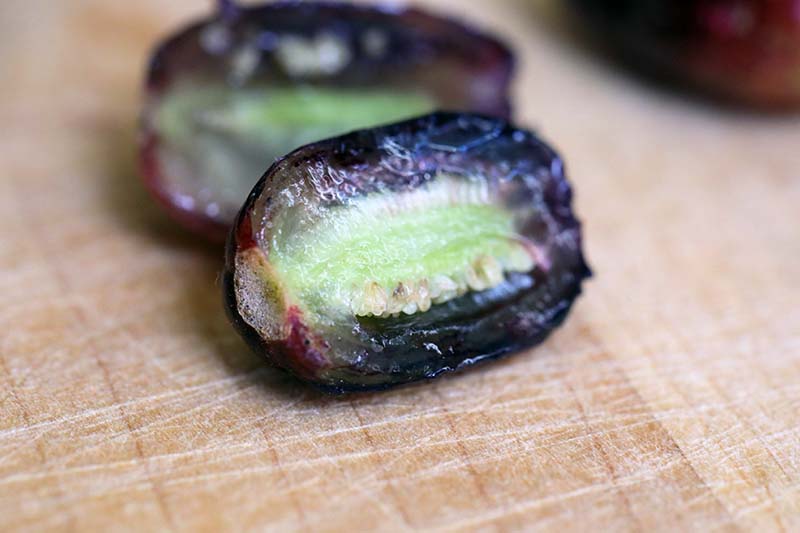
This berry pictured below is too immature to harvest.
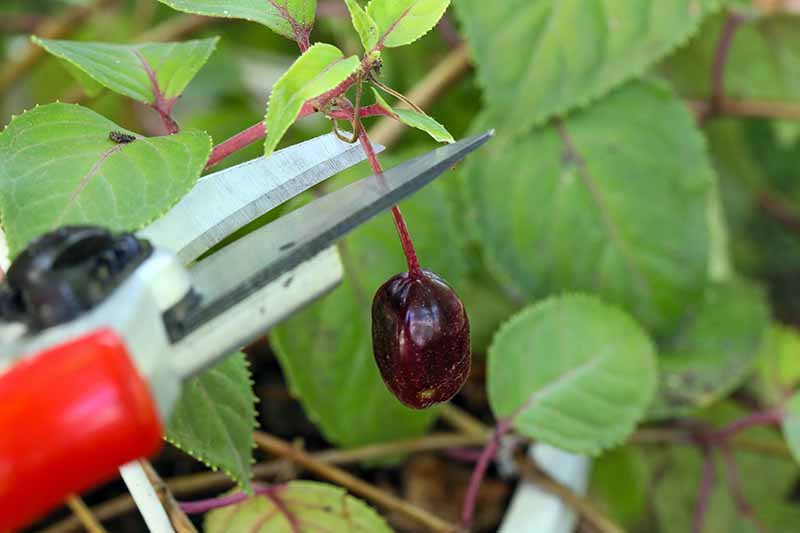
This berry is plump, starting to wrinkle, and has turned dark red. It’s ready to go.

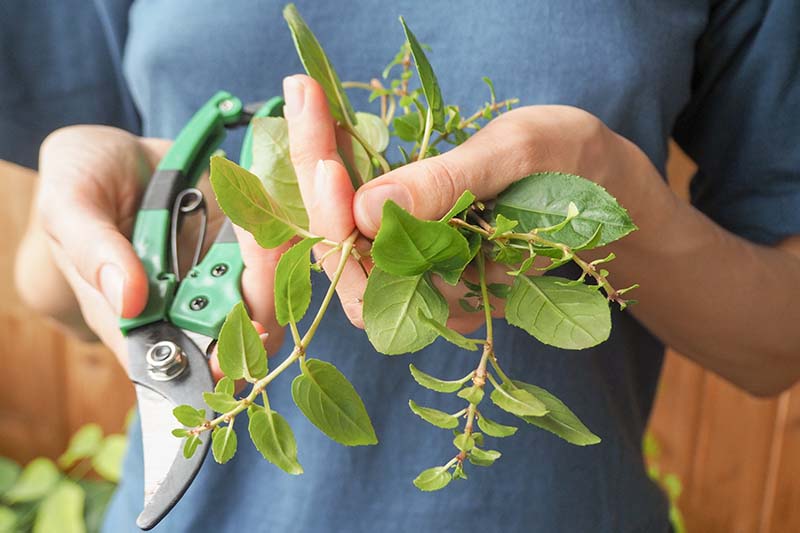
Once the color changes and the berry is juicy and plump, not hard and firm, snip it off with a pair of clean scissors or clippers.
If you aren’t sure, wait until the berry pod starts to shrivel up slightly before harvesting it.
I’ll tell you right now, the birds are more likely to nab your berries than you are, unless you take action. Birds love them when they become big and juicy.
To protect the berries, tie muslin bags around them, or cover the entire plant in mesh fabric. Prop the fabric away from the plant so it isn’t touching the leaves.
Don’t be surprised if your fuchsia stops producing flowers if you let it go to seed. Once a plant starts producing fruit, it often stops producing blossoms.
If you want to avoid this, only allow a few berries to form at a time, and keep deadheading the rest of the blossoms.
Check out our guide to deadheading for more tips on how and when to cut off the flowers.
Tips for Saving Fuchsia Seeds
Once you’ve snipped the berries, it’s time to open the pods and remove the seeds.
This is sticky work, and the flesh of the berries can stain your skin and clothes. Wear gloves and an apron to protect yourself.
First, slice the pod in half.
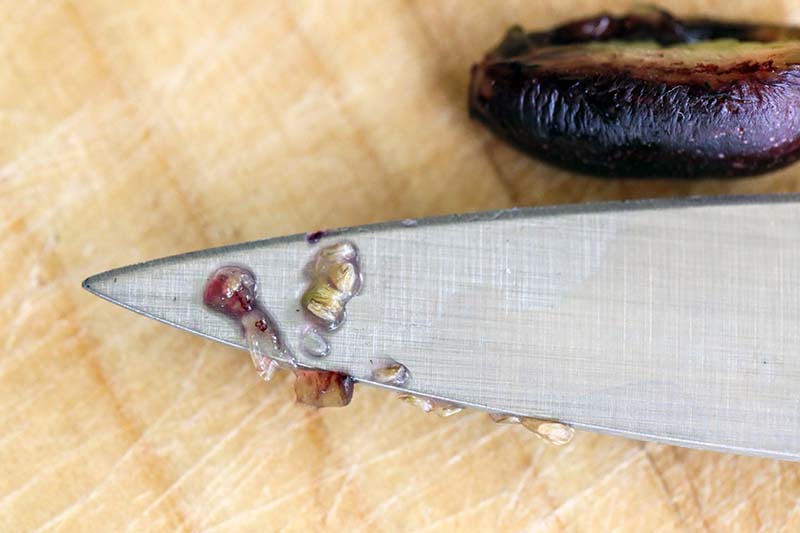
Use the tip of a knife to pry out the seeds inside.
The flesh is sticky and the seeds are pretty small in most fuchsias, so this is easier said than done. Just keep at it.
Once you pry them out, carefully rinse them in a bowl or let them sit in a dish of water for a bit.
Then, put them on a plate covered with a paper towel or cotton cloth, in a spot with good air circulation. Let the seeds dry up for a week or two.
Put the dried seeds in an envelope or small jar and seal them up. Store in a cool, dark place.
When you plant them next year, you should see blossoms in the first year of growth.
Get Ready for More Beautiful Fuchsia Babies
What’s better than one fuchsia? Lots of them!
It’s incredibly easy (not to mention free, if you have access to the berries) to reproduce fuchsia by seed. And who knows what happy accidents you’ll end up with?!
I can’t get enough of seeing new fuchsia varieties, so please come back and share photos of your new babies once they pop up.
And if this guide helped you reach your growing goals, you might want to check out some of our other fuchsia guides next:


Very interesting thanxx
My flowers fall off to quick. Where is the best place to buy
Hi Debra, fuchsias are pretty quick to drop their flowers if they are stressed at all. That means if you change their environment (bring them indoors from out or the other way around), reduce their water, prune them heavily, or bring them home from the store, they might drop their flowers. It’s nothing to worry about so long as the leaves look ok, still. Just try not to stress it further and continue to give it ideal conditions. I prefer to avoid buying my fuchsias at big box stores or home supply stores because I’ve found that my plants often… Read more »
I’ve tried getting the seeds, patting them dry and sowing them, I’ve tried getting the seeds and waiting two weeks and sowing them and most recently I just let the whole berry dry out and kept it in a paper bag for months, then sowed them, all in a seed tray with compost and a layer of sand on top, but not one of them have germinate at all 🙁 Not sure why. I have them indoors.
Hi Bex, there are many reasons that fuchsia seeds might not sprout. For one, they don’t reliably germinate in the first place, so you have that working against you. But if none of the seeds are germinating at all, it’s likely that either the plant you’re harvesting from is sterile. I’ve found the most reliable method is to simply scrape the fresh seeds out, immediately place them in seeding medium with or without rinsing, and place them on a heat mat. They don’t need direct light to germinate, but they do need some bright, indirect light. I would suggest trying… Read more »