
Citrullus lanatus
They’re big. They’re delicious. And they’re not as difficult to grow as you’d expect!
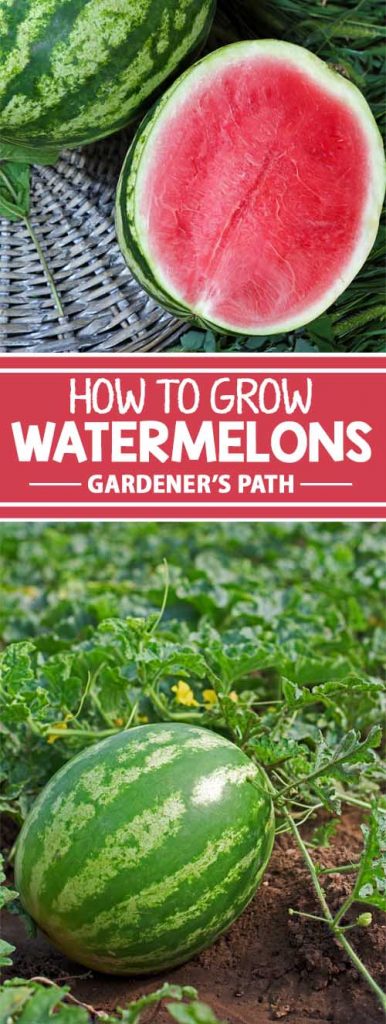
I’m talking about watermelons, the diverse and sweet melons that come in as many different varieties as there are ways to enjoy the ripe fruit.
I’ve had the pleasure of growing a few different cultivars of this melon over the years, and I can tell you that nothing beats the flavor of a sun-ripened watermelon fresh from your own garden!

We link to vendors to help you find relevant products. If you buy from one of our links, we may earn a commission.
Growing watermelons is not the enormous undertaking you might think it’s bound to be, though a little garden planning will help.
I’ll cover everything you need to know about growing these juicy fruits in your own garden, and before you know it, you’ll be eating homegrown watermelon by the slice at breakfast, at your summer picnics, and blended into cocktails.
Here’s what’s ahead:
What You’ll Learn
Cultivation and History
Watermelon is known for being not only sweet and juicy, but also incredibly refreshing, perhaps more so than any other fruit.
Several years ago, when I was living through a heat wave with no air conditioning, a large serving of watermelon every afternoon was what pulled me through the worst of it.
Watermelons are 92 percent water – which should help explain why they are so darn refreshing on a hot day.
And believe it or not, this fruit’s ability to hydrate us is an important part of its history, leading us all the way back to its first use by humans.
Watermelons are native to Africa, where they were first used not so much as a food source, but as a source of water.
The thick rind allowed people to store these melons for long periods of time, and transport them without damage, using them as a water source in hot desert climates.
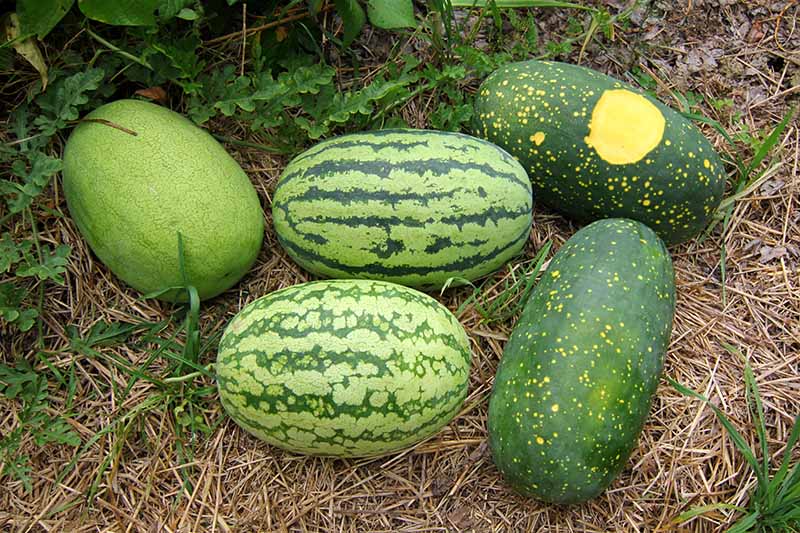
There are many different types of wild melons growing in Africa that have been considered to be the possible ancestor of our cherished cultivated watermelon. These include the citron melon, from the Kalahari, and the egusi melon, native to West Africa.
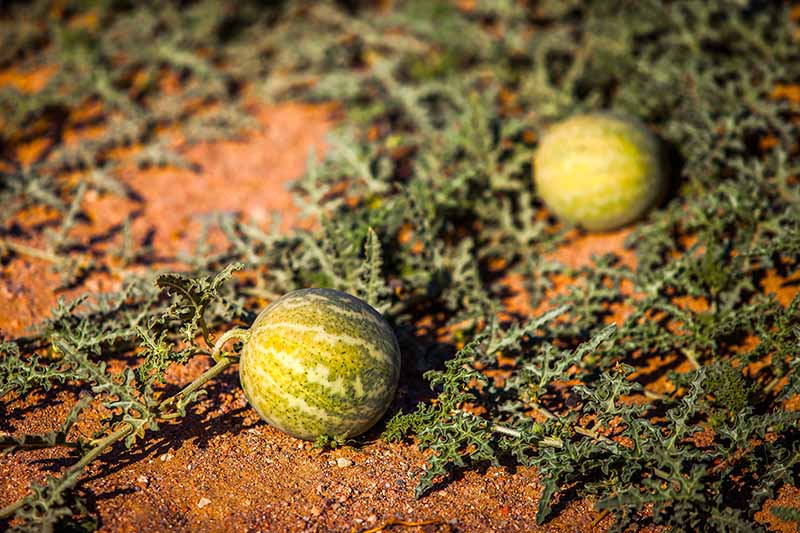
However, evidence points to northeastern Africa as the place of origin for modern watermelons, with its ancestor most likely being Citrullus lanatus var. colocynthoides.
In parts of north Africa, these hydrating fruits still grow wild on drought-tolerant, vining plants.
This fruit has been cultivated for over 4,000 years. Watermelon seeds and paintings of watermelons were found in King Tut’s tomb, as well as in those of other ancient Egyptian nobility.
This fruit eventually spread from Africa to the Mediterranean region, and was known in ancient Greece as the pepon.
Watermelons continued their journey into the rest of Europe, and were eventually introduced to the Americas by Europeans.
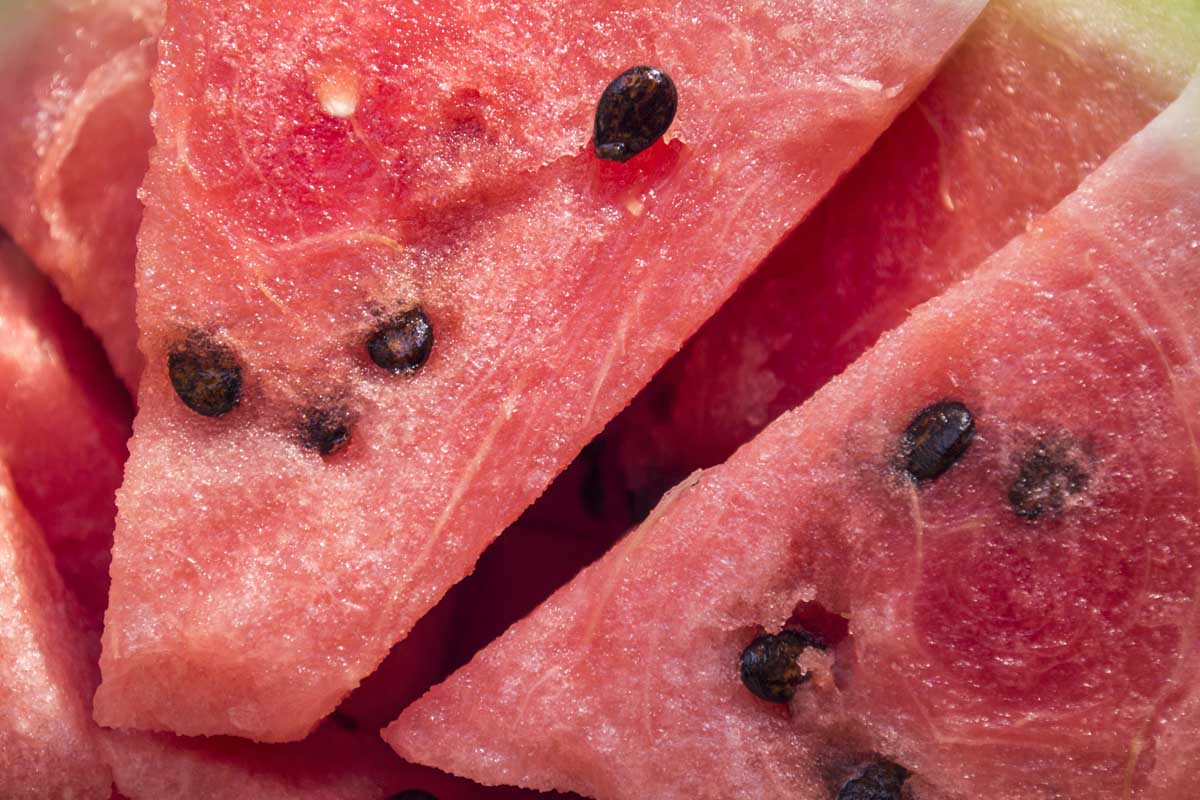
In the US, it’s primarily the flesh of watermelons that is consumed, but the seeds are a popular snack in other parts of the world, and the rind is also edible. Pickled watermelon rind, anyone?
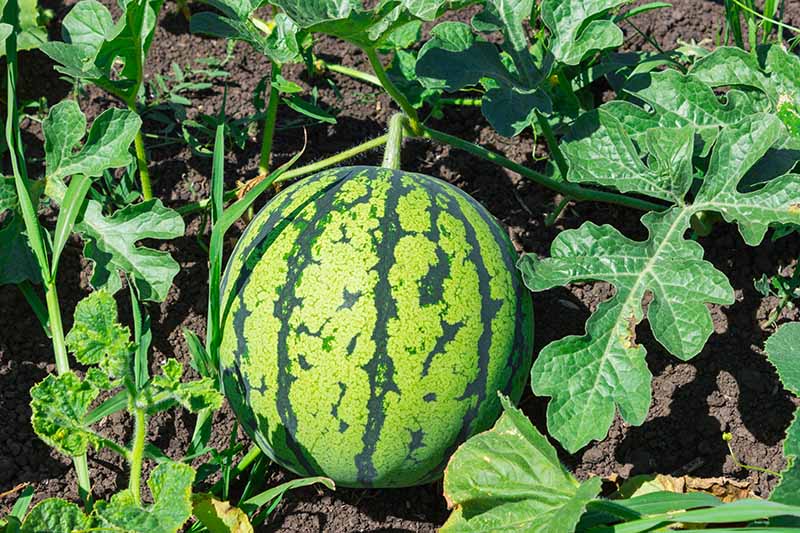
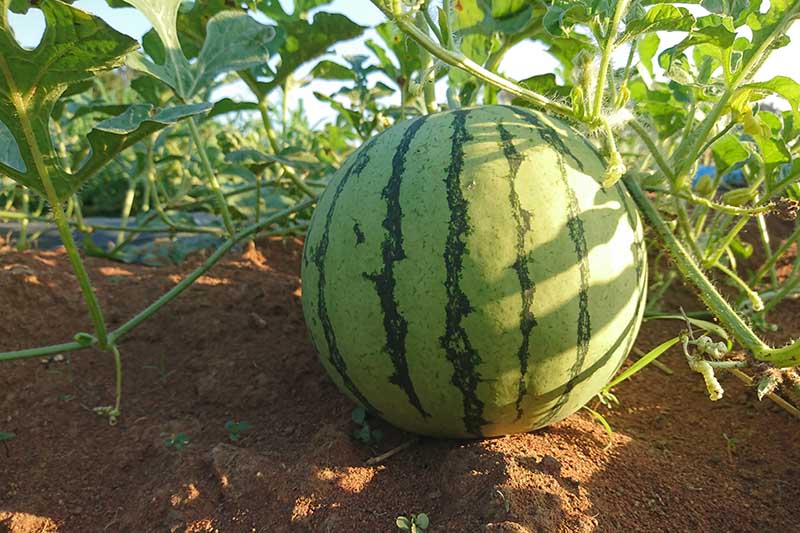
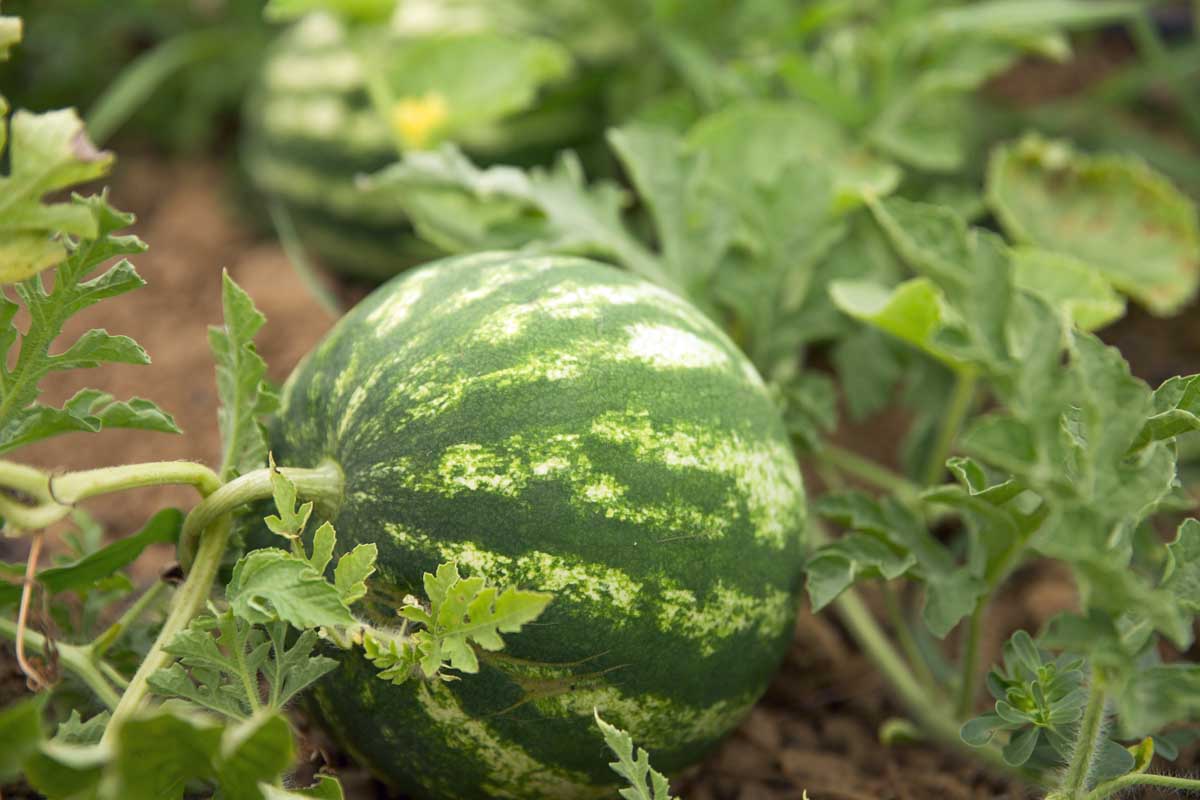
Watermelons grow on sprawling vines – just like their relatives, honeydew and cantaloupe melons, squash, gourds, and cucumbers.
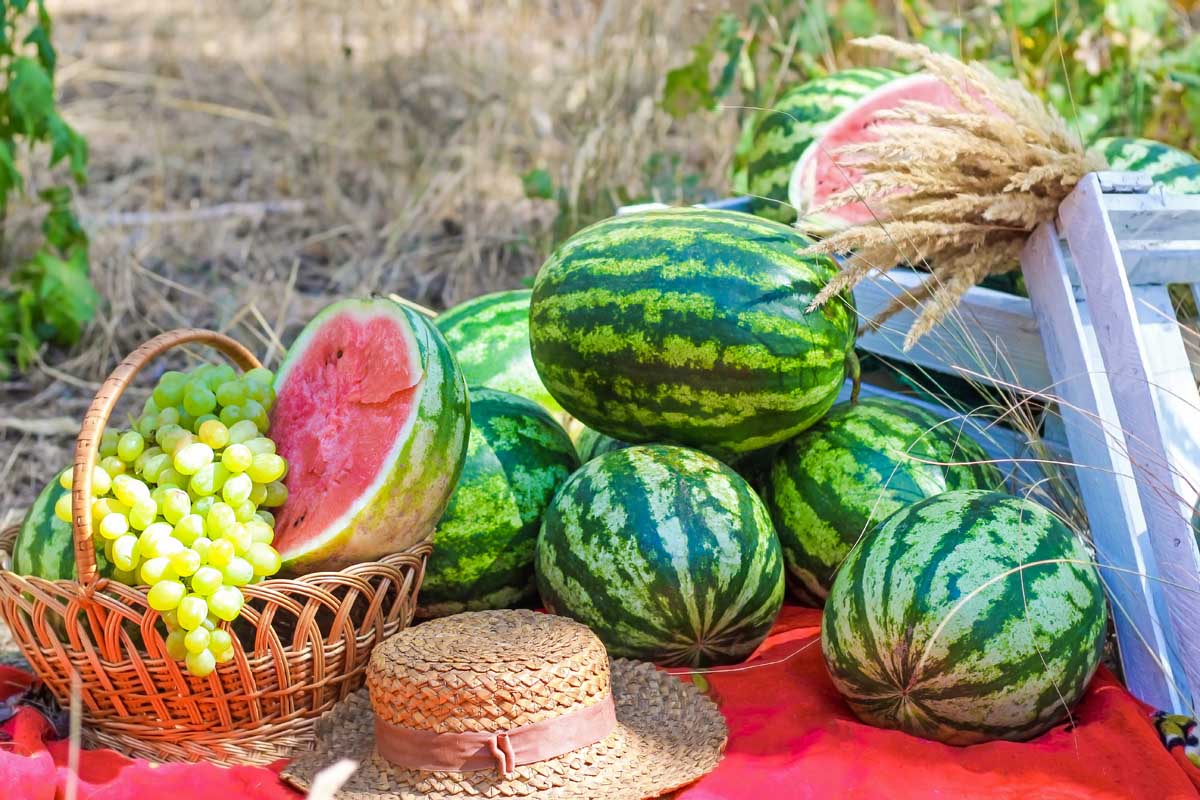
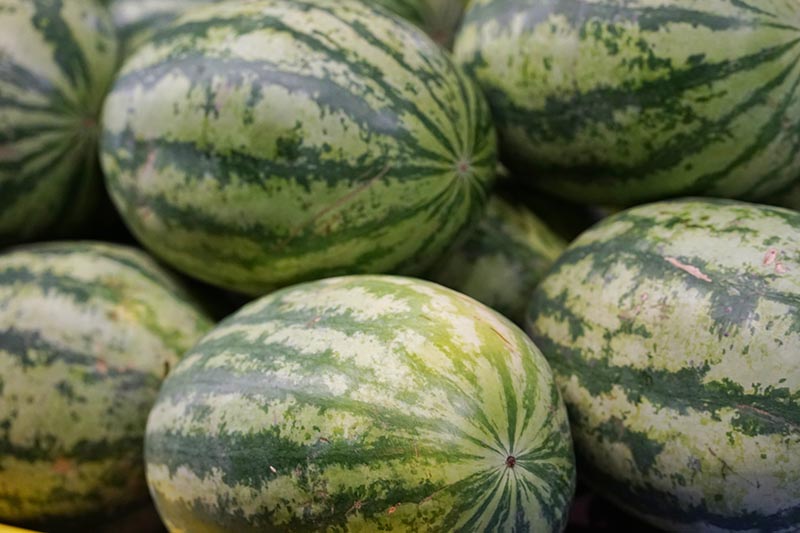
While for most of us these fruits may conjure up visions of something hefty and oblong with light and dark green stripes, watermelons come in a wide range of skin patterns and sizes.
When you grow your own at home, you open up your options to a stunning array of varieties. I’ll get to those a little later.
First let’s talk about best growing practices. Now that we know a bit about where these melons come from, this knowledge should help us in deciding how and where to grow them.
Propagation
Before you run out to your garden with your seed packet in hand, make sure to check the number of days required for your variety to reach maturity.
Depending on how this number compares to the number of days in your growing season, you may want to start your plants indoors instead of direct sowing.
These melons are most successful when sown directly in the garden since their roots are fairly sensitive – however, direct sowing may not work for all varieties and certainly doesn’t work for all climates.
Some varieties can take 100 days or more to produce ripe fruit.
There’s nothing more disappointing than watching a healthy, vigorous plant run out of time to bring its fruit to maturity because of an early fall frost.
Choose a variety that will mature within your growing season or consider starting your seeds indoors and setting out transplants after your last spring frost.
I’ll cover both methods of propagation – but let’s start with direct sowing.
Direct Sowing
Watermelons are warm-season plants that do not tolerate cold weather and will succumb to late frosts.
So make sure you exercise a little patience – the best time to plant your seeds is at least two weeks after your average last spring frost date.
For watermelon seeds to germinate, the soil needs to be a minimum of 60°F. If you can wait for your soil to heat up to the 70 to 95°F range, germination will be more successful and faster.
The ideal soil temperature for watermelon seed germination is 95°F.
Once you have prepared your melon patch (as described below) and the soil is warm enough, you’re ready to sow your seeds.
Soil that is moist but not soggy is ideal, so either water your planting area a few hours ahead of time, or wait a few hours after rainfall.
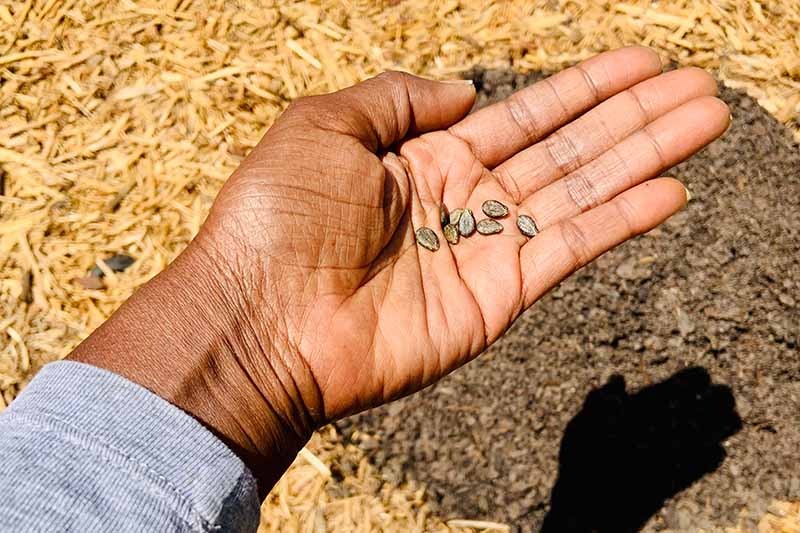
You’ll want to plan on planting these seeds about three-quarters to one inch deep, so scrape about an inch of soil to the side of your planting area.
Next, smooth the surface of the soil in your planting area so that it’s even, then press three or four seeds flat into the surface of the soil.
Now use the soil you scraped to the side to cover the seeds. Pat the soil gently to ensure good contact with the seeds.
Gently water the seeds in with a watering wand or a watering can.
In my dry climate, I water my freshly planted seeds once a day until the seedlings have sprouted and have grown a couple of sets of true leaves.
You may not need to water quite so often if your soil is not prone to drying out, and if you get regular rain showers.
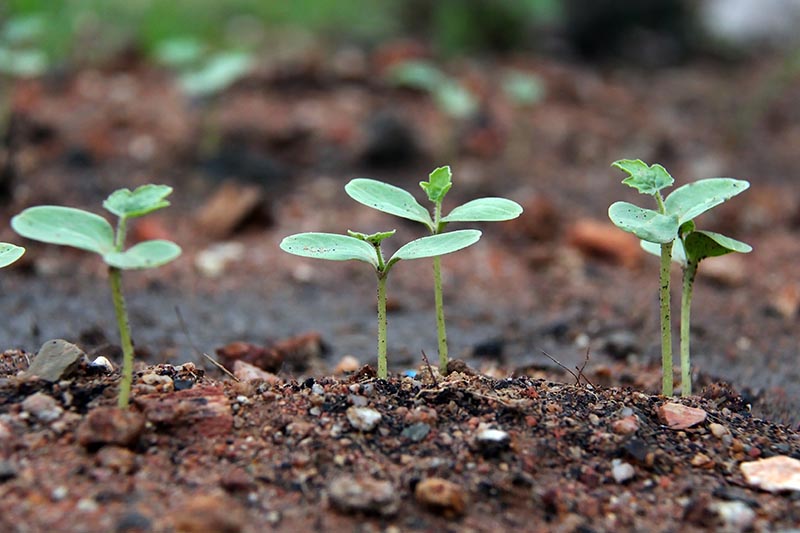
Within five to ten days, your seedlings should germinate.
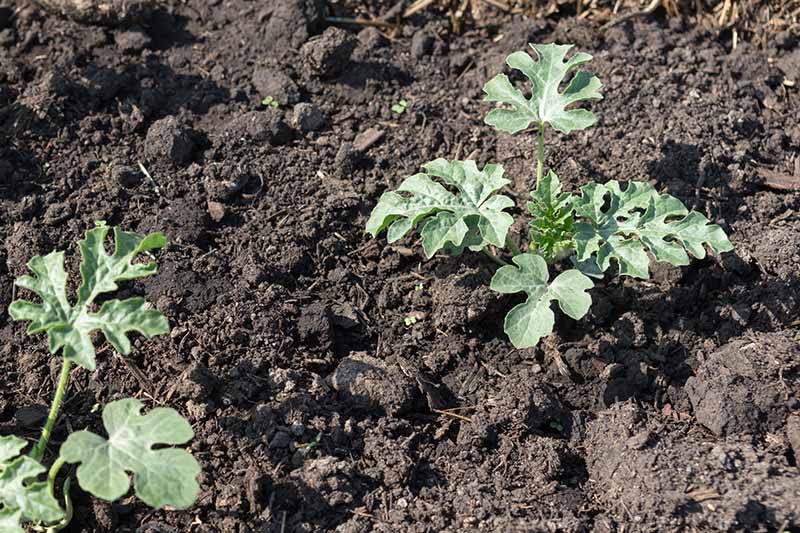
When your seedlings are a few inches tall, with two or more sets of true leaves, thin your plants.
Choose the two best looking seedlings and snip the other ones off with a pair of scissors, leaving two plants per hill or crater. (Not sure what hills and craters are? We’ll get to that a little later, so keep reading!)
From Transplants
If your growing season is shorter than the number of days required to grow your preferred watermelon variety, you’ll want to start these seeds indoors and set out seedlings when daytime temperatures are at least 70°F.
These plants have delicate roots and don’t like to be transplanted.
I recommend that you start seedlings in biodegradable, preferably peat-free, pots such as these CowPots that are available from Arbico Organics, which are made from composted cow manure.
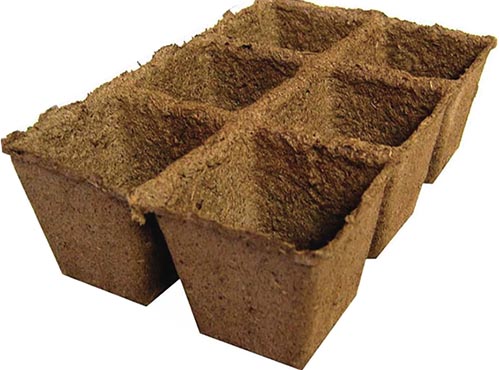
CowPots, Biodegradable Seed Trays
This way you’ll be able to plant your seedlings directly into the soil, pots and all, without upsetting their root systems.
A three-inch pot is the ideal size, since these young seedlings are fairly large.
Check your seed packet to calculate the best time to start your seedlings – usually this is about two to four weeks before your last frost.
If you’ve never started your own transplants before or want a refresher, check out our guide to starting annuals indoors.
Here are the basic steps to follow:
- Be sure to use a sterile seed starting mix to germinate your seeds. Fill your pots with starting mix to about an inch below the rim.
- Plant three seeds per pot, cover with half an inch of potting mix, and then water gently.
- Set the seed trays next to a warm, sunny south-facing window, or under a grow light, and water daily with a spray bottle.
- To help your seedlings germinate more quickly and successfully, you may also need to use a heat mat.
- When seedlings are around two inches tall, with a couple of sets of true leaves, it’s time to thin them.
- Choose the best looking seedling in each pot to keep, and snip the stems of the other ones off with a pair of scissors right above the surface of the soil.
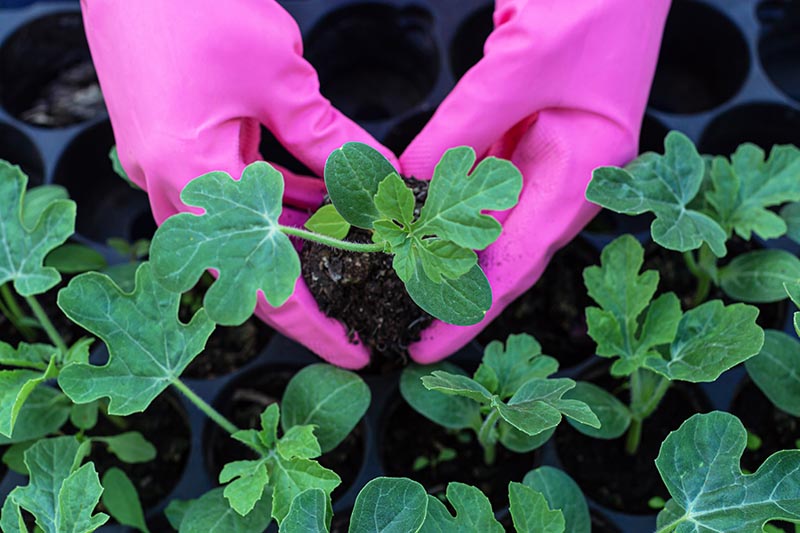
- Around a week or so after your last frost, when daytime temperatures are at least in the 70s, start to harden off your seedlings. To do this, place them outside in a protected location for an hour or so. Each day, increase the amount of time they spend and the amount of direct sunlight they are exposed to outdoors.
- About two weeks after your last frost, if daytime temperatures are at least in the 70s, you should be ready to transplant your seedlings. Plan on planting two seedlings per hill or crater.
- To do this, trim the top rims of your biodegradable pots so that they are even with the soil level inside.
- Dig a hole in the hill or crater that will accommodate the pot – you want the rim of the biodegradable pot to be at the soil level.
- Backfill with soil, and gently water your transplants in. Continue to water daily for the next several days to help prevent transplant shock.
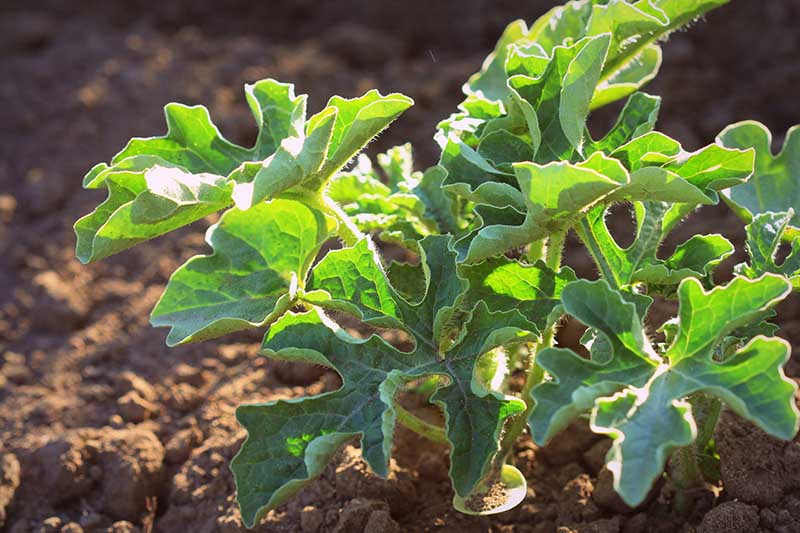
How to Grow
To grow your own watermelons at home, you’ll want to make sure you provide your plants with the best possible growing conditions for a delicious and generous harvest.
But first of all, you’ll have to select a good site for your plants, one that has the best possible soil, copious sun exposure, and plenty of room.
Site Selection
Watermelons are like any other veggie or fruit vine, in that they spread out and take up as much space as you’ll give them.
Like pumpkins, they can also go outside of their boundaries, looping over fences and even wrapping around other plants.

You’ll want to take this tendency to sprawl into account when you prepare your watermelon patch.
To make sure your melons have plenty of room to grow (and to prevent them from disturbing neighboring plants), you may want to pick a planting area far away from the rest of your garden.
If your garden space is limited and creating a separate melon patch isn’t feasible for you, consider planting them at the edge of your garden and train the vines to grow where they aren’t in the way.
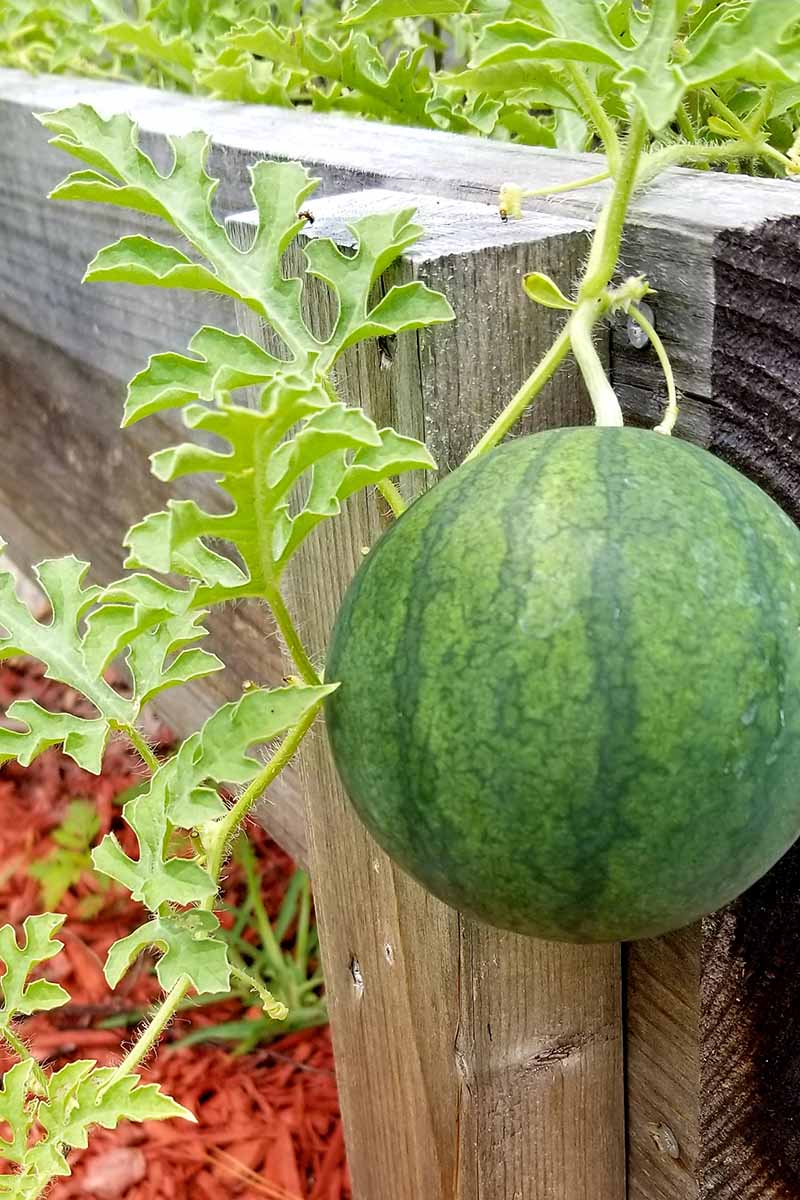
Or you can even go vertical and try your hand at growing your melons on a trellis – though the fruit will need support and the trellis will need to be very sturdy.
One more caveat to consider is that it’s best not to plant watermelons where you grew cucurbits – squash, cucumbers, gourds, or melons – in the past three years, to reduce the risk of pest and disease issues.
Keeping track of crop rotations is fairly easy when you are gardening in raised beds – especially with the help of your garden journal.
Sun
Once you have a potential growing site picked out that provides enough room for 10-foot vines, you’ll want to make sure it also gets plenty of sun.
These plants require a full sun location, which means eight to 10 hours a day – or more – of direct sunlight.
You’ll also need plenty of heat, so if you live somewhere where you have to put on a sweater during the day in midsummer, your best bet would be to grow these fruits in a greenhouse or cold frame.
When preparing your garden beds, make sure to look around and identify any trees that might shade your garden once they fully leaf out, and site your melon patch away from any potential shade.
Remember, at their origins these were desert plants that grew under direct sun with only the shade of their own leaves for protection.
On the other hand, it’s also wise to consider that these plants are descendants of those desert plants and have lost some of their natural resilience to heat through selective breeding.
The fruits of some varieties are prone to sunburn.
If you’re concerned about this risk, pick a sunburn-resistant variety such as ‘Charleston Grey,’ ‘Klondike Blue Ribbon Striped,’ or ‘Sugar Baby.’
Soil
Watermelons grow best in loose, well drained, sandy soil. If you’re unsure what type of soil you have, it’s a good idea to conduct a soil test.
This will give you an understanding of your soil, its pH, and what type of fertilizer, if any, you’ll need.
If you get your soil test results back and learn that you have sandy loam, you’re good to go. If not, you’ll want to mix some sand into your garden soil when you prepare your melon patch.
There is an exception to this – if you are working with clay soil, adding sand can cause the soil to turn into a cement-like substance.
For gardeners with clay, first work on creating a lighter texture by amending it with compost.
In the meantime, your best bet may be to grow your melons in raised beds with a mixture of garden soil and sand.
Your soil test will also provide information about the soil pH. Watermelons grow best in soil with a pH between 6.0 to 7.5.
Whether you plant in raised beds or in the ground, work compost into the soil at the rate of 50 to 100 pounds per 1000 square feet to improve soil structure – and be sure to fertilize.
I’ll get to that part shortly.
To keep your soil loose, avoid walking on or otherwise compacting your planting area.
You may want to consider no-till style gardening, but do make sure you loosen up the soil before planting.
Creating Your Melon Patch
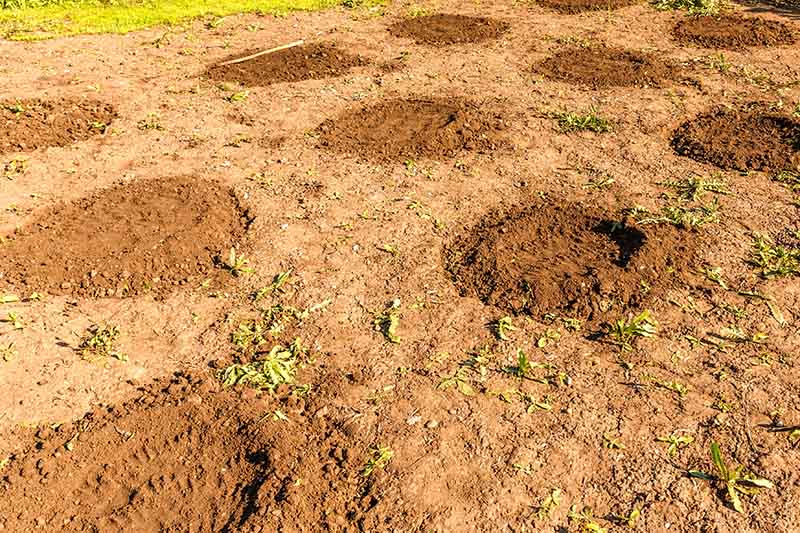
Unless you live in an arid climate like I do, you’ll need to mound up small hills to plant your melons on.
This provides a little extra room for the vines to sprawl over and also prevents water from pooling around the main stem.
For those of us in arid climates, I recommend a shallow “crater” rather than a hill to conserve moisture.
To create such a crater, dig a hole about two to three feet across and six inches deep. Take the soil you remove and mound it around the rim.
The depth of these “craters” will help to prevent water from evaporating, and the higher rims will provide your vines with a little extra room to meander down.
A good rule of thumb is to create your mounds or craters about three to six feet apart in rows that are six to 18 feet apart.
These measurements are flexible – just be aware that the vines can easily reach 10 feet in length, and plan accordingly.
In humid climates you may want to opt for the more generous spacing, to help with air circulation and reduce the risk of disease.
Smaller varieties can be planted closer together. Check the spread of your chosen cultivar on your seed packet.
Fertilizer
Once you have prepared your melon patch and before planting, add some fertilizer to your soil.
Before deciding on what type of fertilizer to use and how much, it’s best to refer to the results of your soil test.
These results will alert you to any nutrient deficiencies and provide recommendations for the appropriate type and amount of fertilizer to use for your particular garden soil.
Whatever the results of the soil test, the compost you work into your soil will be a good form of slow-release fertilizer.
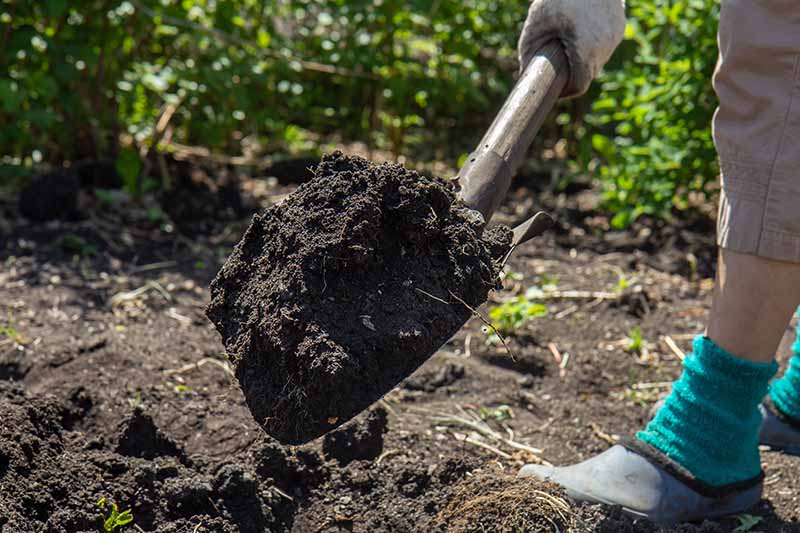
Well-rotted manure is an excellent natural fertilizer – just be sure that it comes from a trusted source.
If livestock have been eating feed sprayed with herbicides, chemicals can sometimes pass through in the manure and cause problems when used as a garden amendment.
Personally, I add both well-rotted manure and compost every spring as I am prepping my soil.
If you decide to skip the soil test and don’t want to deal with manure, you can use an all-purpose, balanced fertilizer such as Down to Earth’s 4-4-4 (NPK) vegetable garden fertilizer.

Down to Earth Vegetable Garden 4-4-4 Fertilizer
It’s approved for organic growers, and is available for purchase from Arbico Organics. Apply it according to the instructions on the package.
Once plants are established, feed them with a monthly side dressing of all-purpose fertilizer, a foliar spray of comfrey tea, or some worm compost.
Care and Maintenance
While your watermelons grow, there are a few ways you’ll need to care for them to ensure the best possible harvest.
Watering
Water is key for the growth and development of watermelon plants, so you’ll want to make sure you provide your plants with enough water – but not too much.
While seeds are germinating and when seedlings are young, in my arid climate, I like to make sure to water every day if the soil has dried about.
I stick my finger in the soil about an inch deep to test it. If it’s dry, I give the plants a drink.
Once plants are established, water deeply and consistently, but less frequently – these plants require one to two inches of water a week, so you may not need to irrigate on weeks when you get rain.
As fruits ripen, even watering is important, to prevent fruits from cracking. Since watermelons hold so much water, they can split or crack while ripening if watering is erratic.
Some varieties are resistant to cracking, such as ‘Sugar Baby,’ ‘Mini Love,’ and ‘Gold in Gold.’
When the fruit are a week or so from maturity – you’ll be able to calculate this based on your planting date and the variety’s average number of days to maturity – withhold water to ensure that your fruits are as sweet as possible.
A little less water will create more concentrated sugars in your melons.
And one more thing to remember when you irrigate: try to water at ground level to avoid splashing water on the foliage, which can spread disease.
Find more tips on watering watermelons here.
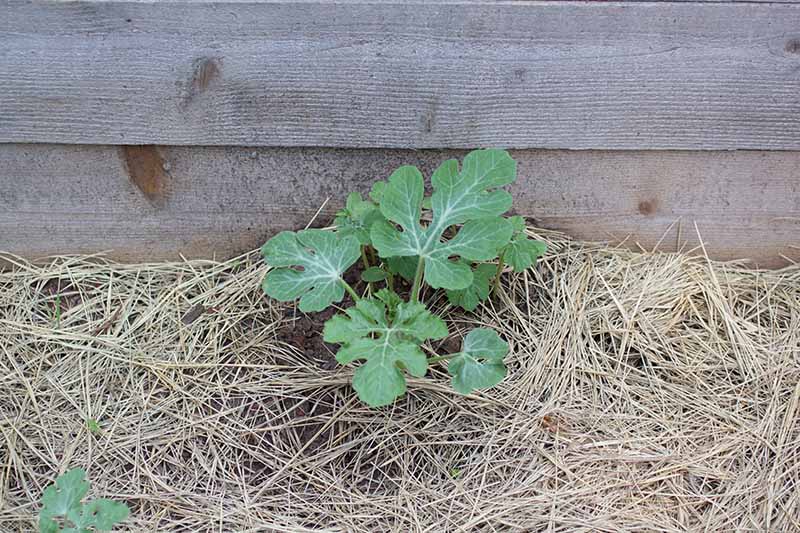
Mulch
So that all your careful watering doesn’t go to waste, mulch around your plants to prevent the soil from drying out and to keep weeds down.
If weeds do pop up around your seedlings, remove them, but take care not to disturb the seedlings’ roots.
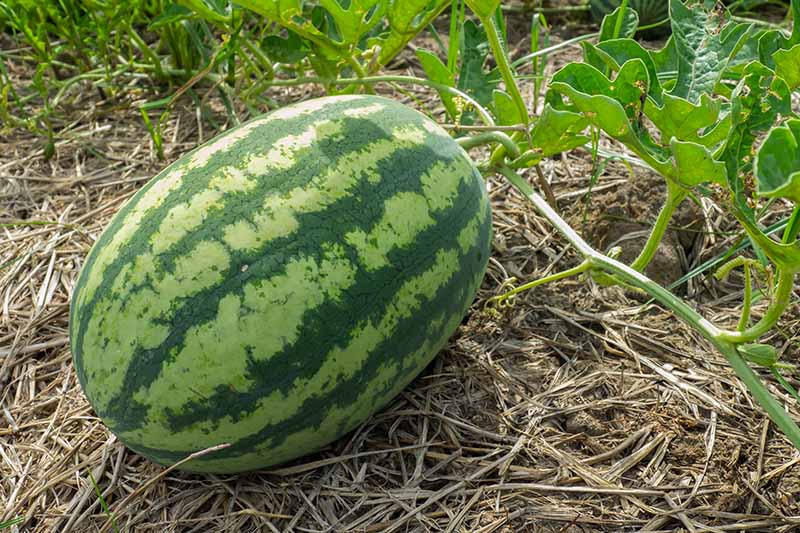
Another advantage of mulching is that when placed under ripening fruits, mulch will help prevent the fruits from rotting.
You can also use mulch to control the temperature around your plants.
As mentioned, watermelons are warm season plants, and they grow best in hot weather.
Once seeds sprout, plants prefer temperatures ranging from 70 to 90°F during the day and 60 to 70°F at night.
So if temperatures in your area are hotter than that, try using straw mulch under your plants to keep the soil cool.
The light color will stay cooler than darker colored mulch.
And if your temperatures are on the cooler side? Instead of straw, use a dark colored mulch.
I use dark compost as a mulch in my high-altitude location where the nights are cool. The dark mulch absorbs heat during the day and releases it at night, keeping the soil warmer.
Growing Tips
- Plant with plenty of room for long vines to sprawl.
- Provide a full sun location.
- Make sure plants receive one to two inches of water per week.
Cultivars to Select
Big, juicy watermelons with red or bright pink flesh are delicious, but there are many different cultivars to choose from when growing these fruits in the home garden.
Do you like the large, oval shaped fruits best? In that case, go with a picnic type.
Do you prefer the smaller round ones that will easily fit in the fridge? Then you’ll want an icebox variety.
Or are you the adventurous type, looking for surprising features such as yellow flesh or golden skin? There are options in a variety of colors as well!
You’ll discover a wide range of delicious watermelon varieties in our roundup, but to get you started, here are a few of my favorite cultivars:
Congo
A picnic variety large enough to feed a crowd, ‘Congo’ won the All-America Selections award in 1950.
This variety has firm, red flesh with a high sugar content, and is deliciously sweet.
These oblong melons have medium-green rinds with dark green striping and max out at 30-40 pounds when fully ripe.
After you’ve enjoyed the succulent red flesh, don’t throw out the rind! The thick rinds on these fruits are great for pickling.
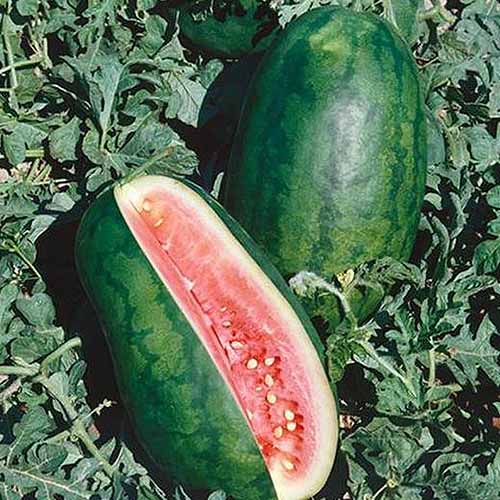
Plants grow to 15 to 24 inches tall with vines spreading 72 to 96 inches, and they have some resistance to fusarium wilt and good resistance to three races of anthracnose.
Are you ready to give ‘Congo’ a go at your summer gatherings?
If so, you can find seeds in an assortment of packet sizes available at Eden Brothers.
Sugar Baby
‘Sugar Baby’ is a compact icebox type, a heavy producer that thrives in smaller gardens. Fruits are small, round, and perfectly sweet.
This cultivar is a favorite among novice and expert gardeners alike, thanks to its sturdy rind that can resist cracking. Plants are also resistant to blight.
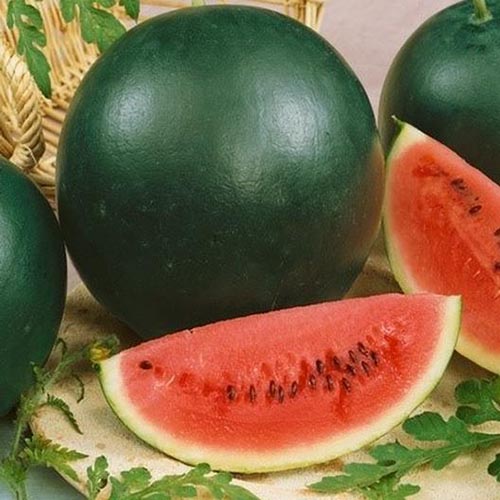
‘Sugar Baby’ produces melons with dark green rinds and red flesh that weigh in at around 12 pounds.
Plants mature to 15 to 24 inches tall with six- to eight-foot vines that are resistant to both cool weather and drought. Fruits resist cracking and have good sunburn resistance.
This is an early maturing variety – you’ll be harvesting watermelons in just 75 days.
You can find ‘Sugar Baby’ seeds in a variety of packet sizes available at Eden Brothers.
Moon and Stars
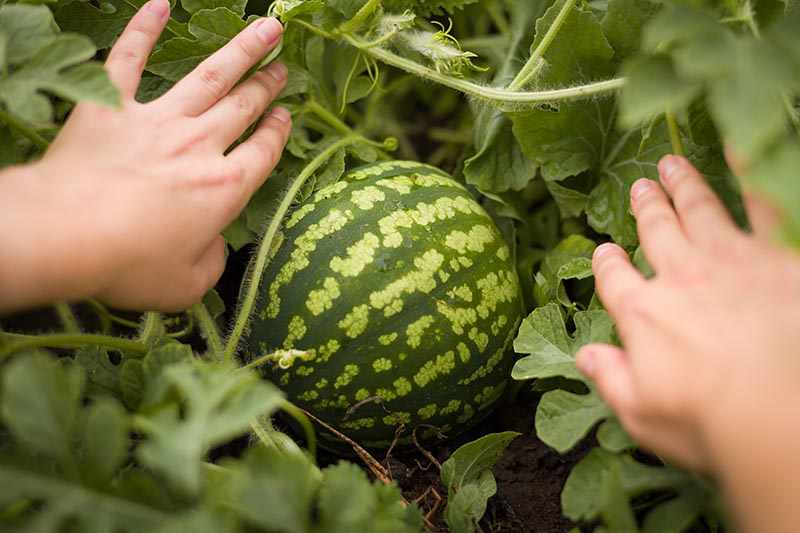
‘Moon and Stars’ may just be one of the most beautiful, fascinating varieties to look at.
Its dark green rind displays bright yellow spots, reminiscent of a dark sky twinkling with a large moon and tiny stars.
These unique-looking fruits average 25 pounds at full ripeness and contain sweet, red flesh.
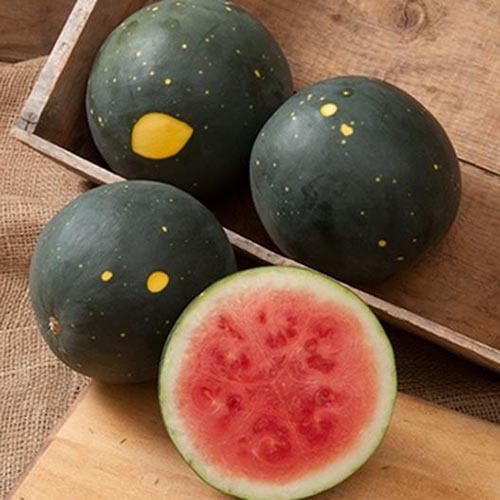
Plants grow 15 to 24 inches tall with vines spreading 72 to 96 inches and will be ready to harvest in around 100 days.
You can find ‘Moon and Stars’ seeds for purchase in an assortment of packet sizes at Eden Brothers.
Managing Pests and Disease
Once you’ve selected your varieties, planted your seeds, and are patiently waiting to harvest your crop, you’ll need to be on the lookout for damage caused by pests and disease.
This part of gardening is part and parcel of the process – and can even be quite satisfying once you’ve gained a bit of experience with it.
Make sure to practice integrated pest management, a method that takes a longer-term approach to the health of your garden.
Herbivores
It seems everyone’s a fan of watermelons – and that includes some of our neighboring wildlife.
Deer are fond of this fruit and will wreck your ripening crop if you haven’t deer-proofed your garden.
To keep these four-legged friends out of your melon patch, fencing is key.
Check out our article on the best deer fencing to learn more.

Perhaps surprisingly, coyotes also love this tasty and refreshing backyard fruit.
Fencing is a good strategy to keep coyotes out of your garden, but you will require a slightly different style than what you would use for deer.
Russel Link, wildlife biologist with the Maine Department of Inland Fisheries and Wildlife, explains that coyotes don’t jump over tall fences in a single bound. Instead, they climb them.
To prevent coyotes from getting into your garden, you’ll need to build a fence they can’t climb over – or dig under.
Link recommends starting with five-foot-tall fencing. Then he suggests adding outward-tilting 15-inch extenders to the top of the fence to prevent the canines from climbing over.
And to prevent them from digging under, extend the fence underground about eight inches, using wire mesh.
Alternatively, create an “apron” on the ground that extends 15 inches on the outside of the fence.
Insects
For many gardeners, insects may be more problematic than the furry, four-legged type of garden pest.
To prevent damage, it’s helpful to know which types of insects plague your garden, what they look like, and how to prevent them from destroying your crop.
Keeping insects under control is important not only because these pests can chew up your plants, but because they can also spread disease.
Melon aphids and spider mites can colonize leaf undersides and leaf tips, interfering with photosynthesis. If you notice either of these on your plants, remove them with a strong jet of water from your hose.
Another pest to be on the lookout for is the striped cucumber beetle. Prevent damage from these cucurbit pests by using floating row covers up until flowering – and with regular inspection of your plants.
If you notice pests, pick them off and destroy them.
Learn more about these and other insects that can bug your crops in our article on watermelon pests. (coming soon!)
Disease
Just like other garden plants, watermelons too can succumb to disease from time to time.
Prevention is your best line of defense. Here are some good preventive measures to take:
- Make sure to source your seeds or plants from reputable vendors. Unwitting seed savers may accidentally pass on disease from infected plants.
- Rotate your plants by crop families. Watermelons are members of the Cucurbitaceae family, along with cucumbers, squash, and other melons. Wait three years before planting from the same family in the same spot in your garden.
- Splashing water can spread disease, so irrigate at the base of plants with a watering wand or drip irrigation – don’t use a sprinkler!
- Avoid handling plants when they are wet, since this is an easy way to spread disease from plant to plant.
- To prevent disease from harboring in your soil, never compost or till under infected plants.
Now that you’ve familiarized yourself with these effective strategies for watermelon disease prevention, keep an eye out for brown lesions and holes in plant leaves, a sign of anthracnose.
If you notice vine tips wilting, fusarium wilt may be the culprit. There are resistant varieties to each of these fungal diseases, and starting off with these will give your plants an advantage over other cultivars.
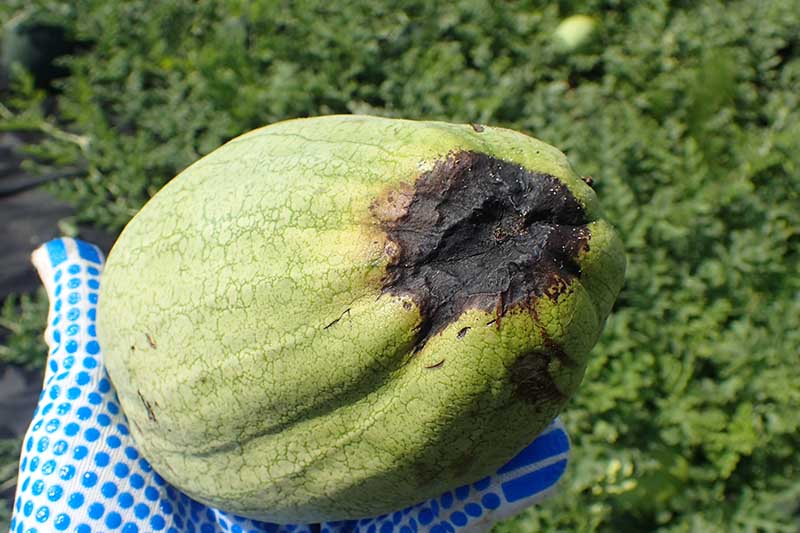
Also be on the lookout for blossom-end rot, a nutrient deficiency which also affects tomatoes.
Learn more about these and other common problems in our guide to fighting watermelon disease. (coming soon!)
Harvesting
It’s important to wait until your watermelons are fully ripe before you pick them. This is one fruit, unlike apricots or avocados, that will not continue to ripen after harvest.
However, watermelons can go from unripe to spoiled in just a few days, so be vigilant about checking them as they approach maturity.
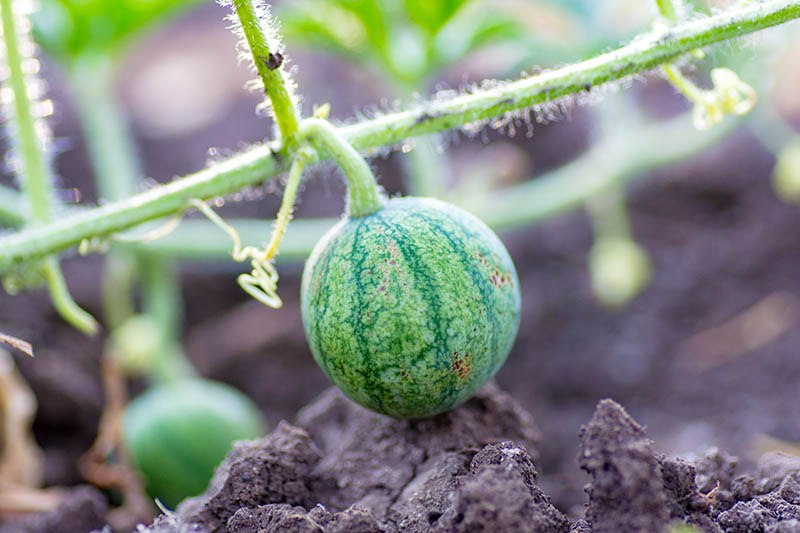
When you see the fruit starting to grow large, it’s time to check daily for ripeness.

When you plant your seeds, it’s a good idea to count ahead the number of days to maturity and mark this date on your calendar or in your gardening journal.
That way, when your fruit is approaching full ripeness, you can start keeping an eye on it and will soon be ready to indulge in a sweet, juicy slice of watermelon.
If the fruit has separated from the vine, or the vine is dead, go ahead and pick the fruit. It won’t ripen any further once it’s off the vine.
If the fruit is still attached to the vine, and the vine is alive, there are several different tricks you can use to decide whether a watermelon is ripe or not.
You may want to try out each – or all – of these methods and decide what seems to work best for you:
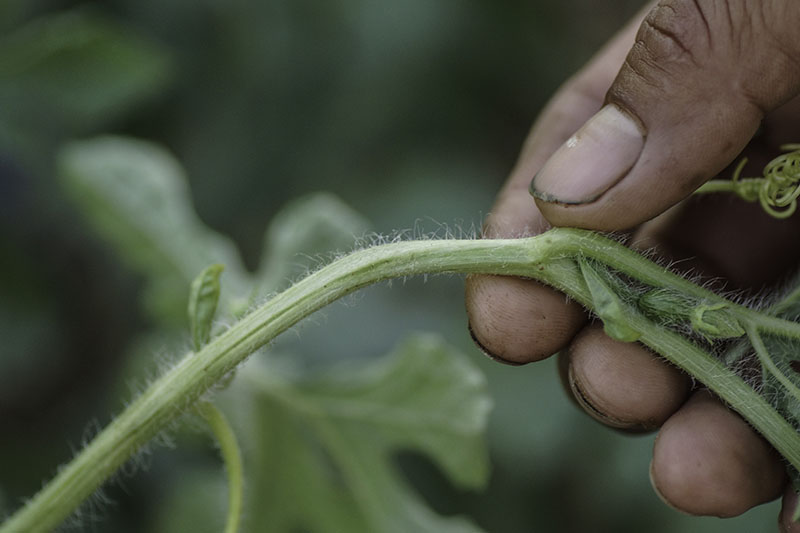
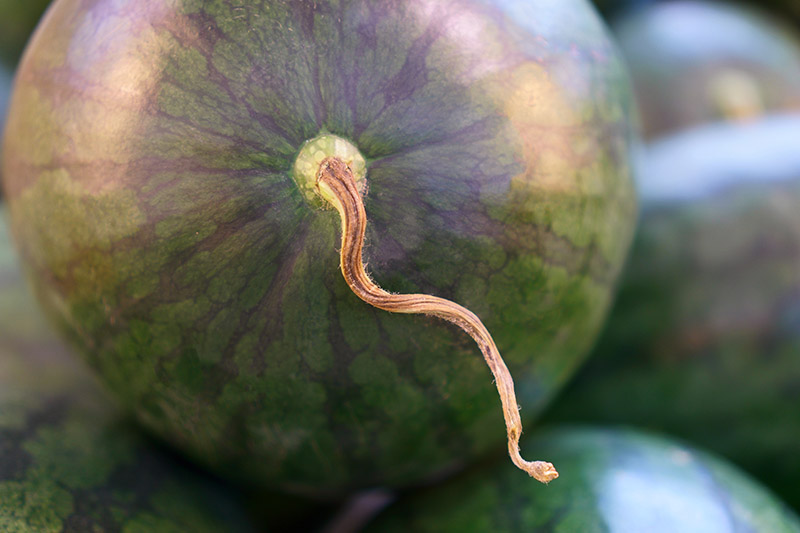
- Look for the curly tendril closest to the stem where the melon is attached. If it’s brown and dry, the melon is ripe.
- The leaf closest to that tendril should also be yellow or turning brown.
- Check the underside of the melon, which turns from light green or white to cream colored or yellow when ripe.
- Wait for the skin of your melon to turn from shiny to dull.
- The blossom end of the melon will soften when ripe.
What? No thumping?
“Thumping” is also a common way to judge whether a watermelon is ripe, but unfortunately this method is unreliable.
A dull thud is supposed to indicate that the fruit is ripe, but it’s not the case with all varieties.
In the case of some cultivars, a dull thud can even indicate that the fruit is overripe.
Another questionable testing method is the fingernail test, in which you scratch the rind with a fingernail to determine whether the fruit is ripe.
The problem with this method is that any damage to the rind serves as a channel for bacteria to enter, which can speed up the rotting process.
If you scratch your melon and decide it’s not ripe, you’re opening the fruit up to the possibility of disease.
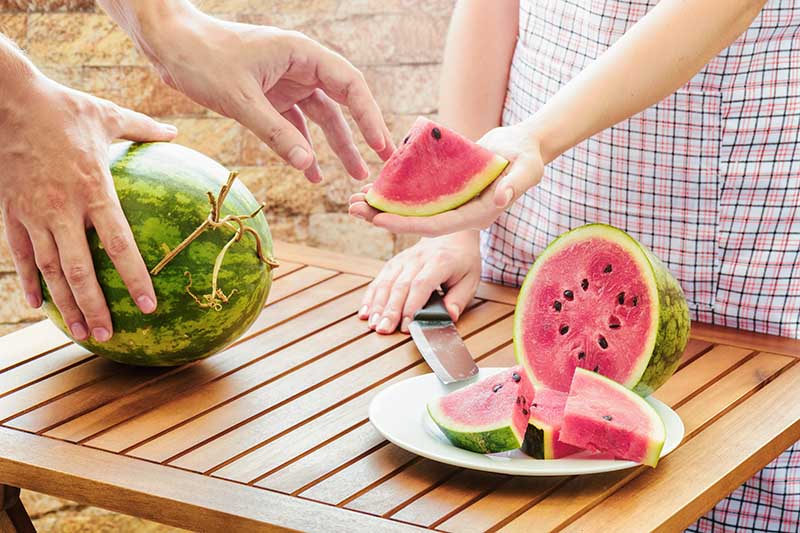
To harvest a ripe watermelon, use a sharp knife to cut the fruit off of the vine, leaving a two-inch-long piece of stem on the fruit.
You may have other melons continuing to ripen on that same vine, so be gentle as you cut.
Once the fruit is removed from the vine, handle it gently to avoid bruising or damage to the rind.
Find more tips on determining watermelon ripeness here.
Storage
After you have picked your melons, check to see if any have split or cracked during harvest – if so, these fruits should be used immediately.
Intact fruits can handle some storage. Freshly harvested melons will last seven to ten days when stored indoors at room temperature in the 68-72°F range.
According to Jim Shrefler and colleagues at the Oklahoma Cooperative Extension, watermelons can actually improve in flavor and color when kept at room temperature for up to a week.
Watermelons will keep for two to three weeks in a location with a temperature of 52-60°F and 85-90 percent relative humidity. This could be your basement or root cellar.
What about the refrigerator? Chilling injury can take place when the fruit is stored at temperatures below 50°F.
Once the fruit has been cut, it will keep in the refrigerator for up to five days in an airtight container.
Of course, you may prefer to eat your melon as soon as you harvest it.
Some people prefer it fresh from the garden, while others (this writer included) enjoy it more after it has been chilled in the fridge.
However you prefer your melon, just make sure you thoroughly clean the rind before slicing it open, since bacteria such as E. coli can be transferred from unwashed rinds to the flesh when it’s sliced.
Preserving
There are several ways to preserve this wonderful summer fruit so that you can enjoy it even in the depths of winter.
Drying
Drying or dehydrating is one way to save this fruit for later enjoyment.
Dried watermelon isn’t exactly commonplace in North America, but perhaps it’s ready to become the next big thing.
This dried treat is also called “watermelon jerky,” which should give you an idea of its leathery texture.
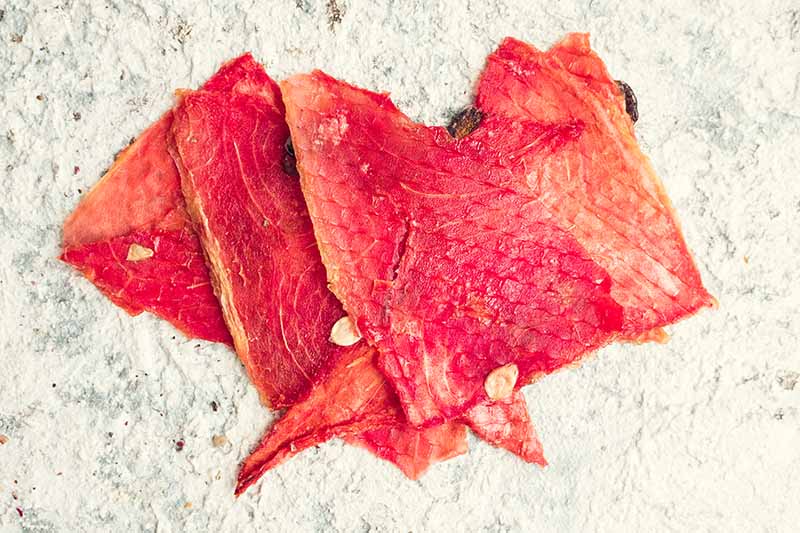
Drying fruit results in a more concentrated package of sugars and flavor, and watermelon is no different.
If you are using a dehydrator, refer to the manufacturer’s recommendations on how long to dry the fruit.
For watermelon, cutting it into half-inch-thick slices and drying for around 20 hours at 135°F is a good rule of thumb.
If you’d like to learn more about the process in greater detail, check out our guide to dehydrating fruits and veggies.
In Asia, watermelon seeds are eaten much like sunflower seeds.
You can try making your own savory seeds for a healthy snack. Prepare them like you would pumpkin seeds – you can learn how to do it on Foodal.
Freezing
If you prefer your watermelon fresh but have a bumper crop that you can’t eat all at once, you can freeze some of it.
You can learn about the best techniques for freezing fruit on our sister site, Foodal.
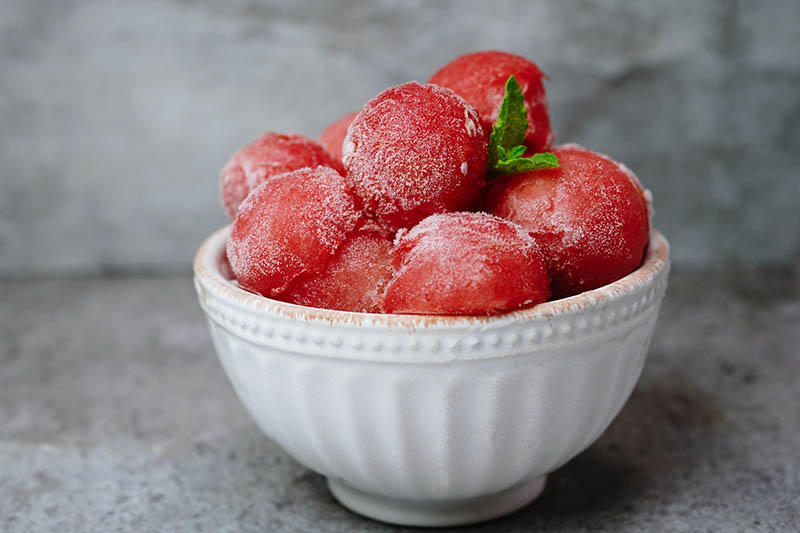
Freezing does change the texture a bit, so it’s best used where the flavor can shine but the texture no longer matters, such as in smoothies or slushies.
Or instead of freezing it in chunks, you could work some culinary magic on it first. Doesn’t watermelon sorbet sound delicious?
You can learn how to make sorbet out of any type of fruit on Foodal.
Canning
Watermelon can be canned in the form of pickles, jam, juice, or wine.
Since this fruit is a low-acid food, you’ll need to pickle it if you want to can it with a hot water bath, or use a pressure canner for non-acidic preparations.

Ready to be guided through the canning process? There’s a complete guide to canning foods at home also on Foodal.
Recipes and Cooking Ideas
Watermelon is so good to eat by the slice that many of us probably don’t think about adding it as an ingredient to our meals.
But if your thumbs are both bright green and you end up with a giant crop of homegrown watermelons, you might be open to some new ideas.
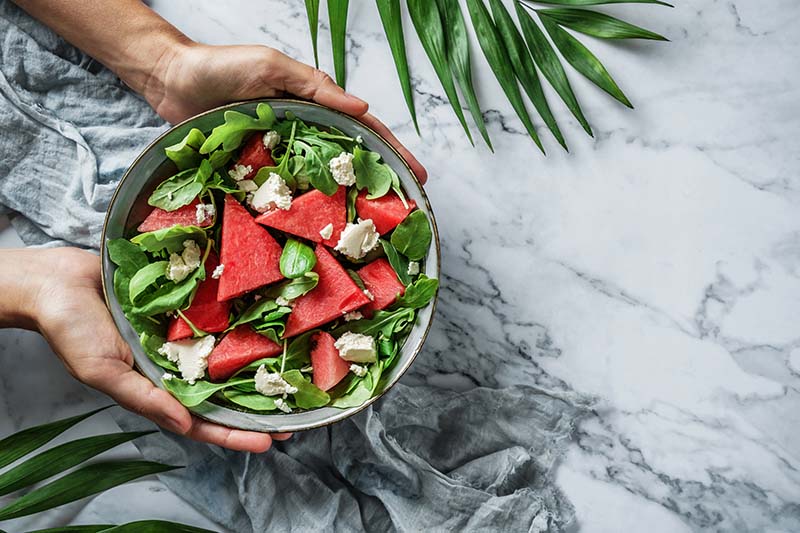
Here’s a thought – try using it as a salad ingredient. Personally, I love how the flavor of watermelon mixes with feta cheese and fresh mint leaves.
Watermelon provides flavor and texture in fruit salads, but to shake things up a bit, how about using a cookie cutter to cut shapes out of watermelon slices instead of going with standard chunks or balls?
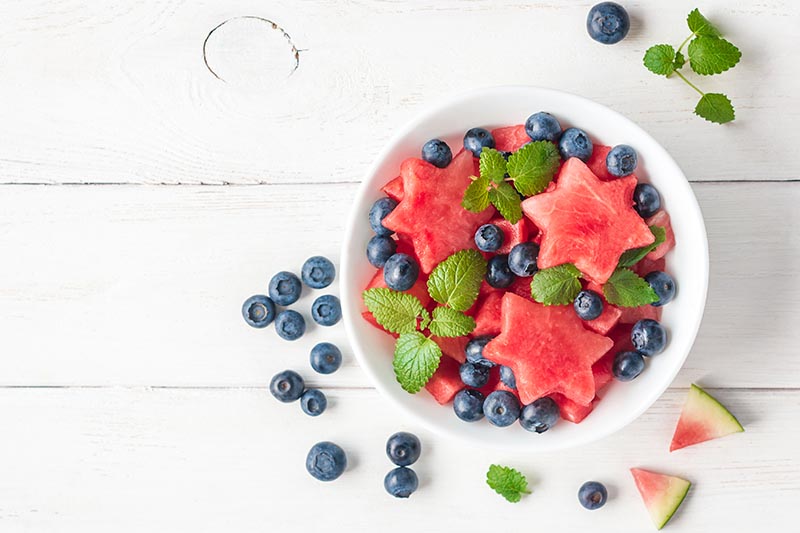
And while star-shaped watermelon pieces might thrill the kids (or your inner child), how about something for the adults?
This delicious recipe for watermelon daiquiris over at Foodal mixes light rum with sweet, frozen watermelon and fresh squeezed lime juice for a drink that is doubly refreshing.

Or leave the rum out and make virgin daiquiris instead.
Quick Reference Growing Guide
| Plant Type: | Annual fruit | Maintenance: | Moderate |
| Native to: | Africa | Tolerance: | Heat |
| Hardiness (USDA Zone): | 3-9 | Soil Type: | Sandy loam |
| Season: | Summer | Soil pH: | 6.0-7.0 |
| Exposure: | Full sun | Soil Drainage: | Well-draining |
| Time to Maturity: | 70-100 days | Companion Planting: | Buckwheat, cowpeas, nasturtium, radish, rice, scallions, soybeans, sweet clover, tansy, wheat |
| Spacing: | 3-6 feet, in rows 6-18 feet apart | Avoid Planting With: | Corn, sunflowers |
| Planting Depth: | 1 inch | Order: | Cucurbitales |
| Height: | 15-24 inches | Family: | Cucurbitaceae |
| Spread: | 10 feet or more | Genus: | Citrullus |
| Water Needs: | Moderate | Species: | lanatus |
| Common Pests: | Aphids, cucumber beetles, cutworms, flea beetles, mites, pickle worms, rind worms, squash bugs, squash vine borer, thrips | Common Diseases: | Anthracnose, bacterial wilt, cucumber mosaic virus, damping off, downy mildew, fungal leaf spot, fusarium wilt, gummy stem blight, papaya ringspot virus, phytophthora, powdery mildew, root knot nematode, scab, watermelon mosaic virus, zucchini yellow mosaic virus |
To Grow Watermelon Is to Love It!
How ’bout it, gardener? Are you ready to grow your own?
Once you’ve put a successful season of watermelon growing behind you, your appreciation for these fruits is sure to grow.
Are you growing watermelons in your garden? Let us know in the comments below!
While we’re on the subject of melons, why not hone your cantaloupe-growing skills too? We have just the articles you’ll need right here:
Thank you very much I never knew about this
Great article. Thanks for the tips
Thank you. This is my first year growing melons and I feel better having read this
Good gardening tips
Thanks a lot
Love from India
Hi Sourav,
Thank you for the kind message – I’m so glad you found this article helpful.
Best of luck with your watermelon growing!
I want to clarify, I should only have 1 seedling growing per mound?? Unlike squash that suggest 3 per mound.
Hi Marissa,
In the article I recommended leaving two seedlings per mound. Hope this helps!
Of growinh a water melon i grow it every year but they are smalllike a soft ball
I really appreciate you taking the time to educate us. You are very informative, but I am more afraid then ever. This process does not seem easy.
Hi Vera, Watermelons aren’t the easiest thing to grow at home, but they aren’t the hardest either. Please keep in mind that this article is intended to show you the ideal conditions for growing this fruit – so you can use it as a guideline. That doesn’t mean you can’t still give it a try even if your conditions aren’t perfect. I think the two most important things for you to focus on at first would be starting with the right soil conditions and choosing a variety that is well-suited to your location. We have an article on watermelon varieties… Read more »
One seedling of Sugar Baby came up! Now we have to dig out a bigger garden plot!
It’s always exciting seeing seeds come up! Best of luck with your ‘Sugar Baby’ and happy gardening!
I need you to pretend I’m a 3 yr old when answering this question, maybe 2yo. How many “seedlings” per mound? What does one seedling look like? My seedlings came up in groups. Like in batches that each have three stems. Is a single stem a seedling or the batch of 3? If each little skinny stem is a seedling and I’m only supposed to have 2 per hill… I’ve got waaaaay to many coming up and FAST!
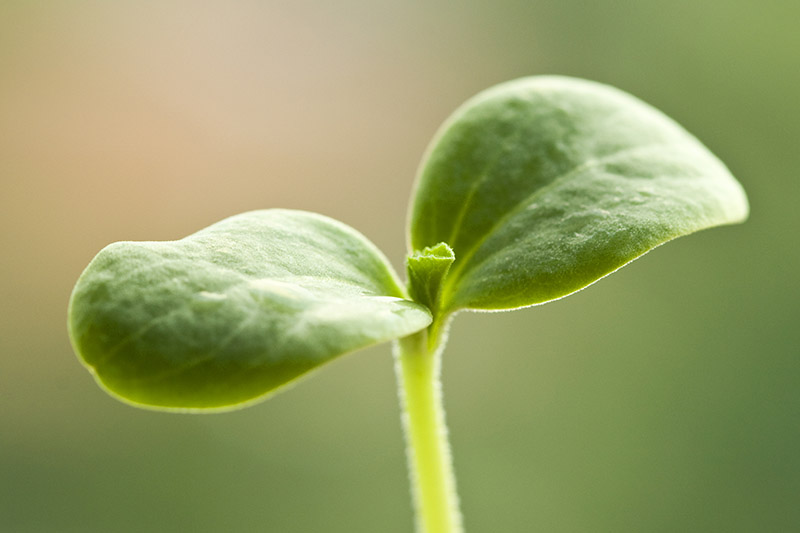
Hi Rauna, I’ll try to help you understand! So if you scroll back up in this article, the first photo in the Propagation section is a photo of a young seedling. It has one stem. Now if you scroll down a bit more to the Direct Sowing section, you’ll see three photos – the LAST of those photos in that section shows young watermelon plants. At this point they are no longer skinny little seedlings and have started to branch – yet each of those is just one plant (with 6 leaves each.) If your seedlings are still in the… Read more »
I planted the whole package of Sugar Baby watermelons…….and every single seed came up!!!! OMG I have over 30 plants!!! I’ve been giving them away to families down the street with kids so they can enjoy growing tiny watermelons for summer fun!
Deb,
Nice work starting your seeds! What a nice way to share your extra seedlings. Sounds like your neighborhood is going to be well-fed this summer!
Thanks for sharing!