

Nothing beats homegrown blueberries. Well, except for maybe one thing… more blueberries!
If you want to expand your berry patch – or get started growing blueberries – sure, you could go buy plants from a nursery, but why not try propagating your own bushes?
Doing your own propagation at home is so rewarding, not to mention cost effective. It’s worth a try.

We link to vendors to help you find relevant products. If you buy from one of our links, we may earn a commission.
In our guide to growing blueberries, we cover how to cultivate these plants in your home garden.
In this article we will cover four propagation methods. Here’s the lineup:
Whether you want to turn your existing plant into a row of productive bushes, or get started on your own berry patch, you can do so with one of these propagation methods.
Cuttings
Blueberries can be propagated via softwood or hardwood stem cuttings. Softwood cuttings are often the preferred commercial method, as they usually have better and quicker rooting success.

When taking cuttings, whether softwood or hardwood, always choose the strongest, healthiest mother plants and branches to harvest from.
To create a good propagation mixture that can be used for either type, combine equal parts of coarse sand, ground pine bark, and peat moss, or equal parts perlite and peat moss. Moisten before inserting the cuttings, but do not saturate the medium.
Make sure your container is at least four to five inches deep. You can use one-gallon containers or flats with deep cells.
While neither hard or softwood cuttings need rooting hormone to root properly, dipping the ends in a product like Bontone II Rooting Powder, available at Arbico Organics, just before sticking them in their holes can help to improve and speed up rooting.
Bontone II Powdered Rooting Hormone
Now let’s jump straight into it, with the details for your selected type of wood.
Softwood Cuttings
Softwood cuttings are those taken from the top of the season’s current growth on the upper parts of the mother plant.
The leaves at the end of the stem (terminal leaves) should be half-grown to nearly mature, and stems should be flexible.
If you take cuttings too early, when the terminal leaves are super soft and stems are really flexible, the cuttings may wilt before they can root.
If you take softwood cuttings too late, when the terminal leaves are mature and the second flush of growth has already started, you may see poor rooting.
A happy medium between the two will result in the fastest, best root development, perhaps a bit closer to semi-hardwood than softwood, if you want to be technical.
Cuttings can be taken in the late spring, during the first flush of growth, or from the fall flush. Spring cuttings are typically much more successful.
If you’d rather take cuttings later in the year when you are less busy in the garden, you might want to take hardwood cuttings instead, covered below.
Collect cuttings early in the morning if possible. Use sharp, clean pruning shears or a knife. If you wish, you may disinfect your tools before beginning with a solution of one part household bleach to five parts water.
Cut four- to five-inch sections of stem. Remove the lower leaves, leaving three terminal leaves in place. Don’t allow them to dry out.
Keep them moist and cool during and after collection by dunking cuttings in a bucket of water, or folding them in wet burlap.
Poke individual holes in the center of the pot. Place the cuttings in the pre-prepared, moist medium to a depth of about half to two-thirds of the cutting length and firm the medium around the base.
Place in a low light area, whether indoors or in a greenhouse, where the temperature is around 70°F.

Keep the medium moist. Either mist regularly to manage humidity, or cover with plastic, propped up to keep it off the leaves. Remove the plastic to let the cuttings ventilate for 10 minutes twice a week.
It can be hard to know if you are watering enough or too much during propagation. Become a sleuth to find out!
You can check whether you’re on the right track regarding moisture by gently removing the cutting from the medium and having a peek at the cut end.
If the medium is perfectly moist and aerated, the cutting should be forming a white to cream-colored callus and may have small white roots sprouting from the callus by the third week. Be careful reinserting if little roots are starting and avoid removing the cuttings once roots are developing.
If you’ve been overwatering, the cuttings won’t have formed a callus and might be sprouting sparse, weak roots. The cutting also might begin turning brown from the cut end up.
Once roots are beginning to develop, the medium will start to dry out quicker. To make sure you are providing enough moisture, press a finger into the soil. If it comes back cool and moist, perfect! If the soil is warm and your finger is dry, you’ll need to add water.
Softwood stems should root within six to eight weeks. Gently tug on a cutting to check for resistance. Resistance equals roots!
Once rooted, fertilize lightly with a complete fertilizer such as Dr. Earth Root Zone Organic and Natural Premium Starter Fertilizer, available at Nature Hills Nursery, at half the recommended rate, as young plants are salt-sensitive.

Dr Earth Root Zone Starter Fertilizer
Continue to care for your cuttings by maintaining even moisture in the potting medium over the summer months.
In the fall, prepare the young plants for the transition from their indoor home to life outside by slowly and gradually hardening them off.
Place in an area with indirect sunlight for one hour, and add an hour of outside time each day until they can spend an entire day out.
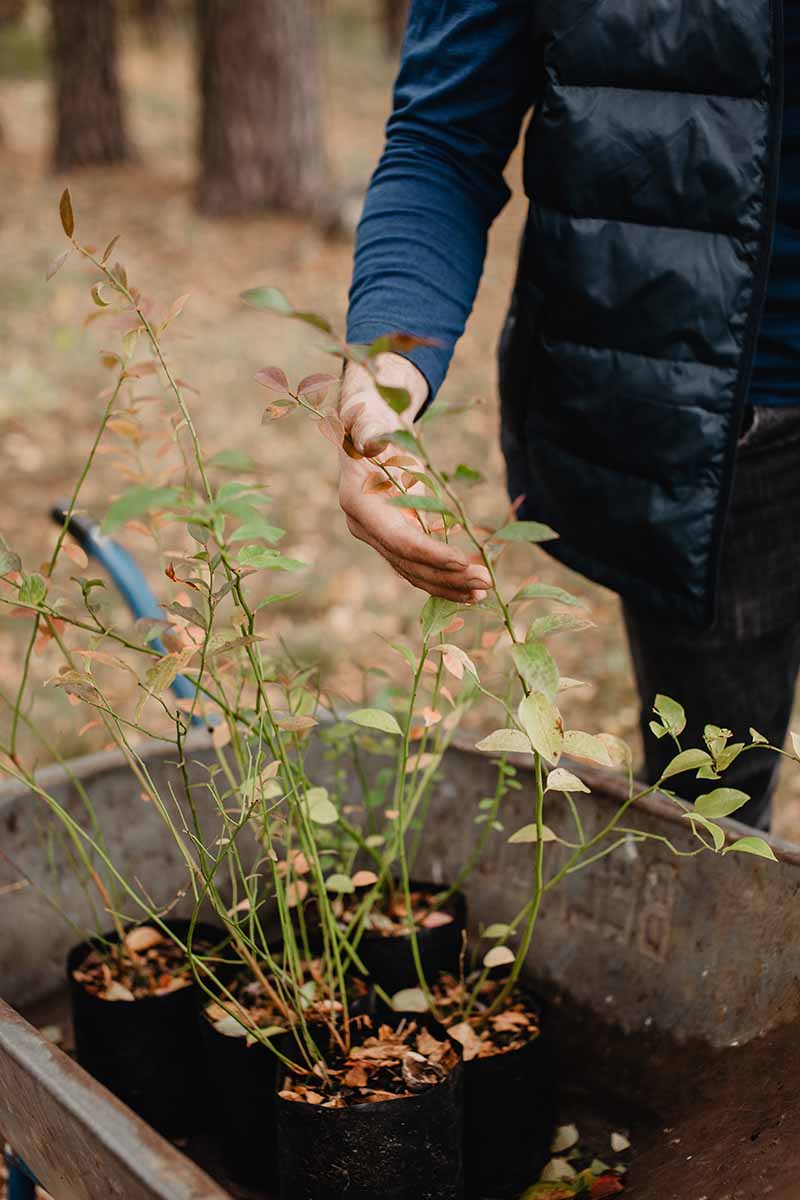
Once hardened off, you can decide to transplant directly into their permanent positions, or into larger containers filled with milled pine bark. Many growers prefer to let their plants grow larger in containers outdoors before transplanting into the garden.
Repotting can also be done as soon as the plants are hardened off.
Mix a complete slow-release fertilizer, such as Down to Earth’s Acid Mix (4-3-6 NPK), available at Arbico Organics, into the new potting medium.
Water well after repotting and keep plants growing in containers in a protected spot over winter, such as a cold frame or against a south wall. Larger plants may respond better to transplanting.
If you decide to transplant directly into the garden, keep the pots near their future permanent positions until they can be transplanted, and be sure to transplant before the ground is frozen.
Mix a half cup of the Down to Earth’s Acid mix fertilizer into the backfill soil, and water well after transplanting.
Top dress both containers and in-ground plants with one or two more applications of fertilizer during the next growing season, or mix into the surface of the soil. Water in well.
Learn more about how to transplant blueberries in our guide.
Hardwood Cuttings
Hardwood cuttings are taken during the dormant season and after a sufficient chilling period. Each cultivar requires a certain number of chill hours, so make sure this has been reached before taking cuttings.

I prefer to take cuttings in April, when many cultivars are finally finished chilling and temperatures are becoming ideal for rooting.
Using sharp, clean tools, cut 12 to 36-inch shoots (also known as whips) that are one-sixth of an inch in diameter, or about the thickness of a pencil.
Clip off an inch of the tip and discard it. Divide the whips into five- to six-inch sections. Cut the ends on an angle to help with insertion into the medium.
Look at which direction the buds on the stem are pointed; if they are pointed upwards you’ve got them oriented the right way.
Insert one stem into each pot filled with moist medium, about half to two-thirds of their length deep. Leave at least one shoot bud exposed and make sure each stem is placed into the medium right side up.
Firm the medium around the base of each. Set the pots outside in the shade to root, or in a greenhouse or cold frame covered with 40-70 percent shade cloth.
Bottom heat via a heat mat set at 68-70°F can help speed up rooting if you have the facilities. Make sure the area is well ventilated.
As long as the medium is kept moist, not wet, hardwood cuttings should form roots – eventually. Often, buds will break and leaves will form before they are even rooted! Keep a good eye on medium moisture during this stage, as they will die quickly if they dry out. Consider misting regularly.
Hardwood stems can take up to six months to root, so this method can be an exercise in patience. But in my experience, most of those taken in April will be rooted by mid July.
Once the cuttings are rooted – which you can check if you gently pull on the stem and feel resistance – apply a light dose of complete, diluted fertilizer with an NPK ratio of 15-30-4 or 13-36-13, or diammonium phosphate, every two weeks until the fall.
Leave the cuttings in their rooting location until the fall or early winter. Transplant into larger pots filled with milled pine bark, and let them grow for another year in the same location.
They should be strong and large enough to be planted in their permanent position by their second winter, before the ground has frozen.
Layering
Layering is a propagation method used as an alternative to taking cuttings. All you need is a flexible branch that will bend to ground level, moist soil, and some rooting hormone powder.
In the spring or fall, find a flexible young shoot, preferably on the outside of your plant. The stem needs to touch the ground at least a foot from the tip, so test the length by bending to the ground before making any cuts.
Once you have identified an appropriate stem, remove the leaves from the top 12-inch section, starting at the stem tip. Then cut a one- to two-inch-long slit in the leafless section of the stem, preferably through a leaf bud.
Sprinkle the cut with rooting hormone, such as Bontone II Rooting Powder.
Dig a shallow trench in the soil where the cut section reaches the ground, peg the shoot down and bury the cut with soil. The tip of the shoot must not be covered with soil.
Keep the buried shoot moist, but not waterlogged.
Within a year the buried section should have developed roots. The aboveground part of the plant should be green and putting on new growth, indicating that it has a good root system.
The new plant can be severed from the mother plant and either transplanted or potted up to grow on. As you would with other types of cuttings, to check for rooting, give it a gentle tug, or give it a wide berth and gently dig it up.
Either transplant to the garden or pot up to continue growing.
Seeds
You can either buy seeds or extract them from your own berries.

Extracting your own seeds is simple enough, but you need to realize that seeds from hybrid plants won’t result in plants with the exact same qualities as the parent.
If you want a specific variety or cultivar, it is best to purchase open-pollinated heirloom seeds, but these can be hard to find.
Pre-stratified northern highbush seeds are available via Amazon.
To extract your own seeds, start with seeds from blueberries that have been frozen for 90 days, either on the bush or in your freezer.

Add three-quarters of a cup of thawed berries to a blender, food grinder, or bowl, and add water until it is three-quarters full. Blend for 10-15 seconds, or mash completely, and set aside to let the seeds and pulp separate.
The seeds will sink, and the pulp will float. After 10 minutes, pour or scoop off the pulp and let it settle again. Repeat until most of the seeds have settled. Remove them from the water, and spread them out to dry on a paper towel.

Fill a three-inch-deep flat with moistened peat moss. Sprinkle the seeds evenly over top, or sow individually, spacing one inch apart. Cover with another thin layer of peat moss.
Cover the tray with newspaper and place in a warm 60-70°F location. Keep the medium moist but not wet.
Germination will take about a month. When the tiny seedlings start emerging, remove the newspaper and place in a sunny window or in your greenhouse to continue growing. Keep moist.
Once seedlings are two to three inches tall, remove each, being especially careful with the roots, and transplant them into their own little pots.
The pots should be two to three inches deep and filled with a mix of equal parts peat, sand, and potting soil. Water well after transplanting and keep in a sunny location indoors or in a greenhouse.
After two to three weeks, fertilize lightly with a complete liquid fertilizer.
Once all danger of frost has passed you can harden off your little blueberry plants and set them outside for the summer. Keep them well watered.
Transplant into the ground, or their own containers, in the late fall or in the spring of the following year.
Suckers
If you notice your bush is sending shoots up a few inches away from the crown of the plant, you can use these to vegetatively propagate new bushes as well.
Let these suckers grow for at least two seasons before dividing them from the mother plant in the late fall or winter before the ground is frozen. To do this, use a sharp shovel to separate off the root the sucker is growing from. Carefully dig eight to 12 inches deep around the sucker to remove the root structure and then rehome it.
Suckers usually have very small and underdeveloped root systems, and their tops will need to be trimmed harshly to even out the root-to-shoot ratio. Clip the shoots to the same length as the roots before transplanting, leaving at least two leaves in place.
You can plant suckers in their permanent position immediately as you would other transplants, or pot them up and let them grow for a season before transplanting.
Treat potted suckers as you would cuttings soon after rooting, by planting in a milled pine bark medium, keeping it moist, and placing in a sheltered location.
Can’t Get Enough of that Blue!
In the case of blueberries, more is always better.
Propagating your own blueberry plants is a fun, gratifying, and cost-effective way to go from owning a few plants to tending a full row of the blue-laden bushes.

Use cuttings, suckers, or layering to clone your best plants, or try seeds for the satisfaction of seeing tiny green sprouts emerging in your house or greenhouse.
Have you ever tried propagating your own blueberries? Tell us about your adventures in the comments section below!
Check out more of our helpful guides to growing blueberries next:
Thank you for the tips, every attempt I feel like I’m closer to success. I’ve tried hardwood in peat and aeroponic cloner last spring. This fall I took several softwood and trying again in a cloner with clay pebbles this time. I used cloning gel and clonex and so far no roots but looks like they may be starting to form, there’s little bumps forming which I hope will grow roots? 2/4 still healthy. I’m checking again tomorrow and will also see what my water’s pH is at, I haven’t seen a specific range recommendation but keep it more acidic.… Read more »
Little white bumps could be calluses, which form before roots. Try not to check too often because the tiny new roots are fragile. Hard not to, I know 🙂 Good luck with everything!!
Tried last fall….followed the instructions to a T, but something went wrong as all 15 cuttings died. I used the right cuttings for the time of year, the right medium to plant in. Kept the moister right, etc, but I think what may have happened is this. The directions I was following said to cover each pot with a plastic bag to retain humidity and moisture. Maybe the cutting got too humid, too wet as they all turned black over 2 months time. Boo Hoo
If they all turned black, it sounds like they probably did succumb to rot. We hope you’ll try again, moderating the moisture as needed!
Once it roots and starts growing over the summer. Can I just keep them inside in a room temperature environment over the winter or it needs to be outdoors in the winter. I’m in zone 7 nyc. I’m just afraid the hard winter will kill the young plant but I also know heated indoor spaces are bad too. Thanks
Hello Sherman! I’m in Zone 7 too, and it is odd to think that properly transplanted blueberry starts can weather these winters. But they really are cold hardy, even in areas where the temperatures are subzero, and should be planted out in fall. In our main blueberry-growing guide, you can learn more about the Zones where different types of blueberries grow best, but you’ll be happy to know all the types do well in Zone 7. Lucky us! If you like, you could plant highbush types in containers (we have these instructions for you) but even then they’ll do best… Read more »
I’m trying this now for the first time and am Clueless about how to go about it, other than your article! My parents planted an acre of 2 different varieties of Blueberry bushes about 35yrs ago, and the last 10 yrs have dwindled the amount of bushes down more and more bc they’re just tired of mowing and weedeating between rows, and the bushes are probably 20ft tall and my parents are just too old to be on ladders picking them in 90+° weather. My son called me a day ago and said when he was at their house, he… Read more »
Hello Sarah R, and good for you and your son for trying to save some of these family heirloom blueberries through propagation.
It would be best for you to follow the directions in the hardwood cutting section of this article, which is included here. Let us know if you have further questions. It may be necessary to return more than once to get the cuttings you need in the right season.
I wish you the best of luck, and hope you’ll keep us updated on your progress.