

Of all those garden chores we do, dividing plants might be one of my favorites. Not only does it make my hostas happier and healthier, but I get a bunch of new plants to fill up empty spots in my garden… for free!
There are several reasons to divide your perennials.
The first is if you want to reproduce your plant to put starts in new places or expand your existing bed. The second is to reduce the size of a plant if it’s growing larger than you prefer.
And the third reason is to refresh the plant if the center starts to turn yellow or become sparse, or if it isn’t sending up flowers.

We link to vendors to help you find relevant products. If you buy from one of our links, we may earn a commission.
Crowded plants can never reach their full potential, and let’s be honest: crowding defeats the purpose of growing ornamentals. Without enough space, plants look shabby and detract from the overall appearance of your garden.
Diving plants is a multi-purpose gardening endeavor, allowing you to improve the health of your plants while gaining free ones at the same time. If it’s time to divide your hostas, for whatever reason, we’re here to help.
Here’s everything this guide will cover:
What You’ll Learn
I can’t wait to get started, so here we go!
When to Divide Hostas
In general, most plants do better if you divide them in the spring or fall, hostas included.
The reason for this is that there is less chance of heat stress and of the plant drying out. Spring and fall weather tends to be more moist with lower temperatures than in the summer.
I personally prefer the fall because hostas are getting ready to go dormant and the leaves aren’t demanding lots of water and nutrients.
Flowering is usually finished, and the plant will have some time to hunker down and settle in before it needs to start growing again in the spring.

You do, however, need to be mindful of any unexpected frosts or hard freezes in the fall.
Provide protection by covering the plant in pine boughs or cardboard whenever the temperatures are predicted to drop below 33°F for the first few weeks after dividing to be on the safe side.
You can remove the cover as soon as the day warms up again.
In the spring, your plant is gearing up for the intense growing season, and is more likely to have stunted growth or to become stressed if you divide it.
If you choose the fall, you want to start on the job about four weeks before the first average expected frost date.
In the spring, divide when the shoots have emerged from the soil but haven’t yet unfurled. (This also happens to be the best time to eat the shoots, by the way!)

Having said all that, I’ve divided hostas in the middle of summer when they became too large for my garden, and they weren’t any worse for the wear. Don’t feel like you must wait if you really need to get the job done.
So, what’s the right age to divide a hosta? Some of the larger hybrids and cultivars can take four or five years to reach maturity.
Smaller ones mature in two or three years. Don’t divide before your plant has reached maturity if you can help it.
It’s not the end of the world if you need to prematurely divide a plant that is becoming pot-bound or if you want to propagate a new plant quickly. Just know that your plant will take a bit longer to reach maturity as a result.
Preparation Tips
Assuming it’s not raining, give your babies a nice, long drink the day before you aim to start your work.
You want the soil to be workable and loose. You don’t want it to be too wet, however. If the ground is soggy from lots of rain, wait until it dries out a bit.
Then, trim away any yellow or dead foliage if the leaves are present, and any scapes (the flower stalks).

Before you dig up your existing plants, it helps to prep the place where the divisions are going to be planted, assuming you’re going to be replanting the divisions and not just reducing the overall size of your plant.
Doing this results in less shock, since there is less time for the roots to be left exposed to the elements.
For tips on setting your hostas up in the ground or a container, read our growing guide.
When deciding where to move your plant, don’t try to take one from a shady spot to a sunny one during the spring or summer (another reason why I prefer to do this garden task during the fall).
While an established hosta can often handle quite a bit of sun, a new division will likely suffer sun scorch and could even die.
If you want to take your divisions to a sunnier spot, put them in a container first and then gradually move them into the sun over a period of several weeks.
Every couple of days, move the container to the sunnier location in increments of about 15 more minutes of exposure each time. This will help it to adapt to the sunnier conditions before you transplant.
Diving Your Clump
Pull your spade out and let’s start. If you’ve been using your spade in other parts of the garden, it’s a good idea to sanitize it first. Wipe it down with a solution of one part bleach to 10 parts water to avoid spreading any diseases.
Now, dig around the entire perimeter of the clump about six inches out from the stems. Then, shove your spade under the plant and tilt the handle back toward yourself to create leverage, and ease the plant out of the ground.

On a large, fully mature plant, the roots can extend downward up to 18 inches or so, so dig down as deep as you can.
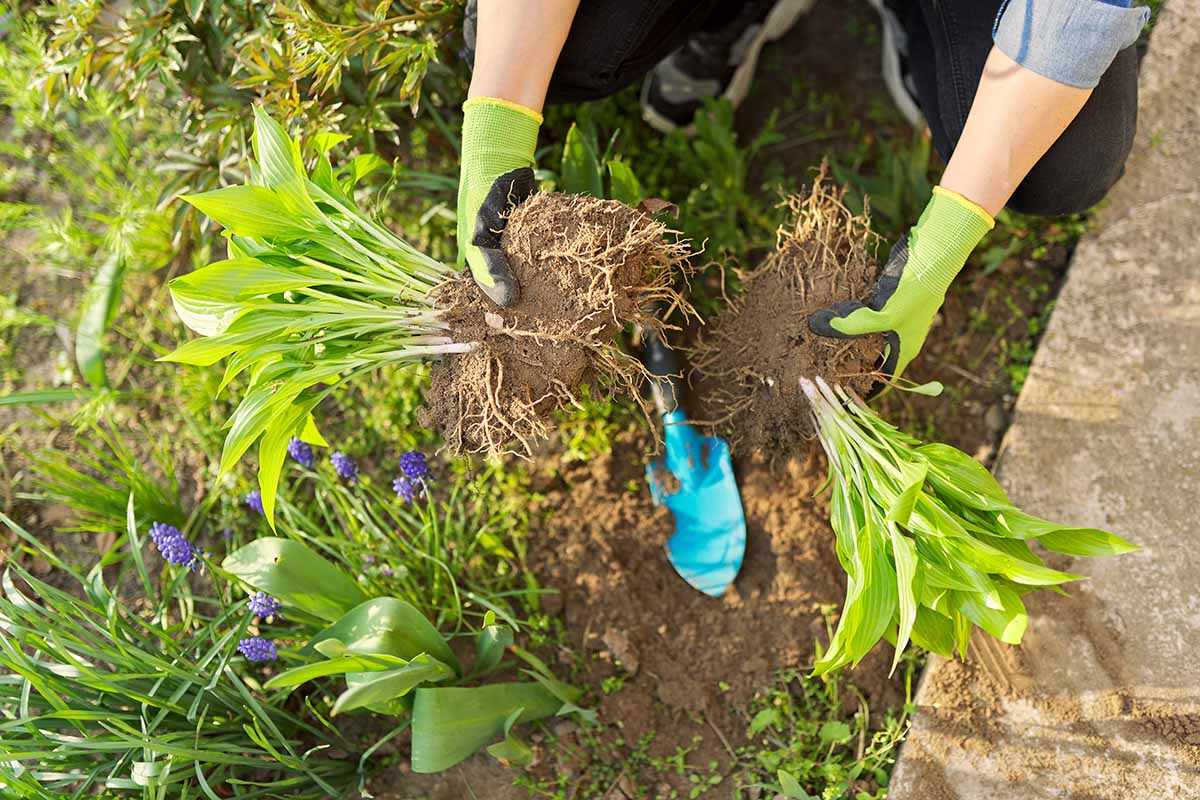
Your aim is to get a good chunk of the root system out. However, as long as you get at least some intact rhizomes, your divisions will likely still survive. That’s one of the wonderful things about hostas – they’re tough.
Pull the clump out of the ground and put it on a tarp, cement patio, or lawn in full shade. Rinse away the dirt from the roots and examine them. Trim away any that look dead or mushy.
You can skip this step if you desire, though it’s particularly useful if you’ve had any sort of rot or fungal issues in the garden.
The soil can act as a protective barrier, so don’t rinse it away if you’re transplanting in the summer while your hosta is actively growing.
Now that you can examine the roots clearly, it’s easier to tell where to divide the plant. Squat down and really look to see where the roots attach to the rhizomes, and the rhizomes attach to the stems and leaves (the crown).
Be aware that a few species have fibrous roots rather than rhizomes, so don’t panic if you can’t find them!
As long as you have some rhizome attached on the varieties that do have them, the crown will likely reemerge and put on new growth after transplanting.
But just to be safe, I like to get a big clump of rhizome and a few buds in each clump that I divide. Typically, I make about four divisions from one 18-inch-wide clump.
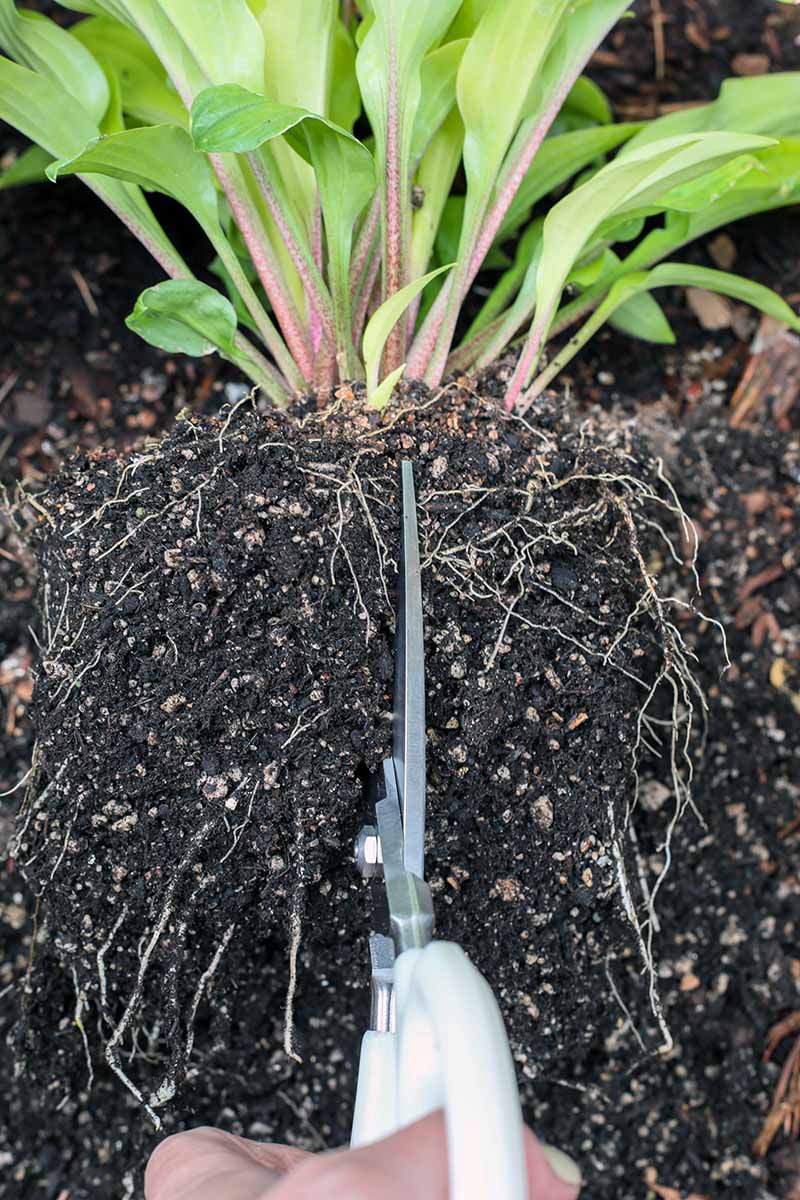
To separate the roots and crown, make sure your tools are clean as described above.
Use a sharp knife, scissors, or the spade you dug the hosta up with and sever the plant at your chosen spots.

If you’ve had rot or fungal issues, now is the time to treat the roots with a copper fungicide dust. Lightly dust all of the roots and the base of the crown before you put the whole thing back in the ground or in its container.
Speaking of copper fungicide, this stuff is a lifesaver. I always keep some in my gardening kit, since it works against a massive range of fungal diseases such as rust or blight. It’s also safe for use in organic gardens.

Bonide Captain Jack Copper Fungicide
If you don’t have any yet, you can purchase one- or four-pound containers of this product from Bonide at Amazon.
Now, it’s time to put those divisions in their new home. Treat them as you would any young transplants, which you can read more about in our guide.
Aftercare
Heat and direct sun are going to be your biggest challenges when helping divisions to become established.
Keep the divisions watered well, and don’t let the soil dry out.
If you stick your finger in the soil and it feels dry up to your first knuckle, it’s past time to water. You might also want to mist the foliage if you have a hot spell.

An inch of wood or straw mulch can help the soil retain moisture.
Don’t fertilize your hosta for a few months after dividing. If you completed this process in the fall, you can start your normal fertilizing schedule in the spring.
A Healthy Hosta Is a Happy One
Dividing isn’t just a way to get free plants. It’s also a way to keep your hosta healthy and looking its best.

Fortunately, for those of us who are lazy gardeners from time to time (speaking strictly for myself, here), it’s not a difficult task.
Still, if you run into any problems, come back here and share your concerns in the comments section below. We and the members of our helpful gardening community are ready to help.
Hopefully, you feel prepped with all the info you need to tackle dividing your plants. And for more information on growing hostas in your garden, check out these guides next:
I just moved to a house that has hostas in the flower garden, should I wait to see what everything looks like before I mess with anything? It seems like there are several clumps growing in a relatively small area, but I don’t want to ruin anything that the previous owners might have cultivated.
(I tried attaching a picture, not sure if it did or not)
My hosta is huge, it has been left to grow and has never been divided.
Is there a way that I can dig out part of the plant to replant without removing the entire plant?
Thank you
Hi Kate, you sure can. Instead of lifting the plant out of the ground, just use your shovel to make a cut through the section on the outside (not the center) of the plant that you want to remove. Cut all around the circumference of the section and then place the shovel on the outside of the plant and wedge the section out.
Replant this new section and fill in the hole you left behind with soil.