Looking for an indoor solution for small-space edible gardening? You’ve come to the right place.
For the first time since I was a teenager, I’m living in an apartment. It has its benefits, such as having less to clean and no outdoor maintenance to do, but there is one large, looming downside – I can’t have a garden here.
Many people might not mind this, as they’re perfectly happy buying all of their food from the grocery store… but I’m a gardener by nature, and as you might imagine, this is a big adjustment for me. My many years of personal experience are fueled by a deep passion for plants.
It hasn’t been easy to continue to fuel that passion here in an apartment without closing my family in among the leaves and vines of a vigorous potted jungle, but one product has provided an opportunity to exercise my green thumb while avoiding overcrowding: the AeroGarden.
We link to vendors to help you find relevant products. If you buy from one of our links, we may earn a commission.
Perhaps you’ve heard of these hydroponic indoor gardening systems already, or maybe you haven’t. Either way, you’re about to learn all about gardening indoors with one of these cool little units!
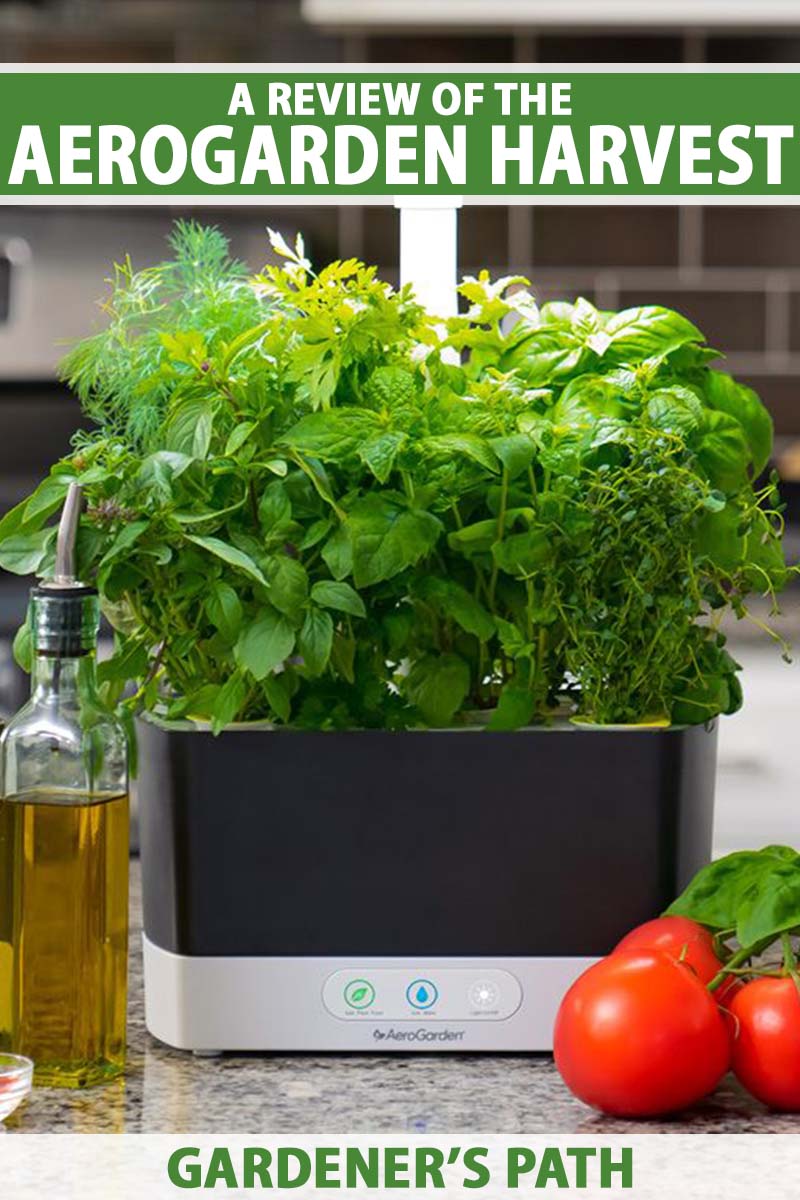
Aerogarden Harvest Review
What Is an AeroGarden?
If you’ve seen any of the many AeroGarden models in stores or online from retailers such as Walmart or Home Depot, you might have been curious about how they work.
If you haven’t had the opportunity to see one in person, or try it for yourself, then you might not know what to expect – and that’s where we come in, with this review!
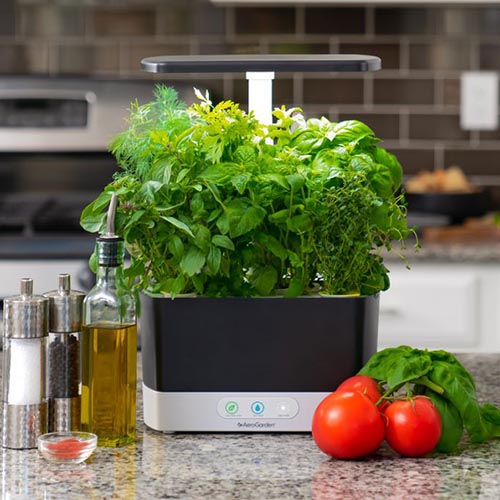
Each model has enough space to grow a variety of plants, including salad greens and herbs, small peppers, and even tomatoes in select units, such as the Farm 24 XL, available via Amazon.
If you have space on the kitchen counter or a table where you can set up a unit, you can have an indoor mini-garden that’s perfect for growing edible produce hydroponically, no sunny window required.
But let’s get back to the basics. The AeroGarden is essentially an indoor countertop hydroponic system.
The AeroGrow company first introduced their indoor systems in 2006, so they’re tried and true, with over 15 years of market tenure.
For people with the urge to garden who have limited or no outdoor space, or those who live in inhospitable regions for gardening throughout the year or in the cold winter months, they’re the perfect choice.
Hydroponic systems replace soil with water as the growing medium. Plants would normally root in the soil and draw water and nutrients as they grow and develop, but in the AeroGarden and other hydroponic systems, water delivers dissolved nutrients instead.
The Harvest model is the one that I tested for this review. It is available from a variety of retailers including Amazon, and direct from the manufacturer as well.
You simply install pre-seeded planting cells into holes in a platform where they’ll remain submerged in water, and away you grow!
The Harvest model has spaces for six planting cells but other models can accommodate more or less, such as the Bounty with 12 spaces, the Farm 24 with 24 spaces, or the Sprout with three spaces.
You can also choose to plant fewer cells at a time if you’d prefer, such as when you’re growing large plants with a broad spread, like tomatoes or peppers.
All of the available models come in several versions including basic, elite, plus, and XL, and in slim or 360 versions with a more compact, round footprint.
Most units come in white or black, and some in sage green, all with a modern look and comprised of materials that also make the units easy to clean.
The elite units have additional features, such as a dimmer for the grow light and voice compatibility with Amazon’s remote assistant, as well as a vacation mode. They are also available with a sleek stainless steel finish.
Accessories for the units are also available, such as a water reservoir, and a spacer kit that allows you to close off holes in the planting deck if they’re unused.
The water reservoir, called the AeroVoir, available via Amazon, is designed to refill fresh water as needed rather than having to frequently refill it by hand.
It holds 1.3 gallons of water and has a slim profile that makes it ideal for display on a countertop, measuring 13.5 inches high by 9.5 inches deep and four inches wide.
Let me tell you more about what comes with the Harvest unit, and what’s required to set it up.
What’s Included
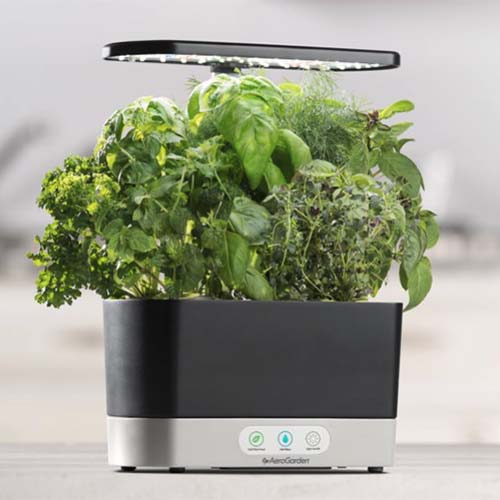
The Harvest model is one of the midsize base units made by AeroGarden. It’s great for those with limited counter space because it only takes up about one square foot of area.
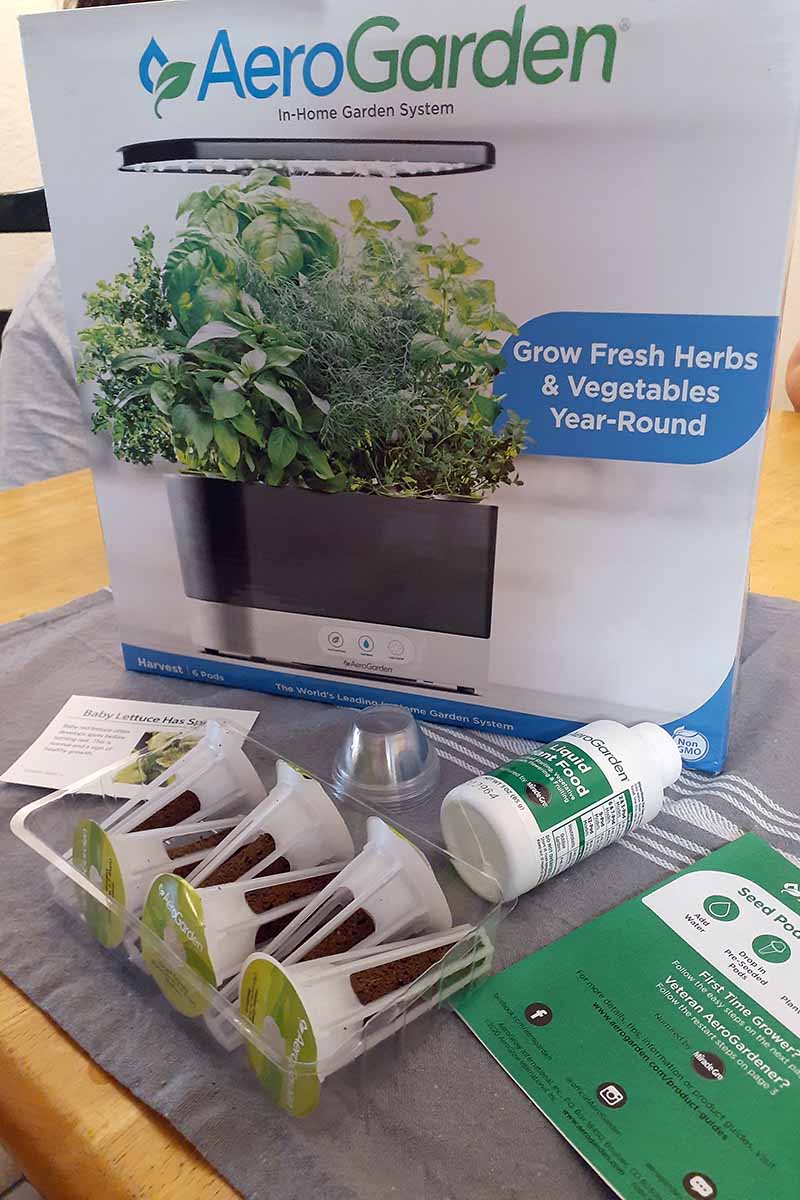
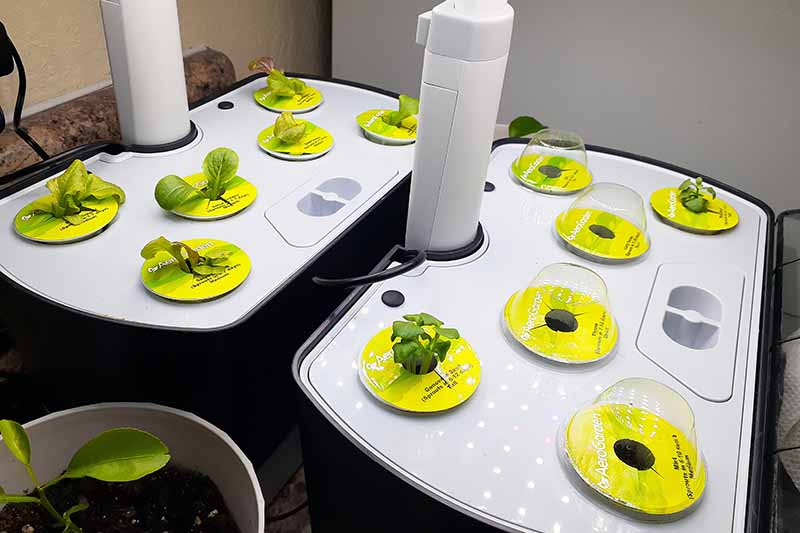
I tested two units, each with a different seed kit. Both units come packaged in a box with all of the required parts and accessories included, and seed cells come in packages of six for the Harvest model, pre-loaded with seeds for growing salad greens, herbs, flowers, veggies, or a customized mix of these, curated to your liking.
Basic Harvest countertop units are made from plastic, and available in black, white, or sage.
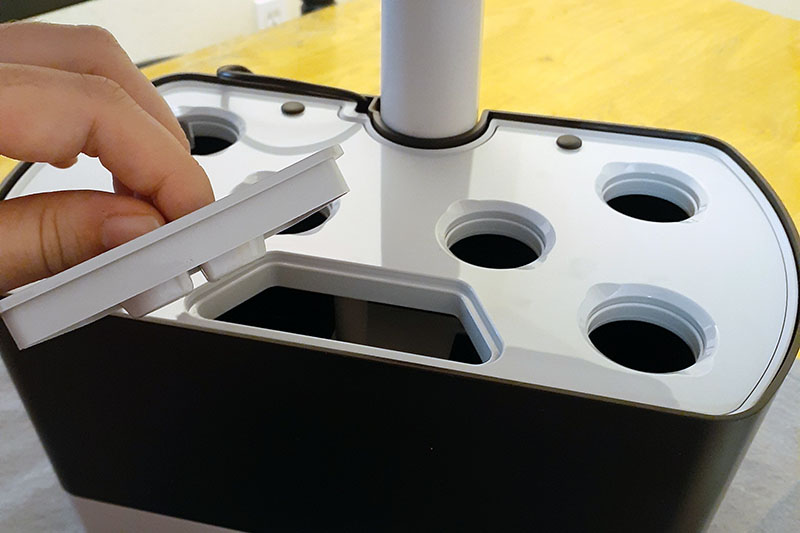
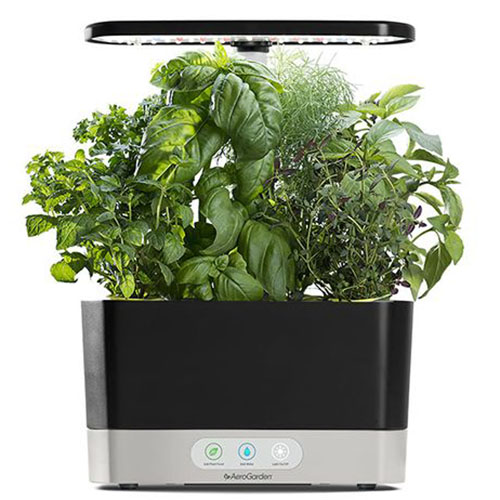
The Harvest is comprised of a lower reservoir, which has controls at the bottom; a removable grow deck with six holes to insert the planting cells; and an attached, adjustable overhead light panel with red, white, and blue 20-watt LED grow lights.
The unit has two indicator lights that flash when the water reservoir is getting low and needs to be refilled, or if it’s time to add more plant food.
The third light on the control panel doubles as a touch-sensitive on/off switch for the overhead light, which may be activated or deactivated by passing a finger over it.
An A/C adapter plug, and a couple booklets containing instructions, tips, and other information, are included with each unit as well.
Comprehensive guidebooks, instructions, and troubleshooting tips are also available via the Resources section of the AeroGrow website, under the headings titled Guides and FAQs.
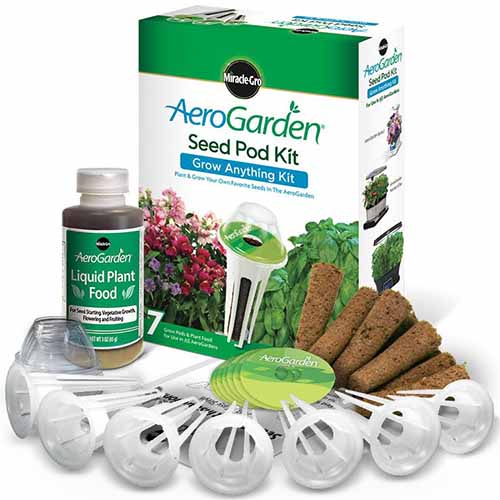
Seed pod kits may be purchased separately, though the units also include a starter kit with purchase. I received Gourmet Herb and Salad Greens kits.
Other featured seed kits include Cherry Tomatoes, Heirloom Salad, International Basil, Microgreens, Spicy Microgreens, Italian Herbs, Pesto Basil, Spring Flowers, and Cascading Petunias.
You can also choose from Green Pepper and Green Smoothie mixes, Winter Wheatgrass, Swiss Chard, Fairytale Eggplant, and Jalapenos, just to name a few, or choose to customize your own seed kid in a given category – herbs, flowers, veggies, and so on – by selecting each pod that you’d like to include individually.
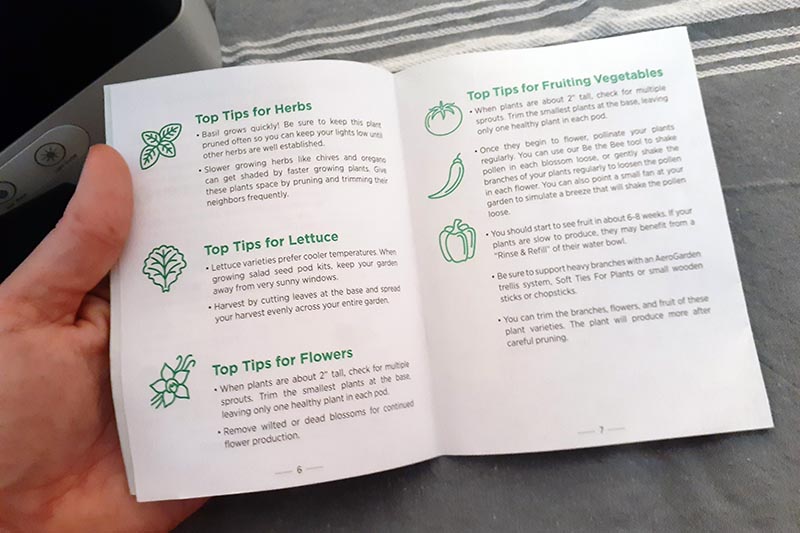
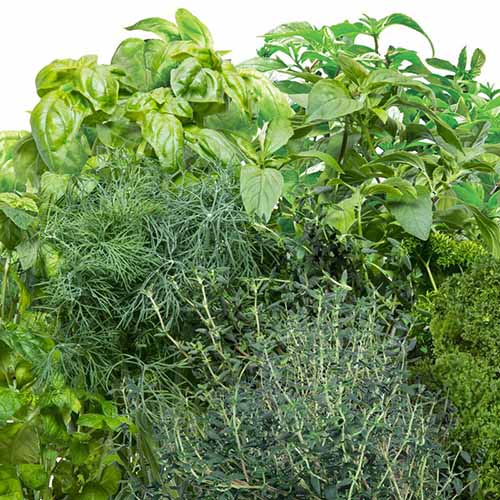
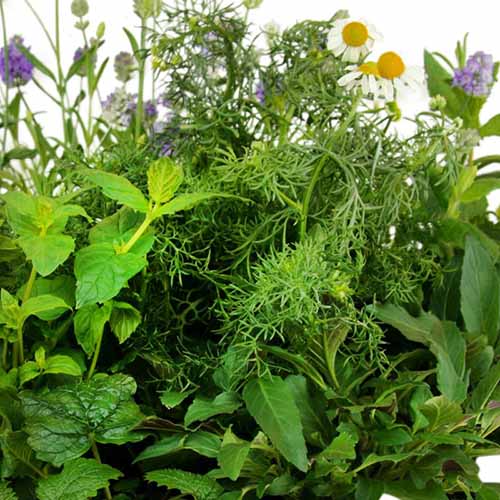
The Gourmet Herb seed pod kit includes six cells, labeled individually with the name of each variety, including Thai basil, curly parsley, Genovese basil, dill, mint, and thyme.
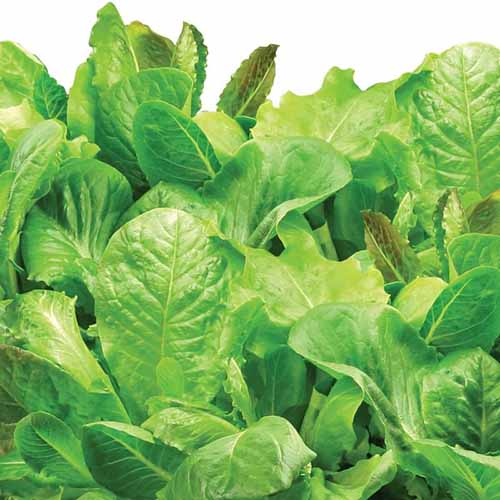
The cells included with the Salad Greens kit have labels attached, but they simply read, “salad greens” rather than noting each specific variety. I consulted the AeroGarden website and found that the kit includes red and green lettuce, butterhead, and romaine varieties.
I’m interested in trying the Japanese Greens for my next round of planting. That kit includes a set of three pods pre-sown with mizuna, tatsoi, and shungiku seeds.
A Fresh Tea seed pot kit is also available, which comes in a six- or nine-pod set including mint, chamomile, and lavender.
Each label is printed with an expected timeframe for germination dependent upon the seed type, such as salad greens which are noted to take one to seven days to germinate, or parsley which is expected to take two to three weeks.
The labels also help to prevent algae from growing in the sponges and water reservoir, which can damage the plants’ roots and the mechanical parts of the unit.
Some cells, like the ones sown with herb seeds, also indicate the anticipated mature size of the plant as small, medium, or large. This helps with figuring out where to plant the cells, as the instructions indicate that larger plants should be placed at the back.
Each cell is comprised of a plastic chamber that contains a cylindrical sphagnum peat moss grow sponge, which is dry at the time of receipt.
The seeds are already sown inside the sponge with a dab of sticky solution that holds them in place, so they don’t shift or get lost in shipping.
Unseeded planting cells filled with sponges are also available for purchase, so you can plant the seeds of your choice.
The Grow Anything seed pod kit comes with everything you need – including plant food, grow domes, and protective labels to top the cells.
You could purchase some day-neutral strawberry seeds, for example, and plant them in the sponges to grow your own berry patch on the kitchen counter! Strawberries are commonly chosen for hydroponic growing.
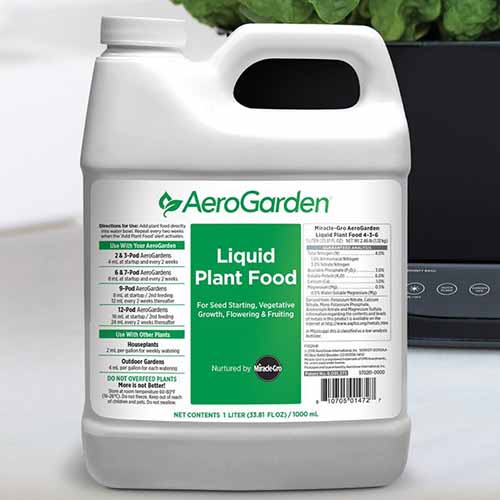
A small bottle of Miracle-Gro liquid plant food, small plastic humidity domes to place over each cell for sprouting, and a booklet of instructions for planting are also included with each seed kit.
Large liter-size bottles of plant food are also available direct from AeroGarden. The liquid fertilizer has an NPK ratio of 4-3-6.
The AeroGarden limited warranty covers any defects in materials or workmanship for one year from the date of original purchase.
Warranty claims may be processed by contacting AeroGrow customer service, and you can feel free to contact them via the website with any questions you may have as well.
All told, I was excited to get started, and I employed the help of my children to begin assembling the kits.
First Impressions
The Harvest countertop unit is smaller than what I had pictured before receiving it, and very lightweight before it has been filled with water.
The total height of the unit when the light is fully extended is 17.4 inches, with a depth of 10.5 inches and a width of 7.5 inches.
It is sleek and modern looking, and I really like that the power switch on the control panel may be activated without having to press on it.
Some appliances that I’ve had with a similar switch wore out and the plastic surface cracked over time with repeated pressing. But there’s no need to worry about that with this unit!
The power cord, which is a class 2/6-watt type, is six feet long, so it can easily reach an outlet without coming up short.
After filling the unit with water, it became considerably heavier, but I was glad that it was lightweight enough to still be movable when filled. It feels very sturdy overall, and doesn’t slosh around much if you need to move it.
The overhead light hood is mounted on an adjustable post, which is a very useful feature as it’s relatively easy to move up or down with a simple pressure switch located at the back of the unit.
The light post allows the light deck to be moved anywhere from four inches above the plants to 12 inches.
The switch is easy to depress, so I would imagine it could work for people with limited coordination or mobility as well.
Setup
After I spent a few minutes reading through the included booklets and familiarizing myself with all of the components, I set out to put the thing together.
The AeroGarden units are advertised as being exceedingly simple to assemble, setting up in minutes, and I must say that I fully agree. It took me less than 15 minutes to set up two kits, even with the kids helping. No tools are required for setup.
I simply opened the box and placed the unit on the table on top of a kitchen towel, in case of any spills.
We added the deck where the seed cells are installed, and used the switch at the back of the lighting unit to move it up and out of the way. Extending it fully gave us enough room to work below it.
Then I added the water to the reservoir, which took 2.4 liters, or a little more than half a gallon of water to fill. The water level indicator inside the unit is clearly visible, so you can easily avoid over- or under-filling the bowl.
There is an opening at the front of the platform with a small removable lid, so you can pour the water in that way, or you can remove the platform if you find the opening to be too small.
The instructions recommend using a container with a spout, such as a watering can. A no-spill watering jug is also available direct from AeroGarden.
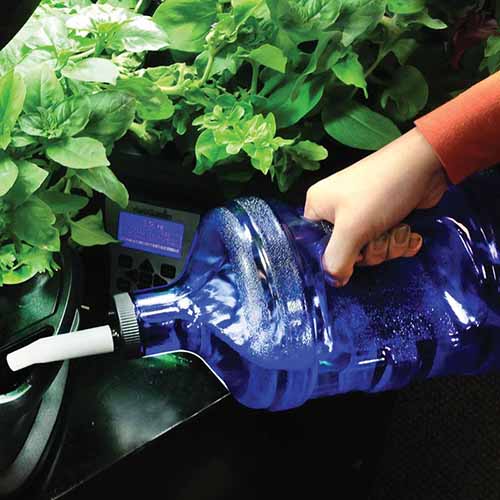
We used room-temperature distilled bottled water, according to the instructions, to be sure that we weren’t adding impurities and minerals like chlorine, salt, calcium, and metals from our tap water, which is very hard.
Minerals and impurities in hard, softened, or well water might damage the pump inside the unit over time.
According to the instructions, tap water may be fine to use in some cases, though distilled water is best as it creates the best pH balance when the plant food is added without adding anything extra.
The instructions also recommend emptying the bowl monthly and refilling with fresh water, as the plant food and dissolved material can create a slimy residue or buildup.
It may be a little challenging to remove the deck when the plants attain a large size, because the roots can become thick and tangled inside the bowl.
After the unit was full of water, we installed the seed cells. They slid in easily, and soon they were all in place and soaking up water into the peat sponges.
You could also lift the platform, install all of the cells, and put it back into place all at once rather than adding them individually as we did.
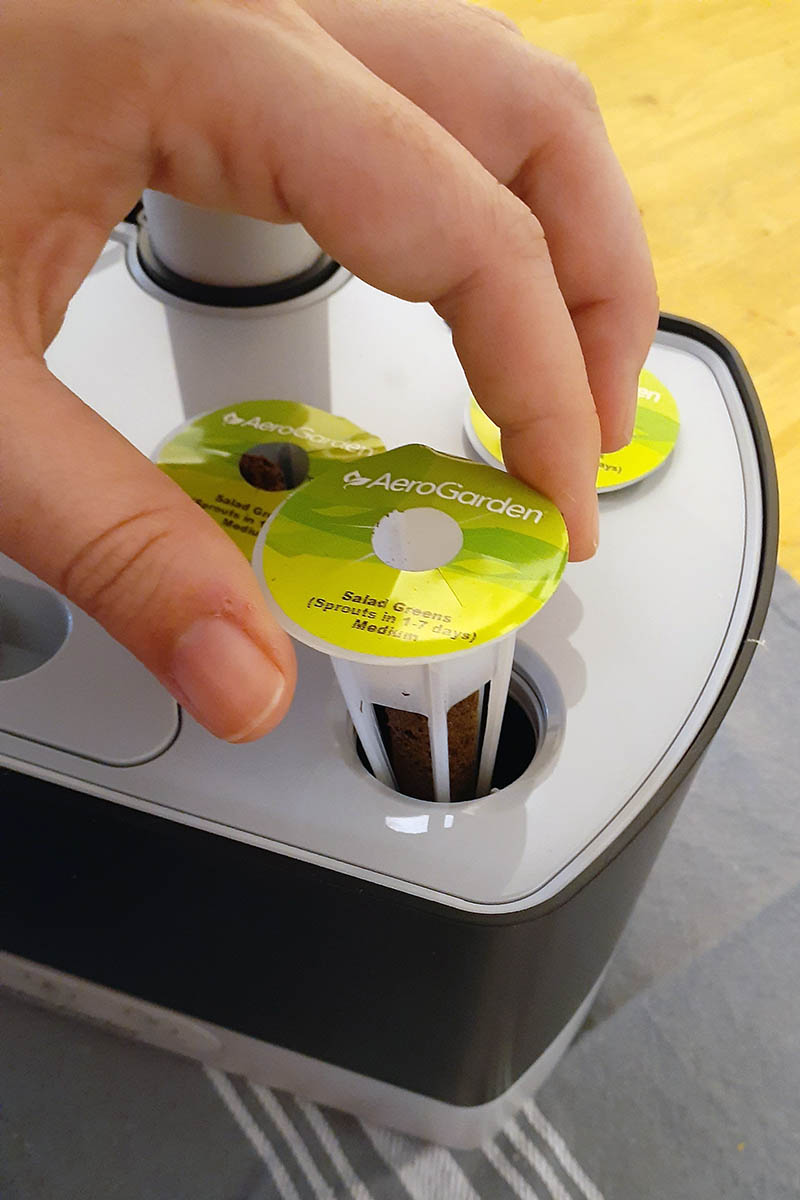
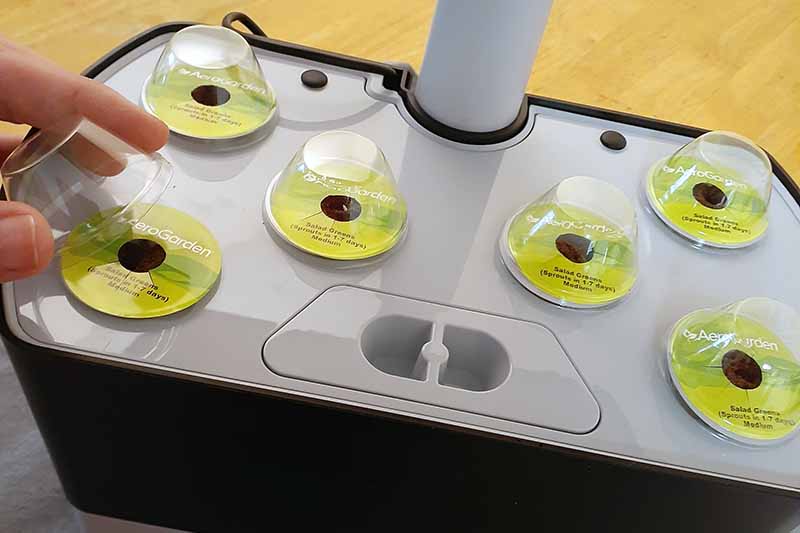
I let the sponges saturate for a few minutes and then added the reusable and recyclable grow domes, which sit loosely on top of each cell and help to hold in humidity.
The instructions note that the domes may not snap on, and in my experience they did not, so I didn’t have to pry them off or disturb the seedlings at all to remove them once the seeds sprouted.
The instructions note that two caps full of the included liquid plant food should be added to the water reservoir after the cells are in place, so I measured two out and poured them in. This was the only step that I needed my kitchen towel for, as the cap dribbles a bit when you pour.
If you’d prefer to prevent any potential spills, Easy Feed plant food dispensers are available in packs of three from AeroGarden.
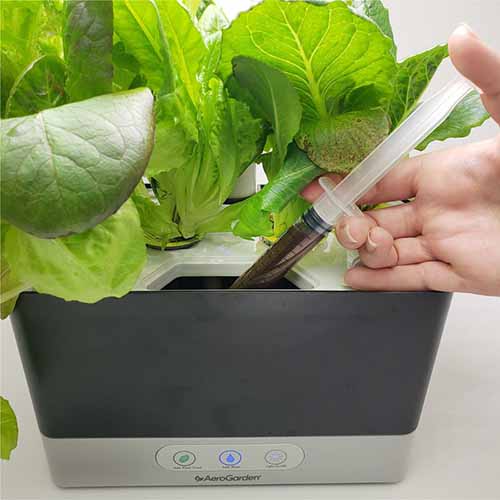
Easy Feed Plant Food Dispensers
These plastic syringes have measurements on the side and a plunger that makes it easy to add the exact amount of fertilizer needed without any waste.
If you do spill, it can be tough to get the plant food out of the seam that it may run into, where the platform seats into the unit. The liquid is orange-brown and it can stain a bit, so be sure to handle it with care.
I picked the unit up easily after it was assembled and moved it to the kitchen counter nearest my stove, which is small and little else fits well there, with access to a power outlet.
If you have the space, feel free to set it up wherever you plan to keep it, so you won’t have to move it. In the case of my family, we needed a little more space for setup so we could work together.
Be sure to select a location that is near an outlet, but not near a sunny window, which can produce too much light for the plants to tolerate. Avoid placing it near sources of heat or cold, or areas that are accessible by unsupervised pets or young children.
The instructions recommend against placing the unit near the stove as it can produce too much heat, which can damage the unit or the plants, but we live in a warm climate and we don’t use the stove often, opting instead to use small appliances that generate less heat.
Temperatures around 70°F are suitable for growing most of the seeds available for purchase for use with the AeroGarden units, but certain plants like lettuce and other types of salad greens may prefer cooler temperatures after they germinate.
The unit is about the size of a coffee maker, and after we assembled and filled the second unit, both fit neatly in the small space I’d selected.
Once the units were in place, we plugged them in. The lights came on and the pumps started running. We followed the instructions to reset the light timer so it would come on in the morning, which was as easy as holding the light button down for three seconds so it would set the new time.
The lights are automatically set to stay on for 15 hours for optimal daylight replication, and the pump runs automatically for five minutes, with a resting time of 25 minutes between pump cycles.
I recorded the planting date on a wipe-off board that we have on our refrigerator, and began counting the days until the seeds began to sprout. You could also log this information in your gardening journal.
Overall, I was impressed. The Harvest units were simple to assemble, with easy-to-follow instructions. All of the included parts were exactly as described and fit together exactly as they should.
There was virtually no mess to clean up, besides the packaging materials, which were few, and a few dribbles of fertilizer.
My kids liked to turn the lights on in the morning when they got up before the timer turned them on, so often in fact that I never got to, and they also enjoyed peeking through the clear humidity domes to see if the seeds had sprouted.
AeroGarden claims their products will produce plants that grow up to five times faster than those grown via traditional methods in soil, so we were excited to see what would happen.
Within a few days of planting, we began to see signs of life. The lettuce seeds began to sprout and the basil seeds were next, emerging after about three days.
After two weeks, none of the other herbs had germinated, although some are noted to take several weeks to sprout.
I made sure to keep the area the units were in within the recommended temperature range of 70 to 75°F and waited about three weeks, which was enough time for all of them to germinate based on the timeframe printed on the pods.
While it’s disappointing when seeds don’t sprout, AeroGarden stands by their products with a “Germination Guarantee,” so it was reassuring to know that they’ll replace any pods that are defective at no cost.
The salad greens were growing well after about ten days, and the leaves were starting to touch the inside of the humidity domes. I removed them, heeding the instructions which say to remove them so the moisture that collects inside doesn’t ruin the small plants.
Maintenance
The AeroGarden Harvest model is very easy to maintain. There is no soil to deal with, so there’s little to no mess to clean up.
At first, the water takes quite a while to become depleted as the plants aren’t large enough to use much.
After they grow to a few inches in height, I was sure the indicator light would come on more often to alert me of the low water level, although the company recommends adding water before the light comes on for best results.
The light comes on every two to three days if I don’t refill it ahead of time, and I noticed that I can hear a slightly louder sound of tinkling water inside it when the pump runs if the water has been depleted. I try to keep it full so that doesn’t happen, even though it’s not that noticeable.
It’s easy to refill the water to the recommended level, and to add more plant food if that indicator light also comes on. The pump inside the unit is very quiet and I barely noticed it running when the water reservoir was full.
If the plants become thickly entangled, such as with salad greens, you might need to trim some away at the front of the deck to open up space where the water cover is located.
It can be difficult to reach under the greens without damaging any leaves, and if you spill any water on the deck, they’ll wilt if they come into contact with liquid that has pooled there.
The instructions recommend leaving the light deck set to the lowest height at the time of planting, and then moving it up gradually as the plants mature so it’s about two inches above them at all times, reducing the likelihood of scalding while providing plenty of illumination.
Salad greens are mostly short to medium in height, and while they can be bushy, you’ll also be harvesting leaves as needed, so they can easily be kept to a manageable size.
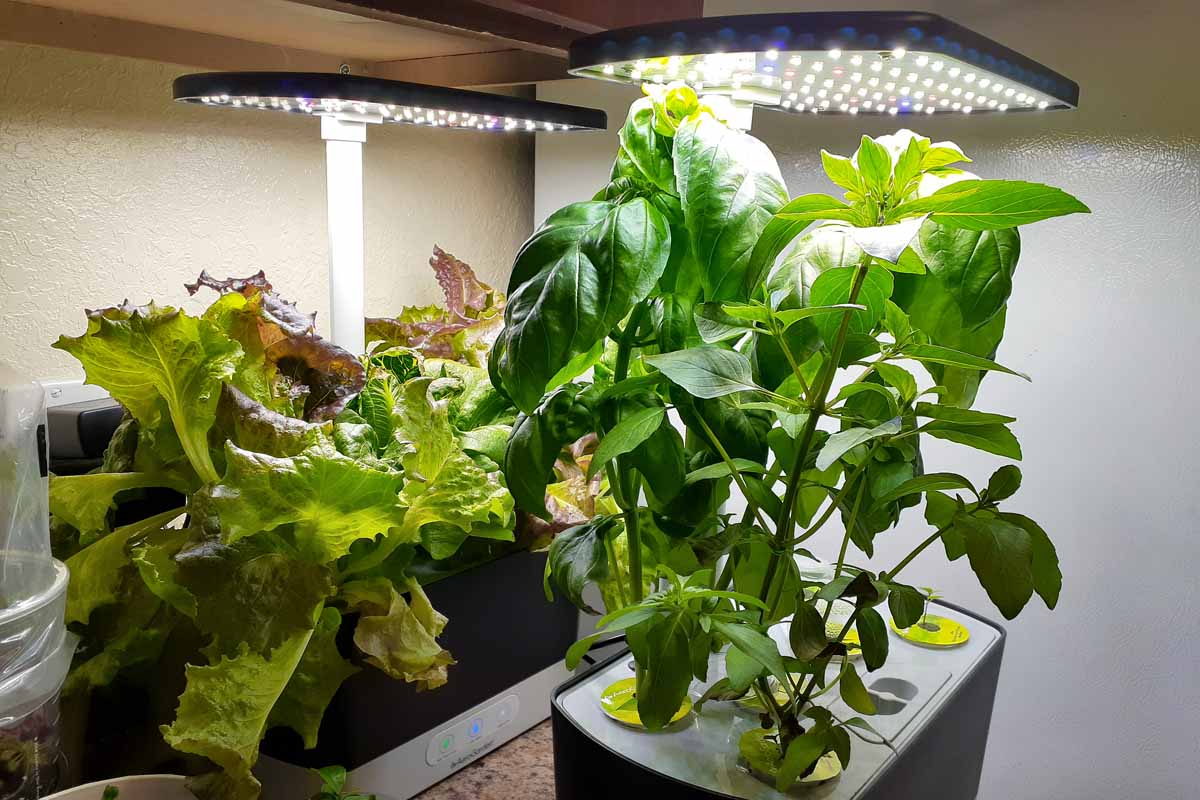
Herbs and other plants may grow much larger – sometimes as much as 24 to 36 inches in height for some of the included varieties in the Gourmet Herbs kit, and for other seeds that are available. Larger units can accommodate larger plants.
Because herbs may grow to an unmanageable size for the Harvest unit without pruning, you’ll want to make sure you cut them back when they reach about 10 to 12 inches tall, so they don’t come into contact with the grow light, and to encourage lush and bushy growth.
Harvesting often and pruning as needed is very important as it not only keeps the plants shaped up and removes any dead leaves or stems, it also keeps the plants maintained to a size that works for the unit.
If they’re allowed to grow too large, they’ll use the water and nutrients very quickly, and top-heavy plants could potentially cause a unit that’s low on water to topple.
You can store harvested veggies and herbs in the refrigerator for a few days, or dehydrate herbs and place them in an airtight container for later use if you can’t use them right away. You can read more about some of our favorite food dehydrators in this roundup on our sister site, Foodal.
One of the only things that I don’t love about the AeroGarden Harvest and that I mentioned before is that there is a ridge where the growing platform is seated inside the unit, and that ridge can be difficult to keep clean if anything gets in there, such as plant food splatter.
It’s also a little challenging to clean the bowl as is recommended every four to six weeks while the plants are growing. The roots can create a large mass, and when you lift the deck, they tend to drip water as well as any gunk that has collected.
I recommend having a large bowl nearby and placing everything on a towel or planting mat to manage any mess. Sit the deck in the bowl and wash the interior of the reservoir out well, but do not submerge it in water. Act quickly, as you don’t want to leave the roots exposed for long.
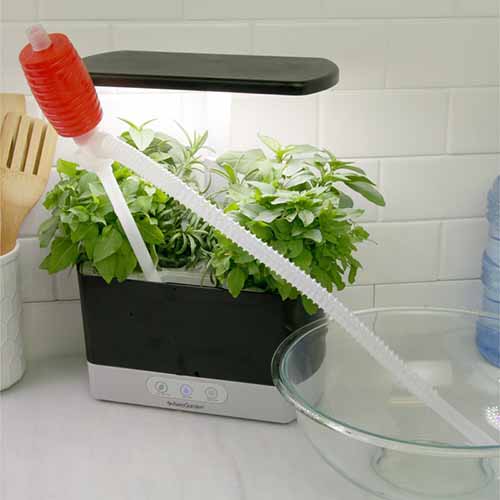
A rinse and refill siphon is also available from AeroGarden for easy periodic cleanup, without having to disturb the growing plants.
Check to ensure that errant roots have not grown into the filter or other crevices, and trim them if you need to. Replace the deck and refill the unit with fresh water when you’re finished.
When it’s time to clean the unit for storage, I’ll follow the instructions to disassemble the garden by removing the deck and the filter. The filter can be replaced if it looks worn out, and more can be purchased in packs of 10 from AeroGarden.
Replacing the pump filter every six to eight months is recommended.
To clean and sanitize the unit before replanting when the veggies and herbs you’re currently growing are finished, simply fill the reservoir with distilled water and a quarter cup of bleach, or five cups of white distilled vinegar if you’d rather not use bleach, and let the pump run for a complete cycle before rinsing and refilling it.
You should also check the filter and internal parts for any roots that may have become lodged inside, and clear them out before setting the unit up again with new seed pods.
Troubleshooting Tips
I didn’t have any major problems with the units themselves; the Harvest is great for small spaces, and I thoroughly enjoyed setting these up and watching the plants grow.
However, I did have a problem with the seed kits. As I mentioned, several of the herbs included with the herb kit did not sprout, even after three weeks.
This is a reasonably easy fix though, because AeroGarden stands by their products and guarantees that the seeds will sprout or they’ll replace them at no cost.
If you contact Aerogarden customer service and explain that your seeds did not germinate, they’ll likely ask a few questions.
They may ask to confirm that the unit is functioning properly, that you’ve waited an adequate period of time for germination, what type of water you used, and the temperature range the seed pods were exposed to.
I contacted them via the chat feature on their website, which was fast and convenient. They responded almost immediately, and after I confirmed that I had followed the directions and my seed pods had not germinated, they mailed out replacements.
It only took about a week for the new seeds to arrive, and I immediately followed the same procedure to replace the defective pods.
The humidity domes that are placed over the planting cells do tend to collect a lot of moisture, and I was slightly concerned that the salad greens – which consisted primarily of various types of lettuce – might remain too wet, which can lead to rotting.
The instructions do indicate that the domes should be removed to prevent this when the leaves are nearly touching the plastic.
After the seeds sprouted, I removed the domes if I noticed that a lot of water was collecting inside.
This could be because the region that I live in experiences high humidity year-round, so I dried them off and replaced them, and I never had an issue with rotten lettuce. If you didn’t know to do this in advance, you might have some trouble with that.
In most regions, and in indoor growing conditions that are often dry, the domes should not be removed and dried prior to when you take them off permanently after germination.
Another issue that I encountered was the potential for insects to be attracted to the young plants. I live in a sub-tropical region and there are a number of types of bugs that often make their way into the house – including cockroaches.
Sometimes they’re huge native cockroaches known as palmetto bugs. Normally, I’m an insect lover, but these guys are where I draw the line.
In my experience, they love certain types of fresh vegetables. To keep the plants protected and to avoid a massive case of the heebie-jeebies, I bought some large mesh drawstring bags to keep the units enclosed overnight.
This has done the trick, and I didn’t have to worry about losing plant leaves to voracious housecat-sized roaches. Okay, they’re not really that big – but they might as well be! (And mesh bags would probably work to keep curious cats that are actually your pets away from your harvest as well!)
Harvesting
Now, about that harvest…
Between the second and fourth week after germination, my salad greens and herbs were growing strong. One of the varieties of lettuce was especially beautiful, with red tones here and there that look lovely on the countertop.

Some of the lettuce was beginning to form a head at around the four-week mark as well, which is very exciting!
My kids enjoyed picking off a loose leaf here and there to snack on, and I taught them to always cut the leaves off at the base on the outside of the plants to allow them to continue to grow from the center.
After about six weeks, the plants that sprouted have grown every bit as large as they would have if they’d been planted in the garden. I should mention, however, that they’ll be using a lot of water at this stage, and you’ll most likely need to refill the unit every other day. That reservoir accessory may be my next investment.
I began harvesting around the six-week mark. The salad greens have made amazing additions to sandwiches and wraps, as they’re mostly butter varieties with a soft texture, aside from the romaine. I’ve already been able to harvest enough at a time to make a full-sized salad to accompany dinner.
I’ve also had to cut the basil back twice, as it shot up to more than 12 inches tall between five and six weeks after germination. It adds a lovely aroma to the kitchen.
I also want to mention that if you live in a humid environment like I do, you may want to prune some of the leaves out from underneath and between the plants as they grow, to improve airflow.
Once they begin to mesh together, they can hold moisture, and I’ve found some wilted lower leaves on occasion.
Harvesting is super simple! You just snip off the parts of the plants that you want to collect with some clean scissors, and either store them or use them right away.
I give the lettuce a rinse before use, just to make sure there is no dust on the leaves, but I haven’t had a single pest or disease issue to worry about, aside from the aforementioned palmetto bug that I successfully thwarted.
The Final Verdict
As I mentioned, I live in a sub-tropical region where the average outdoor temperature is about 82°F, and the sun frequently burns plants.
These units are good for gardeners in hot, humid regions, or for places where temperatures remain too cool in winter or throughout the year for growing certain plants, because indoor temperatures are usually more consistent.
Delicate plants like lettuce won’t be destroyed by extreme temperatures or harsh sun when they’re growing in the more consistent temperatures inside your home. Heavy rain won’t pummel the young plants either, and that’s another big advantage where I live.
The Harvest, or the many other AeroGarden units that are available, make excellent gifts for anyone who is interested in home gardening, but someone with no yard might particularly love them.
People who have physical disabilities or mobility challenges that can’t easily access a garden may also really appreciate them, and they offer a fun project for the kiddos to participate in, too, with adult supervision provided for the youngest members of the family.
One thing that I love about the Harvest units is that they come with their own grow lights. This made it easy to fit two on the counter together without having to install sockets, bulbs, or stands to hold additional pieces of equipment.
The LED lights included with the unit are very bright, and my kids and I noticed that our entire kitchen seems sunnier when they’re on. I never had to worry about the plants getting enough light.
Another advantage to using LED lights is that the bulbs last for two to five years, so you have a long time to plant and grow.
Traditional incandescent grow lights tend to generate a lot of heat – I’ve made accidental contact with one after it had been on for many hours and the metal housing left a small burn on my arm.
The lights on the AeroGarden units feel warm, but there’s no concern that my kids or I will be burned from accidentally touching them. I’m also not uncomfortable with leaving them on when we’re not home.
Another advantage with these units is that the lights are bright enough and radiate widely enough to add some additional potted seedlings nearby if you have space.
My kids and I potted some tangerine seeds that we sprouted and placed them on either side of the Harvest units, where they’ve been growing healthy and strong. You could easily grow more than just the included seeds that come with the kit using these lights. Just be sure not to crowd them, which can increase humidity.
In three weeks’ time, I had salad greens that were about three inches tall. My basil was about the same height, and all looked healthy. I gave them a few more weeks before I started harvesting.
Since the units are reusable, I’ll definitely be able to produce enough plants to get a good return on the investment for these hydroponic kits over time.
I plan to purchase more seed kits so I can keep them planted and try growing a wide variety of plants indoors. My kids will always have fresh veggies to pilfer on the way through the kitchen, and I feel good about that too.
Start a Garden Indoors in a Small Space Without the Challenges of Outdoor Growing
Give that green thumb a workout without even going outside! An AeroGarden hydroponic system like the Harvest is a perfect choice for indoor growing, especially for eager gardeners with living spaces that make outdoor growing difficult or impossible.
Pick up one of your own direct from the manufacturer or via Amazon.
Even a beginning gardener can bring in a successful edible crop or beautiful blooms with these units, and if you experience any mishaps that lead to crop failure, you can just pop some more planting cells in and start over.
Let us know if you’ve tried any of the indoor gardening systems from AeroGarden and how you liked the units, or what you plan to grow if you’re new to home hydroponics, in the comments below!
And if you’re curious about other methods of growing food indoors, take a look at these titles next:
Harvest is an excellent entry-level hydroponic system. With the right approach you can get good results with it. Personally, I have been using it for several years now and am completely satisfied.