
For much of his young life, my son has carefully pre-screened each item of food he puts in his mouth.
You might also call this picky eating. But one day, he started randomly wanting to eat carrots.
Better yet, if I purchased a bunch of colorful organic ones from the grocery store, he’d say, “Purple carrot?” one day, and “Yellow?” the next.
I’m just happy he’s finally eating more veggies. So happy, in fact, that I decided to start my own indoor carrot garden.
We link to vendors to help you find relevant products. If you buy from one of our links, we may earn a commission.
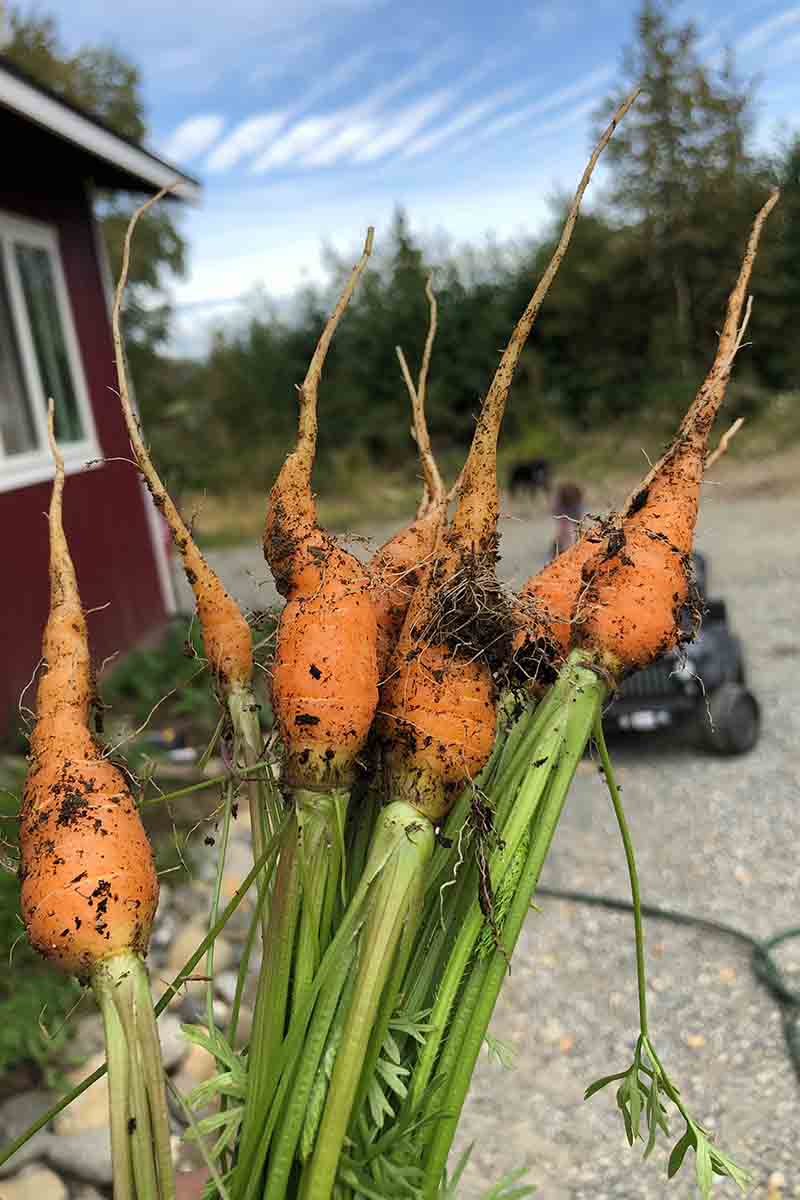
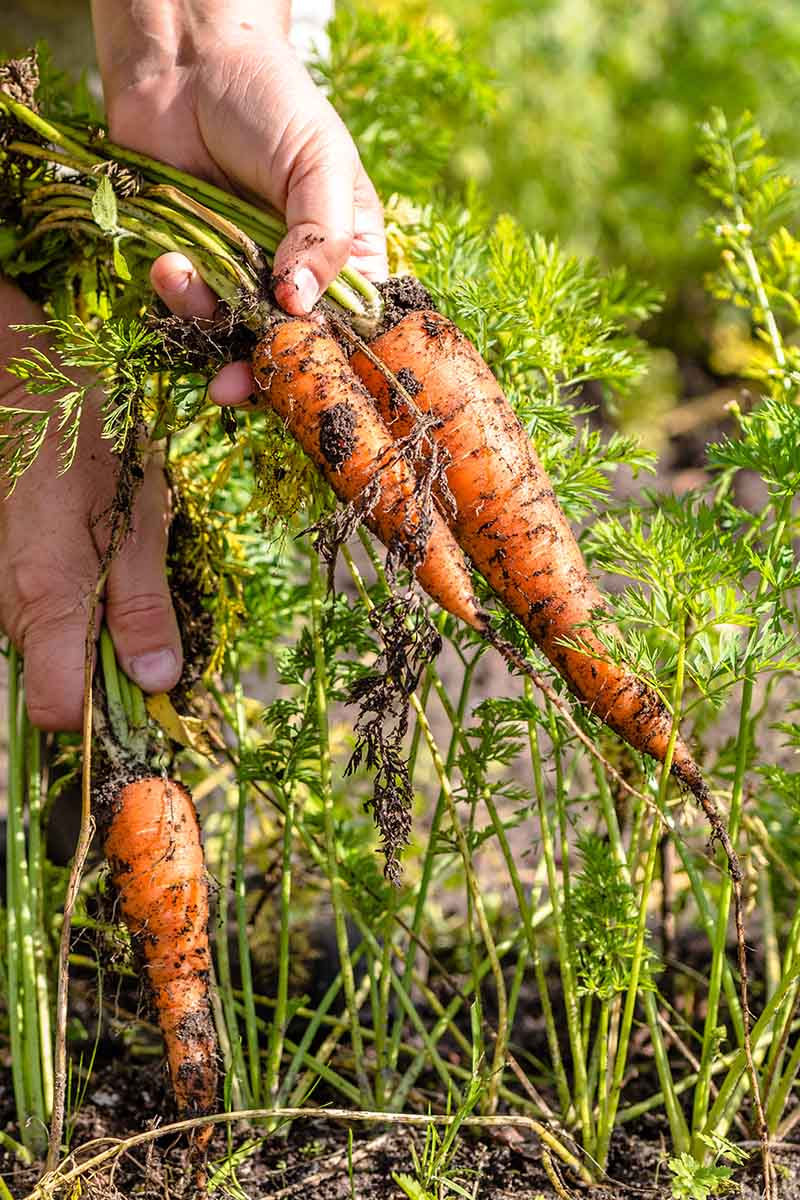
I’d tried growing this tasty root veggie from the Umbellifer family in my raised flower bed the summer before, but because of the rocky topsoil mixed into my outdoor soil mix, they all turned out like this:
I realized that if I grew carrots indoors, I could sow five to seven crops a year, if each crop takes about two to two and a half months to mature. Or even more if I chose to succession plant in multiple containers.
I was really looking forward to having a supply of homegrown veggies for my son to enjoy – and to get him excited about gardening!
In this article, I’ll share what I’ve learned so you can get started with growing your own carrots inside.
What You’ll Learn
Why Grow Indoors?
Aside from the delight of reaping a year-round harvest from your own indoor garden, why else should you grow these bright and sweet veggies indoors?
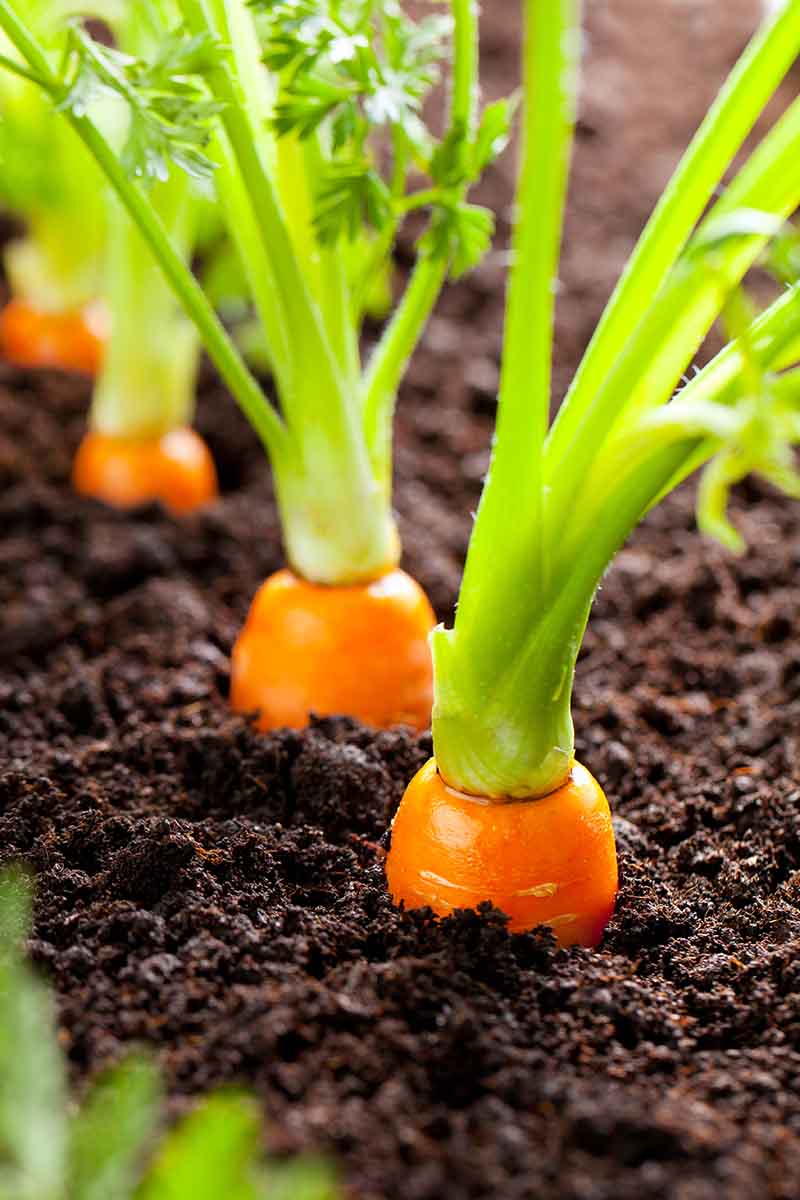
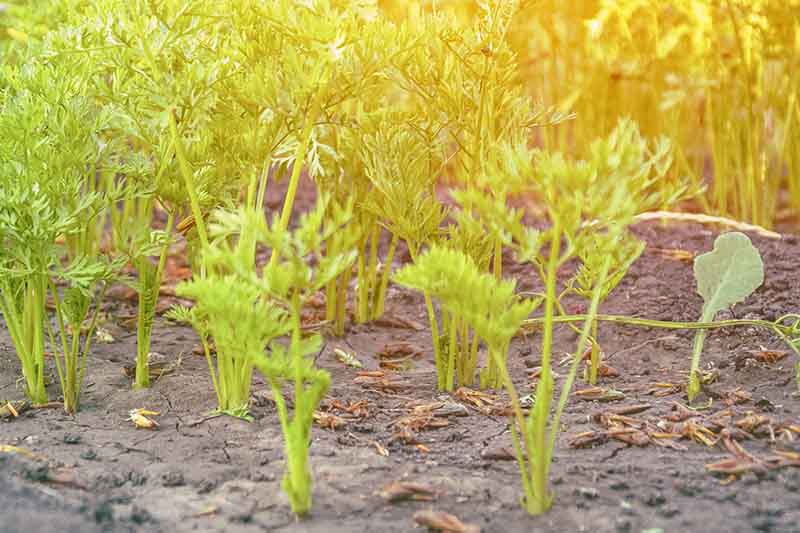
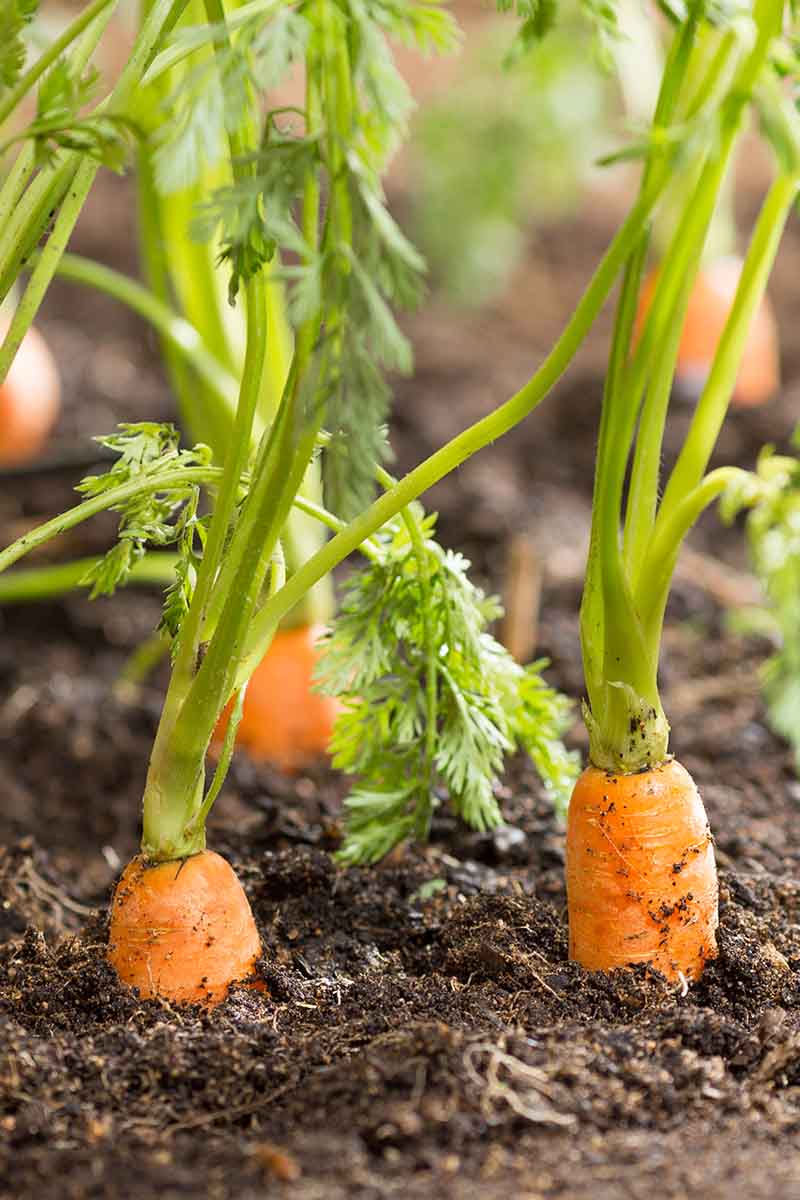
When they’re grown outdoors, these tasty roots often struggle to push down through dirt that isn’t loose, resulting in deformities.
Nonetheless, I was so proud of my deformed carrots, the first grown in my outdoor garden since moving to Alaska. But when I put one in my mouth, I was met with a bitter shock: they did not taste good.
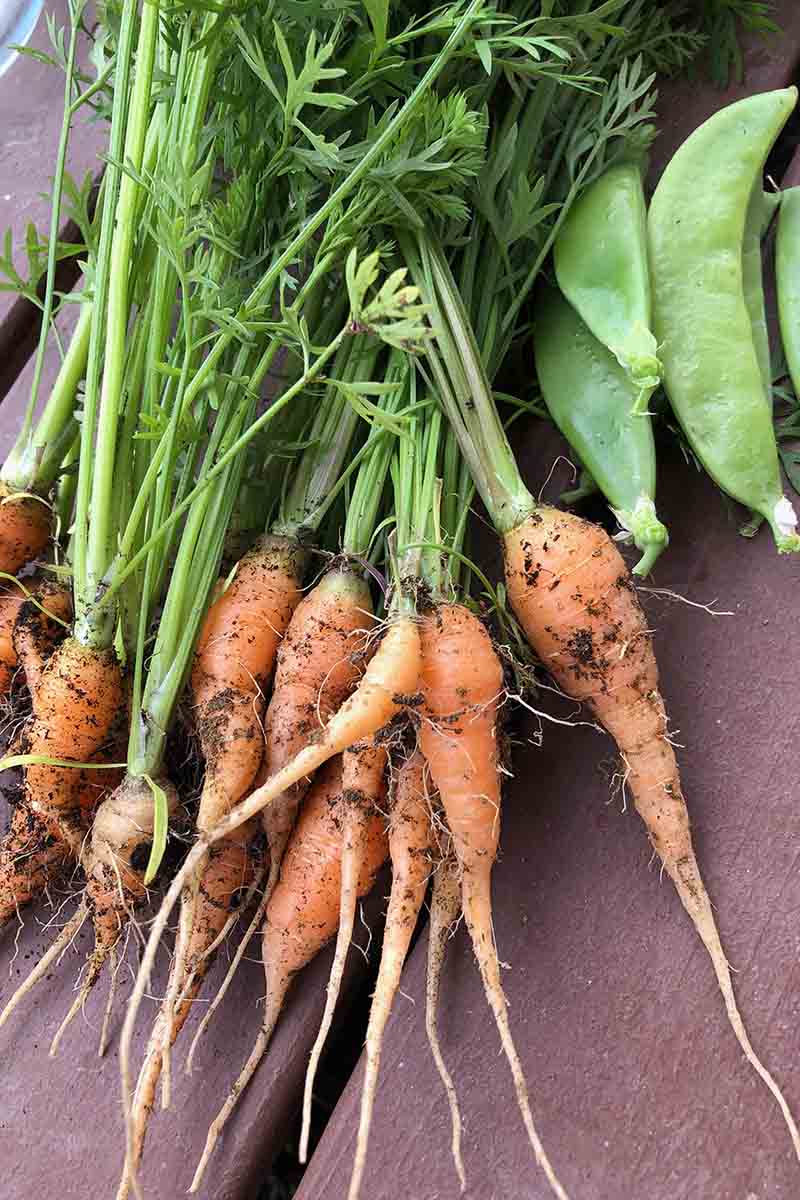
When I look at the photo above, it seems like my carrots have way more going on in the way of tops than they do roots. Maybe there was too much nitrogen in the soil, which causes an overabundance of leaf growth.
Or perhaps there wasn’t enough potassium to support healthy root development.
Maybe the roots were straining to thrive simply because of Alaska’s great heatwave that year, when temperatures consistently hovered at 90°F for what felt like eternity.
For reference, temperatures in Alaska don’t typically rise above 80°F in the summer, and even that feels HOT. Very few of us have air conditioning in our homes up north. Maybe exposure to consistently hot temperatures caused the bitterness.
While the carrot, Daucus carota subsp. sativus, can grow in USDA Hardiness Zones 3-10, too much heat can turn roots bitter.
When you consider that summertime in Zone 10 can average 90°F, this spells trouble for our brightly colored root veggies. They would much prefer it to stay under 80°F, thank you very much, and they’ll protest bitterly as their nutrients and moisture get sucked away by the sun.
So that’s another plus of growing them indoors: you can control the temperature and keep a close eye on their moisture levels, even in the summer.
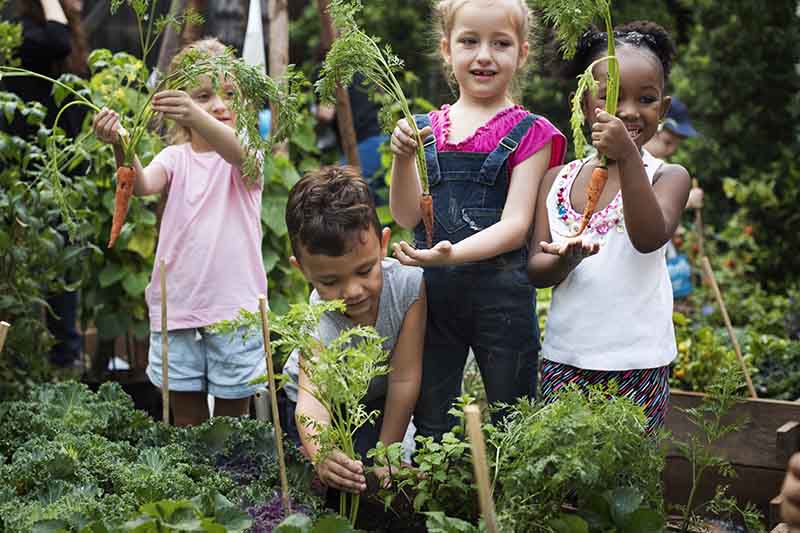
Growing carrots indoors can benefit those in cold climes, too. Even if you live in Zone 2, you – and your kids! – can grow them indoors and enjoy healthy, garden-fresh snacks all year long.
Getting Started
The first thing you need to do is decide how much space you can devote to your indoor garden, because that will determine two things:
- The size of your container(s)
- The variety of carrot(s) you choose
If you only have a small amount of extra space, like a spare windowsill, you’ll want a planter that can fit comfortably on it, something rectangular and long.
It should be eight inches deep at the very least, or preferably 12 inches deep, with a base at least four inches wide.
Someone with more space can, of course, use a larger container and reap a bigger harvest.
For my own indoor carrot garden, I chose an eight-inch-deep, 24-inch-long window box.
This fit nicely on a spare chest, under a grow light, and alongside a few other plants.
If you have the space and enough grow lights (if you need them), by all means, select a 10-inch-wide or even 20-inch-wide container.
A round eight-by-eight-inch container would only fit about four mature “standard” carrots. A ten-by-ten could fit five. A 24-inch-long window box can fit 12.
Any container you choose should have a draining grid or holes in the bottom, and a draining tray underneath.
Read more in our full guide to growing carrots in containers.
Finding the Best Variety
No matter what type of space you have or what size container you choose, there’s a cultivar to fit your needs.
Let’s take a look at a few of the smaller varieties that, due to their shorter roots, are perfect for growing indoors.
Chantenay Red Cored
An heirloom variety that grows 5-6 inches long, ‘Chantenay Red Cored’ is perfect for 8-inch-deep containers.
Plant seeds two inches apart to give plenty of room for them to grow round and juicy. With a golden-orange color and an extra-sweet flavor, this carrot is sure to make you smile.
Originally from the Chantenay region of France, and first introduced by Ferry-Morse in 1930, ‘Chantenay Red Cored’ features – you guessed it – a reddish core, and matures in 70 days.
Seeds are available in a variety of packet sizes from Eden Brothers.
Danvers
Ideal for 10-inch-deep containers, ‘Danvers’ grows 7-8 inches long. This is an excellent choice for those who prefer long, slender carrots over short, stubby ones.
Developed in 1870 in Danvers, Massachusetts, this type grows well in relatively shallow soil, and delivers a timelessly carroty crunch. Sow seeds two inches apart and harvest 75 days after planting.
Seeds in packets of various sizes are available at Eden Brothers.
Read more about growing ‘Danvers’ carrots here.
Little Finger
These tiny treats grow just 3-4 inches long, so you can grow dozens of them in a wide, 8-inch-deep rectangular planter.
Sweet and succulent, this cultivar tastes delicious whether it’s pickled, canned, or enjoyed fresh, on its own or dipped in your favorite sauce.
‘Little Finger’ is about the size of a finger at maturity, but no less beautiful for its small stature. Sow two inches apart to give plenty of room for healthy root growth.
Maturing in just 65 days, you can find ‘Little Finger’ seeds in packets of various sizes at Eden Brothers.
Royal Chantenay
Bred from ‘Red Cored Chantenay,’ ‘Royal Chantenay’ was released by Northrup King Seed Company in 1952, and is rounder with blunted edges.
It’s another sweet variety that kids are sure to love, and even better? It offers a dependable, heavy yield.
Sow two inches apart to allow room for that plump cylindrical growth. Roots only grow 5-6 inches in length, so this cultivar is ideal for nearly any size container.
Find seed packets of various sizes at Eden Brothers and watch your carrots mature in 70 days.
Sweet Treat Hybrid
A couple summers ago, my next-door neighbors here in Alaska generously shared tons of their garden produce with me. They brought homegrown carrots and peas one day, which I sliced and shelled, and I sauteed them together in butter.
The end result tasted like candy. Ever since then, my goal has been to grow carrots that sweet. So I chose this cultivar, ‘Sweet Treat Hybrid,’ which promises to be as sugary as a lollipop.

Since the roots grow six inches long, I planted them in my 12-inch-deep container and am eagerly awaiting their maturation in another month. They mature in 70 days, and like most cultivars, they need to be sown two inches apart.
Get your packet of 600 seeds from Jays Seeds via Amazon.
How to Propagate
Now it’s time to get growing. You’ll need your selected container and seeds, along with:
- Loose, well-draining potting mix.
- A low-nitrogen fertilizer, such as 5-10-10 or 4-10-10
- A grow light, if you don’t have a window or area that provides at least six hours of sunlight
While you’re welcome to try starting your seeds in trays, it can be easier just to start them in containers. However, this is the method that I used, and I’ll include a little more information on how to do this in the next section of the article.
Starting your indoor carrot seeds directly in pots can give them an extra jump because their tender roots don’t like being disturbed, and they don’t respond well to transplanting.
First, fill your container with potting mix and a 4-10-10 or 5-10-10 fertilizer – follow the instructions on the package to determine how much to use, as this will depend on the size of your container.
Make 1/8 to 1/4-inch-deep holes two inches apart – check your seed packet for the recommended planting depth of your chosen cultivar. Drop two to three seeds in each hole, cover lightly with soil, and spray with water. Keep the soil moist until the seeds germinate.
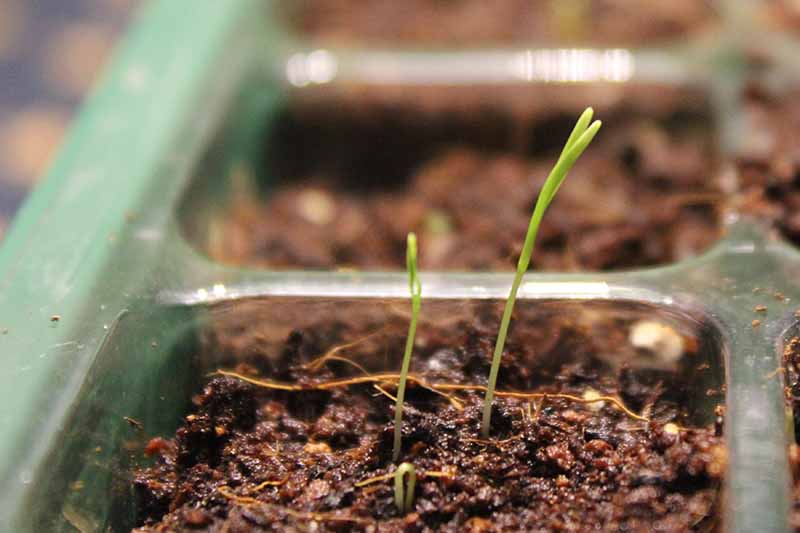
Set your container in a sunny location or under a grow light. The seeds should germinate in 14-17 days, though some can take up to 21 days.
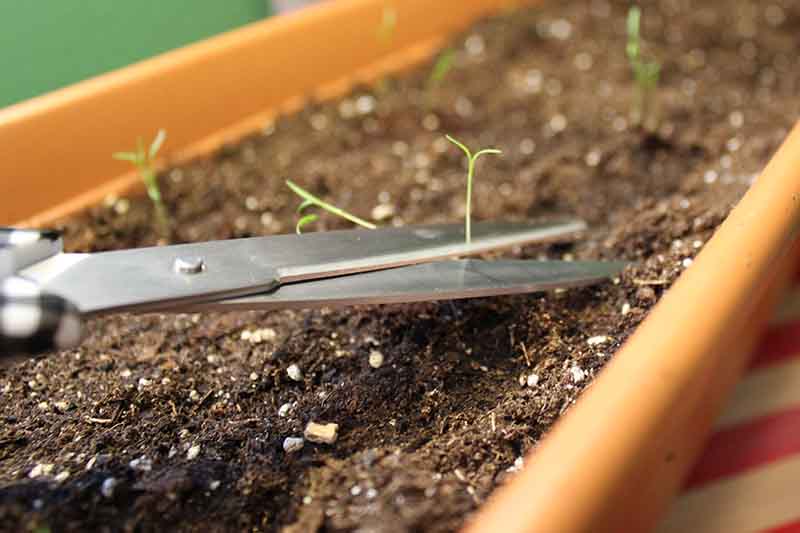
When the seedlings are 1-2 inches tall, check to see which ones are the most robust and green. Thin out the weaker extras with sharp scissors so only the strong seedlings remain, spaced every two inches.
Before long, the first true leaves will emerge and your plants will look a little bit like praying mantises.
This root veggie needs moist soil that isn’t waterlogged. Water deeply, pouring slowly over the plants, and let it soak all the way into the soil.
It’s crucial to make sure the roots get the moisture they need.
Give your young plants at least six hours of sunlight (or its artificial equivalent) every day.
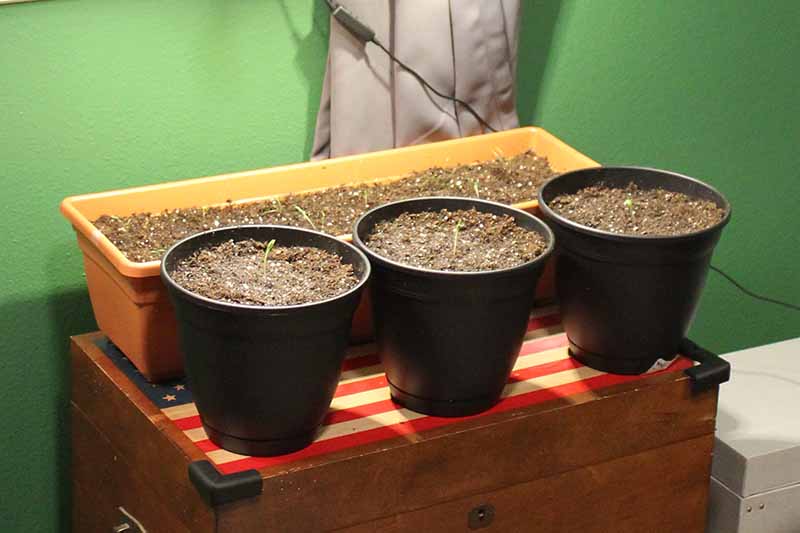
Seed Trays
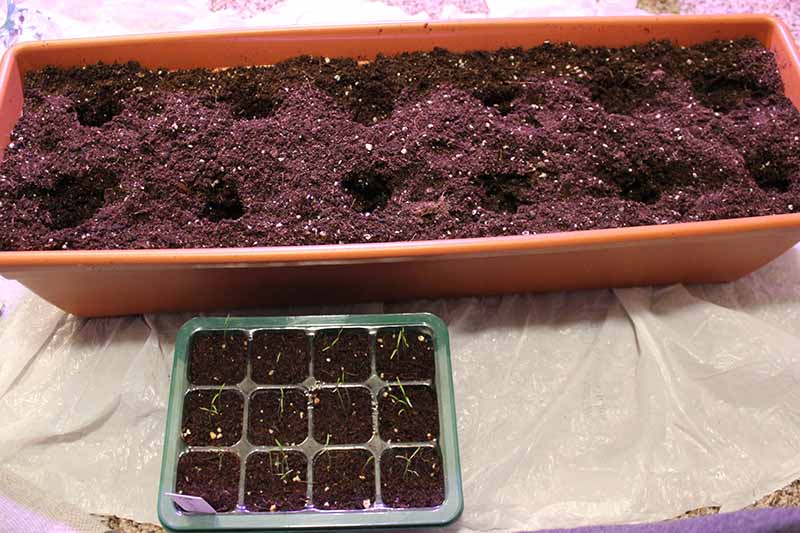
Even though these roots don’t love being moved, I took the seed tray route because I still hadn’t purchased a container large enough for planting when I was getting started.
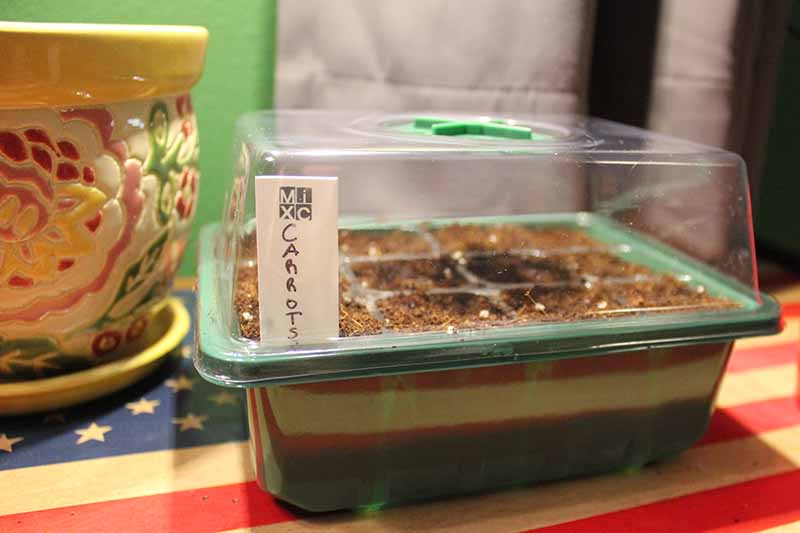
I do feel that a covered seed tray can help the seeds germinate more quickly – all the extra humidity helps a lot.
Fill each cell with potting mix and then make 1/8 to 1/4-inch divots in each cell. Drop two or three tiny carrot seeds into each divot, cover lightly with soil, and spray with water so as not to displace the seeds.
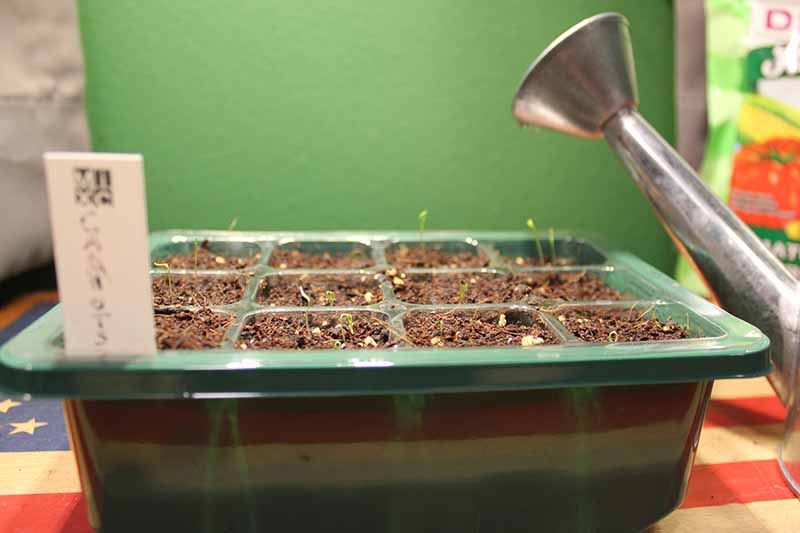
Germination can take up to three weeks, but I found that by keeping the seeds in their mini greenhouse and setting them under a grow light, they germinated in just six days.
If you don’t use a grow light or place them in a sunny window pre-germination, be sure to do so the instant you see green shoots emerging.
I had yet to learn my lesson about grow lights and legginess back when I planted my carrots indoors. So, like my container-grown rhubarb, my greens ended up being a bit “leggy.”
If you use a grow light, you must make sure it is positioned about two to three inches away from your newly sprouted seedlings. The recommended distance may vary depending on the specific type and strength of light you are using.
This is something I failed to do.
Also, ensure that your grow light provides full-spectrum white light, or a mix of red and blue light, to facilitate healthy growth.
Using an LED grow light is ideal because it doesn’t emit as much heat as most fluorescent lights would. If you put a heat-emitting light too close to your plants, this can overheat the leaves and cause them to wilt.
My seedlings grew tall, thin stalks because they were straining toward the enchanting glow of the grow light.
This caused problems later on. (Stay tuned for more details about “leggy” carrot tops below.)
In addition to ensuring they have enough light, you should also give your seed trays a slow, deep watering when you begin to see green tops.
Transplanting Seedlings
If you start your seedlings in trays or peat pots, transplant them when you see two or three lacy, carroty true leaves appear.
Get your container ready the same way I described above for planting directly in containers, by filling it with potting mix and that 5-10-10 or 4-10-10 fertilizer.
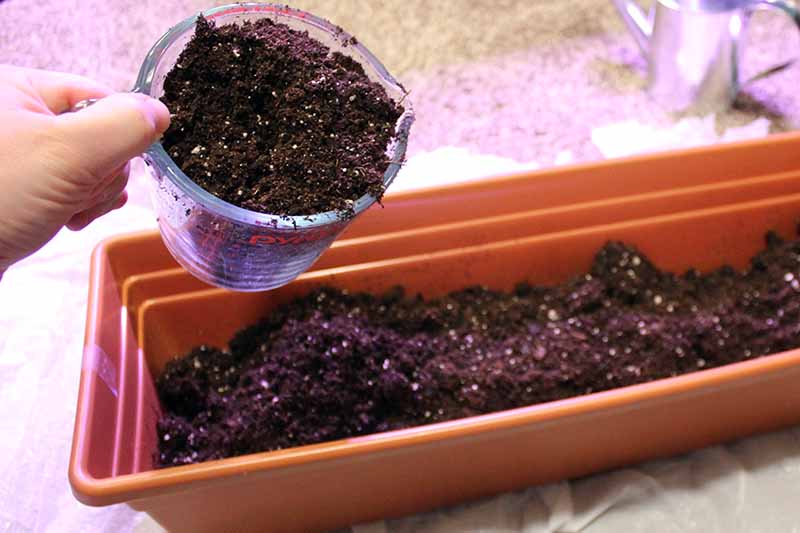
Follow the instructions on the fertilizer package to see how much to add to the soil. Again, this all depends on the size of your container. Make sure to mix the fertilizer into the soil well.
You want to space your seedlings two inches apart in your container. Dig each hole the same size as the root ball of the seedling you are transplanting.
Spray the seedlings with water and let it soak in for a few minutes to make the plants easier to handle. Then pop the seedlings out and set each one gently into a planting hole.
If you’re using peat pots, soak them in water first to get them nice and mushy. When you transfer them to the holes, work the peat until it breaks apart. This will help to keep the pots from inhibiting root growth.
Tuck the soil back in around the seedlings and water well, pouring slowly and allowing it all to soak deeply into the soil.
Set your container back under the grow light or in a sunny location, and watch your little shoots grow.
Growing Carrots Indoors
There are a few important things to keep in mind when cultivating your indoor carrot garden. All of these are crucial not only when starting seeds, but throughout the lives of your crops.
Watering
First, you’ll need to be vigilant about watering. While most roots need about two inches per week, your indoor garden may require more.
I’ve found that the heating system in my home dries out the dirt in all of my indoor plants very quickly, so I actually water my carrot garden every two days.
Anytime you see that the potting mix looks dry on the top or is pulling away from the edges of the container, add an inch of water to your plants. You can feel with your finger an inch down into the soil, and if it’s dry, your crops need watering.
Fertilizer
It’s also important to keep your plants well fed. When the seedlings are about three inches tall or have three or more true leaves, give them some more of that low-nitrogen fertilizer.
Gently work half a teaspoon of fertilizer into the area surrounding each carrot top, making sure to mix it in well. Water the plant when you’re done. You’ll want to do this every three weeks.
Light
An issue to watch out for when growing indoors is floppy tops.
For me, leggy, floppy tops weren’t a problem when I planted carrots outside under the warm, never-ending Alaskan summer sun.
But grow lights aren’t like the sun. They need to be close to the plants that you are growing in order to work effectively.
The next time I sow carrots indoors, I’m going to keep the lights two to three inches away from my seedlings, instead of five to six inches away. Now, as my seedlings continue to grow, I adjust the lights so that they are always just a couple of inches away.
And I’ve learned a few tricks to strengthen leggy seedlings that you can try, too:
First, after adjusting your grow light to be close to the tops of your plants, be sure to keep it on for six to eight hours per day, every day.
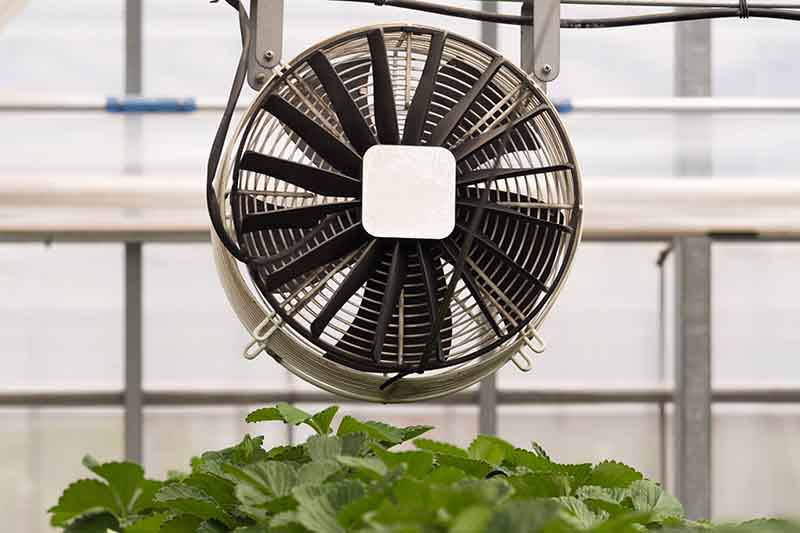
Second, bring a fan into the room for a few hours a day. On the lowest, gentlest setting, position the fan a few feet away from the seedlings.
You’re trying to mimic wind here, which sends a signal to the plant that it needs to grow a thicker stalk.
Lightly running your fingers over the tops of the plants a couple times a day can help too, for similar reasons.
Finally, try mounding extra soil up around your stalks to help support them. Just be sure not to cover the cotyledons or any true leaves.
Here’s why all this matters: legginess makes for weaker plant stalks that are too thin to support themselves. Young, weak seedlings are more susceptible to damping off, a fungal infection common in seeds started indoors, which we’ll talk more about in a moment.
So it’s worth strengthening your leggy shoots in every way possible.
Succession Planting
It won’t be long before you’ll be pulling juicy carrots from your indoor garden!
But what if you’re craving an even bigger harvest? If you have the space for it, wait about a month after starting your first batch of seeds, and then plant another container. This way, just as your first harvest is dwindling in your refrigerator, you’ll be ready to harvest another.
Or, once your carrots are about 45-50 days into their growing journey, plant more seeds directly into the same container in between the carrots you’ll be harvesting. These new seeds should be planted about an inch away from the maturing plants around them.
By the time they germinate and begin to grow roots, you’ll be harvesting the mature carrots and can plant more seeds in their place.
Just be sure to fertilize the soil before each new planting to ensure it doesn’t get depleted. Every two plantings, remove about half of the old potting mix and add new soil so that you continue to provide a healthy, nutrient-rich environment for your container garden.
You’ll also need to harvest very carefully, so as not to disturb the already developing roots from your first crop.
Keep this succession going indoors all year long if you want to – because you can!
Growing Tips
- Choose a variety that fits comfortably in your selected container and growing space
- Make sure your grow lights are close enough to the seedlings – usually 3-5 inches for small home units
- Provide even moisture, but do not allow the containers to become waterlogged
Managing Pests and Disease
Since you’re growing your carrots indoors, the only malady you really need to worry about is a potential fungal infection, or damping off.
If your seedlings all suddenly wilt for no apparent reason, you can probably blame damping off. Stems often have a water-stained base and slump sadly onto the soil.
Caused by the fungi fusarium, phytophthora, pythium, or rhizoctonia, it’s impossible to treat damping off once it begins. It spreads quickly, obliterating all your precious seedlings.
See our guide to damping off to learn more.
To avoid it, you should:
- Space seeds two inches apart and thin after germination
- Remove humidity covers as soon as germination happens, to prevent overly moist conditions
- Make sure the soil is loose and well-draining
- Provide good airflow, with a fan on its lowest setting
If a tray is overtaken by fungal disease, dump it out, clean and disinfect it, fill it with new soil and seeds, and try again.
Harvesting
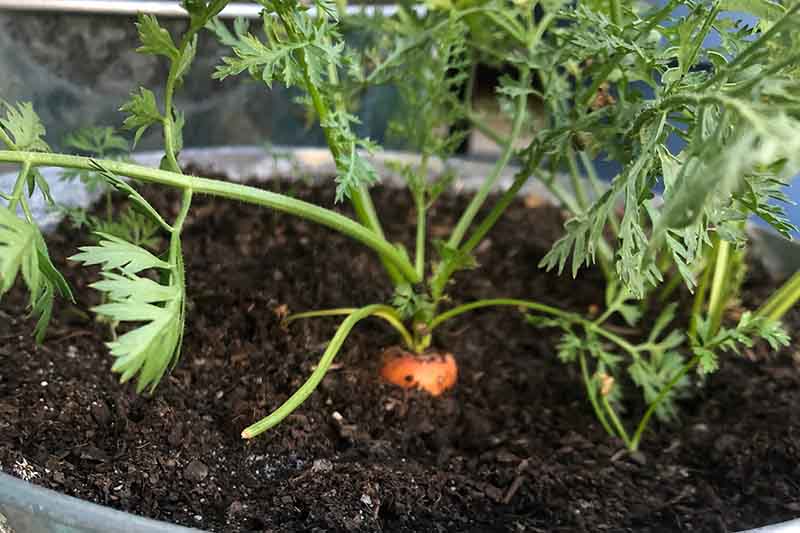
These roots have one clear, easy way of saying they’re ready for pulling: they show off their pretty orange shoulders.
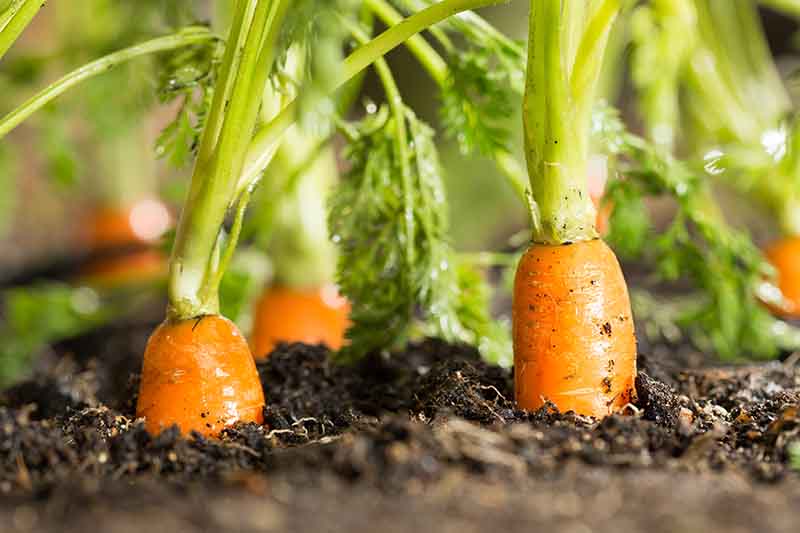
If the tops aren’t pushing out of the soil after the number of days when your seed packets indicate they should be ready, scrape your finger around the base of the leaf stem. If you see a plump-looking carrot just below the surface, that means they’re ready.
Shoulders will be about a half inch to an inch and a half in circumference, depending on the cultivar.
Firmly grip the carrot top at its base, just above the root, with your thumb pointing down, and gently tug the carrot out of the soil.
Of course, if you want tender, tiny roots, you can harvest earlier than the specified number of days to maturity listed on your seed packet.
Spring carrots (or “baby” carrots, which are different from the baby carrots at the store that are actually mature carrots cut down to remove damaged portions) will be about the length and width of your finger for most cultivars.

You can also plant crops that you plan to harvest as babies about an inch apart for a larger harvest, since they don’t need to grow as big around.
If you’re growing a smaller variety, it’s not really worth it to harvest early since the finished product is already going to be so small when it’s mature. I recommend waiting for those to reach their full size before harvesting.
A Year-Round Feast of Sugary Roots
When you grow carrots indoors, there’s nothing to stop you from enjoying the sugary spikes all year long.
Imagine setting down a dish of roasted carrots at Christmastime, like in this recipe from our sister site, Foodal, and proclaiming that you plucked them fresh that morning from your very own indoor garden.

Or dazzling guests with super-sweet, indoor-grown roots even when temperatures rage into the 100s outside.
Won’t your guests be delighted?
Have you ever grown carrots indoors? Let us know about your experience in the comments!
If you want to learn more about growing carrots, you’ll need these guides next:


I have successfully grown kings 2 indoors. I am in the Scottish Highlands.
Ah, Kings 2! Those are large carrots — that’s an accomplishment. Thank you for reading! (And the Scottish Highlands! I’d love to visit there one day.)
You might enjoy looking at Elliot Coleman and his carrots. He found that the cold weather made them sweeter. How did your sweet treat carrots turn out?
Thanks for the tip! I’ll look into it. They turned out small but delicious, especially once the sunlight came back in full force and I set them in the windowsill.
I sprinkle cinnamon powder over the soil in the germinating pots at the same time as sowing my seeds. it prevents fungal disease (damping off)
Actually, carrots get sweeter when they winter over in the ground. True, they need fluffy soil to grow long, but if you plant them, and mulch them for the winter, and the critters don’t get them, they develop sugars to prevent the root from freezing.
Yes, readers can find out more about this in our guide to overwintering carrots in the ground!