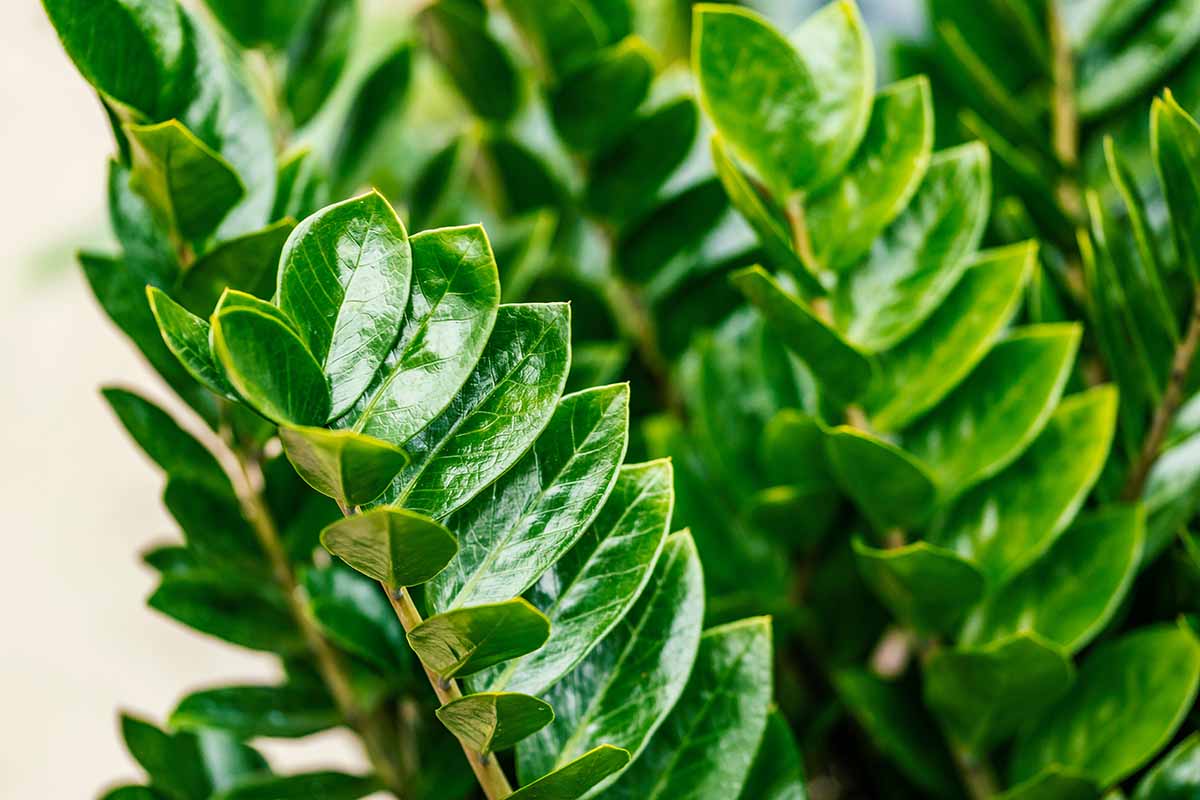
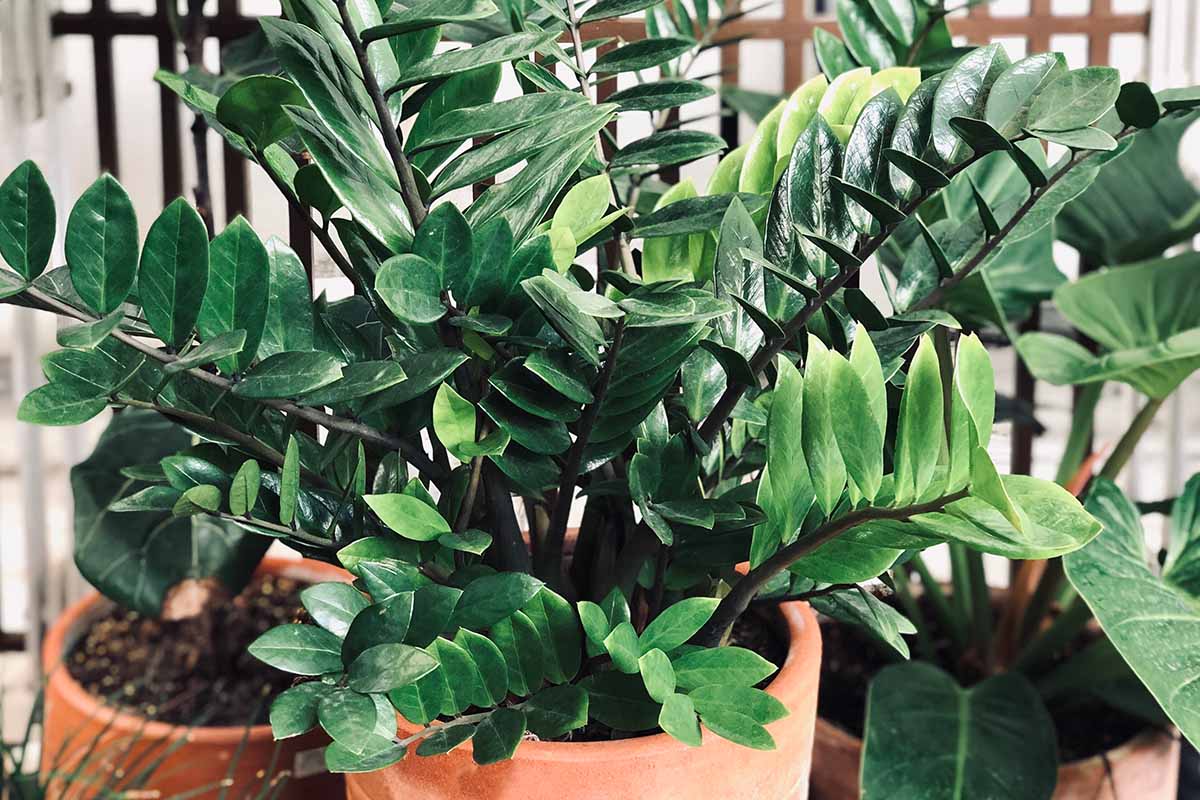
Zamioculcas zamiifolia, or the ZZ plant for short, is an ideal houseplant for beginner gardeners. It can thrive without a lot of light or water, and it is easy to propagate and share.
We link to vendors to help you find relevant products. If you buy from one of our links, we may earn a commission.
ZZ plants are typically started from leaf cuttings, which means you can create many new plants from a single parent.
Continue reading for instructions. Here’s what we’ll cover:
What You’ll Learn
Propagating ZZ plants from leaves is incredibly easy, and since it requires only a single leaf cutting per cloned start, this method makes it easy to avoid damaging the parent plant.
The only downside is that this process can be slow, so patience is key!

While it is also possible to start new ZZ plants by dividing and separating the rhizomes, this method is not recommended, as doing this may cause significant damage to the parent.
Taking Cuttings
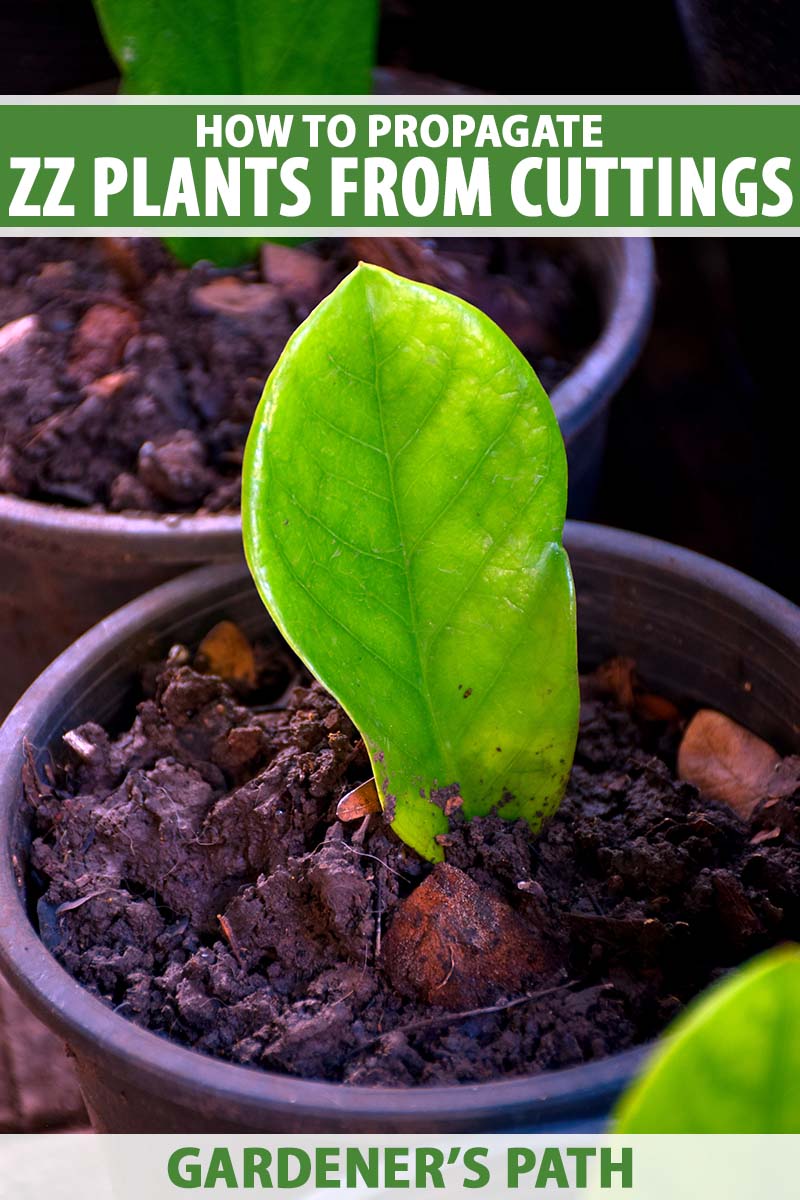
Start by picking a leaf from a mature stalk, and snip it with as much of the petiole attached as possible.
Since this method takes a long time to produce results, and not all cuttings may take, it is a good idea to cut several at once to increase your chances of success.
Once you have cut a few leaves, let them sit out for an hour or two to allow the cut ends to callus over. This should help to protect them from rotting.
If you prefer, it is also possible to take stem cuttings. The main downside is that you can only take a few at once or you risk harming the parent plant.
To do this, cut a few inches off the top of a mature stem, with at least two leaves attached. You can root stems in a similar manner to leaf cuttings, following the instructions below.
Rooting in Soil
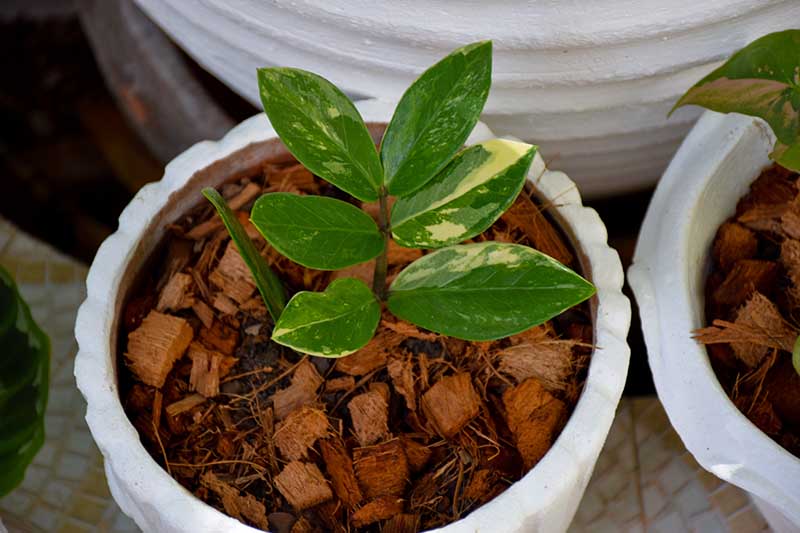
Find a pot with good drainage holes. The size isn’t really important, and whatever you have on hand should work fine. The plants will ultimately be repotted into larger containers after they root.
You can plant several leaves in one large pot, spacing them an inch or two apart, or plant them separately in smaller pots.

Start by filling the pot or pots with a well-draining, light potting mix. A blend of half potting soil and half perlite or vermiculite will work well. You could also use a mix of half perlite and half peat or coconut coir.
Insert each leaf cut side down into the potting mix, sinking it about half an inch, or just deeply enough so it will stay upright.
Water well and set the container in a warm area that receives bright, indirect light. Preferably, this should be somewhere you will remember to water them every couple of weeks, since it may be many months until they root.
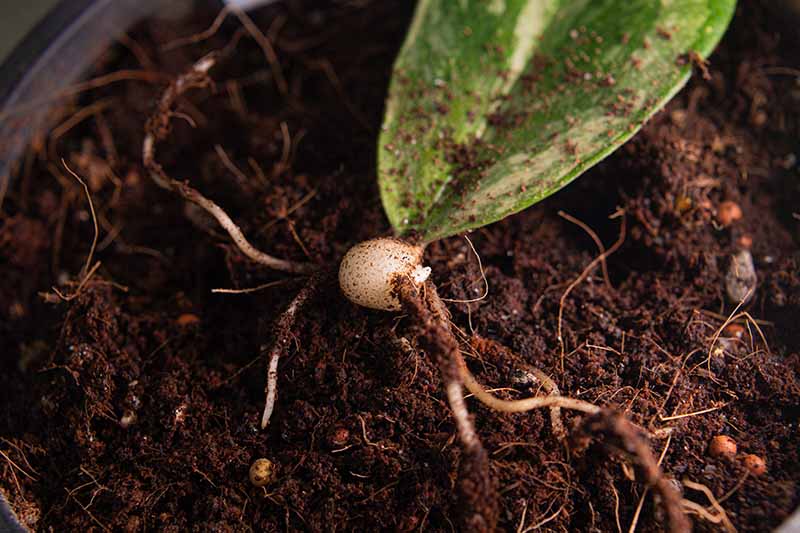
Each leaf will eventually produce a new rhizome and roots. Be patient and keep in mind that this can be a slow process!
In ideal growing conditions of about 80°F, they may create new rhizomes in about four weeks or so, but when grown in more typical indoor temperatures, this could take up to nine months.
You may be able to speed up the process by setting the pots on a heating pad designed for plant propagation, or by covering them with clear plastic bags to create a humidity dome. If you do this, be sure to open the covering briefly each week, to allow for some airflow.
After about a month, start checking for rooting by tugging gently on the leaves. But do so carefully, as the new roots are easily damaged.
You may also start to notice the leaves moving upwards as stems begin to grow. This is another sign that they have rooted.
Once the leaves have developed small rhizomes and a couple of roots, replant each into its own six- or eight-inch pot to continue growing.
Rooting in Water
If you prefer, you can also try rooting your cuttings in water. This method offers a fun visual way to monitor your progress. However, it can also be very slow, and there is more of a chance of rotting.
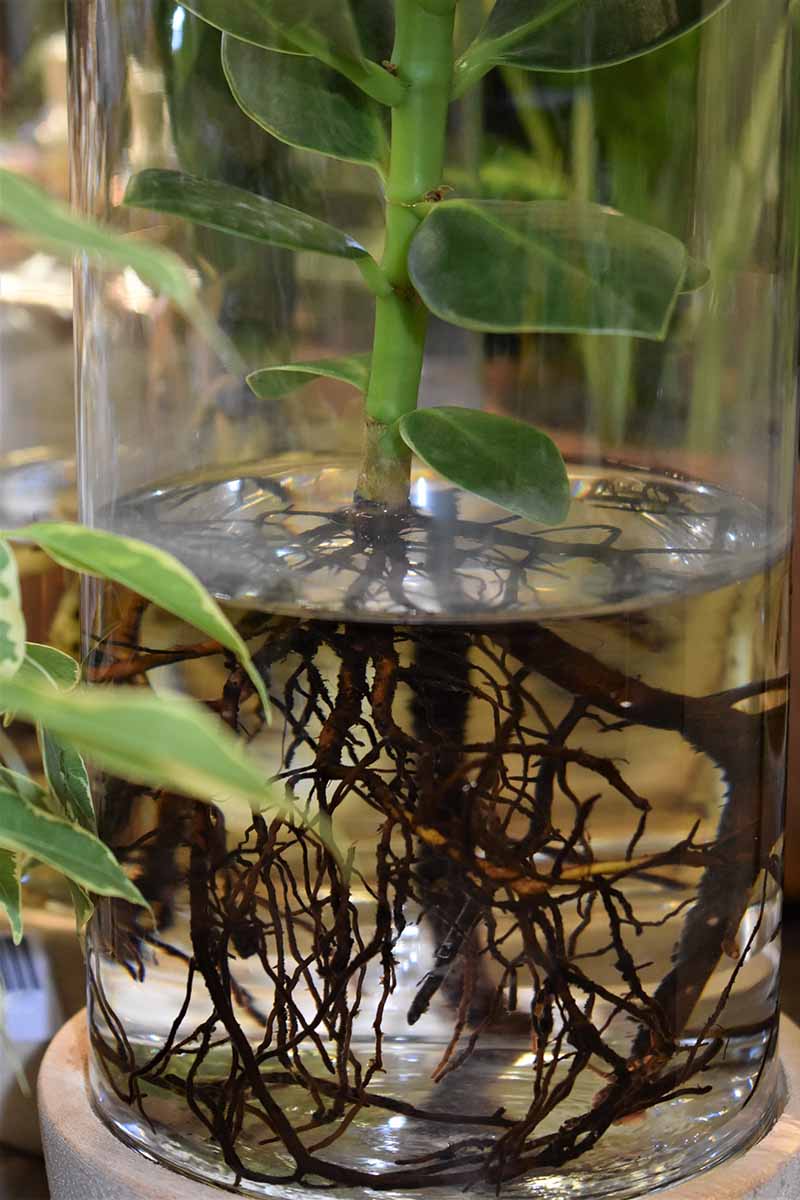
Place the cut leaves or stems in a narrow cup with a small amount of water. You need to use just enough water to cover the cut ends. Set the cup in a warm and bright location, changing out the water a couple of times a week.
Be patient, as it could take months for the roots to grow large enough to repot. Once you start to notice roots forming, it is time to pot up the cuttings in soil.
Give the Gift of Plants
Starting Zamioculcas zamiifolia from leaf cuttings is a fun (and free!) way to grow new plants.
As long as you’re willing to wait for results, you will wind up with plenty of baby plants to go around – not a bad holiday gift idea if you have time to plan ahead!
Are you growing ZZ plants and have you tried propagating them? Let us know in the comments section below!
To learn more about propagating houseplants, check out these articles next:


Thank you for this article. I have followed the procedures you outlined and now, after three months, new green shoots are appearing from the original propagating leaves. My question is, when should I re-pot these small new ZZ plants from their plastic cups to new pots? Thank you, Peter
Tug very gently on the leaves to check for rooting. The new growth you are noticing is a good sign that they are rooting well. Once they feel stuck and have developed a few roots, they are ready to be replanted into larger six- or eight-inch pots.
Yes
ZZ Plant. Heather, am so grateful to come across this article. I have had this plant since the 90’s and treasure it. Its all over with me where I live. I love the soil and plant easily. I will try propagating just for fun. Im humbled.
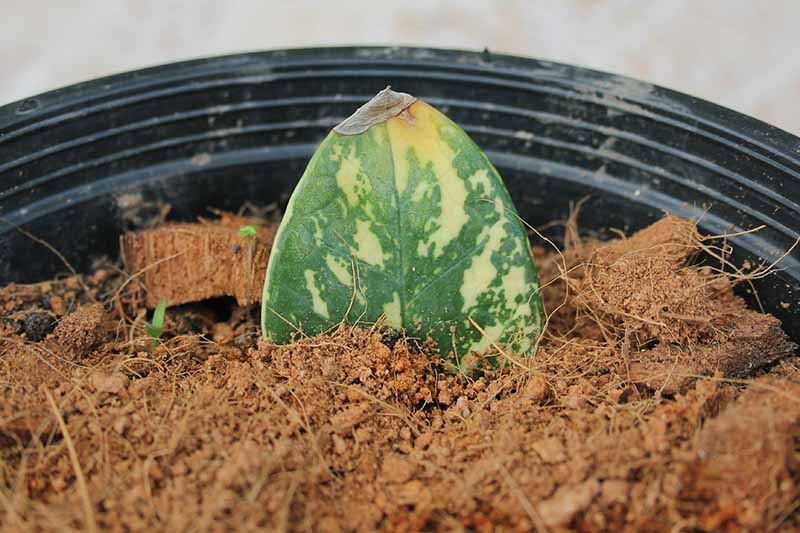
Are the ZZ leaves supposed to turn yellow when rooting in soil?
A little yellowing is probably nothing to worry about, but if they turn completely yellow this is likely a sign of overwatering – though it may be indicative of other extreme environmental conditions as well, like high heat or exposure to too much sunlight. If they haven’t yet set roots, toss these and start over. You may have better luck if you try stem instead of leaf cuttings the next time.