Astrophytum myriostigma
Astrophytum myriostigma, aka bishop’s cap cactus is a species appreciated for the beautiful patterns on its globe- or column-shaped stem.
This popular cactus is not only beautiful, but it’s also spineless.

We link to vendors to help you find relevant products. If you buy from one of our links, we may earn a commission.
It’s native to the hot desert and arid shrubland regions of northeast Mexico where it grows nestled in among other plants and rocks.
Also commonly known as bishop’s hat or bishop’s miter, this species usually reaches up to 24 inches tall and four to 10 inches wide, though some very old specimens grown in their native habitats can reach up to five feet tall.
What You’ll Learn
When viewed from above, these plants have either a star shape or a somewhat globular appearance depending on how many ribs are present and their shape.
The ribs may be broad and rounded or narrow and angular.
They typically have between three and 10 ribs, and along these are beautiful areoles, which are modified branches.
Quick Look
Common name(s): Bishop’s cap, bishop’s hat, bishop’s miter cactus
Plant type: Evergreen succulent
Hardiness (USDA Zone): 10-11 (outdoors)
Native to: Northeast Mexico
Bloom time / season: Spring, summer
Exposure: Direct sunlight, full sun outdoors
Soil type: Gritty succulent and cactus growing medium
Soil pH: 6.0-7.0
Time to maturity: 5 years
Mature size: 24-60 inches high x 4-10 inches wide (depending on cultivar)
Best uses: Houseplant, cactus planters, xeriscaping
Toxicity: Low
Taxonomy
Family: Cactaceae
Subfamily: Cactoideae
Genus: Astrophytum
Species: Myriostigma
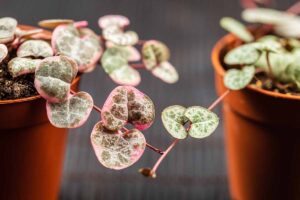
Bishop’s cap cacti usually have white flecks on their skin – also known as flocking – which are hairy scales, and in some cultivars they take on a highly ornamental appearance.
This flocking is unique to species in the Astrophytum genus.

There are also varieties, cultivars, and forms of this species that are fleck free, and denoted by the botanical descriptor nudum.
These “nude” bishop’s cap cacti, have smooth skin and a greener coloration than those that are flocked.
The flowers of bishop’s cap are funnel shaped and yellow with yellow centers. If pollinated, they will produce seed-filled berries that split open when they are ripe.
How to Grow
Bishop’s cap cacti are easy to grow indoors on a sunny windowsill or outdoors as part of a xeriscape in USDA Hardiness Zones 10 and 11.

Our guide to growing astropytums gives an overview of cacti in this genus and how to cultivate them in your home or landscape.
Now let’s have a look at how to grow bishop’s cap.
Soil
One of the most important requirements for A. myriostigma is well-draining soil.

In addition to a soil pH range of 6.0 to 7.0, bishop’s cap needs a very gritty growing medium with excellent drainage, made up of 10 percent organic matter and 90 percent mineral content.
This can be accomplished by using a commercial cactus and succulent potting mix and adding gritty materials such as coarse sand, fine pumice, or lava rocks.
You can also learn to make your own cactus potting medium here.
Light
Bishop’s cap cactus needs full sun, that’s to say six to eight hours of direct sunlight per day. You may need to use a grow light if you don’t have a suitable spot in your home.

These cacti don’t really enjoy scorching sun during the hottest part of the day in summer.
For outside growers or indoor gardeners with very big south-facing windows, provide some light shade during the hottest part of the day.
Temperature and Humidity
Hailing from hot regions, bishop’s cap cacti grow best when temperatures are 70 to 90°F during the day.
They are hardy to temperatures in the low 20s, as long as soil and air moisture are both low.
In general, humidity of about 40 percent is sufficient.
Water
Sometimes indoor gardeners find watering cacti to be tricky, wondering if they should only give tiny amounts of liquid at a time.
So let’s clear that up – when you read that you shouldn’t overwater your bishop’s cap, that doesn’t mean you should only provide trickles of water!

Water deeply when the soil has dried out completely and wait for the water to drain out of the bottom of the pot. Alternatively you can use the bottom watering method.
After watering, let the pot drain completely and toss out any water that collects in the saucer underneath the pot.
If you see cracks in the cactus, you might be watering too often. Always err on the side of underwatering rather than overwatering.
If the plant is looking a bit deflated, you may have gone too long between waterings.
When these astrophytums are exposed to temperatures below 60°F, withhold water completely or they will rot.
Repotting
Make a mental note, or put it in your gardening calendar – bishop’s cap cacti need to have their growing medium changed out every couple of years, even if they haven’t outgrown their pots.
If you have recently purchased a specimen from the store, you may wish to repot to ensure it’s growing in the right potting medium.

Choose a container that has adequate drainage holes and if necessary is just one size larger than the current pot.
Remove the cactus from its container carefully, and clean off as much of the potting medium from the roots as possible.
It’s best that the roots are dry when repotted, so if they’re wet, place the bare root specimen on a plate out of direct sunlight, and allow the roots to dry out before proceeding.

When you are ready to pot, add a shallow layer of growing medium to the bottom of the container.
Hold the bare root cactus in place over the pot, and fill in around it with growing medium. Make sure all the roots are covered.
Adjust the amount of growing medium in the pot, keeping an inch gap between the top of the medium and the rim of the pot.
Fertilizing
A little fertilizer will help your bishop’s cap cactus maintain healthy growth, but be careful not to overdo it.
Astrophytum cacti only need to be fertilized once a month during the growing season.
Choose a very gentle gentle product, such as Dr. Earth’s Succulence Cactus and Succulent Plant Food.

With an NPK ratio of 1-1-2, this fertilizer is mild and formulated specifically for cacti and succulents. It’s available in 16-ounce bottles from Arbico Organics.
Cultivars to Select
There are some fabulous cultivated varieties of A. myriostigma, but the straight species is also beautiful in its own right.
Let’s take a look at a few standout cultivars:
Fukuryu
‘Fukuryu’ is a cultivar of A. myriostigma known for its funky looking, randomly occurring creases and lines.

There are different forms of this cultivar – some have flocking that appears in stripes, some are almost ball shaped, and others are known for being fleck-free.
Kikko
‘Kikko’ is another cultivar of A. myriostigma that has many different forms.

The defining characteristic of this cultivar are the horizontal furrows that crease the ribs, creating prominent tubercles.
Depending on the form, these tubercles can be rounded, crystal-like, or more washboard-like.
Onzuka
‘Onzuka’ is covered with a thick pattern of white flecks on the surface of the skin.

The pattern of the flecks varies, appearing sometimes like a sky full of snow or reptile scales. Or the flocking can be so thick it looks almost like the rind on a camembert cheese!
Propagation
A. myriostigma can be propagated in two different ways: sowing seeds and grafting.
We’ll describe both methods briefly, as well as providing directions for transplanting seedlings.
From Seed
While propagating cacti and succulents from seed is slow, requiring about a year from sowing to transplanting, it’s quite a fun project!

And one that’s best undertaken in late winter to early spring.
Choose or create a mix that contains 80 percent gritty mineral ingredients such as coarse sand, fine pumice, or lava rocks, and 20 percent organic matter such as coconut coir, compost, or pine fines.
- First, blend the ingredients to make the seed starting growing medium.
- Fill pots or trays with growing medium to within an inch of the rims, then moisten it with water.
- On top of the growing medium, spread a thin layer of horticultural sand, roughly one third of an inch thick.
- Spread the seeds at least half an inch apart, then cover lightly with a sprinkling of sand then moisten the sand.
- Cover the pots with a plastic bag or cling wrap, or set them under a humidity dome. Keep the medium evenly moist.
- Maintain the temperatures at 80°F during the day and 70°F at night. If you don’t have a suitable location, you can always use a heat mat.
If the seeds are fresh, they will germinate quickly, within a few days. Give them a month, though, just to be safe.
A month after germination, start to acclimate the seedlings to less humid and brighter conditions by removing the plastic or humidity dome and gradually moving the seedlings to a south-facing window.
Continue this gradual acclimatization process little by little, until the seedlings are living at ambient humidity and are used to direct sunlight or more intense exposure from a grow light.
Allow the seedlings to remain in the same pot or tray until they are a year old or older.
From Grafted Rootstock
Since bishop’s cap cacti are naturally slow growing, one way to speed up the maturation process is to graft a seedling onto another, faster growing cactus.

To propagate using this method you’ll need a bishop’s cap seedling that is at least two months old, rootstock, plastic wrap, a rubber band, and a sharp, sterilized blade, such as a box cutter.
Selenicereus and Pereskiopsis species are commonly used as grafting rootstock.
- Cut off the tip of the rootstock, and bevel the edges. Then cut the seedling in half horizontally in the middle.
- Recut a thin layer of the rootstock so that the wound is fresh, then stick the wounds together, pressing gently to remove any air bubbles.
- Cover the astrophytum scion and the top inch or so of the rootstock with plastic wrap, and secure the wrap to the rootstock with a rubber band.
- Place the grafted rootstock in a shaded location for a week.
After a week, check the graft. If it was successful, the astrophytum scion will adhere well to the rootstock.
If the scion comes off, the graft wasn’t successful – but you can try again, taking fresh cuts along the wounds on both rootstock and scion.
Transplanting Seedlings
Give them at least a year growing in their seedling pots or trays before transplanting the young bishop’s hats.
Select either a nursery pot or something more decorative, but make sure it has drainage holes, is deeper than it is wide, and measures between two and three inches wide.
You can use a spoon to dig the seedling and its root ball out of its current container.
Since the root ball is likely quite small, fill the pot nearly full with growing medium.
Use the spoon to make a hole in the center of the pot, then insert the roots, taking care not to cover the stem.
Leave a space of around 1/2 inch between the top of the growing medium and the rim of the pot, and be sure to hold off on watering for the next four days to a week.
Managing Pests and Disease
Outdoors, there are likely other plants in your yard or garden that will tempt deer and rabbits before they make a move on your bishop’s cap cactus.
And if you keep your cactus healthy with plenty of sunlight and not too much water, it will be more likely to resist the onslaughts of insects too.
Indoors and out, bishop’s cap is subject to the usual suspects of scale, mealybugs, and spider mites.
What you can’t see unless you unpot your plant is the type of mealybug that infests the roots.
Known as root mealies, these look like rice-sized pests that feed on the roots and stunt the growth of the plant.
Generally disease only shows up when the cactus is chronically overwatered, either as a result of too much attention from the watering can or poorly-draining soil.
Learn more about dealing with rotting succulents here.
Hat’s Off to This Astronomically Cool Cactus
Sometimes you just have to pause and marvel at the wonders of nature.
Bishop’s cap cacti are special, not least because they are spineless and nontoxic, so make ideal houseplants if you have small children or curious pets.

Now that you know how to care for your bishop’s cap cactus, it’s your turn to share. Are you growing one of the fabulous A. myriostigma cultivars? Which ones are still on your wish list? Let us know in the comments section below.
And if you need any help troubleshooting a plant problem, just let us know, we’ll be happy to help!
Still up for expanding your cacti and succulent knowledge? We have more articles for you right here: