Clivia spp.
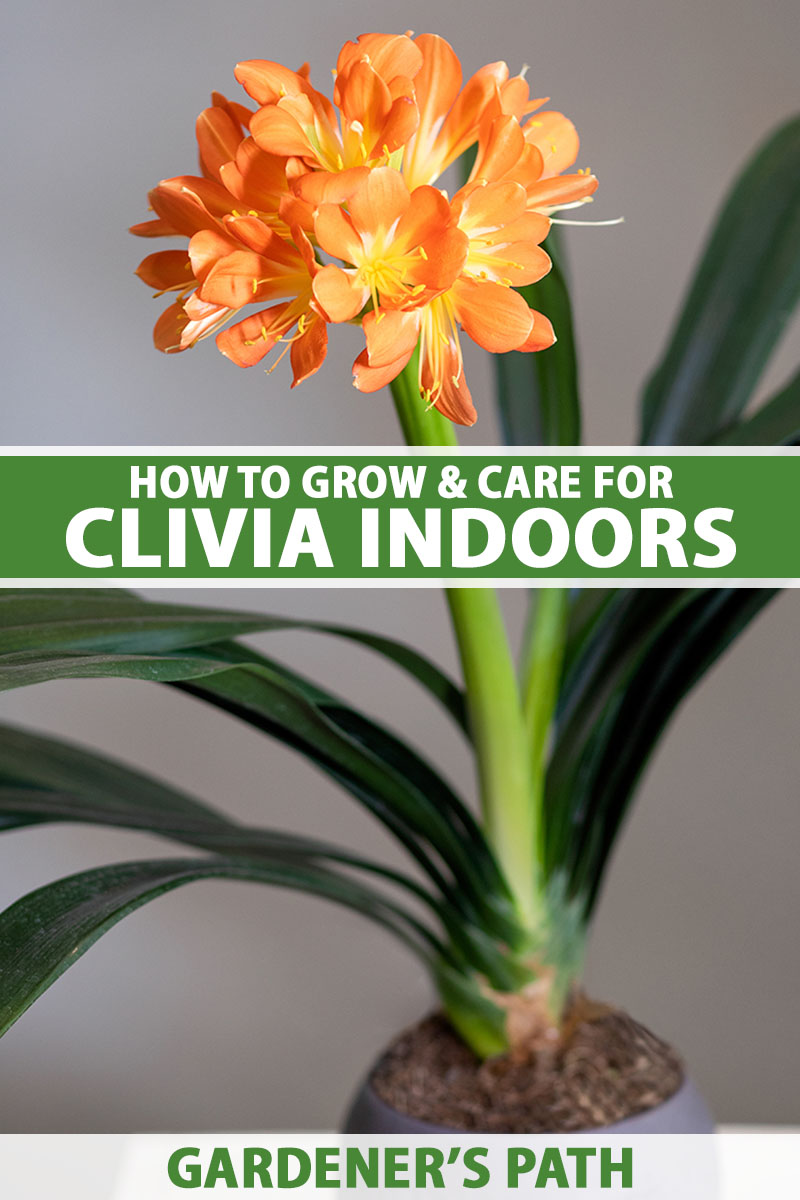
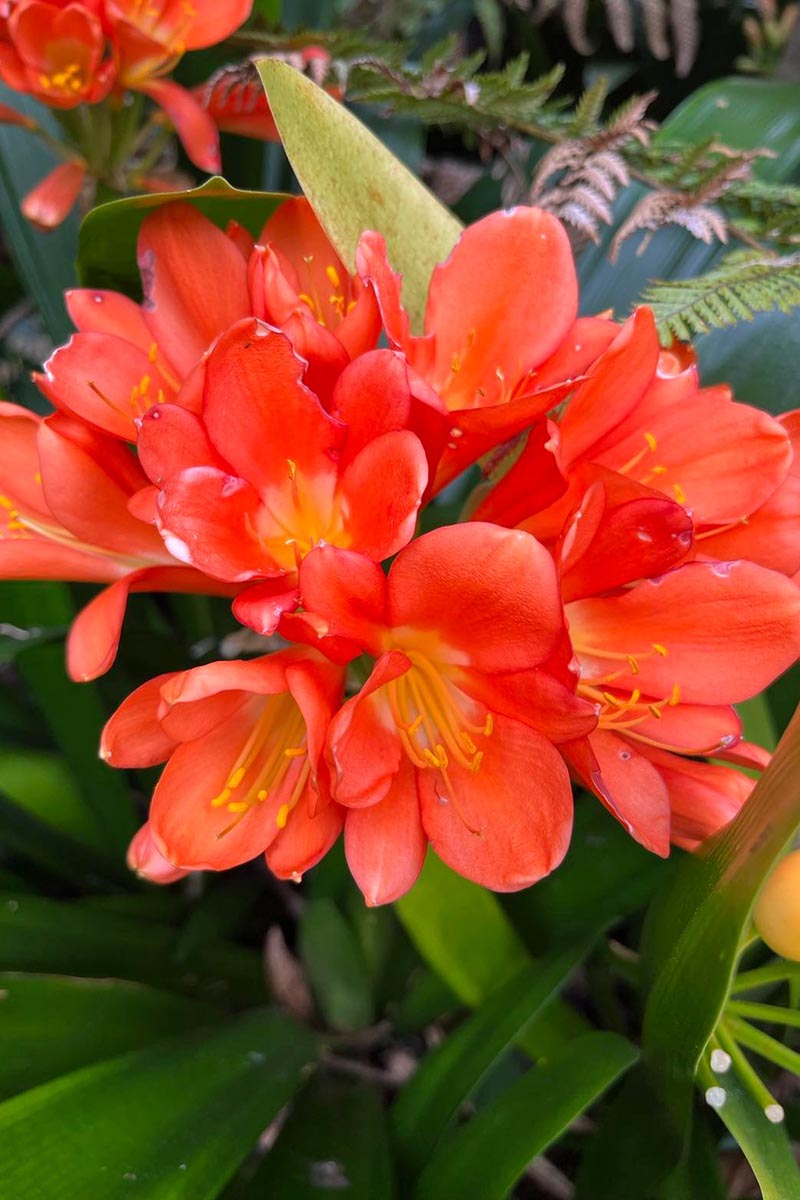
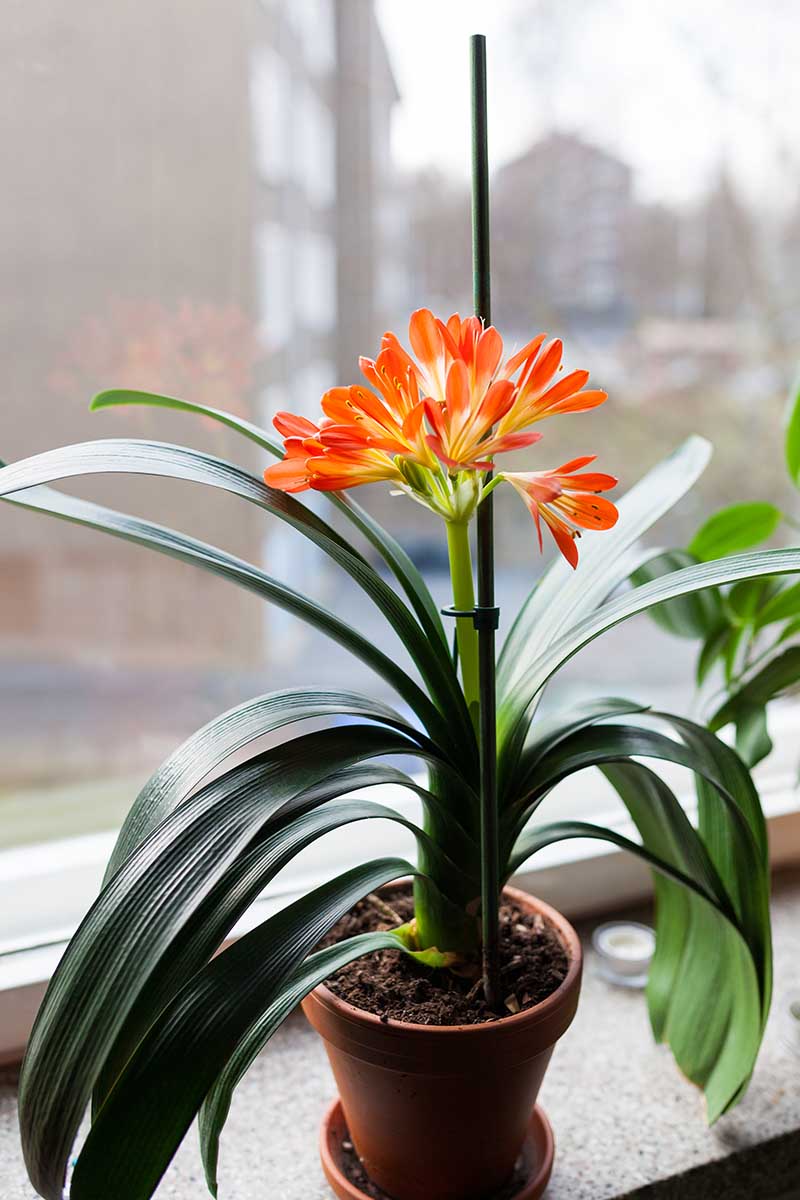
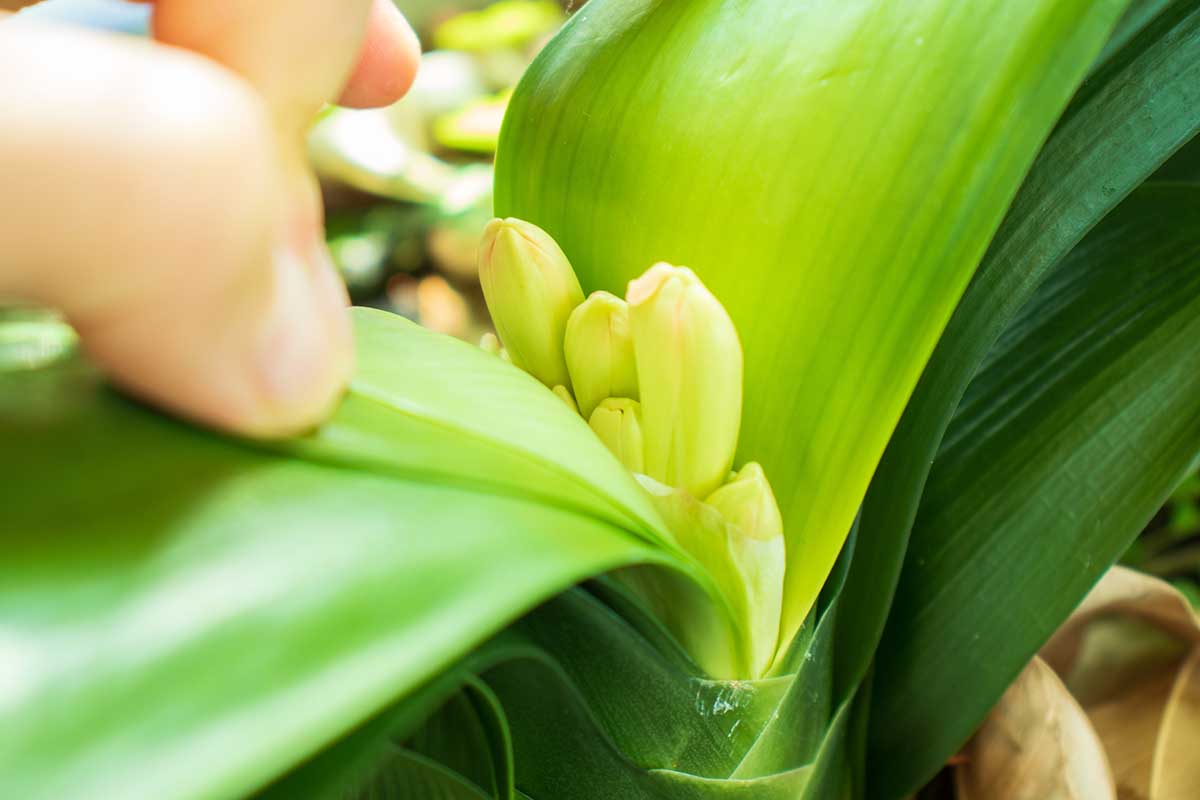
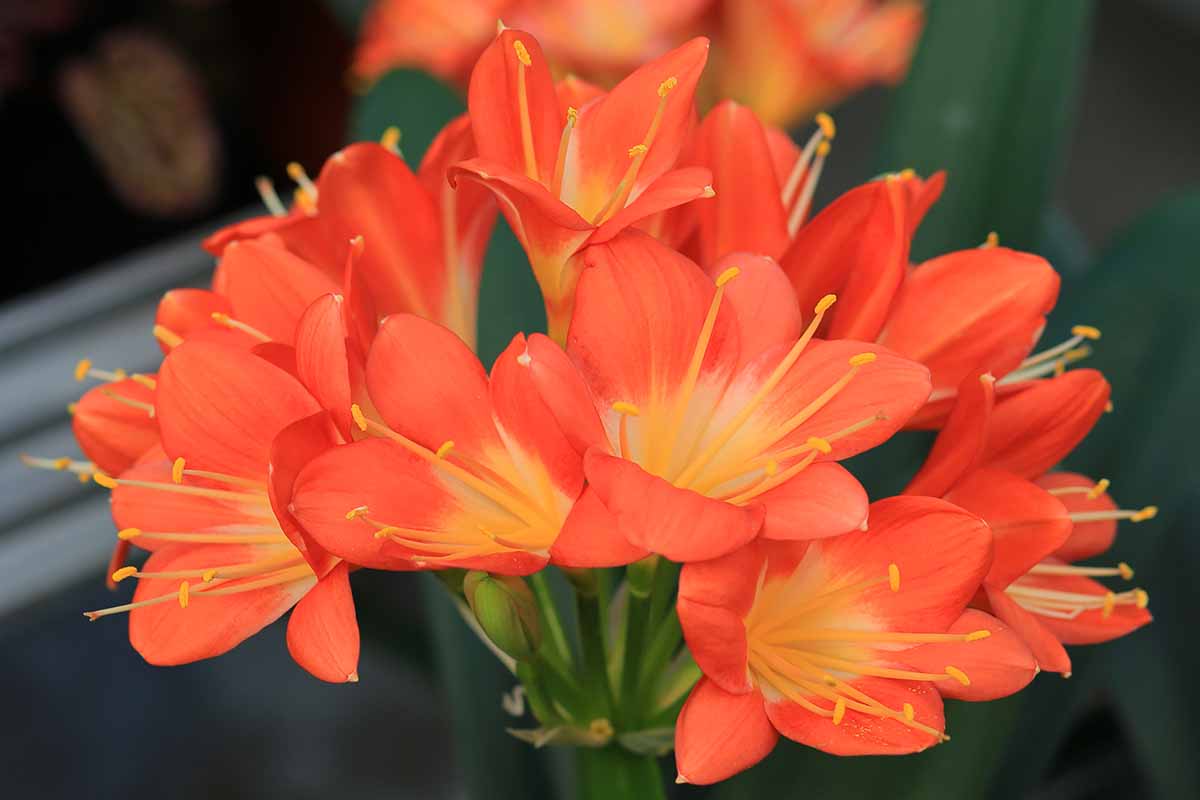
The bold flower clusters of Clivia in early to mid-spring and their arching, often symmetrical, strap-like foliage make them stunning additions to an indoor plant collection.
This guide will discuss how to care for them as houseplants. Most clivias can’t tolerate cool temperatures, but if you’re in Zone 9 or 10, they’ll grow happily outdoors all year in the right conditions.
We link to vendors to help you find relevant products. If you buy from one of our links, we may earn a commission.
That’s how they grow in the warmer regions of my New Zealand homeland.
Every morning of my childhood, I’d look out my bedroom window to a sea of clivias waving hello, with stunning bursts of orange flowers in spring. They thrived despite near year-round neglect along the shaded side of our family home.
Caring for clivias isn’t complicated but they do have some specific needs that are a little different to many other popular indoor plants, as they prefer less light than most and aren’t fond of standard potting soil.
Here’s what I’ll cover:
What You’ll Learn
Cultivation and History
Clivias are native to southern Africa, growing wild in forest understories in South Africa and Eswatini (formerly known as Swaziland). They’re also known as clivies, Cape clivias, bush lilies, and klivias.
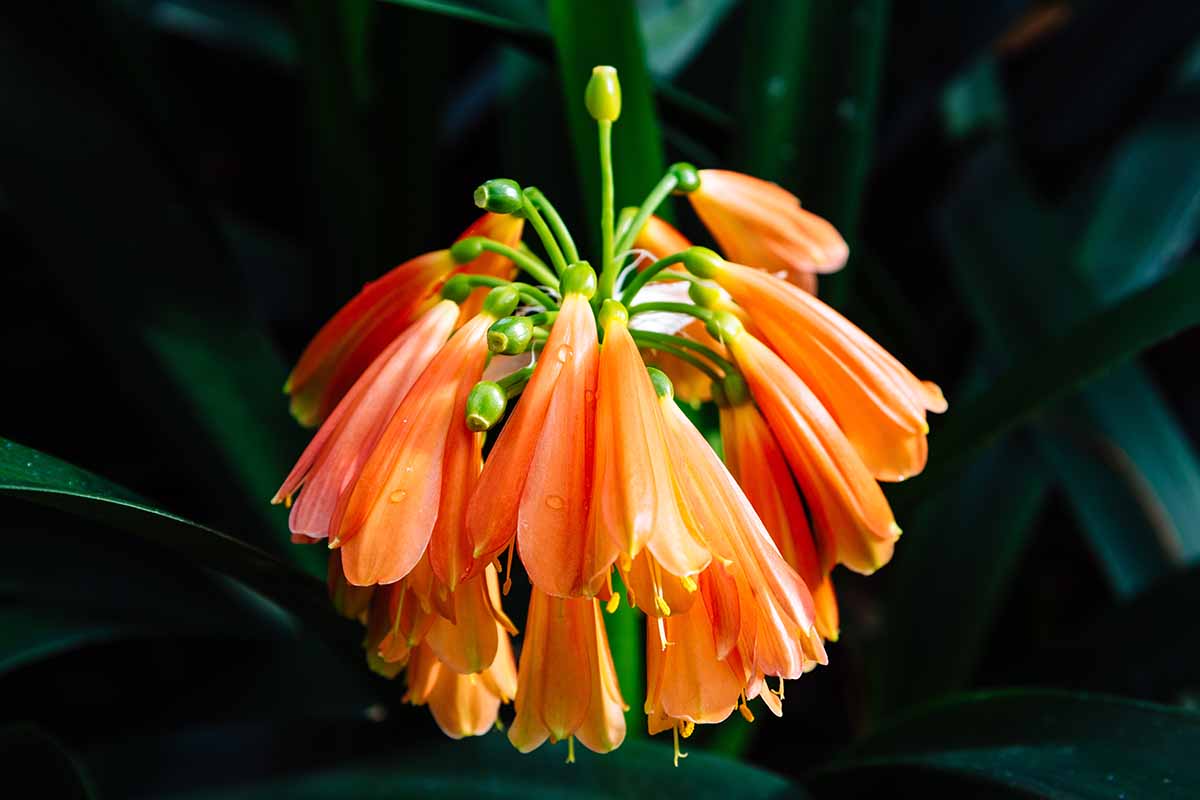
Members of the same family as amaryllis, Amaryllidaceae, the flowers look similar, but clivia blooms are smaller and grow in bigger clusters. These plants also prefer dappled shade, the opposite of sun-loving Hippeastrum species.
There are six described species of Clivia as noted below with the dates when they were first described, with some only identified fairly recently.
In the wild, most live in the loose leaf litter beneath large tree canopies while some are epiphytes, living on rocks, rotten logs, or sometimes low branches.
- C. caulescens (1954)
- C. gardenii (1856)
- C. miniata (1854)
- C. mirabilis (2002)
- C. nobilis (1828)
- C. robusta (2004)
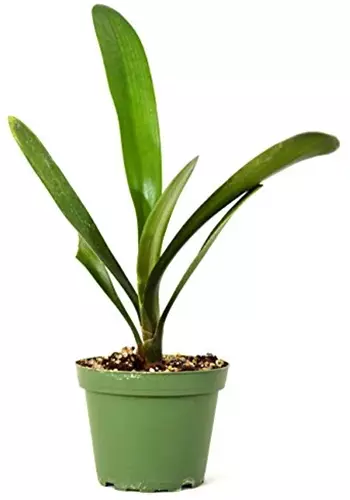
The varieties you’ll find for sale as houseplants are species plants, hybrids, and cultivars of C. miniata, the most common, and C. nobilis, but all clivias have similar care requirements.
Plants grow to a mature height of two to three feet with about the same spread.
British gardeners were besotted with C. miniata when they first became available as houseplants in the mid-1800s and breeders started producing ever more colorful hybrids.
They’ve remained fashionable show-offs since then thanks to their architectural foliage and bright, colorful flowering displays which last for weeks in spring.
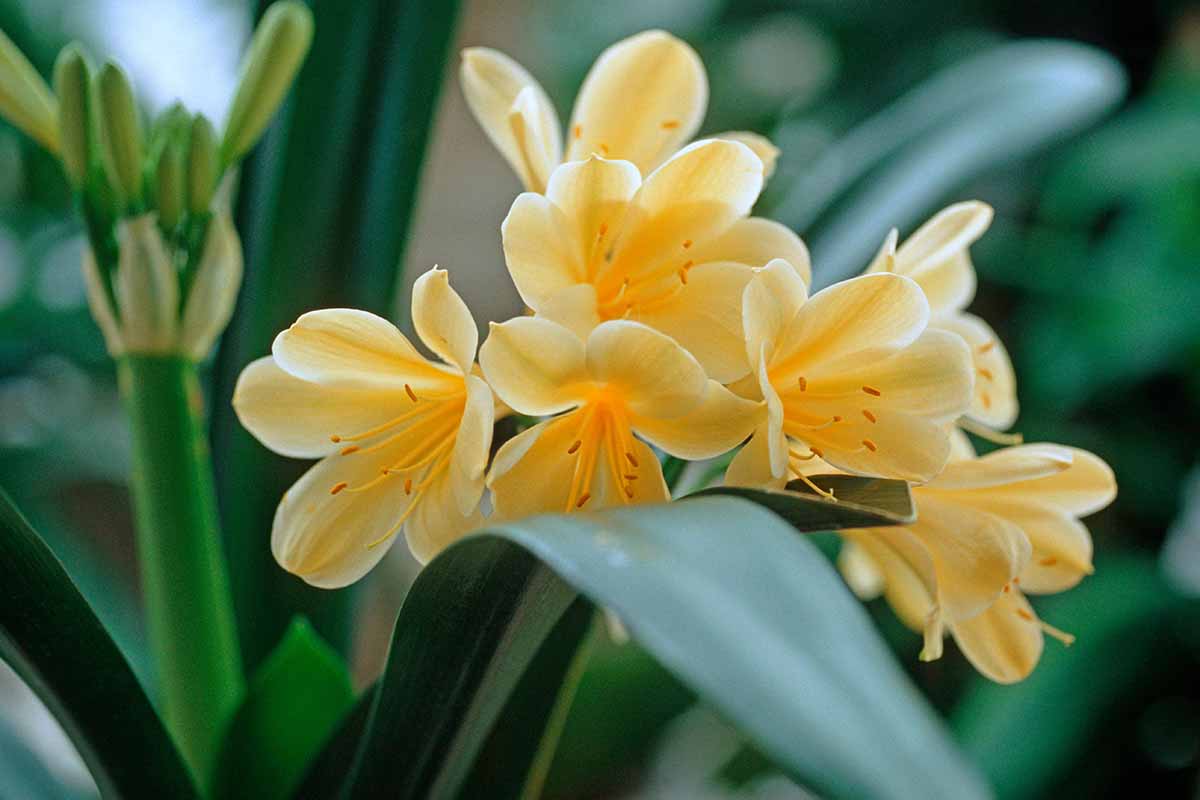
Today there are hundreds of flower colors available, from vibrant oranges to soft yellows, greens, and pinks, as well as delicate peaches and creams.
The latest hybrids include amazing bicolor mixes that look as if the petals are hand-painted, and several types with variegated foliage.
A Note of Caution:
The foliage contains low levels of toxins, including lycorine and other alkaloids. The highest levels are found at the base of the stem and in the green berries.
Pets and people should not eat any parts of this plant. Symptoms of ingestion include vomiting, excess salivation, and diarrhea.
Propagation
Clivia can’t be propagated from tissue cultures. Commercial nurseries must start them from seed or from offsets, which grow around the base of the mother plant.

Offsets can be divided easily from the mature mother plant and these clones will produce flowers of the same color. Other than buying one, this is the easiest way to add plants to your collection.
Plants grown from seed take three to five years to bloom, and around 10 years to reach their full size. You also may not get the color you expect, depending on how the flowers that produced the seed were pollinated.
Clivia breeders are very patient, careful people. Flowers are pollinated by hand with strict protocols but there’s still no 100 percent guarantee of the flower color or variegation on the foliage, and growers have to wait years to see the results.
This is also why clivia plants tend to be expensive to buy.
From Offsets
Offsets or “pups” grow beside the mother plant and they are genetically identical. Technically, a pup is a daughter produced asexually by the plant in same way as succulents, peace lilies, and bromeliads.
A clivia offset can be divided off from its mother when it has nine to 10 of its own leaves. This ensures it should have at least a few thick, healthy roots attached to its base as well.
You can divide offsets throughout the year, but the best times to propagate pups are in spring after flowering or in autumn.
In spring, you get the fastest root growth, while in autumn, the cooler temperatures tend to mean less chance of fungal infections.
You will need:
- One pot for each offset
- Fungicidal powder, such as garden sulfur
- Free-draining bark-based potting medium
- General purpose liquid or granulated fertilizer
- Small, clean rocks for support (optional)
Pots should be taller than they are wide as these will naturally drain better than wide, short pots, with a diameter slightly wider than the roots of your offsets.
You also want to have two to three inches of space available between the bottom of the roots and the pot base. Pots should also have multiple drainage holes at least half an inch in diameter.
Carefully remove the whole plant from the pot, including the mother as well as the offset or offsets.
The potting mix around the roots should be dry and easy to remove at division time. Lay the plant on its side and gently roll it from side to side while pressing to loosen the soil, then hold it upright with both hands and gently shake it.
If the potting mix won’t come off, wash it away with a gentle stream of water.
Check that the offset has its own roots attached to its stem. If it doesn’t, leave it with its mother and repot them together.
If it does, check to see if its roots are free of its mother or not. It may still be joined to her at the crown, just below the mother’s main stem.
Check by gently pulling and shaking the offset away from the mother. If it’s free, with a little more shaking and gentle pulling its roots will untangle from its mother’s. You can do the same with any other offsets if they are sufficiently mature.
If joined at the crown, use a sharp, sterilized knife to cut the offsets free. Make the cut as close to the mother’s side of the crown as possible.
Dab a generous amount of sulfur or another type of fungicide onto the wounds on both plants, then leave them to dry on a paper towel in an airy spot for a few hours, out of direct sunlight.
If you’re working with multiple offsets, sterilize the knife between cuts in a 10 percent solution of bleach and water, using one part bleach to nine parts water.
Clivias require a fast-draining potting mix – read about the options available to you and learn about suggested fertilizers in the How to Grow section below.
At this point, if you’re using a slow-release granular fertilizer, evenly incorporate it into the potting mix in the recommended quantity. Measure how much potting mix you need, tip it into a large container, add the granules, and mix well.
Place two to three inches of potting mix in the bottom of the pot, then tamp it down firmly. Hold the division over the pot in one hand so its roots are hanging loosely and the base of the stem is about half an inch below the pot rim.
Use your other hand to add more potting mix, tamping each layer down, until it reaches the base of the stem. Clivias are top-heavy plants and this helps to anchor the roots.
If the offset still moves about too much, you can place three or four small rocks around the base of the plant to help support it over the next six months to a year. Remove the rocks when they are no longer needed.
Water well and allow the water to run out the bottom of the pot. Don’t place a drainage tray or saucer underneath it as any water that remains will interfere with good drainage.
If you’re using a liquid fertilizer, add it after watering. Repeat with any additional offsets.
The mother plant can be put back into her original pot – repot in the same way as the offsets.
From Seed
You can buy seeds of named varieties, but there are drawbacks to this propagation method. You’ll need a lot of patience as it can take three years for a young clivia to bloom, but more likely four to five years, or sometimes longer.
Adding to the time, there’s a chance the color may not be what you were expecting, despite the best efforts of the breeder to ensure results.
You can also harvest seeds from your own mature plants, particularly if you’re growing just one variety and the seeds have been hand-pollinated indoors.
However, due to self-pollination or insect pollination, if growing multiple varieties, the flower color will be random – and again, you’ll be waiting at least three years to find out what you’ve got.
How to Harvest Seeds
Pollinated flowers produce a green berry that grows to the size of a cherry and ripens over six to 12 months.
As it nears ripening, the berry will change color over a few weeks to red (indicating the flower color will have orange to red tones) or yellow (yellow to cream tones).
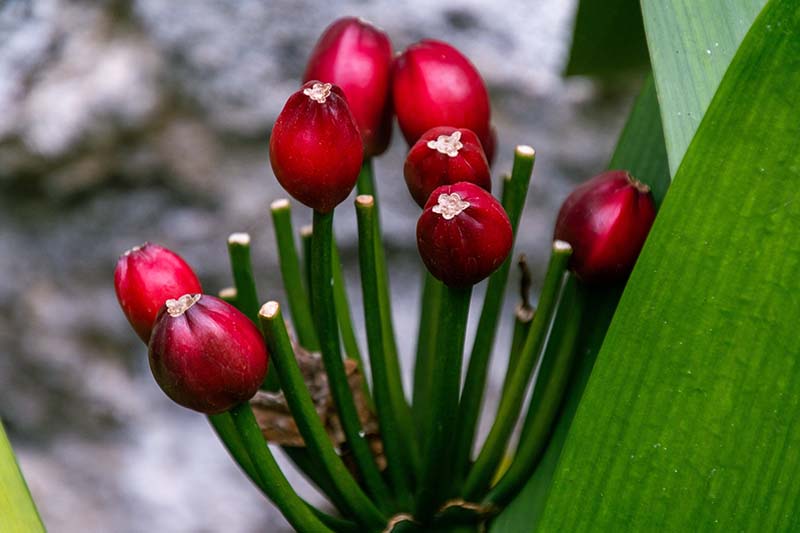
You can harvest berries anytime from when they begin to change color until they’re fully ripe. At that time, it will feel soft if you squeeze a berry between your fingers.
Cut the berry stalk off the plant at the top of the stem. Cover the wound on the plant with garden sulfur to prevent fungal infection.
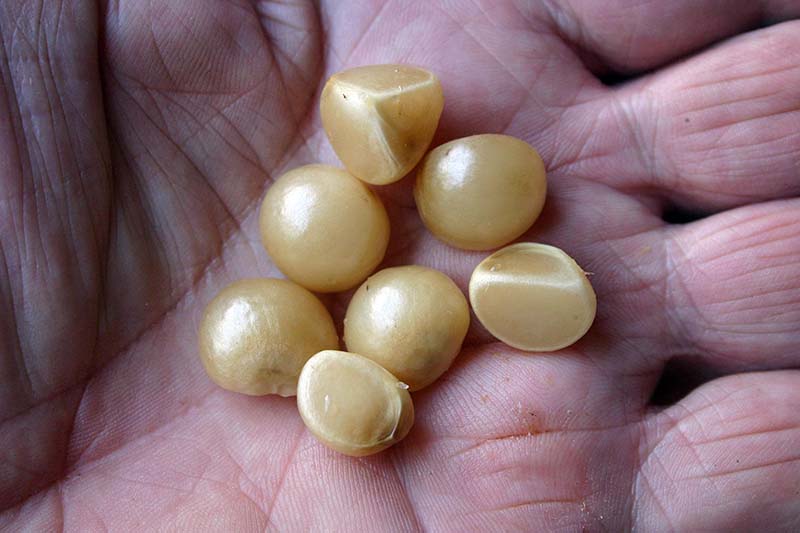
Remove the fleshy pulp and then a thin membrane from around the large, pearly seeds. Be careful as the seed may have begun to sprout a small shoot and if you accidentally break it off, it won’t regrow.
The main reason seeds fail to germinate is due to fungal infection. To reduce the risk, mix one part three percent hydrogen peroxide with two parts water to create a one-percent solution.
Soak the seeds in it for 24 hours, then dry gently with paper towels.
How to Germinate Seeds
Clivia seeds are best propagated within a few weeks of harvest. However, it depends in part on the time of year when your seeds have ripened. Store in a sealed plastic bag with a few drops of water in a low light place such as a cupboard.
Use a seedling tray with drainage holes in the bottom, a domed clear lid to retain moisture, and a solid tray underneath to hold water.
Fill with a layer of a moist, standard seed-starting mix or a soilless potting mix.
Each seed will have a small mark on it – a little, raised, slightly dark spot. This is the growing point which needs to make contact with the soil. Space the seeds one to two inches apart and gently press down until they’re covered about halfway.
If a seed has already sprouted, use a dibber to make a hole for the root, then insert it into the soil.
Label the container or rows as you go, if planting multiple varieties.
Cover the container and sit it in a bright, warm room in a spot with indirect light. Seeds need consistent warmth of 73 to 77°F and 60 to 70 percent humidity to germinate.
Depending on the indoor temperature of your home, you may need to use a heat mat to maintain the temperature.
Don’t lift the lid unless you absolutely have to. Add water to the tray placed underneath to bottom water as needed – the soil should be consistently moist but not wet.
Check regularly for signs of fungal growth and remove any infected seeds and the surrounding soil. Some breeders mist a fungicide spray over the seeds to prevent infection.
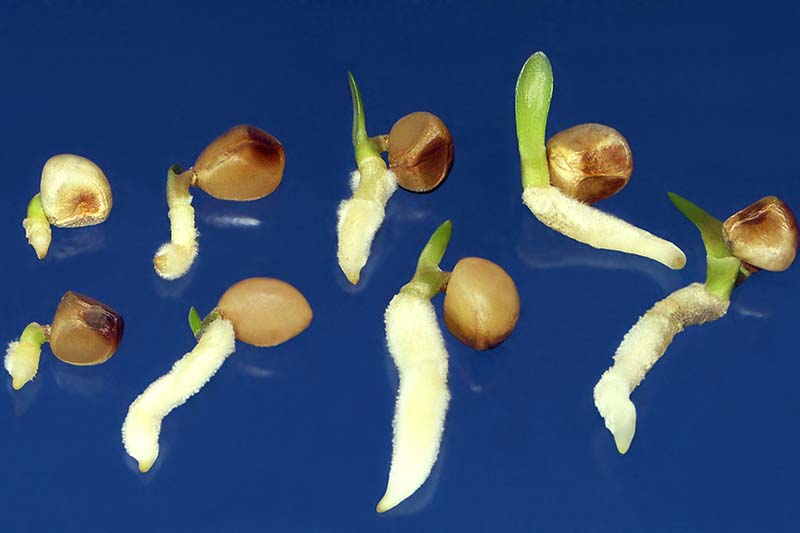
It will usually take about two to four weeks before you see signs of development, but some varieties can take up to six months.
Roots may push the seed up and out of the soil. If so, carefully remove it, use a dibber or pencil to make a new hole, then place it back in the soil with the root covered.
When the first true leaves are one to one and a half inches long, you can transplant the seedlings.
Transplanting
To transplant your seedlings, you’ll need pots that are about two inches across and at least four inches deep, with drainage holes and filled with a seed-starting mix or a soilless potting mix.
Always handle seedlings very carefully as damage to the roots will kill the whole plant. Use a teaspoon pushed into the seed tray to lift the plant up and out.
Hold the plant in one hand so its root or roots are dangling in the pot, then backfill around it with a coarse potting mix, firming it down gently as you go. There’s no need to remove the potting soil from seedlings as you want to avoid disturbing the roots.
At this point you need to start fertilizing your seedlings. Former North American Clivia Society president Jim Shields spent more than five decades growing clivias in Westfield, Indiana, 20 minutes north of Indianapolis.
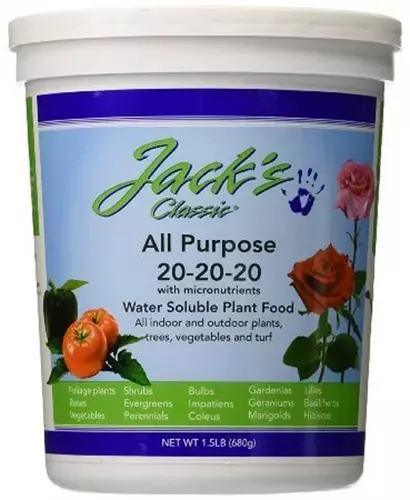
Jack’s Classic All-Purpose Fertilizer
He recommends Jack’s Classic 20-20-20, available from Walmart, at a ratio of one level teaspoon per gallon of water at every second watering.
South African clivia grower and Youtuber Manie Maree of Clivias4Africa prefers to use fertilizer granules thoroughly mixed into the soil.
His choice is Osmocote Smart release granules, available from Home Depot, which slowly release nutrients over six months or so.

Seedlings and young plants need more water than mature specimens aged over five years. Keep the soil moist but not wet, which may mean misting the soil or gently adding more water with a watering can twice a week, or more often as needed.
The foliage grows quite slowly but the root system can reach around four inches deep by the time plants are six months old, when they can be repotted.
Signs that a seedling is ready for transplanting into a larger container include roots peeking out the bottom, and in some cases growing media popping out of the pot as it’s pushed up and out by the roots.
Young clivias may need repotting three or four times – or sometimes more! – over their first four to five years of growth.
Mature plants can stay in the same, adequately-sized pot for three to 10 years if they’re not showing signs of outgrowing their container.
Repot one size up, using fresh medium in a container one to inches larger than the one it has outgrown, if roots are coming out of the drainage holes at the bottom or pushing up out of the soil surface.
How to Grow
Clivia plants have quite specific needs. They can’t tolerate bright sunlight, the cold, or much moisture around their roots. Conversely, too little light is also a killer.
They may be cultivated as houseplants in all Zones but will happily grow outside year-round in Zones 9 and 10 in their preferred growing conditions. We cover outdoor clivia care in a separate guide. (coming soon!)
The Right Pot
When mature, at around 10 years old, clivias will stand around three feet high by three feet wide. They’re top-heavy and prone to falling over so many growers keep mature plants in clay pots to try and avoid this, rather than lighter plastic.
The pot should be taller than it is wide with large drainage holes at the bottom. Look for ones with multiple holes, half to three-quarters of an inch across around the base.
If the roots start growing out the bottom, or pushing up out of the top, replant into a pot that is one size up, slightly bigger than the root ball by around an inch or two at most. Don’t be overly generous – clivias like to be close to but not quite root bound or they won’t flower.
The pot should sit on a base of sand or a capillary mat so water can drain out, allowing the soil moisture level to remain perfectly even from top to bottom. Don’t place potted clivia on a plate, saucer, or tray, or suspend it so the base is in the air.
Don’t place rocks, gravel, broken bits of pots or any type of screen in the base of pots either. A lot of gardeners have heard the common myth that this assists with drainage.
Research on the part of Paul Cumbleton of the UK Horticultural Society at Wisley, shows it has the opposite effect, preventing water from draining quickly and forming a wet layer where the water slows as it hits barriers.
Wet patches lead to root rot, killing plants.
Climate Requirements
Clivia foliage is very prone to burn damage, turning brown around the edges and tips.
Don’t keep plants in full, direct sunlight or expose them to frost, no matter what Hardiness Zone you’re in. It may be tempting to bring those potted plants outdoors in the summertime, but you need to keep an eye on the weather!
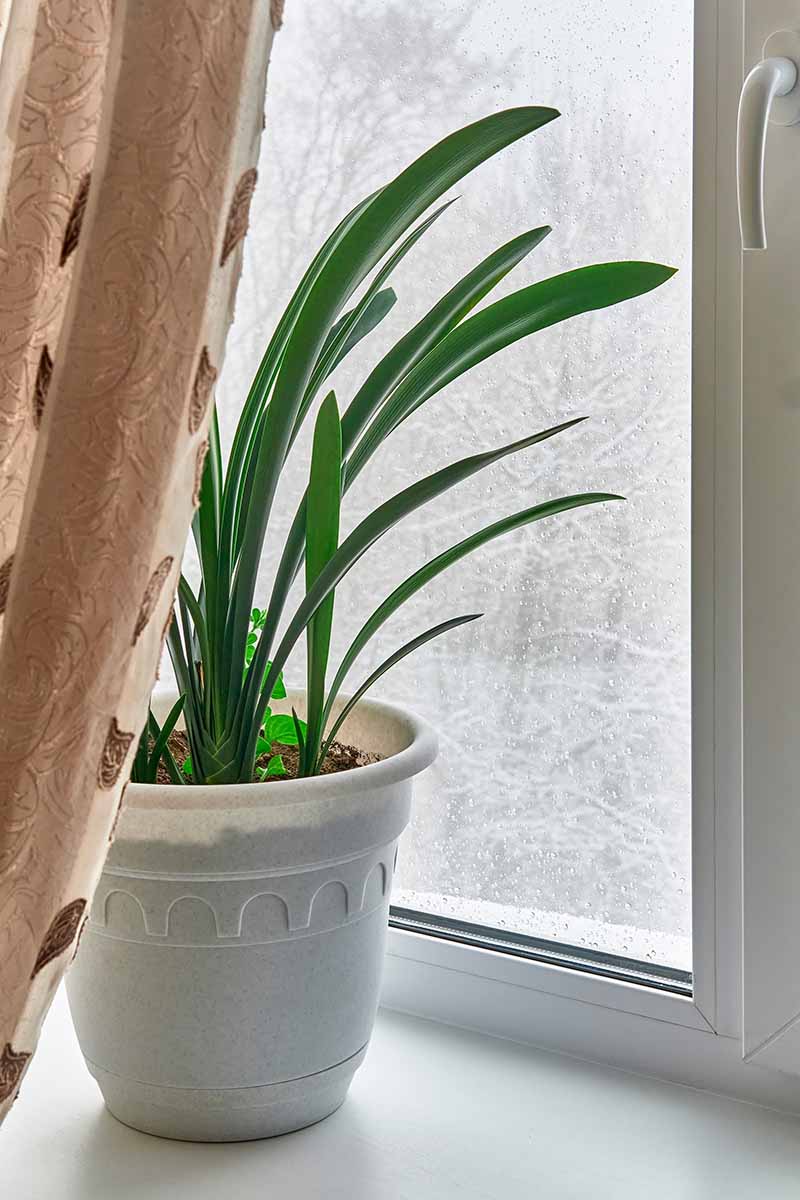
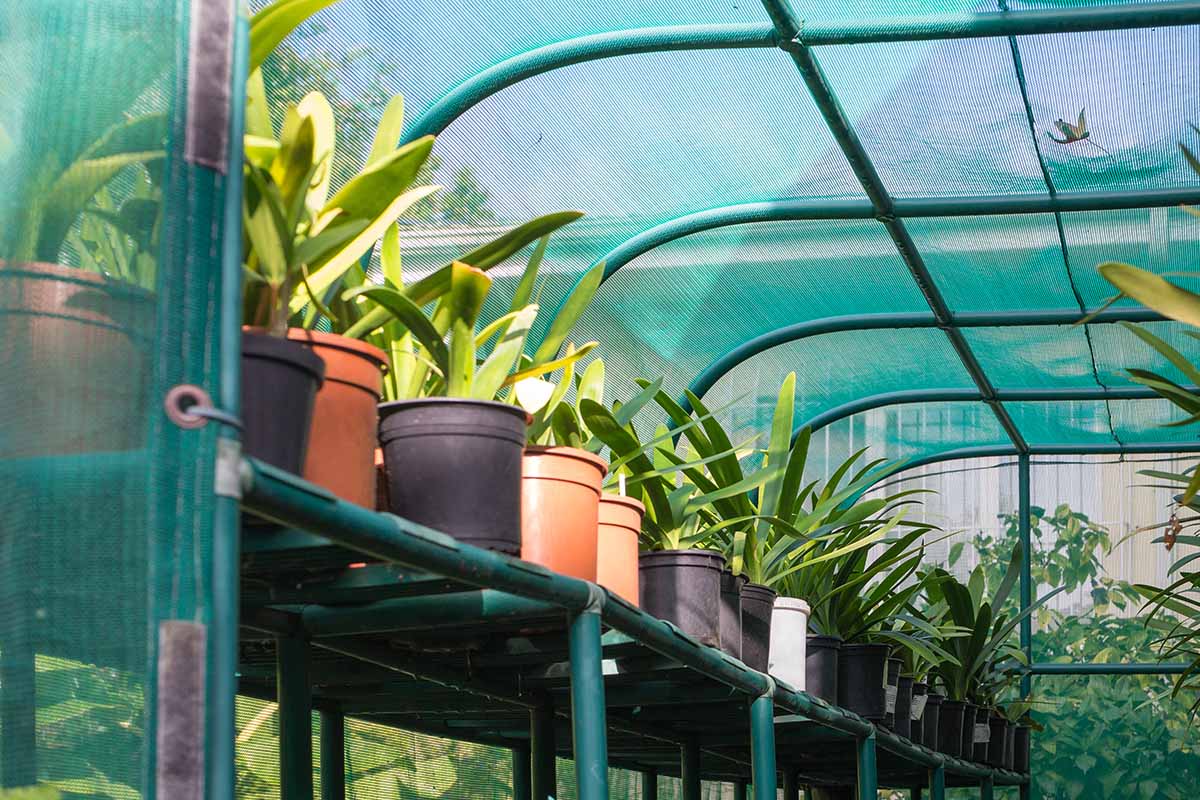
Indoors, they need bright, indirect light throughout the day. The ideal ratio outdoors is 80 percent shade to 20 percent sunlight. In Zones 9 to 10, where they can grow out in the garden, all-day dappled shade is best.
Clivia like to be in the warm. Temperatures around 65 to 70°F are ideal, or they can tolerate temperatures up to 80°F.
In Zones 1 to 7, you can put your plants outside in summer once it’s warm enough. Soft, direct morning and late afternoon sun is okay, but they need dappled shade in between. Bring them inside before the temperature begins to drop to around 60°F.
In cooler locations, bring them in at night to prevent large temperature fluctuations.
Over winter, clivias need a cool spot to prepare for flowering, at a temperature of 40 to 55°F for up to eight weeks – read more in the How to Promote Flowering Indoors section below.
Soil
In their native regions, clivias grow roots along the ground, through the natural leaf litter on forest floors – not down into the soil.
To grow them successfully in pots, you need to mimic these characteristics. In their South African homeland where they’re enormously popular as houseplants, gardeners often buy a local pre-made clivia growing medium.
It’s made from large chunks of pine bark mixed with lime, nitrogen, and water, which is hot composted until all that’s left is its hard, porous structure.
The rest of us must make our own. It needs to be coarse and quick-draining, which means as you pour water in at the top, it’s running almost as fast out the bottom of the container. This helps to avoid rot in the thick, spongy roots and also allows the plants to absorb the high amount of oxygen they need to survive.
The ideal growing medium is:
- Stable (doesn’t contain rotting organic material)
- Porous and chunky
- Fast-draining
- High CEC (cation exchange capacity, a measure of the medium’s ability to provide nutrition)
- Acidic (pH 5.0-6.0)
Plants may manage to find a way to grow in poor soil but they won’t typically do well and will rarely, if ever, flower.
Mixes to avoid include ordinary garden topsoil, clay, heavy potting mix, compost, mushroom compost, wood shavings, sawdust, vermiculite, or chicken litter. All hold too much moisture and/or don’t promote the flow of oxygen.
You can use perlite – the Clivia Society recommends it as one option for seedlings – but they warn that you must be fastidious with your feeding and watering regime as it doesn’t hold enough nutrients to sustain plants.
If used as part of a mix to promote drainage, no more than 30 percent perlite should be added.
One easy option is to use a medium to coarse bark-based orchid potting mix like this organic option from Perfect Plants, available via Home Depot, as a base, comprising around 50 percent of your mix.
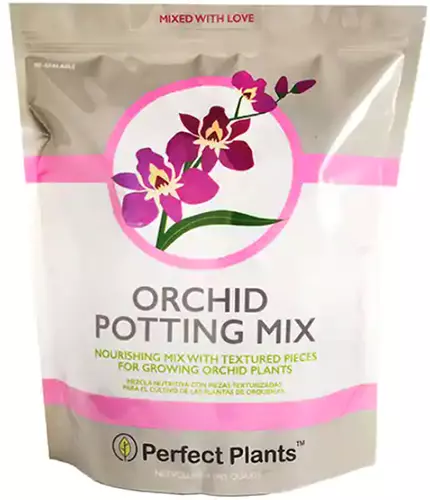
The other 50 percent can be a well-draining potting mix.
Other base options include composted pine bark, a mix of medium and fine coconut husk chips, or a slightly acidic (ericaceous) potting mix. Again these should comprise around 50 percent of the mix.
You can add coconut coir or sphagnum moss for bulk but these should comprise no more than 30 percent of the mix as they can cause waterlogging.
Quartzite sand can help with drainage. Sieve it and only use the coarser pieces, not the fines, and don’t make it more than 25 percent of the mix.
Don’t use any other type of sand. River sand may contain soil that can carry diseases and nematodes. It and other sand types eventually migrate into the tiny spaces in a potting mix, slowly decreasing airflow and eventually blocking water movement.
Cliva expert Jim Shields would create a DIY growing medium that starts with two parts Pro-Mix T potting mix, now known as Pro-Mix Tropical.
Its main ingredients are Canadian sphagnum peat moss, peat humus, and perlite.

To that he adds one part coarse sand and one part granite chicken grit, like this product from Chicken Heritage, available on Amazon.
You can also add slow-release fertilizer granules – read more on the best types of fertilizer for clivias below.
If you do create your own growing medium, it’s crucial to mix it well. Jim Shields once used a small concrete mixer to make bulk batches and would leave it running for an hour, but you probably won’t need this much!
Feeding
When asked what the best product is for fertilizing clivias, the answer varies from grower to grower.
Some use slow-release granules, applied in spring and autumn. Granules can be added to potting mix when you repot or spread on the soil surface, well away from the stem. Water well afterwards.
Others feed little and often, about once every two to four weeks, using liquid fertilizer. Clivias like more nitrogen and phosphorus after flowering through to early autumn, then higher potassium levels from mid-winter for good flower growth.
A good general fertilizer will have a 3-1-5 ratio of nitrogen (N), phosphorus (P), and potassium (K). But some growers use an all-purpose, balanced 20-20-20 fertilizer.
Most growers don’t feed their plants from autumn to mid-winter – read more about why and learn more about caring for these plants over winter under How to Promote Flowering Indoors below.
Watering
Clivias are incredibly drought tolerant. In the wild, they receive most of their yearly watering in summer and sit in almost bone-dry conditions over winter.
Overwatering is the most common mistake. The first sign is yellow foliage, followed by stunted growth and rot around the base.
In a list of his tips for growing clivia, Jim Shields has some sage advice for beginners on when to water mature plants.
“It is very hard to hurt a clivia by letting it go dry. Until you have the “feel” of caring for your clivia, it is always best to err on the side of watering too infrequently.”
The basic rule is to provide more water in summer, and much less in winter. When it’s warm, you may need to water thoroughly, as often as once a week indoors.
Let the potting mix go dry before you water. Check the soil two to four inches deep and the drainage holes at the bottom.
If you’ve got your potting mix right, water will drain out quickly. It ensures you’re wetting the roots all the way to their ends, and they aren’t sitting in a wet patch at the bottom of the pot, which will cause rot.
Water running through the pot also helps to flush out salt buildup caused by chemicals in treated water and use of fertilizers.
Don’t leave your plants outside in the summer during periods of prolonged rain. A little rain on occasion is fine but too much introduces the risk of rot.
Growing Tips
- Use free-draining soil.
- Choose a pot that’s only slightly bigger than the root ball.
- Keep in dappled shade or in a spot with bright, indirect light.
- Water only when the soil is dry.
How to Promote Flowering Indoors
Clivias should start flowering when they have around 12 to 14 leaves. Well-cared-for indoor plants tend to flower at a younger age than those that live outdoors.
They need a cool, dry period over winter or the flower-growing tissue within the plant won’t be activated.
Plants produce inflorescence tissue every time they produce four new leaves. However, if they stay warm, well fed, and watered in a stable environment year-round, this tissue will never develop.
To induce flowering, plants need to be moved to a cool, dry spot where the temperature is 40 to 55°F for at least 25 days, or up to 60 days. Some growers will keep them in this dormant state for up to 12 weeks.
They also need a lot less water at this time, and – if you don’t use slow release granules – no fertilizer. Reduce watering to almost nothing, just providing a little every week or two to stop plants from drooping.
Once you see flower stems starting to grow, bring them back into a warmer area that’s around 65 to 75°F.
Slowly start watering again, building up to regular levels over a couple of weeks. Too much water given too soon will rot the roots.
Start feeding again too. Jim Shields recommends a liquid fertilizer with more potassium than nitrogen and phosphorus, up to double the amount.
If you don’t want berries to form, deadhead the flowers after blooms fade. Only remove the flower stems when flowering has finished and use garden sulfur on the wounds to prevent fungal infection.
Pruning and Maintenance
Use a sharp knife or scissors to cut off spent flower heads. Don’t cut off the flower stalks until the plant has finished flowering as they’re still able to provide extra energy to the plant through photosynthesis.
Also trim off any damaged foliage at this time.
If the tips of leaves burn and turn brown, remove the damaged tissue. Use sharp scissors to trim back to healthy tissue. You can cut to match the natural shape of the leaf so it doesn’t stand out, rather than cutting straight across and leaving a stump.
Cultivars to Select
Clivias are specialty plants so it can be difficult to find named varieties in nurseries. You’ll tend to find C. miniata houseplants for sale with no variety name indicated.
Others are labeled according to color.
Deep orange types are the most common, often listed as Fire Lily (C. minata).
There are more yellow options available today than there used to be, thanks to the efforts of a lot of patient breeders.
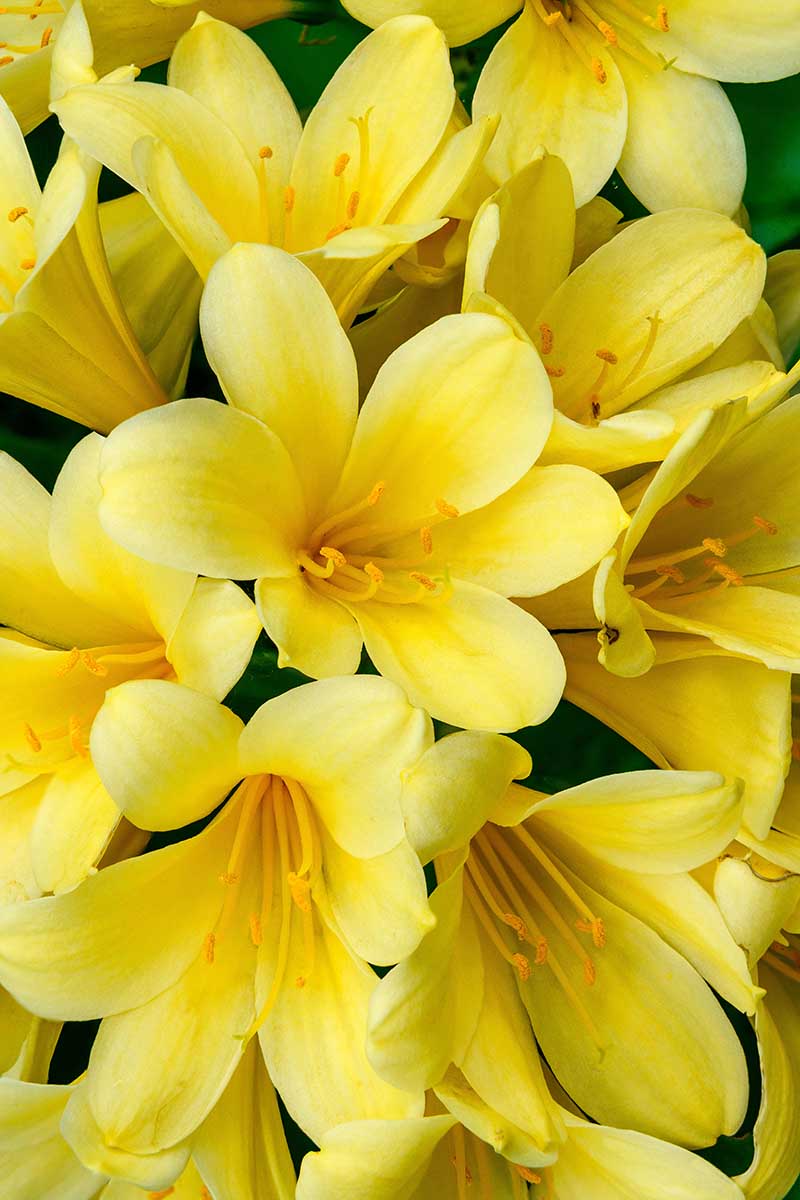
In the 1980s, San Marcos Growers in California started trying to produce a good-quality yellow and the result – 13 years later – was C. miniata ‘San Marcos Yellow,’ which has been popular ever since.
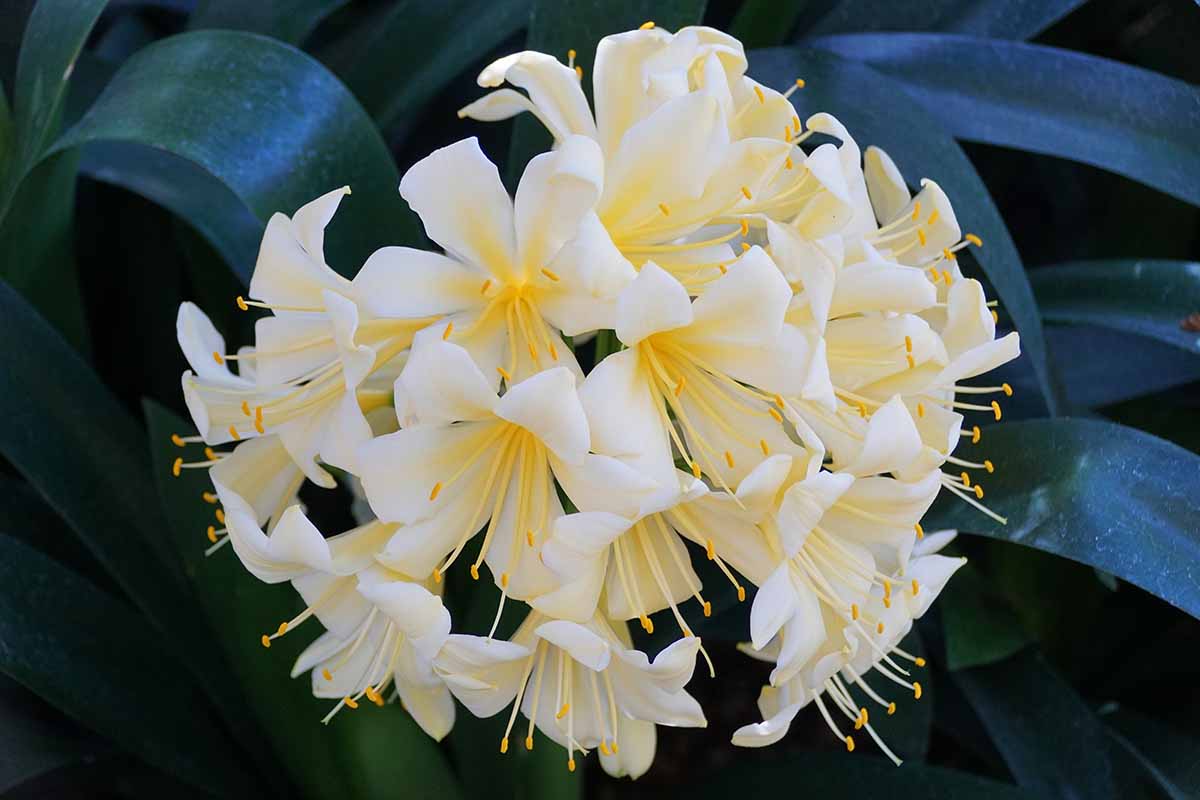
One of the most striking yellow varieties is C. miniata var. citrina, a naturally derived variety also known as yellow clivia, with cream to lemon yellow flowers.
All of the yellows in cultivation are derived from this variety.
A popular yellow option that’s easy to find is ‘Good Hope,’ with young plants available from Walmart.
If you want the latest, vibrantly gorgeous flower options, the North American Clivia Society has a yearly seed sale that runs from March to April. However, remember that you will need to wait for three to five years after planting to see flowers.
Some of the more difficult plants to find are those with variegated leaves. Check with the North American Clivia Society as some of their members are now successfully growing variegated plants.
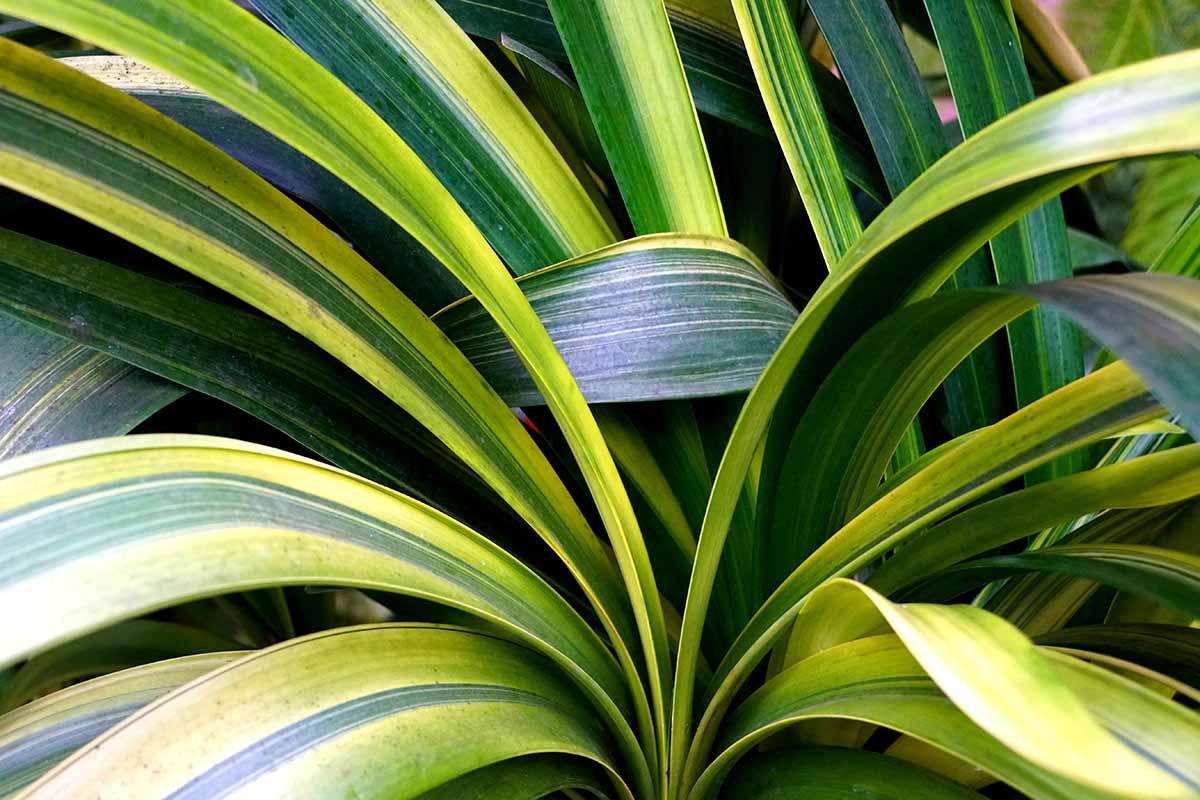
Variegated clivia are more prone to browning on the whiter parts of the foliage. It’s crucial to keep them in low light. Even then, you may still see browning, in which case they may need even less light.
Otherwise, care for them the same as for standard clivias. These will always grow more slowly as they have less chlorophyll providing energy to the plant.
Managing Pests and Disease
Clivias are pretty robust plants when cultivated in the right conditions, but there are a couple of issues you may see.
Mealybugs
These like to hide in the tight folds at the base of the stem and under leaves. They can be hard to spot until there are a lot of them. They’re tiny, ranging from one to five millimeters in length, wooly-looking with a waxy sheen, and oval-shaped.
Spot treatments with rubbing alcohol are usually the best way to control them – you can learn more in our guide to controlling mealybugs.
These pests can hide beneath the porous potting mix clivias love so you may need to check for them in the surface soil around the base of the plant too.
Root Rot
The thick, firm, fleshy white roots don’t like being damp and need adequate airflow to absorb a lot of oxygen. In the wild they run along the ground in the leaf litter of trees, rather than growing down into the soil.
If the foliage is starting to turn yellow, this is a sign of overwatering or waterlogged soil, and it’s important to act immediately.
Remove the pot and soil, cut away any brown or soft roots, and replace the potting mix. Be sure to plant only in a container that drains well, in a porous medium.
Quick Reference Growing Guide
| Plant Type: | Broadleaf flowering evergreen | Flower / Foliage Color: | Bicolored, cream, peach, orange, pink, yellow / green, variegated |
| Native to: | South Africa, Eswatini | Water Needs: | Low to moderate |
| Hardiness (USDA Zone): | 1-8 (indoors), 9-10 (outdoors) | Maintenance: | Moderate |
| Bloom Time: | Spring | Tolerance: | Drought |
| Exposure: | Morning sun, dappled shade, bright, indirect light indoors | Soil Type: | Orchid potting mix, porous |
| Time to Maturity: | 3-5 years (from seed), 1-2 years (from offsets) | Soil pH: | 5.0-6.0 |
| Spacing: | 12 inches to 3 feet (outdoors) | Soil Drainage: | Well-draining |
| Planting Depth: | Half-buried (seeds), root ball level with soil surface (transplants) | Order: | Asparagales |
| Growth Rate: | Slow | Family: | Amaryllidaceae |
| Height: | 2-3 feet | Subfamily: | Amaryllidoideae |
| Spread: | 2-3 feet | Genus: | Clivia |
| Common Pests and Diseases: | Mealybugs; root rot | Species: | Caulescens, gardenia, miniata, mirabilis, nobilis, robusta |
A Fiery Houseplant
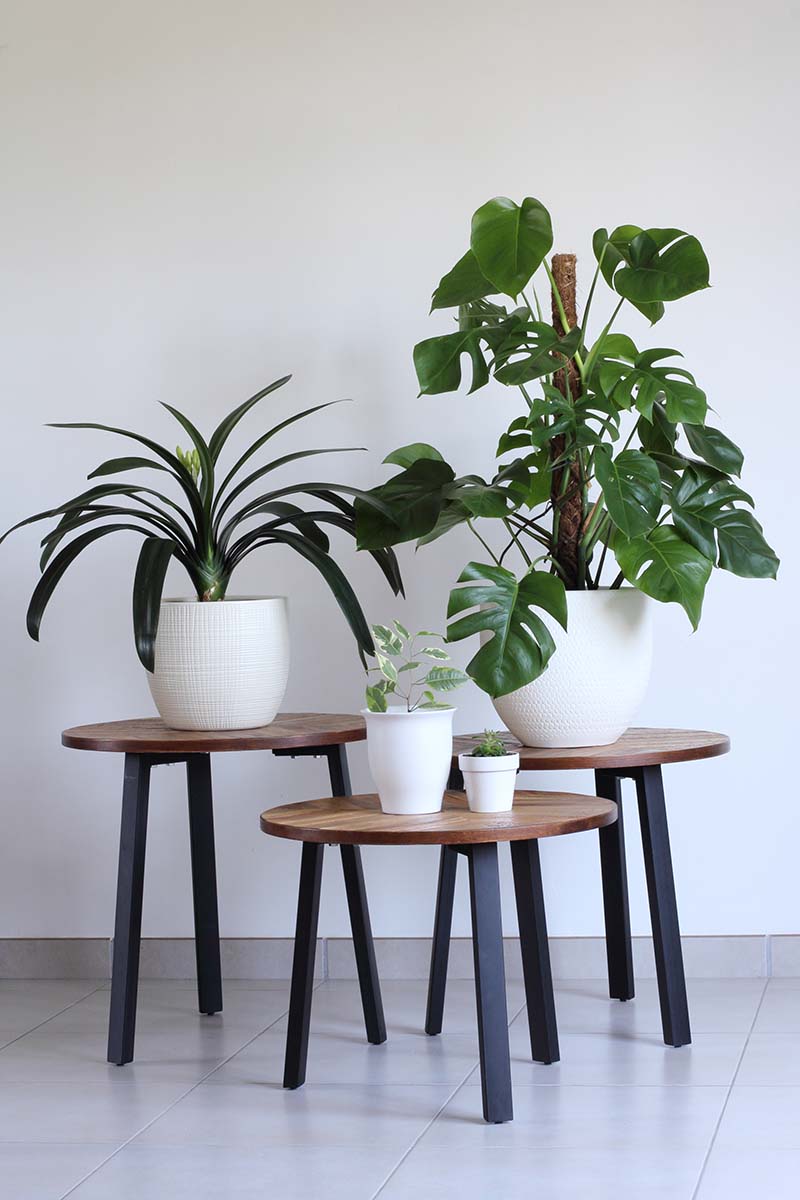
Clivias make stunning additions to a houseplant collection, but they don’t need to hog the limelight in the sunniest spots.
This year I have three new clivias and they arrived just in time for spring in the Southern Hemisphere.
‘Tango x Mango’ is soft apricot with creamy-yellow centers, ‘European Peach x Cameron’s Peach’ has the softest, barely peach petals and yellow umbels, and ‘Debutante x Just Peachy’ is a slightly warmer peach with delicate yellow lines.
Do you have a favorite clivia? Let us know, or even better, show us photos of your flowers in the comments section below!
Looking for more stunners to add to your houseplant collection? Check out these guides next:


A thorough and excellent article written by someone who actually researched and is knowledgeable rather than someone trying to make a buck or is just using scraped info from the internet without any added personal experience! Thank you.
PS, my clivias can’t seem to ge too much AM sun indoors, but I have burnt them outside even in the “shade” and took 2-3 years for foliage to recover.
Thank you for your kind words Cathy!
I heartily concur!!
Hi Clare, Stumbled upon this article, fantastic to read and learn about these beautiful plants. I received 3 plants from an old gardner many – many years ago. Hadn’t a clue what they were. Stuck them in pots and hoped for the best. Lovely green foliage but no flowers for years. So replanted them under the shade of a large Paperbark tree. There a year later two produced stunning orange flowers. Only waited 6/7 years for flowers, so then I was able to find out they were Clivia. And they have flower for 3yrs now. This year I got the… Read more »
Thank you for reading Pauline and for your kind words! Your Clivia looks beautiful. We have these a lot in and around Auckland (NZ) and when they are all blooming at once, they are stunning!
Great informative article most of which my mum has taught me about looking after this plant without her ever reading up about it.
But for the very first time in around 25 years of having these plants my seeds on one plant have actually begun to sprout whilst on the plant, something I’ve never come across before.
Any suggestions on what I should do with my new babies.
I have an 8 year old clivias i
The flowers are beautiful on it but I have noticed on some of the foliage there’s little yellow spots not sure what these are but they aren’t on all the foliage
Hi Lynn, can you share a picture of the foliage so we can take a look and advise. Thanks!