Phaseolus vulgaris
Navy beans are a type of shelling bean (Phaseolus vulgaris) that were first named in the US after being bred from wild legumes that originated in Peru and later made their way to Spain.
Shelling beans are those that have a tough rather than an edible pod, and the seeds inside are removed for cooking, rather than being eaten raw.

We link to vendors to help you find relevant products. If you buy from one of our links, we may earn a commission.
Navy beans, also called Boston or haricot beans, are white, small, and oval, with a mild, nutty flavor, perfect for soups, chilis, and salads.
In this guide, we’re going to cover how to grow navy beans in your vegetable garden. Here’s what’s ahead:
What You’ll Learn
The US grows the majority of navy beans in the world, though the quantity has been dropping in recent years.

So-named because they were served to sailors in the navy, the seeds are nutritious, full of fiber, protein, fat, and essential amino acids.
Consuming navy beans can help lower your cholesterol and they have more cell health-supporting phosphatidylserine than any other plant that we know of.
Quick Look
Common name(s): Navy, haricot, pearl haricot, Boston, white pea beans
Plant type: Annual legume
Hardiness (USDA Zone): 3-12
Native to: Peru
Bloom time / season: Summer
Exposure: Full sun
Soil type: Loose, rich, well-draining
Soil pH: 6.0-7.0, slightly acidic to neutral
Time to maturity: 85-100 days
Spacing: 6 inches
Planting depth: 1 to 1.5 inch (seeds)
Mature size: 5 feet wide x 5 feet high
Water Needs: Moderate
Taxonomy
Order: Fabales
Family: Fabaceae
Genus: Phaseolus
Species: Vulgaris
The plants can be determinate or indeterminate.
The former are bush types that tend to have pods ready for harvest all at the same time, the latter being long vines that produce over a period of time.
The pods are generally ready to harvest in 85 to 100 days and are grown as annuals in USDA Hardiness Zones 3 to 12.
How to Sow
Wait until the soil temperature is above 50°F before sowing seeds or transplanting starts.
It’s best to inoculate the soil with Rhizobium phaseoli before you sow seeds or transplant starts. If you’re unfamiliar with using inoculants, you can find more information here.

You can find legume inoculant available in a variety of packet sizes at True Leaf Market.
From Seed
Typically, most gardeners sow seeds directly outdoors as like most beans, the seedlings don’t transplant well.

If you intend to grow in rows, put them 14 inches apart. In square foot gardening, give them about six inches of space around each plant. Planting closely together helps suppress weeds.
- Prepare the soil by mixing in some well-rotted compost and your inoculant (if using).
- Moisten the soil so it’s damp but not waterlogged.
- Poke holes about an inch or an inch and a half deep and sow your seeds.
- Cover the seed with soil and tamp down gently.
- Keep the soil evenly moist and you should see green growth emerging in about 10 days.
If you want to grow your crop in a container, use a pot that is about a gallon in volume.
Transplanting
To transplant nursery starts, dig a hole about the same size as the container the seedling is currently growing in.
Remove the plant very carefully, but don’t touch the roots or try to loosen them up. Set it in the ground and gently firm the soil around it. Water well and keep the soil moist.
How to Grow
Navy beans are easy to grow so long as you give them plenty of light, warmth, and moisture.

If you’re growing a vining type, make sure you give the plant something to climb up – a fence or trellis works well.
Let’s take a look at the optimal growing conditions.
Temperature and Sunlight
These plants like temperatures between 60 and 85°F, and soil temperatures over 70°F. They can potentially tolerate cooler conditions, but they won’t grow well.
Give your navy beans lots and lots of light – at least six hours a day of direct sunlight, preferably more.
Soil
Ideally, you’ll grow your crop in loamy, organically-rich soil. If you have heavy clay or very sandy soil, you’re better off growing in a container or raised bed instead.
Otherwise, just work a good amount of well-rotted compost at least six inches deep in your soil to make it rich and loose.
The pH should be between 6.0 to 7.0.
Water
Navy beans grow best if you keep the soil consistently moist.
That means if it’s not raining, you want to check the soil frequently. It should feel like a well-wrung-out sponge. If it’s drier than that, add some water.

Make sure you water at the soil level rather than all over the foliage to prevent fungal diseases.
I like to try and do my watering in the morning so that any moisture on the plant has time to dry out before the nighttime.
Apply a layer of mulch to help retain moisture. Straw or leaf litter works well.
Fertilizing
Legumes absorb nitrogen from the air and “fix” it in the soil.
This means you don’t need to worry about applying any fertilizer during the growing season unless you do a soil test and find your soil is deficient in other macronutrients.
If you want, apply a side-dressing of well-rotted compost a few weeks after planting to add nutrients.
Where to Buy
Most of the time, the plants will just be labeled as “navy” without any mention of a specific cultivar.
You can find them at many local nurseries or garden centers.

If you prefer to shop online, you can purchase packets of 100 seeds from Everwilde Farms via Walmart.
Pests and Disease
Any common herbivore will happily consume your beans. Deer, mice, rabbits, raccoons, rats, skunks, voles, and woodchucks will all eat the leaves and fruits.
The easiest way to prevent damage is to use netting, fencing, or some other form of physical protection.
Insects
Most beans are susceptible to feeding by a variety of different beetles.
Black bean aphids (Aphis fabae) are specialist aphids that feed on these legumes.

These black to dark green bugs pests cluster in groups on the undersides of leaves and at leaf joints to use their sapsucking mouthparts to feed on the plants.
This feeding can spread disease as well as stress the plant, often turning leaves papery yellow and resulting in stunted growth.
If you notice an infestation, our guide to dealing with aphids can help you out.
Apart from aphids, seedlings may be attacked by cutworms or larvae of the bean seed fly (Delia platura).
Disease
Rotating your crops, providing adequate moisture, and growing in full sun will go a long way toward avoiding any diseases.
Here are a couple of very common issues you may encounter:
Botrytis
Botrytis is a fungal disease caused by Botrytis fabae or B. cinerea. It’s also called gray mold and in cool, humid conditions it can rapidly get out of control.
As the name suggests, it shows up as gray fungal spores all over your plants.
If you cut open a stem, you’ll find white fruiting bodies, and the seeds will develop sunken brown areas. When infected, the flowers may abort and the seeds can rot.
It’s important to start treating the moment you notice symptoms.
There are lots of options, including products that contain Streptomyces lydicus WYEC 108, copper, Ulocladium oudemansii (U3 strain), or citric acid.

Arbico Organics carries a product called Procidic, which harnesses the power of citric acid to kill pathogens like botrytis.
Rust
Rust causes a reddish-brown fungal growth on plants.
It’s caused by the fungi Uromyces phaseoli typica and U. appendiculatus, both of which prefer lots of humidity and warm air to thrive.
The disease starts out as small raised white spots on the leaves, pods, and stems.
These tiny spots erupt and that’s when the rusty brown fungal growth starts to expand. Sometimes the spots will have a yellow halo, but not always.
Over time, the leaves might turn yellow or black and they might die. As the leaves die, the yields are reduced. A heavily infested plant might die entirely.
You can treat rust using products that contain the beneficial bacteria Bacillus subtilis.

CEASE is an excellent product, and it’s available at Arbico Organics.
Harvesting
Depending on the variety, your navy beans should be plump and ready to harvest between 85 and 100 days after sowing.

When the pods dry and turn brown, the seeds inside should feel firm. If you give the pods a little shake, they should rattle slightly and they might have started to split open.
To harvest, use a pair of scissors or pruners and snip the pod of the branch. Don’t pull them off by hand unless you plan to rip out or cut down the entire plant.
It’s best to harvest in the morning when the plant still has a lot of moisture.
For indeterminate plants (vining types), you should harvest regularly. In the case of determinate types (bush), you can harvest the pods all at once.
Preserving
Store freshly harvested pods in the fridge in a plastic bag if you can’t immediately shell them.
When you’re ready to shell, split the pods open by hand or place them in a sack or pillowcase and stomp on them.

Toss out any that are moldy, eaten by pests, or otherwise compromised.
Dry the beans at around 100°F in a dehydrator, or lay them out on screens in a cool, dry spot away from direct sunlight.
Store them in an airtight container.
Cooking Ideas
The classic way to prepare navy beans is in soup, usually with ham.
But they make a marvelous addition to bean salads, with their cheerful white color punctuating what could otherwise be a dark dish. And let’s not forget my favorite: Boston baked beans.

Use them in chili, barbecue, pies, or a classic Italian soup.
There is an excellent recipe for Italian soup over at our sister site, Foodal if you’re looking for suggestions.
In the Navy (Bean)
Growing your own dried legumes is very rewarding. Navy beans store for a long time, seeing you through those cold winter months. Plus, the plants don’t take up much space in the garden.

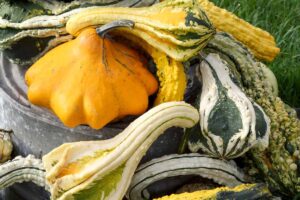
Grab yourself some corn and squash and make a three sisters garden while you’re at it.
Are you growing navy beans? Let us know in the comments section below!
And for more information about growing other types of beans in your vegetable garden, check out these guides next: