Morchella spp.
Morel mushrooms are highly sought-after, valued for their nutty, earthy flavor and unique texture.
The fruiting bodies of species in the Morchella genus appear in spring and are typically found growing wild in forested areas throughout the Northern Hemisphere.
It’s no surprise that gardeners and fungi enthusiasts alike have wondered if these mushrooms can be cultivated intentionally. The answer is yes, but they can be very challenging to grow.

Morels are very finicky about moisture, temperature, and the substrate they grow in, requiring specific environmental conditions. For most growers, results are unpredictable.
Still, with persistence and careful planning, it is possible to grow morels at home.
In this guide, we’ll cover what morels are, the conditions they need to grow, and how to prepare a growing area to improve your chances of a successful harvest.
Here’s what we’ll go over:
What You’ll Learn
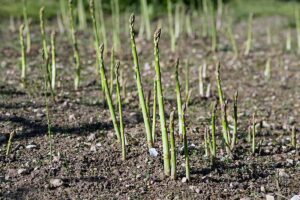
True morels are the edible, spore-bearing fruiting structures of fungi in the Morchella genus.
These mushrooms are typically between two and six inches tall, with hollow, cream-colored stalks called stipes, topped by deeply ridged, pitted caps known as ascocarps.
Honestly, they look like a weird combo of honeycomb, coral, and brains, all on a stick.

These fruiting bodies develop in spring from an underground mycelium, or root-like network of filamentous hyphae that connect to tree roots, rotting plant matter, and soil.
The mycelium anchors the mushroom, while the hyphae feed it.
There are more than 70 recognized species in the Morchella genus, with a native range centered in the Mediterranean region.
Today, morels are widely distributed across temperate regions of Europe, Asia, and North America.
Individual species have specific endemic and provincial distributions, and often have strong ecological associations with particular types of trees.

Species identification is tricky, as morels vary significantly in appearance even within the same species.
Standard dichotomous keys are often unreliable, so identification typically involves comparing multiple traits to known species profiles.
In addition, there are a number of different mushrooms known as “false morels” which can be toxic or deadly if eaten.
Foragers hunting for morels have a saying: “if it ain’t hollow, don’t swallow,” referring to the stalks.
And while some morel imposters are edible, assuming so with less-than-absolute certainty is a bad idea. A potentially harmful or lethal one at that.
Types of Morels
Scientific research and advancements have helped clarify the classification of Morchella species, which are now generally grouped into three main color-based clades: white, yellow, and black.
Each group includes multiple species that share similar structures and ecological preferences, although there is significant variation within each type.
Black
Black morels belong to Morchella sect. Distantes, often referred to as the Elata clade. This group includes species such as M. elata, M. tomentosa, and other dark-ridged types.

They are usually conical to cylindrical in shape, with dark brown to black ridges and lighter, grayish pits. The ridges are often arranged in vertical or nearly parallel lines.
These species are widespread in temperate regions and are especially common in recently burned or disturbed forests.
Some are known as “fire morels” because they appear in abundance the spring following a wildfire, feeding on nutrients released from the burned material.
Others grow in association with living or decaying trees in undisturbed forests.
White
White morels belong to the Rufobrunnea clade, which includes species such as M. rufobrunnea and M. anatolica.
These have pale, conical caps with thick, vertically aligned ridges that are creamy white to light tan, often showing faint reddish or pinkish tones as they mature.

The lower edge of the cap may hang slightly free from the stalk, which helps distinguish them from other types.
Unlike most forest morels, white species often appear in disturbed soils, landscaped beds, or garden mulch rather than shaded woodland environments.
They are common in Mediterranean and subtropical regions but can also be found in temperate zones, especially where human activity has altered the soil.
Yellow
Yellow morels are part of the Morchella or Esculenta clade and include species such as M. esculenta in Europe and M. americana in North America.

The asocarps are rounded or egg-shaped with irregular, netlike ridges that range from pale yellow to golden brown.
The pits are often darker, giving the surface a honeycombed appearance. The cap is attached along its lower edge to the hollow, whitish stalk.
These species usually grow in woodland habitats, along forest edges, or in areas with abundant decaying organic matter.
They are distributed throughout Europe, Asia, and North America and tend to appear in spring as soil temperatures warm.
Getting Started
Ready to start on this journey? Here’s what’s required before you can begin:
Spawn
Unlike plants that grow from seeds, Morchella species reproduce from spores released by their fruiting bodies, or ascocarps, in a cloud, almost like they’re sneezing.

Mycology vendors will combine spores with a substrate of wood and supplemental ingredients to create spawn, which you can effectively plant in your growing site.
Spawn is usually available in grain or sawdust form, and sometimes as wooden plugs or pegs that can be inserted into prepared beds or logs.
When purchasing, choose a high-quality product from a reputable mycology supplier to ensure the best chance of success.
Slurry
Alternatively, you can make a “morel slurry,” which can be poured directly onto a prepared bed.
To make the slurry, bring about a quart of water to a boil in a pot. Stir in one to two tablespoons of molasses or honey, then remove the pot from heat and let the liquid cool to lukewarm.

Pour the cooled mixture into a blender, add several fresh, unwashed morels, and blend briefly.
Transfer the mixture to a clean glass jar, cover the opening with a sterile cloth secured with a rubber band, and let it sit at room temperature overnight.
The next day, pour the contents into a clean bucket, add a cup of wood ash, and top up with cool or lukewarm water.
Cover the bucket and let it rest for another 24 hours. Your slurry will then be ready to use.
The Proper Environment
Morels fruit only under very specific conditions, so the goal is to mimic their natural habitat as closely as possible.
Choose a shaded site that receives minimal direct sunlight, particularly during summer.

If planting in the ground, select a spot near trees. Many Morchella species form relationships with particular hosts, so place your bed close to compatible tree types whenever possible.
Ideal conditions for fruiting occur in temperate regions with a distinct spring season.
Daytime temperatures of 50 to 70°F, nights in the 40s, and consistent humidity from light rain or overcast weather provide the best environment for ascocarp development.
The longer these “just right” conditions persist, the more likely you are to see success.
If your garden naturally provides these conditions, you’re already ahead of the game.
A “Morel Bed”
Whether you use a raised bed or an in-ground plot, creating the right inoculation site is absolutely essential.

Start by marking out an area about nine to 15 square feet. Remove weeds, stones, and debris, then excavate the top four to six inches of soil.
Refill the space with fertile, well-draining soil with a neutral pH. A loamy mix works well, or you can use sandy soil amended with compost to improve moisture retention.
Adding organic material will help replicate the nutrient-rich environments where morels naturally grow.
Fresh wood ash mimics the post-fire conditions that often trigger fruiting, while peat moss and ground gypsum supply additional minerals and improve structure.
Blend one to two inches of these materials into the top layer of soil.
How to Grow
Once you’ve prepared your planting site and readied your spawn or slurry, it’s officially go time. The best inoculation times are in spring after the final frost or in fall before first frost.

If you are using grain or sawdust spawn, spread it evenly over your planting site and work it lightly into the soil. Cover the surface with one to two inches of wood chips.
For plugs or pegs, insert the pieces into loosened soil so they’re almost buried, then add the wood chip layer on top.
Spore slurry? Simply pour it evenly over the prepared bed and finish with the same wood chip covering.

Keep the soil beneath the mulch consistently moist but never waterlogged. Overwatering can lead to rot or mold, while allowing it to dry out will stall fungal growth.
Water as needed to maintain the feel of a well-wrung-out sponge.
Patience is essential. It can take anywhere from two to five years for morels to establish and produce fruiting bodies.
During that time, maintain the mulch layer and continue monitoring moisture levels.
When conditions are right, typically in spring, you may begin to see the distinctive honeycombed caps pushing through the surface.
If you reach that stage, congratulations. You’ve accomplished what many mushroom growers consider one of the most challenging feats in cultivation.
Harvesting and Preserving
When your morels are fully developed, harvest them carefully using a sharp, clean knife.
Cut each mushroom at the base of the stalk, just above the soil line, taking care not to disturb the underground mycelium.

For future growing success, it may be helpful to leave some mushrooms alone and untouched so that they can spread their spores.
If your harvest needs cleaning, soak the mushrooms in lukewarm, lightly salted water for about 30 minutes, changing the water every 10 minutes.
This helps dislodge dirt, debris, and any insects that may be hiding in the pits.
Rinse them thoroughly, pat dry with a clean towel, and shake gently to remove excess water from the hollows.

For the best flavor and texture, cook and eat morels within a few days of harvest.
They can be stored in the refrigerator for up to a week in a paper bag to maintain airflow and prevent moisture buildup.
If you’d like to preserve them for long-term storage, dehydrating is the best option.
Our sister site, Foodal, offers a detailed guide about how to dry mushrooms safely and effectively.
Feel Compelled by the Morel?
Don’t ignore that feeling. With knowledge, elbow grease, and a bit of luck, your future can be filled with delicious morel-munching.

Growing these mouthwatering mushrooms is no easy task. So, serious props to you for wanting to give it a try. Even more if you succeed!
Still have more questions? Anything that this guide missed? Let us know in the comments section below! And feel free to share a picture of your morel harvest!
And for more information about growing mushrooms, add these guides to your reading list next: