
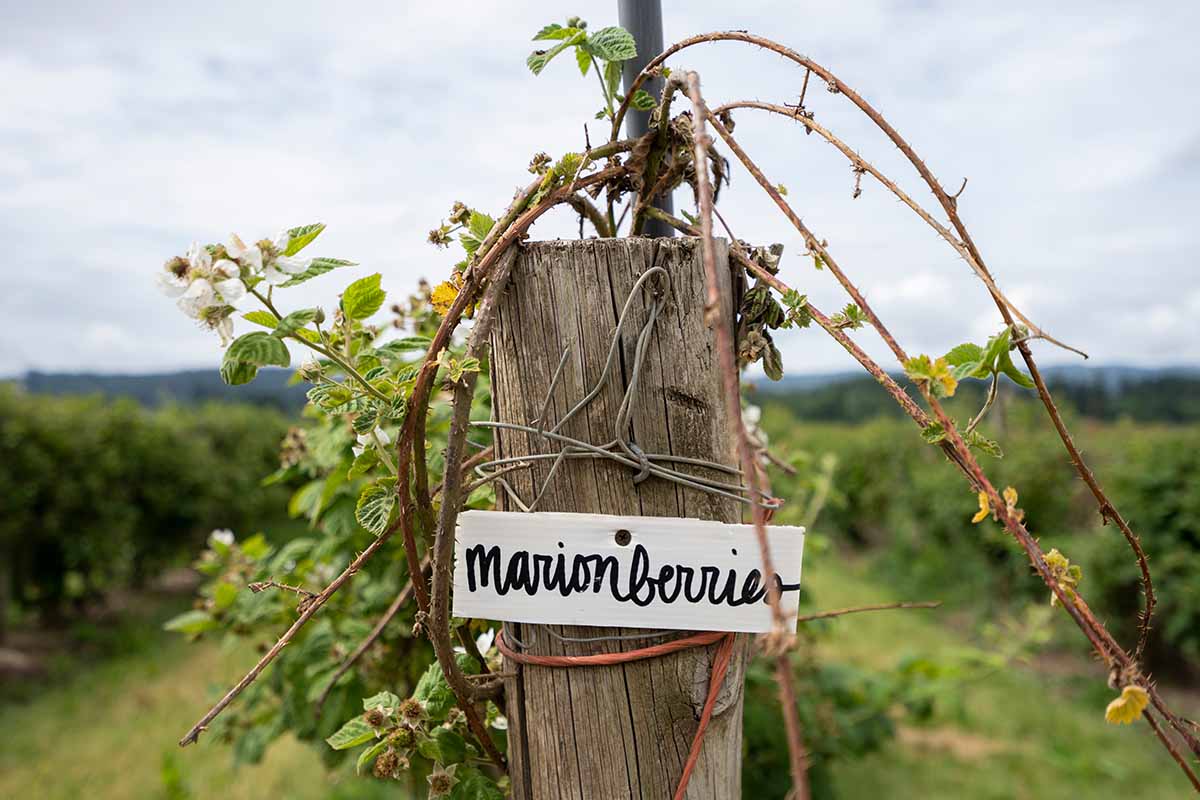
Rubus x ‘Marion’
If you ever visit Oregon, be prepared to fall in love with the local hero: the marionberry. It’s everywhere.
At every restaurant, grocery store, and tourist shop.
In the summer, when the 33 million-plus pounds of local marionberries are ripening, Oregonians are stuffing their faces with cobbler, pie, ice cream, beer, and shakes.
It’s not just Oregon that’s enraptured. The marionberry is arguably the most popular trailing blackberry in the world, and for good reason.
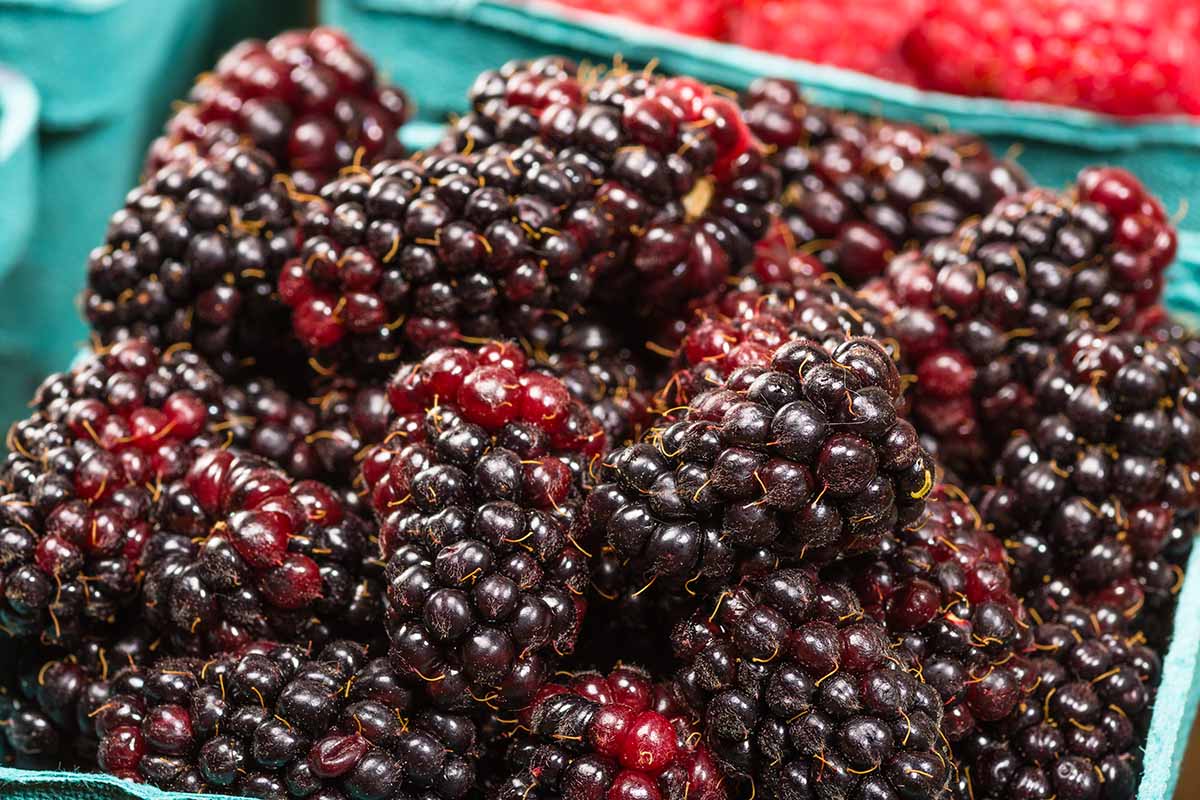
The berries are big and juicy, with an earthy berry sweetness that is ideal for just about any dish. Locals call it the “cabernet of blackberries.”
Technically, the name is Rubus x ‘Marion’ but you’ll see it styled as “marionberry” and “marion berry.”

We link to vendors to help you find relevant products. If you buy from one of our links, we may earn a commission.
However it is spelled, this blackberry cultivar somehow improves on the luscious flavor of the original fruit. It’s a bit like a blend between a raspberry and a blackberry.
Because the fruit is juicy and soft, it’s almost impossible to find sold fresh outside of the state of Oregon.
Most marionberries are shipped frozen or processed. So what do you do if you crave the sweet zing of the fresh fruits? Grow your own!
That’s exactly what we’re about to help you do, and here’s what we’ll talk about to that end:
What You’ll Learn
The marionberry is a hybrid of two types of blackberry: the Chehalem and the Olallie berry.
These berries are hybrids themselves, with a bit of the North American native berry Rubus ursinus, some of the highly invasive Himalayan blackberry (R. armeniacus) and a dash of red raspberry (R. idaeus).

To be specific, the marionberry has 44 percent of R. ursinus, 25 percent of R. armeniacus, and six percent of R. idaeus in its genetic makeup.
Don’t worry, it’s not potentially invasive like the Himalayan blackberry.
There are no escaped marionberries in Oregon, and that’s because they don’t grow from seed and they don’t propagate from the buds on the roots like Himalayan blackberries do.
Quick Look
Common name(s): Marion, marionberry
Plant type: Trailing perennial cane berry
Hardiness (USDA Zone): 6-9
Native to: Oregon
Bloom time / season: Summer bearing
Exposure: Full sun
Soil type: Slightly sandy to slightly clay, well-draining
Soil pH: 5.6-6.5, slightly acidic
Time to maturity: 2 years
Spacing: 4 feet
Mature size: 20 feet long by one foot tall (without support)
Water Needs: Moderate
Taxonomy
Order: Rosales
Family: Rosaceae
Genus: Rubus x
Cultivar: ‘Marion’
The marionberry was bred by Oregon State University agricultural scientist Dr. George Waldo in Corvallis, Oregon, in 1948.
Corvallis, by the way, is in Marion County, which is where the berry derives its name. That’s right, it has no relation to the famous former Washington D.C. mayor Marion Barry.
It was released to the public in 1956 in cooperation with the USDA Agricultural Research Service and quickly rocketed to stardom in the state.

Marion County still produces 90 percent of the world’s crops, and if you visit Corvallis in August, you’ll be surrounded by more marionberry goodness than you thought possible.
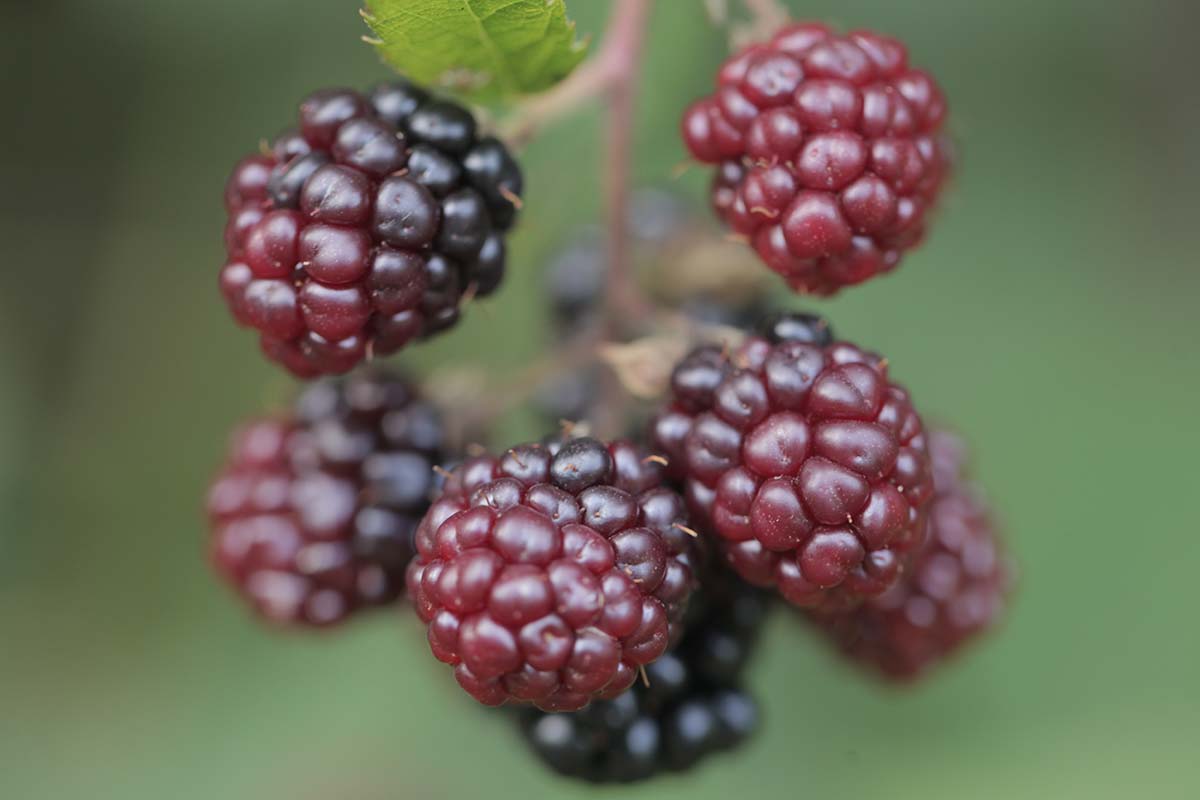
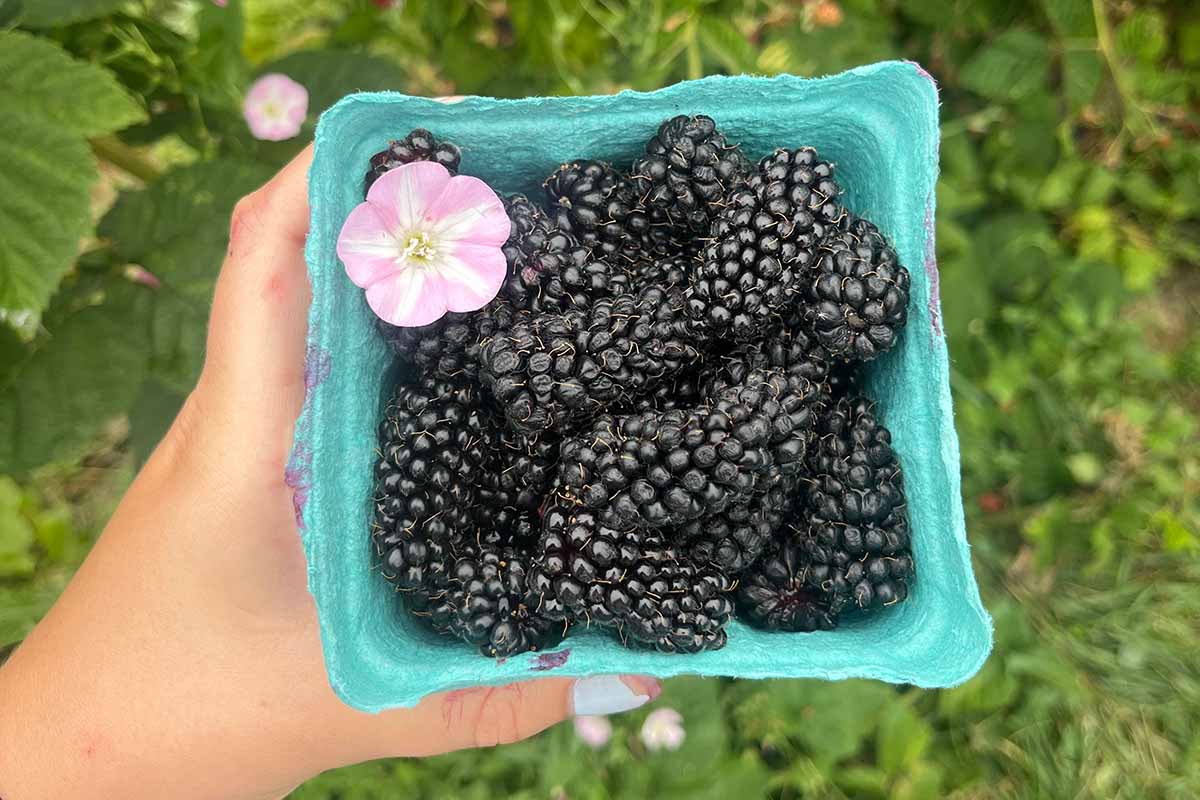
The flavor is earthy, sweet, with just a bit of tang, the seeds are tiny, and the receptacle is narrow.
The receptacle is the white center running down the middle of blackberries, and it can be a bit bitter.
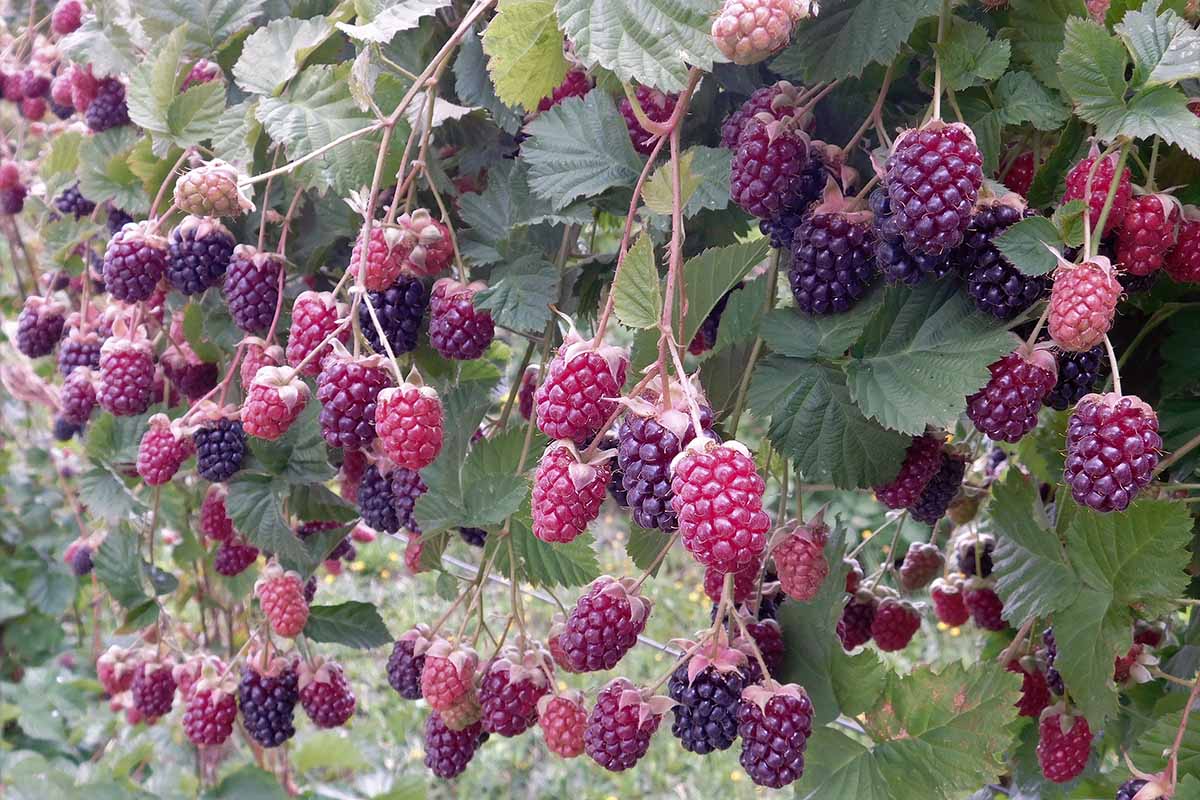
Marionberries are slightly longer than they are wide, and turn nearly black when ripe.
How to Grow
Marionberries are suitable for cultivation in USDA Hardiness Zones 6 to 9.
You can grow them in cooler regions, but you’ll need to protect the plants during winter and your harvest will be reduced.
Marionberries are a summer-bearing type, which means you’ll harvest one crop per season and the berries only grow on floricanes.
If that sounds like a confusing bunch of words, don’t worry. We’ll talk all about what this stuff means.
Care needs are similar to those of blackberries. Here’s what you need to know to be successful with growing marionberries:
Light
Marionberries prefer full sun, but they will still produce – albeit slightly less robustly – in partial sun.
Keep in mind that sun exposure can change over the years or even from season to season.
As trees fill out and cast shade, you might need to prune nearby plants to create better sun exposure.
Soil
Marions are pretty adaptable to different types of soil.
In a perfect world, you’d grow them in fertile, well-draining medium that is primarily sandy loam or clay loam.
But they’ll tolerate pretty much anything even close to this. Heck, they’ll even survive in heavy clay as I can tell you from personal experience.
Where they can be a little picky is soil pH. A slightly acidic pH between 5.6 to 6.5 is ideal.
If the pH is too high, you can amend it using elemental sulfur. This should be done the year prior to planting to give enough time for the pH to shift into the appropriate range.
Water
Newly planted marionberry canes should be kept moist – but not soggy or waterlogged – at all times. The roots shouldn’t be allowed to dry out.
Depending on your soil and climate, established plants need about an inch to an inch and a half of water each week.
When you water, you want the soil to be wet a foot down. Then, water again when the soil has almost completely dried out, but don’t allow it to dry out all the way.
Water at the soil level using drip irrigation or a hose to avoid wetting the foliage.
If you must rely on sprinklers, make sure to do so in the morning so the moisture has plenty of time to dry out in the sun.
Fertilizing
Even if the soil starts out rich and nutritious, years and years of berry growing will deplete it, particularly of nitrogen.
Before adding any fertilizer, the first step is to test your soil. I know it seems like a hassle, but trust me: it’s worth it.
You can reach out to your local University extension office and they can guide you toward local testing options.
It’s important to pick a local tester because they know the soil in your region and they will be able to give you valuable insight that a generic online testing service can’t provide.
When you receive your test results, you will have a good idea of what your soil needs to support growth, and the results should include recommended amendments.
I test my soil every three years to get a good idea of what’s going on, and most years, all I need to add is some nitrogen.
If you find that’s the case for you, I’m a big fan of feather meal to add nitrogen. It’s produced from meat industry waste and provides a steady source of nitrogen.
Down to Earth makes a good option that comes in four-pound boxes.

Pick up Down to Earth Feather Meal at Arbico Organics.
If at any point the leaves start to turn pale or yellow, before you jump to the conclusion that it has a disease or pest issue, check the soil nutrients.
This is doubly true if the discolored leaves are the older ones.
Learn about fertilizing blackberries here.
Containers
You can grow marionberries in pots provided you have a good support structure for the canes. If you go this route, choose a container that is at least 20 gallons in size.
Our guide to growing blackberries in containers has more information.
Trellising
Marions are trailing caneberries, which means they’ll spread across the ground unless you prop them up.
Fruits developing on the ground will rot or be eaten by all the critters out there looking for a snack.
While you don’t technically have to train the canes on a support, you will have larger yields and fewer pest and disease issues if you do.
You don’t need a sophisticated system. I’ve even used a few sturdy tomato cages in the past.
So long as you have horizontal wires, poles, or ropes to attach the canes, you are good to go.
The lower support should be about three feet high and the higher support should be about six feet up.
As the canes develop, attach them to the trellis using twine or gardening tape.
Where to Buy
Marionberries aren’t as popular or easy to find as other cane fruits like raspberries, but you can often pick them up at local nurseries that carry a good selection of caneberries.

If you prefer to shop online, visit Nature Hills Nursery and pick up marionberry plants.
Maintenance
The marionberry tends to produce just a few canes, but each cane is long, up to 20 feet.
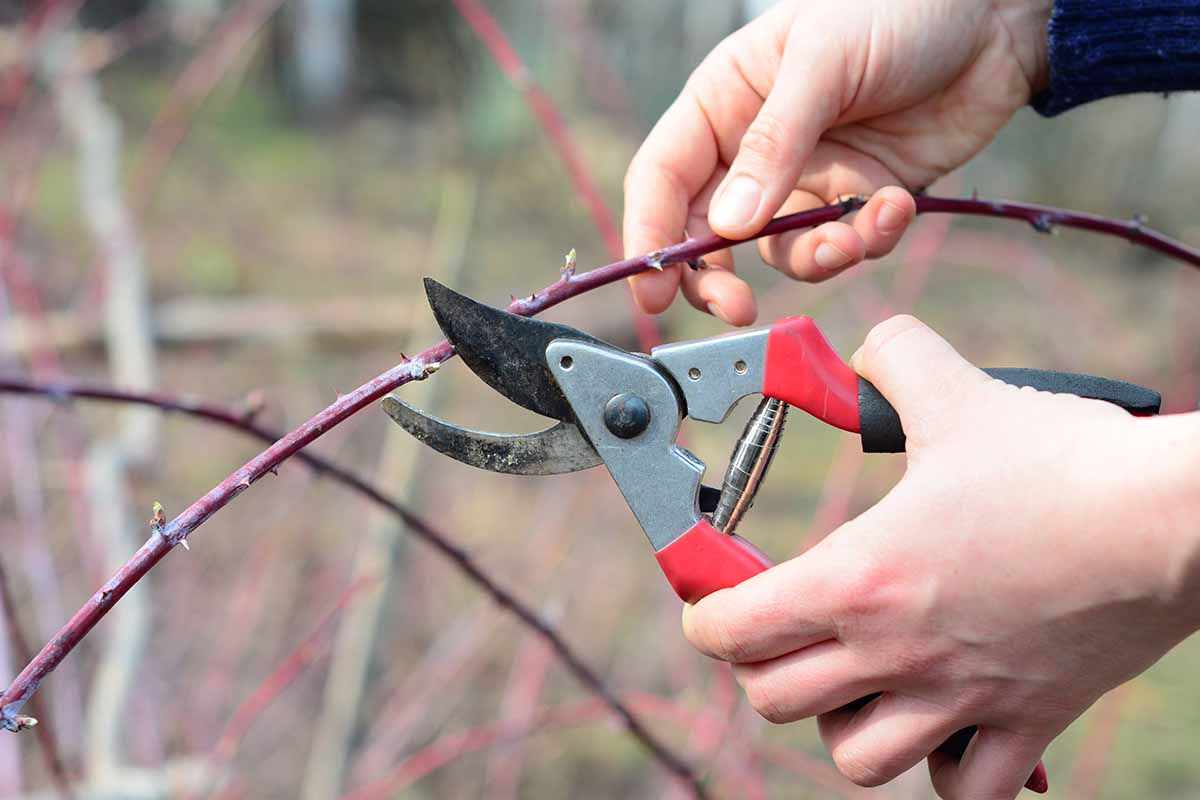
To keep it producing nicely, you will need to prune every year. You want to have about five main primocanes at any time. The rest should be pruned down to the ground.
“What’s a primocane?,” I hear you ask. We have a whole guide to helping you understand the difference and why it matters.
But as a quick overview, primocanes are the canes that started growing this year. When a cane is a year old, it is considered a floricane.
You want to preserve about five primocanes each year and give the rest the chop. Try to preserve the largest, most robust canes.
Prune the primocanes that you’re preserving down to about six feet in the winter. Cut back lateral branches on those canes to about two feet.
Remove any dead canes and clean up any fallen leaves or debris lying around.
Learn more about pruning here.
Do your best to eliminate any weeds at planting time, because once established, it’s hard to weed around the marionberries without getting all scraped and poked.
Place mulch around the base of the canes to help suppress weeds and retain moisture in the soil, but don’t let the mulch touch the canes, which can cause rot.
In the winter, add additional mulch to prevent frost heave or damage to the roots.
Check your supports and re-affix any canes that have come loose, or loosen up any canes that look like they’re being held too tight.
Propagation
Marions can’t be grown from seed as they are hybrids.
Regardless of which method you use, give your plants about four feet of space to grow.
You can place a weed mat on the ground in advance of planting for the canes to trail along. Then, cut a hole in the mat for the plant to sit in.
From Cuttings
If you want to feel like the world’s greenest thumb, try propagating marionberries from cuttings. It’s exceptionally easy.
Since marions don’t actually have “wood,” you’re going to take a cutting of a cane.
- In early spring, or even late winter in Zones 8 and up, take a six-inch cutting from the tip of the cane.
- Insert the cut end in potting soil in a one-gallon or larger pot.
- Set the pot in a sunny part of the yard or garden.
- Water well and keep the soil moist. Don’t allow it to dry out at any time.
The plant should start putting on new growth within a few weeks. Don’t give up if it takes a bit more time so long as the cutting is still green.
If the cutting turns black, it didn’t take. Toss it and start again.
You can also take root cuttings to use for propagation.
- To do this, gently dig down next to the plant.
- Look for a six-inch section of root that is about as thick as a pencil. Cut it away from the plant.
- Fill a one-gallon or larger container with potting soil.
- Lay the root you cut horizontally and bury it with about an inch of soil.
Place the pot in a sunny spot and water well. Keep the soil moist.
From Divisions
You can take a division from the marionberry plant anytime you want. I like to do it when the plant is dormant, but this method is usually successful regardless of the time of year.
Find a clump of that looks like it might be easily separated from the rest of the plant.
This looks like a cane that is a little bit further from the others or a section that sits apart from the main bramble.
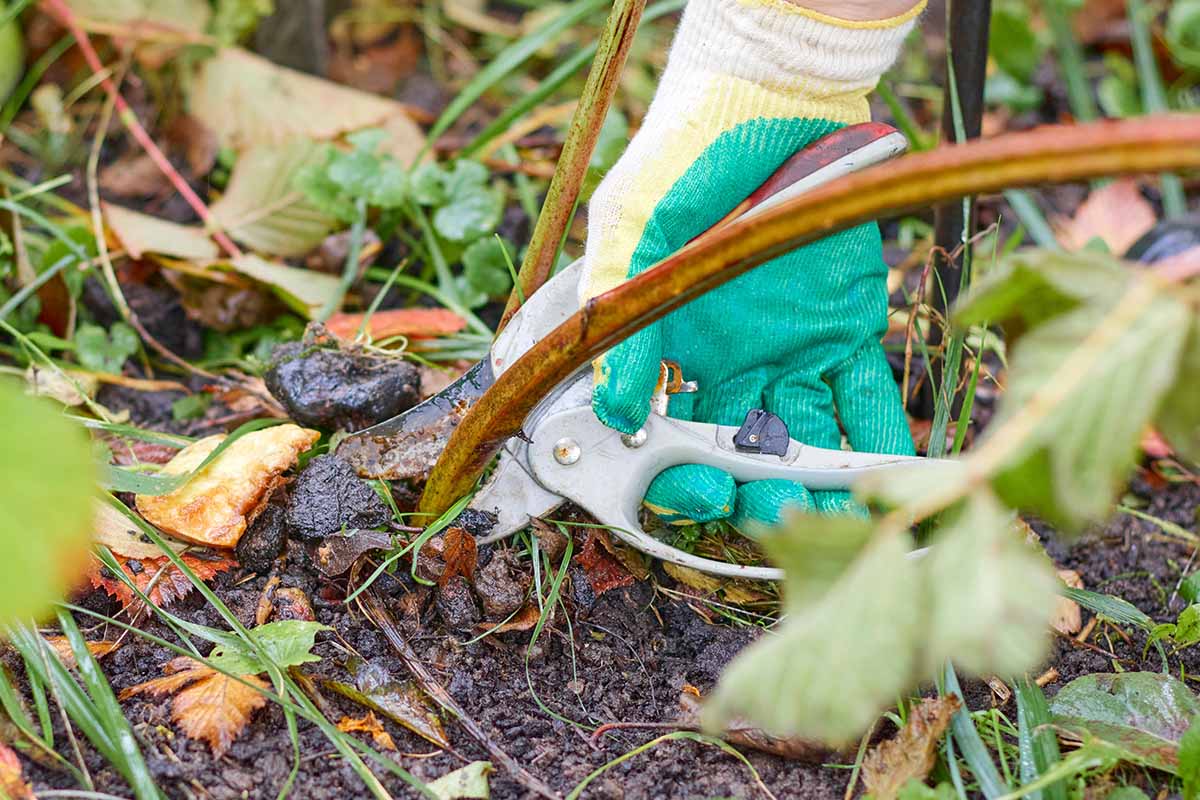
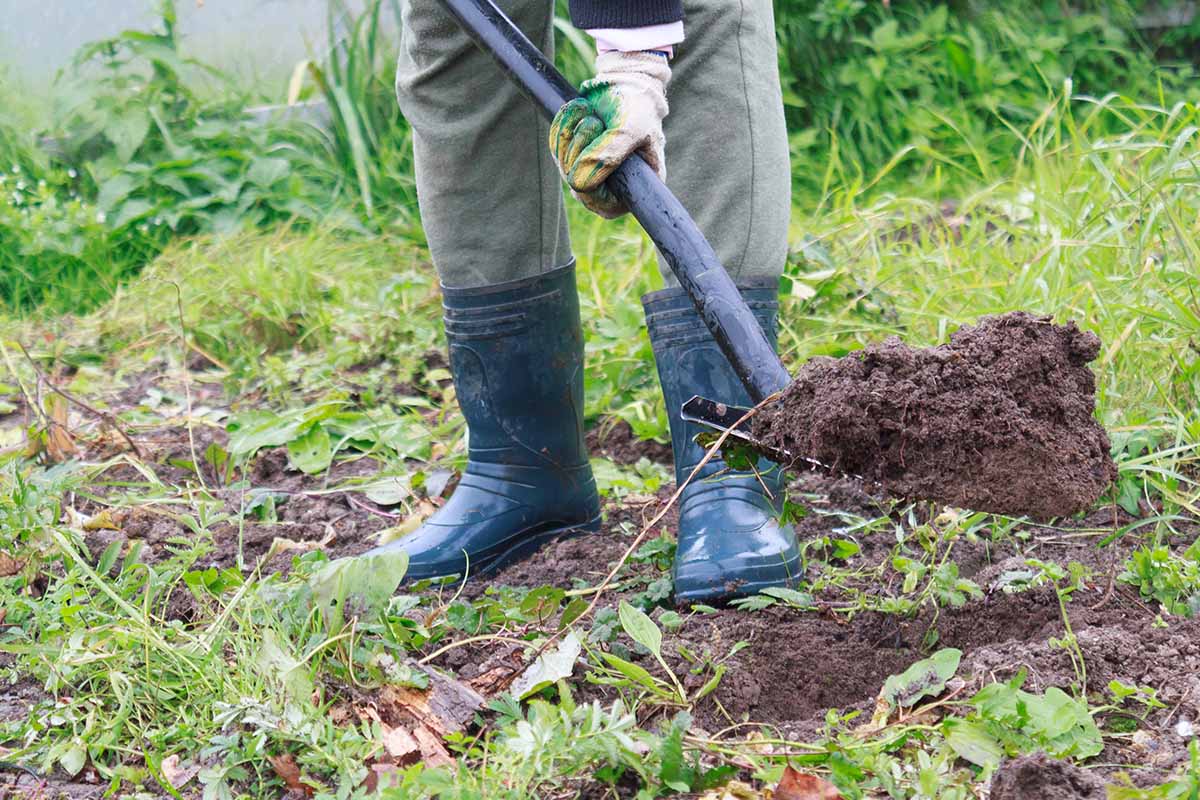
Use a shovel to dig straight down and around the section to separate it from the main plant.
You might need to use your clippers to release some of the roots from the main plant without damaging anything.
Fill the hole you made back in with soil and put the newly made section in the ground as you would a potted plant.
Transplanting
When you buy ‘Marion’ plants from the nursery, you’ll often have a choice of bare roots or potted plants.
Bare Roots
If you can’t plant your bare roots right away, heel them in by burying the roots in soil or sawdust and keep the medium moist until it’s time to transplant.
Once you’re ready, dig a hole deep and wide enough that it can accommodate the existing roots.
Set the roots in the hole you made and spread them out so they aren’t twisted or bunched up.
As you hold the plant upright, fill in around the roots with soil.
Gently tamp down the soil.
Keep filling the hole until the spot where the roots connect to the cane is about an inch or two underneath the soil surface.
Water the soil and add more if it settles.
Potted Plants
Transplanting a potted marionberry couldn’t be easier. Dig a hole the same width and depth as the container.
Remove the plant, dirt and all, from the growing container and gently loosen up the soil and outer roots.
Set it in the hole. It should sit with the top of the potting soil level with the ground.
Backfill any gaps, gently tamp down, water in well, and add more soil if necessary.
Pests and Disease
‘Marion,’ and blackberries in general, tend to be pretty tough once they are established.
Pests
You might have to compete with birds for the fruit and the plants can be affected by a few diseases, particularly in wet conditions.
Deer will browse the very young shoots and, of course, any herbivore is going to make a go for the ripe berries, especially birds.
Netting is really the only reliable option for protecting the marionberry fruits. I find that my plants are so productive that I don’t mind sharing with the wildlife.
But I do make an effort to get out every day and harvest some for myself.
Smaller pests aren’t a serious problem on ‘Marion’ plants. You may see spider mites, aphids, or thrips.
Disease
On the bright side, marionberries are very resistant to verticillium wilt and have moderate resistance to rust and gall.
The bad news is that marionberries are very susceptible to calico virus, dry cell, purple blotch, and septoria leaf spot.
Calico Virus
Calico virus is a carlavirus spread by dagger nematodes (Xiphinema species) that causes yellow mottling or line patterns on leaves and reduced plant vigor.
It can spread like wildfire in blackberry fields, devastating plants.
Purchase only certified disease-free plants to avoid introducing this virus to your garden. Otherwise, your only recourse is to pull the infected plants.
You can have your soil tested for the nematodes. This is typically reserved for commercial growers, but home growers certainly can test their soil, as well.
If these nematodes are present, don’t plant marionberries at all.
Dry Cell
Dry cell is common among these berries, partly because it’s caused by a variety of different pathogens present in the same areas that these plants are typically grown.
When dry cell is present, individual druplets will dry out and become hard. You might also see areas of discoloration, sometimes with scabbing.
The symptoms can appear at any point in the development of the berry, and may or may not be accompanied by fungal spores.
There’s nothing you can do once the symptoms have appeared. Instead, focus on keeping pathogens out of your berry patch going forward.
If you have a particularly wet year, you’ll need to pay particular attention, since most fungal pathogens tend to proliferate in wet weather.
You can use a broad-spectrum fungicide early in the year as the berries first begin to develop.
Copper is a reliable choice, as are products containing Bacillus subtilis, which is a beneficial bacterium that prevents and slows fungal growth.
I prefer to use the latter as it has less impact on the environment than copper.

CEASE by BioWorks contains this powerful bacteria and is approved for organic growing.
You can pick it up at Arbico Organics in one- or two-and-a-half-gallon containers.
Continue using whichever fungicide you choose every month or as long as wet conditions persist, unless the manufacturer recommends otherwise.
Purple Blotch
Purple blotch is named for the dark green splotches that develop on the canes, eventually turning purple with red margins.
It’s caused by the fungus Septocyta ruborum, which breeds on floricanes and then infects primocanes.
The disease spreads in water, either rain or splashing water from irrigation. The leaves won’t show signs of infection.
Trellising is one of the most effective preventative measures as trellised canes are rarely infected.
As an extra precaution, make sure to water at the base of your plants at the soil level and not on the leaves.
Keep weeds away, too, because they create humid microclimates that favor infection.
Once purple blotch develops, you’ll need to remove the affected canes as there is no cure.
Septoria Leaf Spot
Septoria leaf spot causes red spots to develop on the foliage. When the spots are new, they’ll be a light brown, but they darken as they age.
If you look closely, you might even see the black fruiting bodies in the center of the spots. You might also see spots on the canes.
All of this havoc is caused by the fungus Sphaerulina westendorpii.
Trellising, careful watering practices, and weed control will all go a long way to preventing the disease.
If the disease is present, apply copper after harvest, again in early fall before heavy rains, and once more in early spring.

You can find Bonide copper fungicide available from Arbico Organics in 16- or 32-ounce ready-to-use bottles or as hose-end.
Harvesting
When the fruits darken to nearly black and start to take on a slightly matte appearance, they’re ready to eat. Now, it’s a race between you and the birds to see who can get to them first.
Harvesting is pretty easy. Just gently grip the fruit and twist while pulling. It should pop right off.
As you place the berries in a collection container, be sure not to stack them more than a few deep or the berries at the bottom will get squished.
Or you can use my technique, which is to transfer the berries directly from the cane to my mouth. I never have to worry about unintended squishing that way!
Preserving
Don’t wash berries before refrigerating. Place them in a shallow container.
If using glass or ceramic, line it with a paper towel first and leave it uncovered or loosely covered with a paper towel. They’ll keep for up to three days in the refrigerator.
You can also freeze them and they’ll keep for at least a year. This involves rinsing, placing them in a single layer on a cookie sheet, and putting them in the freezer until solid.
Once they are solid, you can move them to a storage container or bag.
Then, of course, there’s canning. Our guide to picking blackberries will walk you through this process.
Cooking Ideas
Obviously, the berries are perfect for all kinds of desserts. Cheesecake, pie, ice cream, tarts, danishes, galette, crisps, cobblers, you name it.

Wherever you can use fruit in a dessert, you can probably use marionberries. Our sister site, Foodal, has a recipe for delectable blackberry scones that you have to try.
I love to use them in savory dishes, as well. Try them in baked beans, on your charcuterie board, in salads, or on bruschetta.
They go particularly well on pork dishes, and there’s a pulled pork sandwich dish at a restaurant near my house that will knock your socks off.
They use ‘Marion’ berries mashed up and spread on top of the pulled pork. Think a turkey sandwich with cranberry sauce but insanely better.
All Hail the Marvelous ‘Marion’ Berry
Portlandia fans know the power of the marionberry. In the Brunch Special episode of season two, they feature heavily as the breakfast treat that people will wait in line for hours and will battle post-apocalyptic mercenaries for.
You don’t have to do either because you’ll have them bursting forth from your own plant in no time.
Once you do, you have to come back and tell me your favorite way to eat them. Fresh off the vine? On top of pancakes? Made into cider? All of the above?
If you want to learn more about growing berries in general, we have a few other guides that will set you on the right path. Check these out next: