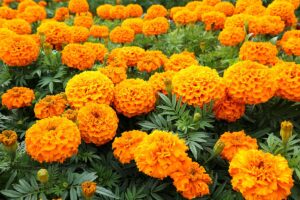
Gladiolus (Gladiolus spp.) are summer flowering corms with stately spikes of bright, ruffled blooms and upright, sword-like foliage that makes a superb structural statement.
A favorite for beds, borders, and cutting gardens, they’re also readily adaptable to container cultivation, adding their regal allure to patio pots, planters, and other vessels throughout the garden.

We link to vendors to help you find relevant products. If you buy from one of our links, we may earn a commission.
Gladiolus makes a terrific impact when massed into stands and adds height and color to mixed plantings, or they can be paired with other bold bulbs like alliums, cannas, or crocosmia for a sizzling tropical theme.
In our guide to growing gladiolus, we cover how to cultivate these impressive flowers in your landscape.
To get the most from potted plantings, it’s important to use adequately sized containers, a suitable growing medium, and to choose the varieties best suited for containers.
Are you ready for some standout, showy patio planters? Then let’s jump into how to grow gladiolus in containers.
Here’s a quick look at what’s ahead:
What You’ll Learn
Cultivation Basics
Gladiolus are indigenous to Africa, Europe, and the Mediterranean basin. These perennials grow from corms and produce tall scapes of showy, ruffled flowers in rich, vibrant colors.

They bloom generously from early summer through to early fall – and planting out corms every two weeks is an easy way to extend their already lengthy flowering time.
The plants enjoy loamy, well-draining soil with a sandy texture and a slightly acidic to neutral pH of 6.0 to 7.0.
Flowering is best in a full sun location with a minimum of six hours of direct light each day, although they can tolerate a little afternoon shade, especially in hot regions.
They are generally hardy in Zones 7 to 10, with some varieties suitable for Zones 5 to 10.
Cultivars to Select
The most popular choices for the home gardener are hybrids typically classified as G. × hortulanus.

These are divided into three main groups, all with an extensive range of flower colors.
- Grandiflora hybrids, G. grandiflora, produce large, funnel-shaped and ruffled blooms four to six inches wide on tall spikes three to six feet tall with up to 30 flowers per scape.
- Nanus hybrids are miniature varieties with small, trumpet-like blooms three inches wide on scapes that grow up to two feet tall.
- Primulinus hybrids, G. dalenii, have loose, hooded flowers two to three inches wide on scapes up to three feet tall and often feature contrasting throat blotches.
Dwarf varieties typically grow in the range of 12 to 36 inches tall and make a handsome, upright choice for containers.
Nanus types are popular miniature varieties with soft, pastel colors on scapes that grow up to 24 inches tall.
They also have better cold hardiness than standard varieties and are suitable for cultivation in Zones 5 to 10.
Here are some varieties to consider:
Charming Lady
‘Charming Lady’ is a nanus type with beautiful, bubblegum pink blooms.

You can find ‘Charming Lady’ corms available in packets of 10 at Burpee.
Hardy Dwarf Mix
If you prefer a mix of colors, the Hardy Dwarf Mix features a selection of nanus types with pretty flowers in cream, peach, and pink.

It’s available in packets of 20, 40, or 100 bulbs at Eden Brothers.
Glamini
The Glamini® series (G. grandiflorus) is a handsome choice for containers as plants grow up to 24 inches tall and are hardy in Zones 7 to 10.

The Glamini® Mix offers beautiful blooms in colors of burgundy, pale pink, purple, scarlet, and buttery yellow.
Packets of 24 bulbs are available at Burpee.
Container Choices
If you opt to grow dwarf varieties that top out in the range of 12 to 36 inches tall, pots with a minimum of 12 inches in diameter and height are suitable.
Standard varieties grow much taller, and these need taller pots for a couple of reasons.

The first is that shallow pots make it too easy to overwater the corms, which can lead to root rot and bulb collapse.
Another reason is that taller pots are needed to balance the impressive height, which can look top-heavy in small vessels.
For a visually pleasing look, aim to use containers that are roughly one-and-a-half to two-and-a-half times shorter than the mature plants.
For example, if your plants grow five to six feet tall, choose a pot that’s in the range of 18 to 30 inches in height.
This size helps to anchor the overall appearance and provides a satisfying, harmonious sightline.
Containers can be made of any type of material such as ceramic, fiberglass, hypertufa, terra cotta, or wood.
However, if you plan to overwinter bulbs in their pots, ensure the material can withstand the low temperatures your region experiences.
Those made from materials such as ceramic or terra cotta are easily cracked or damaged in freezing temperatures.
Also, the pots must have drainage holes to prevent soggy soil – wet soil is a leading cause of bulb rot.
I like to line the bottom of my garden pots with a layer of porous drainage material to ensure water moves freely and doesn’t saturate the bottom layer of soil.
A two-inch layer of broken pottery or pebbles works well as a drainage layer.
Catchment saucers can be used to prevent water spilling onto decks or patios. You can also use pot toes or stands to elevate the pots to let water escape so the corms stay firm and healthy.
Growing Medium
Choose a potting soil rich in organic matter, well-draining with a gritty or sandy texture, and with a slightly acidic to neutral pH of 6.0 to 7.0.

You can use any good-quality commercial potting soil, but I suggest amending it to improve drainage, nutrients, and tilth.
Work in one part of organic materials such as compost, well-rotted manure, or worm castings.
Add in one part of gritty materials such as landscape sand, pea gravel, perlite, or stone chips to create a sharper texture for excellent drainage.
Potting Up
Gladiolus are summer-flowering corms that are sown outdoors starting in mid-spring.
To extend their bloom time, pot up corms at two-week intervals until mid-July for continuous flowers all summer and into fall.

Place your containers in a full sun location and fill with the amended soil, then mix in one tablespoon of bone meal for each corm to promote strong roots and vibrant bud set.
Nestle the corms into the soil at a depth of three times the corm’s height, or about three to six inches deep and spaced two to four inches apart, with the basal plate, or flat end, down.
Carefully backfill with soil then firm gently over the corms. Water lightly to settle the corms in place.
For taller varieties, staking may be needed to keep the stems upright. If you opt for dwarf varieties they won’t require additional support.
Maintenance
Just like gladiolus growing in garden beds, potted care is simple and straightforward.
Feeding
If your corms overwinter in their pots, in early spring before new growth emerges, add a two-inch layer of organic materials such as compost, rotted manure, or worm castings as a side dressing.
Work it carefully into the top two inches of soil with a hand cultivator.

After new growth emerges, scratch a slow release, flower-boosting fertilizer into the surface of the soil.
Use a formula with lower nitrogen than phosphorus to ensure plenty of flowers, not just foliage. Reapply in early summer before blooming starts.
Burpee’s Natural Organic Rose Bloom fertilizer has a ratio of 4-6-4 NPK that’s ideal for flowering plants.

Burpee Natural Organic Rose Bloom
You can find it available at Burpee.
Alternatively you can use a balanced liquid or water soluble formula diluted to half strength and applied every three weeks during the growing season.
Watering
Water potted gladiolus regularly, providing one inch of water per week in the absence of rain.
When the top inch of soil is dry, water deeply to ensure the entire root ball is moistened and avoid frequent, shallow applications.
Container plants typically dry out faster than those in the ground and in hot weather, you may need to water every few days.
After flowering, monitor the soil moisture and reduce watering as needed.
Lightly moist soil is fine, but the corms and roots don’t like wet feet and won’t consume as much water after the flowers are spent.
Winter Care
After flowering, deadhead the spent blooms to direct energy into the corms.
If your gladiolus are winter hardy for your region, the corms can be left in their pots to overwinter.

But if you’re in the cooler end of their hardiness range, it’s a smart idea to move pots to a sheltered area for extra protection.
Sites such as against a fence or foundation wall, a building corner, or tucked into shrubbery are usually a degree or two warmer than out in the open.
When the foliage has faded and died off, cut the stems back to two inches above the ground with clean, sharp shears.
A two- to four-inch layer of winter mulch, such as shredded bark, chopped leaves, or straw applied to the soil surface is also helpful to safeguard bulbs from heaving in freeze/thaw cycles.
In areas outside of their hardiness range, corms should be dug up before the first frost and overwintered in a frost-free location.
Our guide to how to lift and store corms has all the details for this step.
Potted Perfection
With their upright spires of glorious, colorful blooms, gladiolus are potted perfection!

Choose smaller pots for dwarf gladiolus or go big with large containers that showcase the bold finery of standard cultivars.
Give them organically-rich, well-draining soil in a sunny location and water deeply when the top inch of soil has dried out.
Then kick back and enjoy the results of your spectacular container garden!
What types of gladiolus do you like to use in pots and planters? Let us know in the comments section below!
And for more information about growing gladiolus, check out these guides next: