Winter is a time when most crops go dormant or have died off for the season in many areas, leaving a brown, slumbering landscape in the garden. But there are a number of vegetables that can be grown in the winter.
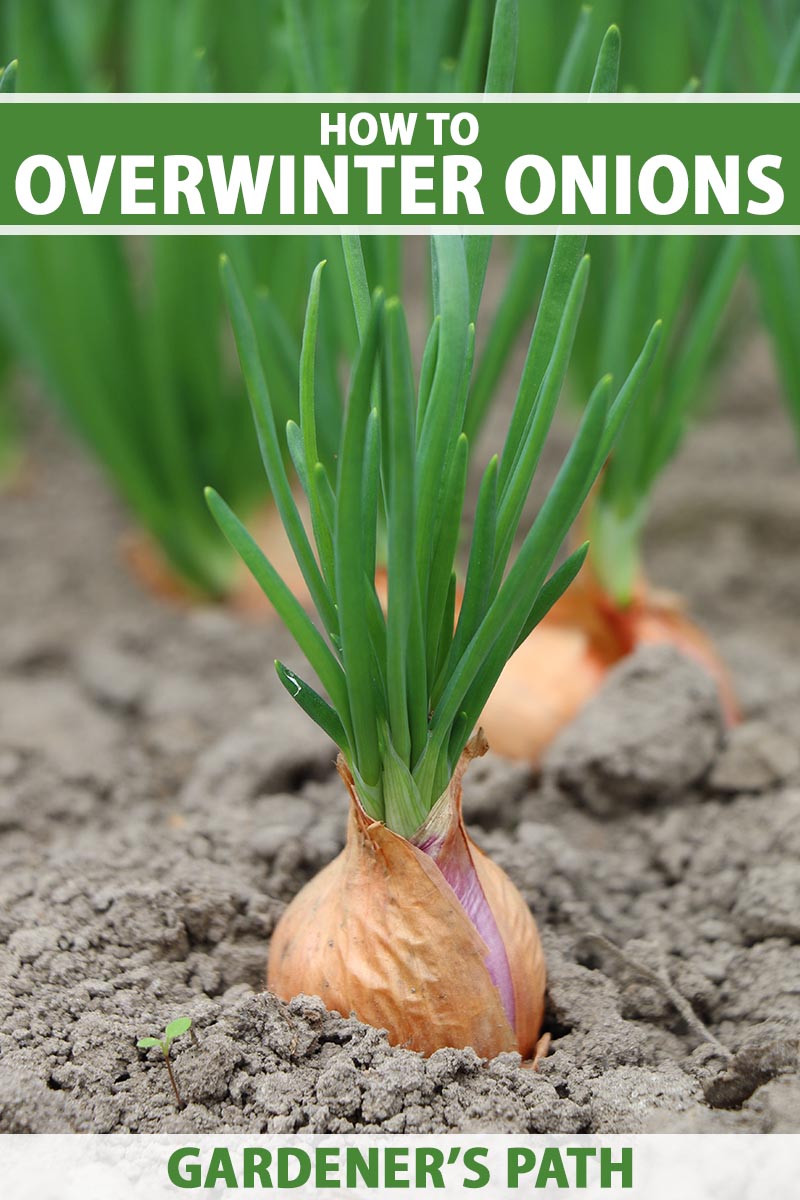
Onions can be planted in the fall to begin their growth cycle and get a jump on the next season, for an early harvest.
Many gardeners agree that fall planting also helps to produce bigger, more flavorful onions than what they get when seeds or sets are planted in the spring.
Rather than starting fresh while the ground is still cold, fall-planted onions are already established when they emerge from winter dormancy, with strong root systems and bulbs that are already developing.
We link to vendors to help you find relevant products. If you buy from one of our links, we may earn a commission.
So, which type should you plant, and when?
Most onion types are cold hardy to some degree, but there are some, known commonly as “winter onions,” which are better able to tolerate very cold or even freezing temperatures.
Bolt-resistant and long-day varieties are also preferred.
Keep reading to learn more about growing winter onions in your home garden!
What You’ll Learn
What Are Winter Onions?
“Winter onion” is a term used to describe onions of several varieties that are particularly well-suited to fall planting and powering through the chilly winter months underground.
Some types, such as multiplier onions, grow in clusters rather than individually, as with other commonly grown bulb varieties.
Several of the most popular winter varieties are heirlooms that have been in cultivation for over a hundred years, while other cultivars suited to fall planting have been developed more recently.
While there are a number of choices for winter growing, be sure to look for a type that grows well in your region. Day length is an important factor when selecting what cultivar to grow – we’ll touch on that a bit later, so keep reading!
Easy cultivation, cold tolerance, long storage, and versatility in preparation have solidified this vegetable’s position as an important food crop all over the world, even in places where many crops are a challenge to grow. And fall planting is a proven method to produce your best crop yet.
When it comes to planting, timing is key. Let’s discuss that next.
Propagation
Propagating winter onions is very similar to what you would do with any other type, with just a few additional considerations.
Because they spend the majority of their time in the soil when temperatures take a dive, being sure to plant at the right time and keeping them protected may require slightly more effort.
You can plant your onions from seed or sets. There are a few notable differences between these options, so let’s take a closer look.
From Seed
Root vegetables such as onions, carrots, and potatoes that develop edible roots, tubers, or bulbs underground are best started by direct planting, rather than starting seeds in flats or pots for later transplanting.
It takes about four to five months for most types of onions to fully mature.
For a winter crop, seeds should be sown in early fall in areas with average low winter temperatures in the 20 to 30°F range, or in late summer in areas where average winter temperatures fall below this range.
A key rule of thumb to keep in mind is that seeds will take longer to become established before going into winter dormancy than sets. Plan to allow for two to three months of growth prior to the first frost date in your region.
You’ll want the plants to have enough time to begin forming a bulb, rather than being just a wispy blade, by the time temperatures fall and the first hard frost sets in. But you don’t want to encourage them to develop too far, or this leaves them prone to bolting.
Seeds in particular can also easily become overwhelmed by weeds, even in the fall.
This is a detriment, since the unwanted plants will compete for water and nutrients, and it’s a race against the clock to get your onions established before the arrival of winter.
Press seeds about a quarter inch deep and cover them lightly with soil.
Spacing depends on the variety you choose; bunching-types will need to be planted about eight to nine inches apart, whereas individual bulb onions will require about four to six inches of space per plant.
Water the seeds in well, and maintain moisture without leaving the soil feeling wet. Too much moisture can cause rotting.
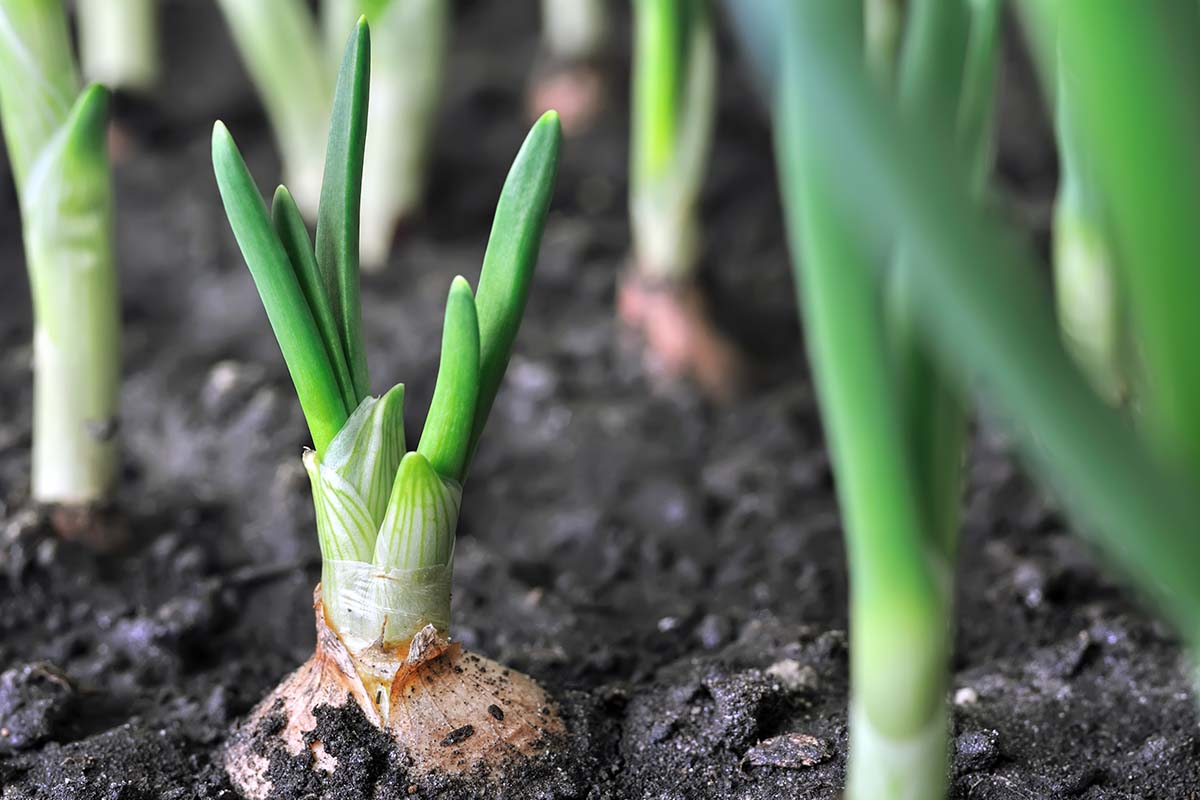
Fall-planted seeds tend to germinate more quickly than they do when planted in the spring, since the ground is warmer in the fall. Sprouts should emerge within about a week in the fall, while it may take closer to two weeks in the spring.
There are some potential advantages to starting seeds indoors if you choose to go this route.
Late summer and early fall can still be rather balmy, which can lead young plants to wilt, and encourages the spread of disease and pest infestations.
Unexpected warmer temperatures also encourage bolting, or the process of sending up a flower stalk in preparation for seed formation. Bolted bulbs will split, soften, and become inedible after producing a flower stalk, and these will need to be pulled.
If you must start seeds in flats or pots, ensure that they have good drainage. Adding one part coarse silica sand to one part compost and two parts potting soil can aid in drainage and make the texture more friable, or crumbly and easy for bulbs to form in uniformly.
If you intend to plant your onions in a container that they’ll remain in through the season, be sure that it’s at least 12 inches deep and 18 inches wide, as the bulbs need adequate room to grow without stunting. Pots can easily become overcrowded, resulting in smaller bulbs at harvest time.
Note that results may vary, as containers are not as well insulated as the ground through the winter.
Rather than leaving containers outdoors, it may be best to wrap the bases in cloth or burlap, mulch the tops heavily, and move them into a protected area in an unheated garage or basement for the duration of winter dormancy.
Unwrap and move them back outdoors after the last frost date in your area, hardening them off to outdoor conditions first by adding about an hour of exposure each day over the course of a week.
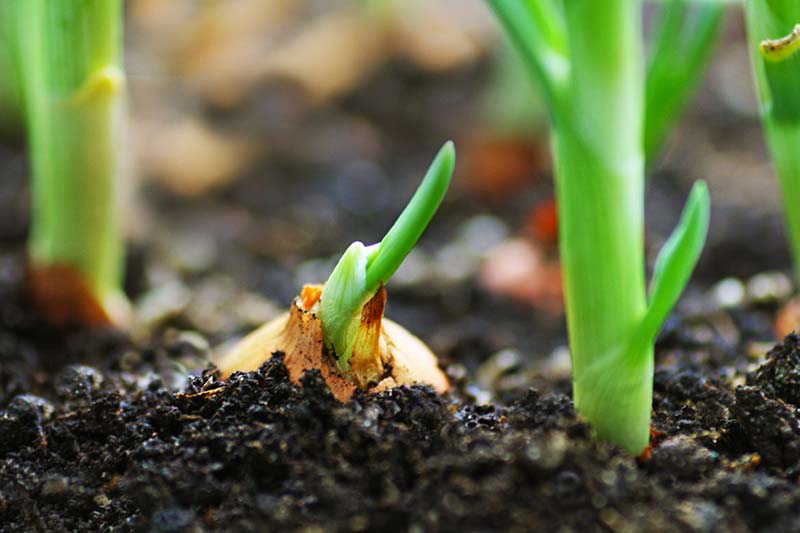
From Sets
Onion sets are bulblets that have been started from seed, harvested, dried, and stored in a dormant state from the previous season.
This is the preferred option for growing fall-planted onions, as they’re more mature when you put them in the ground, able to become established more readily, and produce crops at harvest time that are ultimately of higher quality as a result.
You can also plant them about three to four weeks later than you would seeds.
You can usually find sets in garden stores, through online retailers, or even in your own garden if you have planted seeds with the intention of harvesting them early for planting later.
When you’re selecting onion sets, be sure to give each bulb a gentle squeeze. You want to feel firmness, rather than a bulb that gives easily between your fingers.
Signs of a green scape growing from the top of the bulb are a plus, as this is a good indicator that they’re alive.
As an added bonus, many online retailers will wait to ship out sets until the appropriate planting time in your region.
You may also note that some nurseries and growers sell live “slips,” immature seedlings that are often sold in “sets” of 100 or more.
These are also suitable for fall planting, and can be revived in water before putting them in the ground if they have begun to wilt or dry out.
Success rates can vary with slips, as young onions don’t respond well to transplanting as described earlier, so plan to plant more than you need. Though harvest quality is often better, quantity may be lower in terms of final yields.
These bulbs have been dormant, sometimes for a long period of time, and that can lead to failure at the time of planting.
Sets are also known to bolt more easily particularly if you’re starting sets in the heat of late summer in your area.
This isn’t recommended, of course – cool weather is preferred. Bulbs that bolt will soften and split, becoming less desirable as a food source.
To avoid bolting, it’s best to select a bolt-resistant variety known for growing best throughout the winter months.
Again, this depends heavily upon your region and USDA Hardiness Zone. Some growers also recommend purchasing heat-treated sets to avoid bolting.
Two benefits of planting sets as opposed to seeds, however, are that they’re easier to handle because they’re larger, and they mature more quickly. Rain and watering can cause seeds to shift, whereas sets are easier to space adequately since they generally stay where you put them.
If you plan to use sets, I recommend planting about a third more than the number you actually hope to harvest to allow for failure. If you end up with a higher success rate, you can always give some to friends and family.
Sets propagated in the fall are treated similarly to seeds or onions planted in the spring in that they need the same sunny conditions, with loose, moist but well drained soil that’s rich in organic material. Compost or aged manure amendments work well.
Sets also need less time to become established before winter dormancy, and as with seeds, warmer soil temperatures in the fall help them to get a good head start before the arrival of frost and snow.
Depending upon the variety that you choose, you’ll want to plant about one to two months prior to the first frost date for your region.
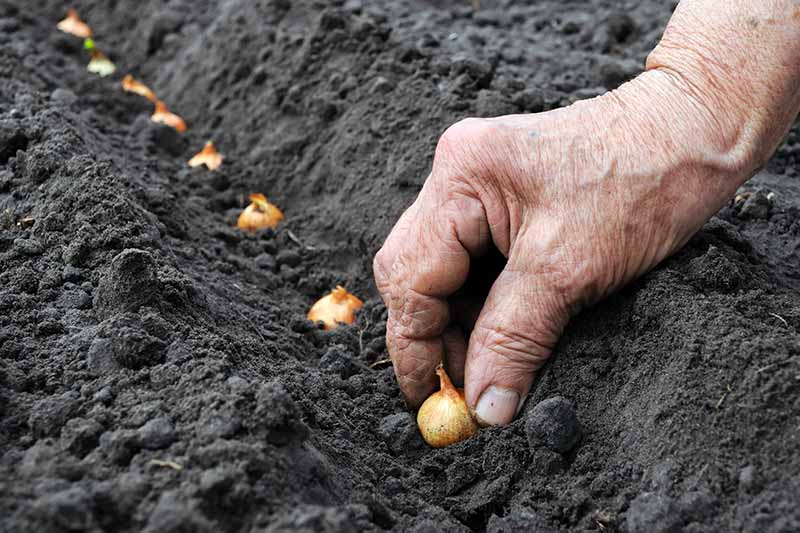
Dig a long trench or individual holes, and plant sets in the ground with the pointy end facing up, about two to three inches deep, so the bulb tops are at surface level. Space them four to six inches apart, just as you would with seeds.
Water them in well, and provide supplementary water as needed in the absence of rain to keep the soil moist. Do not allow the bulbs to sit in standing water.
How to Grow
Onions are one of the most low-maintenance crops you can grow. They practically thrive on neglect, provided that certain conditions are met.
Choose a planting site that has full sun exposure for at least six to eight hours per day.
It’s extremely important that winter onions have adequate light at planting time, as this helps them to grow, and provides warmth that heats the ground up around the forming bulbs.
In the spring, a full-sun location will also warm more quickly as the ground begins to thaw and plants emerge from dormancy.
Prepare the soil for planting by tilling or turning to loosen and aerate it. Root vegetables and bulbs prefer loose soil over compacted soil, as hard, impenetrable, or rocky soil can cause stunting.
Amend the planting beds with aged manure or compost, and add sand as well to loosen hard soil and improve drainage.
Your onion bed should be placed in a location that doesn’t stay boggy after rain or watering. Good drainage is essential for these vegetables. Standing water can very quickly cause rotting or spread disease, and ruin your entire crop.
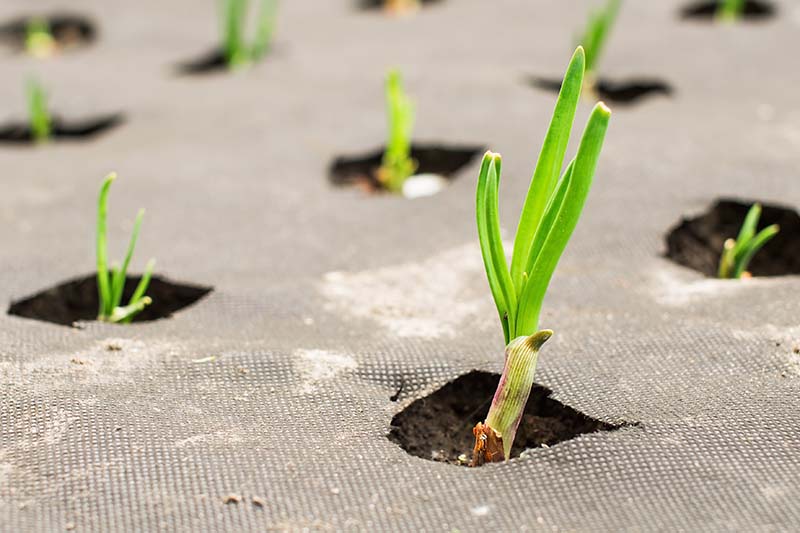
Allow enough time for seeds or sets to root and become established prior to ground freezing. After planting, mulch to keep weeds out and to lock in moisture. About half an inch of straw or shredded leaves will do the job nicely.
Add about an inch more after your onions have sprouted, but without blocking their exposure to sunlight.
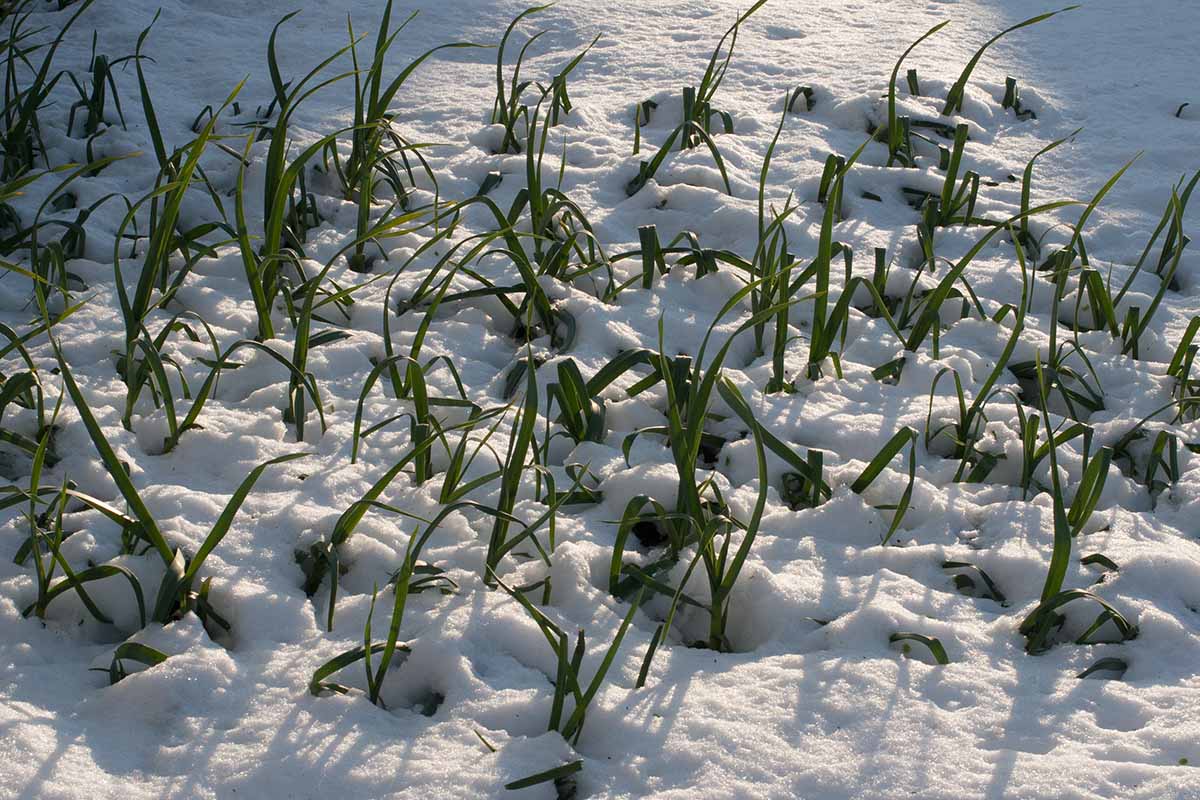
Continue adding mulch until the arrival of the first deep freeze, until you have about four inches piled on top of the plants to protect your crop from the winter chill.
You can also allow fallen leaves and plant matter from the garden that has not been infected with disease or infested with pests to decay naturally, to mulch your plants and contribute to healthy soil that’s rich in organic material and nutrients when they break down in the spring.
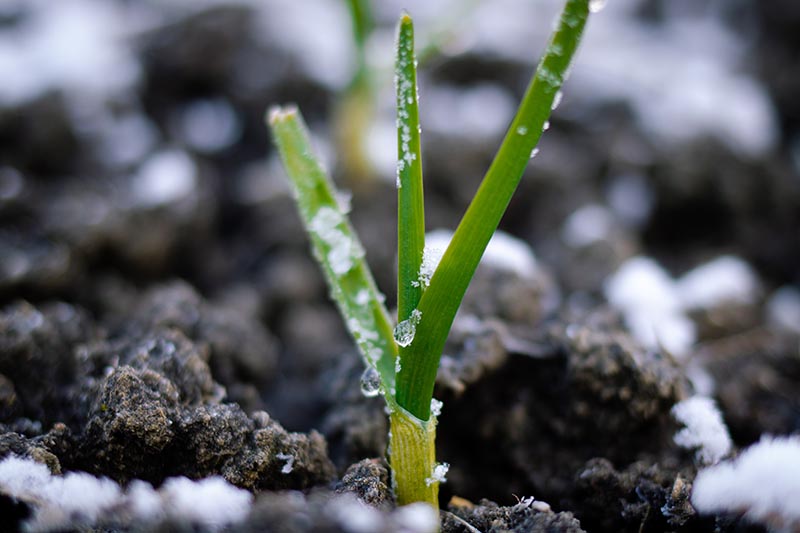
Snow that falls on top of the mulched plants will provide an extra layer of insulation in regions with frigid winters.
Be sure to keep on top of those weeds until the arrival of frost, and pull or clip them when you see them.
When in doubt, don’t pull if you’re concerned that what you’re looking at may actually be an onion sprout, but be sure to pull any plant invaders that will crowd out your crop, and compete for water, light, and nutrients. Resume weeding with the arrival of spring.
Water your crop in the absence of rain in the fall, and cease watering with the arrival of the first hard frost. In dormancy, they won’t need the extra moisture, as this will make them prone to rot.
If any onions bolt before the arrival of winter weather, meaning they’ve turned their efforts to flower and seed production and produced a tall scape, carefully pull these and fill in the hole.
You can eat the tiny bulbs they’ve produced if you like, but otherwise, these won’t produce the full-grown onions you’re looking for the next spring and summer.
Bolting can also happen in the spring, and is more likely to occur if you planted them too early in the fall.
You want them to become established but not mature significantly before they go into dormancy, so they will continue putting their energy into producing big, juicy bulbs when they awaken in spring.
Planting winter crops means you will need to keep the temperatures and growing conditions in your region in mind.
Some growers in extremely cold regions with short growing seasons employ poly tunnels or row covers to trap warmer air around their plants, helping them to become established in the fall, and emerging from dormancy earlier in the spring than they would otherwise.
In areas where hard freezes are common and prolonged, a fabric or plastic floating row cover can also be added after mulching, on its own or in combination with a poly tunnel, providing extra protection – just be sure to secure any protective materials well against winds and heavy snow.
Harsh, cold winds can be damaging for onions. They can break the neck where the scape emerges from the bulb, which can cause the bulb to die off. It’s best to shield young plants if your region experiences strong winds.
Container growing is also possible; however, if your region experiences extreme cold, containers may not provide enough protection for overwintering.
Fill a deep container, such as a rectangular planter that’s at least 18 inches deep, with a mix of one part each of compost and coarse sand, and two parts potting soil. Plant seeds or sets as previously directed and water to settle.
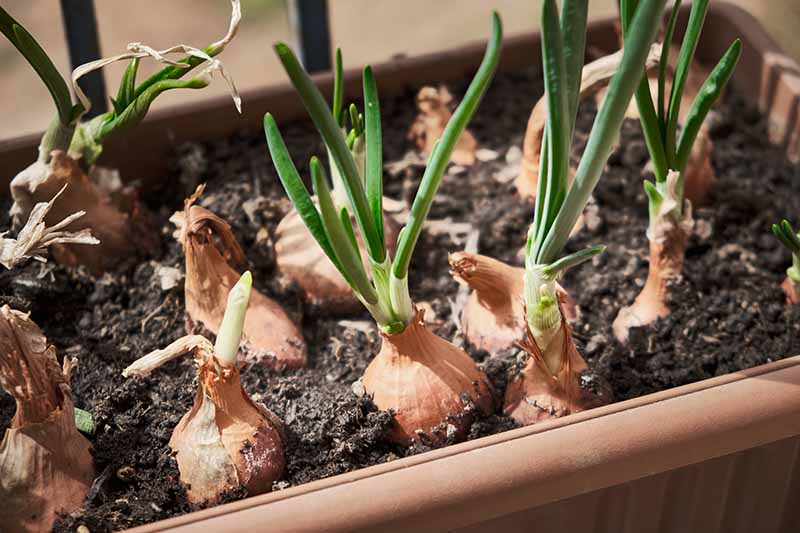
After sprouts have emerged, the containers can be mulched and covered, or moved to a warmer location, such as a protected place in the garage.
You can also wrap the container in bubble wrap or heavy fleece for added protection – just be sure not to cover the plants with anything but mulch.
Remove all protective wrappings and mulch from your plants after the last frost date in the spring, or as soon as the weather warms and they begin to put on new growth.
Species and Cultivars to Select
There are a number of varieties of onion that are very cold hardy, but some of the most common types can be planted in autumn in Zones 3 through 9 with excellent results.
Keep an eye out for bolt-resistant and long-day varieties, as these are well-suited to fall planting.
And keep timing in mind when you make your choice between seeds and sets, as seeds will require more time before the arrival of winter to germinate and become established, while planting too early can make them more prone to wilting, bolting, pests, and disease.
Long-day onions require more daily sunlight exposure to produce bulbs, and they are particularly well-suited to growing in cold northern regions. These are also typically better for curing and longer storage after harvest.
Below, we offer a few suggestions, beginning with standard bulb-type varieties of A. cepa, and rounding out the list with a couple of additional winter onion species you may like to try.
Walla Walla
The sweet yellow bulbs of this long-day heirloom A. cepa cultivar are known for attaining a mature size sometimes twice as large as their spring-sown counterparts.
Sweet and juicy with a mild bite, ‘Walla Walla’ is an excellent choice for fall sowing that is well suited to colder regions of the North.
Sets are available from Burpee and seeds are available from Botanical Interests.
Other traditional bulb-type cultivars suited for overwintering include ‘Bridger,’ ‘Keepsake,’ and ‘Toughball’ if you’re looking for a yellow variety, or ‘Desert,’ ‘Electric,’ and ‘Sunrise’ if you’re more in the mood for red.
Multiplier or Potato
The potato onion (Allium cepa var. aggregatum) is a bunching or “multiplying” variety that is generally planted from sets rather than seeds, as they rarely produce flower stalks.
This variety is not known for producing exceptionally large bulbs – they typically reach no more than three to four inches in diameter, max – but it is very productive, provided the sets are healthy and disease-free.
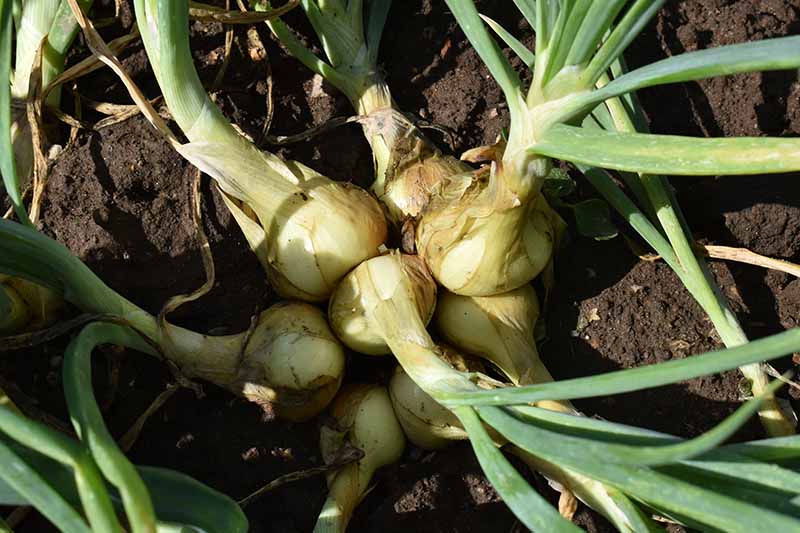
These gained popularity among Great Depression-era gardeners as the white or yellow bulbs can generate a substantial return on a small investment, and may be harvested for eating or planting year after year.
One pound of bulbs can produce three to five pounds of onions, on average.
A large, mature cluster of three to four inches in diameter can produce eight to 12 shallot-sized bulbs.
These are also well suited for container growing, and will continue to produce bulbs provided that they have adequate room, with at least six to eight inches of space to grow and multiply.
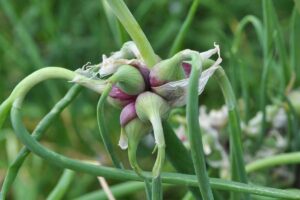
Egyptian Walking
Allium x proliferum is something of a curiosity amongst gardeners, with a unique perennial growth habit.
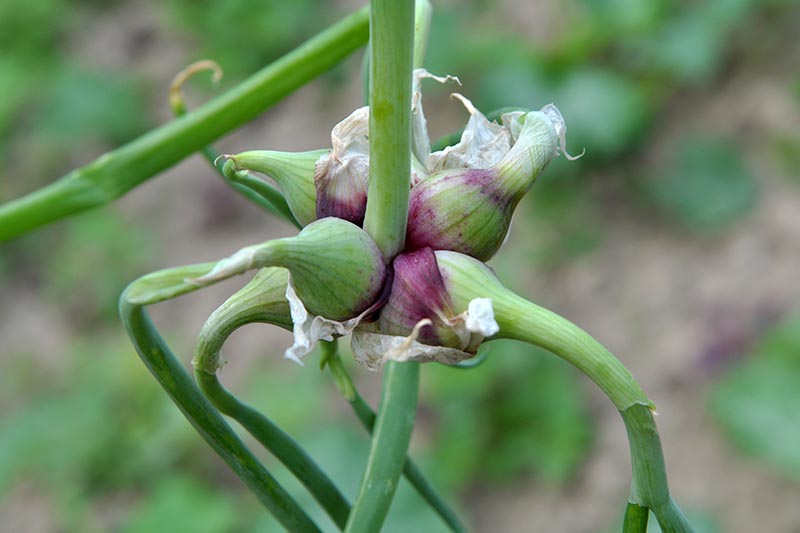
Known as “top-setting” onions, they’re a bunching variety with a twist – the bulblets are formed at the top of a tall stalk, where they form a bunch that weighs down the stalk until the cluster touches the soil.
From there, the young bulblets will take root, “walking” to a new location to start a new plant.
While the bulbs are tiny – only about one inch in diameter – they have a strong flavor and can be used in the same way as pearl onions in cooking.
The stalk and bulblets sprout from a parent bulb that’s also edible, with a much stronger taste.

The parent bulbs can be planted about six inches apart and left in the ground year-round. With a thick layer of mulch for protection, they’ll overwinter to return each spring.
You can find bulbs in sets of five plants at Burpee.
Managing Pests and Disease
There are remarkably few pest or disease issues to keep an eye out for in most regions that experience a true winter when planting your crop in the fall.
If you’re in an area that remains above freezing for most or all of the winter, that may be a different story.
But in regions where snow falls and the ground freezes, you’ll be spared the majority of concerns – this is one of the chief benefits of overwintering onions!
There are just a few common problems to be aware of:
Herbivores
Most herbivorous animals will avoid onions unless virtually every other food source has been depleted. In fact, they contain disulfides that can actually repel, and potentially be toxic to, a number of animals.
If there is little foliage remaining for wildlife in your area to consume and you notice that some animals – such as rabbits, deer, and squirrels – are resorting to your onion patch for sustenance, you might consider tossing out some feed corn to divert their interest elsewhere.
Otherwise, consider planting your crop in an area that is fenced, or use row covers to keep them safely tucked away from marauding animals.
Gastropods and Insects
While there are a few different types of insects that can cause damage to onions, most will not cause problems in the winter, and many will die off at this time of year.
Thrips, which are discussed below, can still remain present in the soil, waiting to emerge in the spring. Others may cause problems at planting time, or when plants emerge from dormancy.
Slugs and Snails
While slugs and snails are not likely to cause problems in the dead of winter, they can still munch on your onion crop in the fall or early spring.

Both slugs and snails will eat onion scapes, and can cause a fair amount of damage. When they’re present, you’ll notice slimy trails where they’ve passed through, and obvious signs of chewed leaves.
Because there are a number of ways to deal with both, I recommend checking out our guide to dealing with slugs and snails for more information.
Thrips
Onion thrips are only one-twelfth of an inch long.
They are most common in hot, dry months like what you’ll commonly see in the summer, but they can survive in the soil over the winter if they manage to conceal themselves inside bulbs or skin.
The adults can lay viable eggs without mating and produce hundreds of nymphs each. The adults are pale yellow to light brown, and typically gather in groups on leaves where they suck sap from plants.
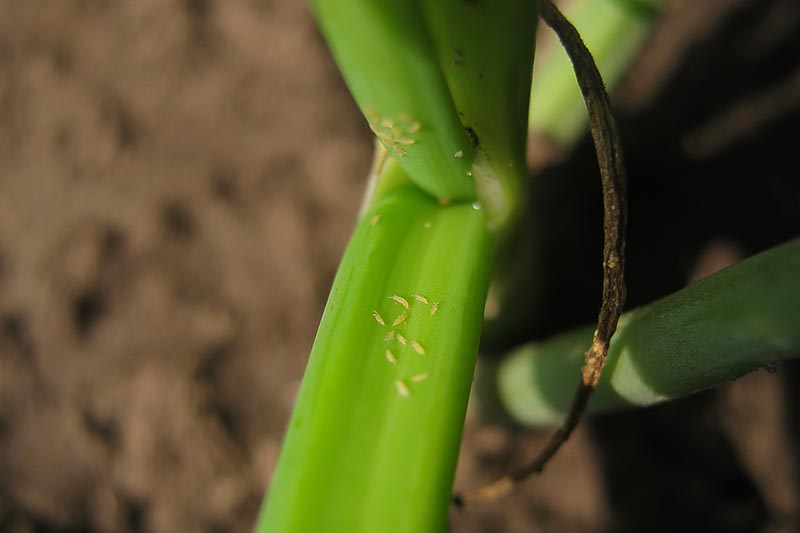
If you plant in the fall, you’ll probably dodge them; but if you plant in late summer, they may remain in your onion crop until spring.
When they’re present, you’ll see white to silver blotches on onion tops, worsening over time until the plant begins to die off. They can also spread disease easily via their piercing mouthparts.
Treat thrips as soon as you notice them, particularly if you’ve got a few weeks before temperatures will drop below freezing after you plant.
Spray the plants generously with insecticidal soap or neem oil, applied according to package instructions. You may need to reapply it after about ten days if the problem persists.
Learn more about how to deal with thrips in our guide.
Diseases
Just as with insect pests, diseases will be less of an issue in the winter months in areas where temperatures drop below freezing.
Botrytis
There are several species of Botrytis fungi, all of which can show up in wet growing conditions. Botrytis can spread in the winter when snow melts and bulbs are moistened.
This fungal disease can cause rotting, such as neck rot; blotches and sunken spots on leaves or bulbs; and foliage die off, which inhibits bulb development.
As mentioned previously, good drainage is extremely important in an onion bed. Avoid allowing bulbs to sit in soggy soil or standing water, as this is a breeding ground for botrytis.
If you do see signs of fungal disease, it’s best to harvest all affected bulbs to avoid further spread to neighboring plants, and destroy the infected material.
You can apply a fungicide to combat the remaining fungi, but avoid overuse as it can lead to resistance.
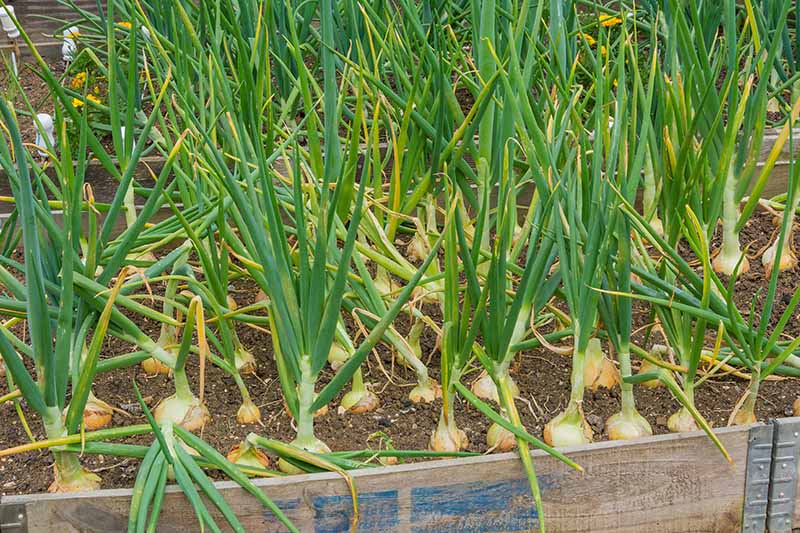
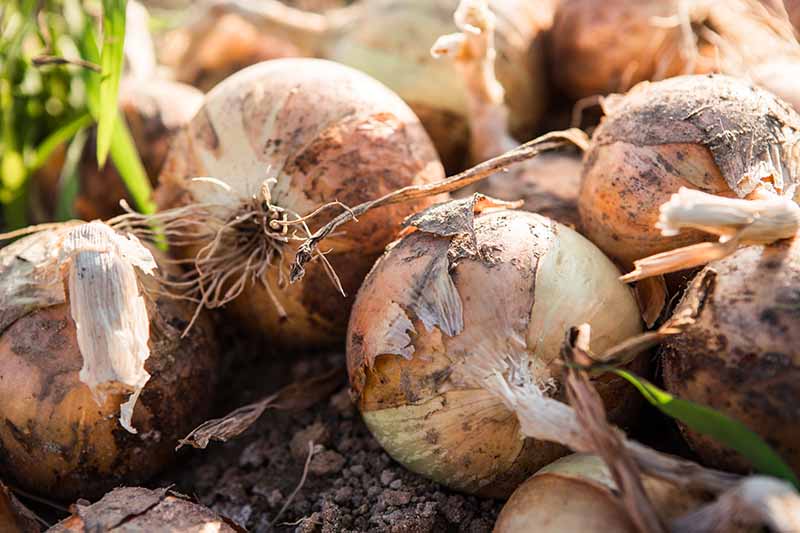
Harvesting and Preserving
Immature winter onions that are about three to five inches in diameter, depending on the variety, can be harvested when the ground thaws in spring for an early harvest, or allowed to continue growing to maturity.
Any time you opt to harvest an onion early, backfill the hole left in the soil to protect other surrounding bulbs from exposure to cold air and water that may collect.
Onions planted in loose soil are generally fairly easy to harvest by simply grasping the leaves, which grow above ground at the neck, where they meet the bulb below the ground. Twist gently at first to loosen and then pull upward.
If the soil is compacted or the ground is still frozen, it will be more difficult to bring the onions up. You may find that using a spade or shovel is necessary to release the onions from the soil.
Note that those harvested early are not suitable for curing and long-term storage. Once you’ve brought them inside, it’s best to use them right away, as they may only last for a week or two in the refrigerator before beginning to spoil.
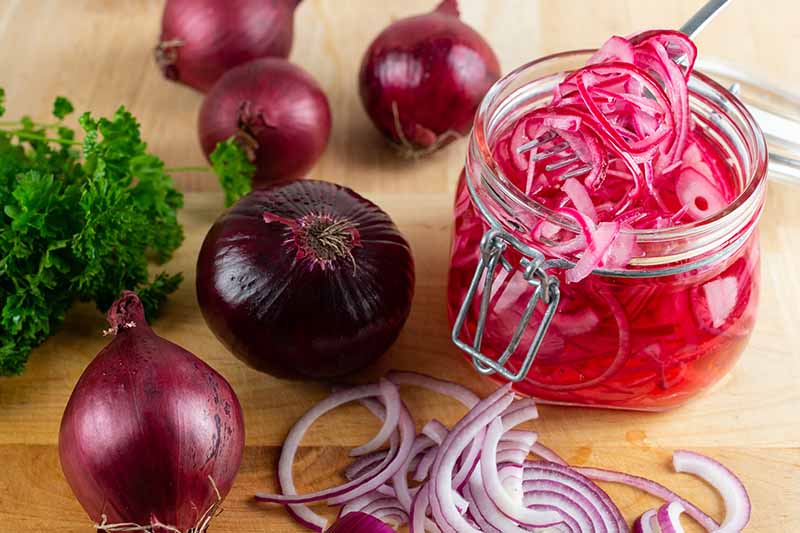
There are a number of ways to preserve both cured and uncured onions, however, including pickling and pressure canning, dicing and dehydrating, and even chopping and freezing for later use.
Versatility abounds with onions, so get creative!
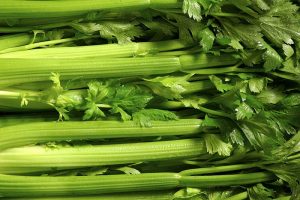
Slice them to mix with other vegetables, such as broccoli, celery, carrots, and hot peppers, pack them in pickling brine, and pressure-can them for some enticing giardiniera to enjoy through the early spring and beyond.
Mature harvest will happen earlier in the season for winter onions than it will for those planted in the spring.
Note your crop for signs of readiness, like green tops that flop over on the ground, and broad crowns peeking out from the top of the soil.
Slumbering Winter Onions Provide Sustenance and Exercise for Your Green Thumb
Before you pack away those garden tools and close the book on this year’s growing season, consider extending your harvest through the colder months by planting winter onions.
A reduced need for weeding, fewer pest and disease problems, and an earlier harvest are the chief perks of planting onions in the fall.
Not to mention, fall-planted crops benefit from an early head start by producing bigger, more flavorful bulbs.
Have you had some success growing a particular variety of onion in the winter? Let us know, and share some pictures with us, in the comments below!
And for more information about growing onions at home, have a read of these guides next:
Great post about the planting and taking care of the onion plant. Thanks for sharing this piece of information with us.
Thank you Harry, we’re glad you found it useful!
Hello, Kelley Spicer. Your tips on growing onions have been helpful, but I still have a question as to what white variety will give me smaller (2″ diameter) bulb onions in my garden. My soil (McKinney, Tx) is black alkaline clay, with a pH of 8.3.
Any suggestions?
Richard
Hi Richard! Glad to hear that you got some useful tips from the article! With regard to alkaline, clay soil – it can be tricky to find onions that will deal with both. Some don’t struggle terribly in clay soil, but the added alkalinity can create additional problems. For example, onions grown in heavy clay may have a strong, unpalatable flavor, or may remain smaller in size. Alkalinity can cause nutrient deficiencies and stunting, or it may kill them off entirely. Since clay doesn’t drain well, it can also lead to rotting or the development of botrytis. I’d recommend amending… Read more »