
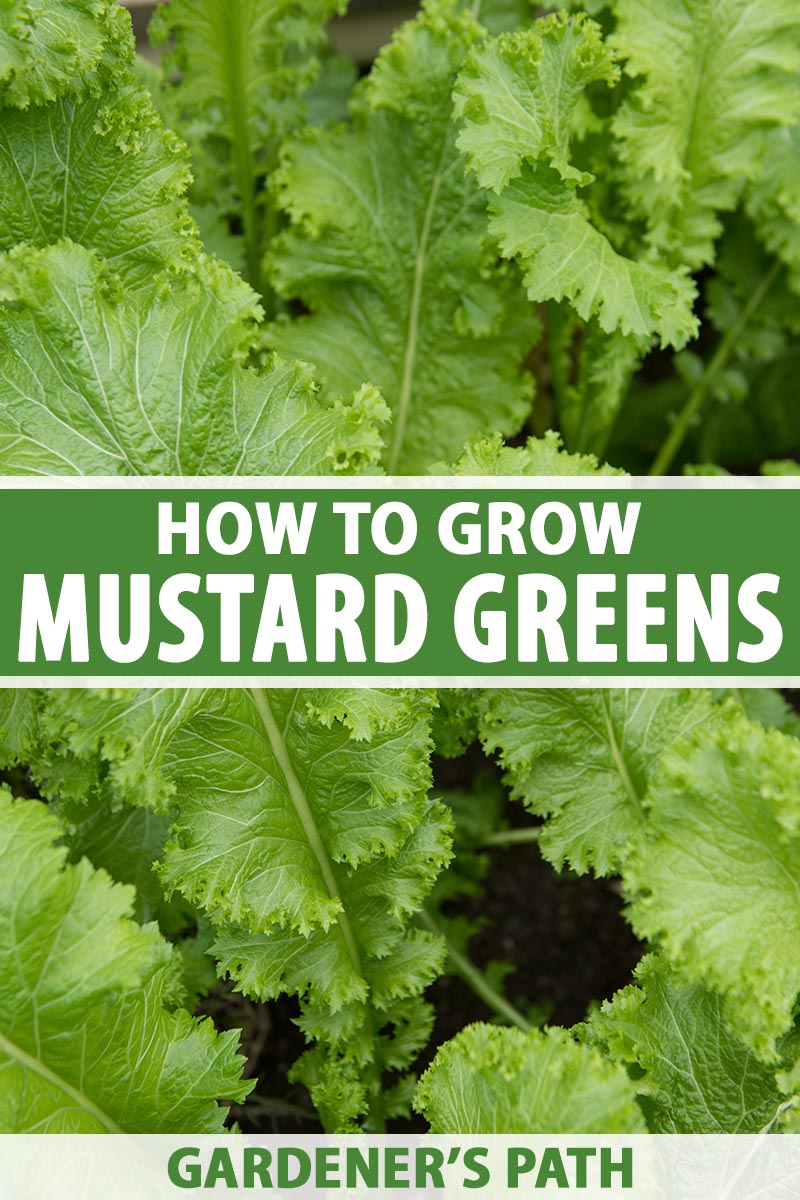
Brassica juncea, B. rapa var. japonica, B. rapa var. narinosa, and Sinapis alba
So many mustard greens, so little time? That’s only half true.
There are dozens of types of this tasty cool-weather annual that you can grow, for a fact.
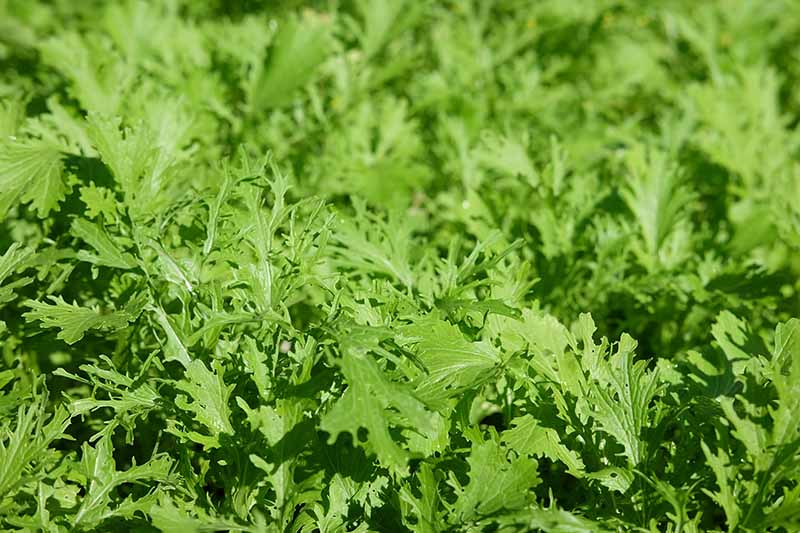
There are rosettes of mild tatsoi, big broad leaves of Southern varieties like ‘Old Fashioned,’ and thin stalks of mizuna with serrated leaves.
We link to vendors to help you find relevant products. If you buy from one of our links, we may earn a commission.
I could happily list many more, and I will, in a bit. But first I must reassure you that having “so little time” will not be as much of an issue here as it may with other garden vegetables.
All of the many available types grow quite quickly.
If one doesn’t do well, or its taste is not to your liking, you can grow baby leaves of another within a few weeks.
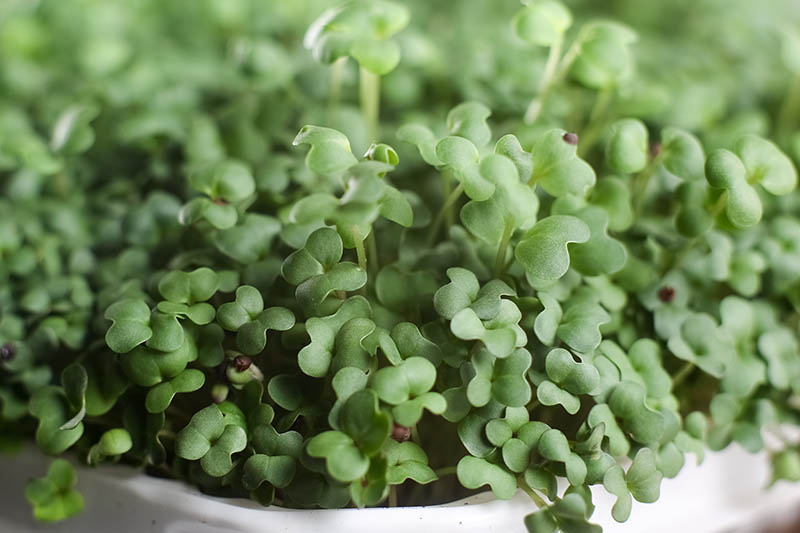
They are excellent candidates for growing as microgreens, too, either on their own or in a mix of fellow Brassicas. You could plant a tasty combo that’s ready for harvest in just nine or 10 days!
Most mustards are also happy to grow in containers, provided there is enough space, moisture, and well-drained, nutritious potting soil to meet their needs.
So you’ve got plenty of options, and plenty of time, but let’s not waste a second.
We’ll dig into the details right away, so you’ll have a working knowledge – before you know it! – of the best ways to grow and care for mustard greens.
Here’s what I’ll cover:
What You’ll Learn
What Are Mustard Greens?
Full disclosure: Up until a few years ago, I didn’t understand quite how extensive the selection of mustard greens was.
I’d just been blithely living my life, eating mesclun, enjoying stir fry from a local Japanese restaurant – and eating a lot more mustard than I realized.
But now I know what’s what. I’ve discovered the wide range of veggies that belong to this branch of the Brassicaceae family, and I’m excited to share them with you.
Some, I was already familiar with.
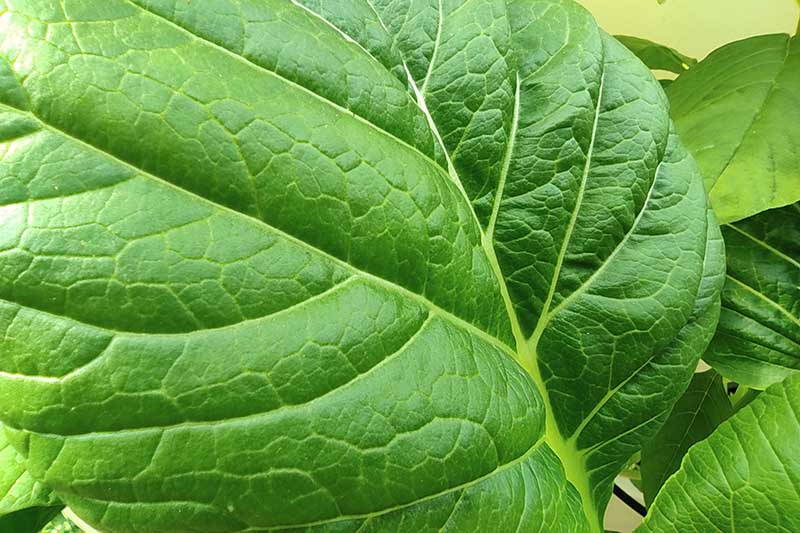
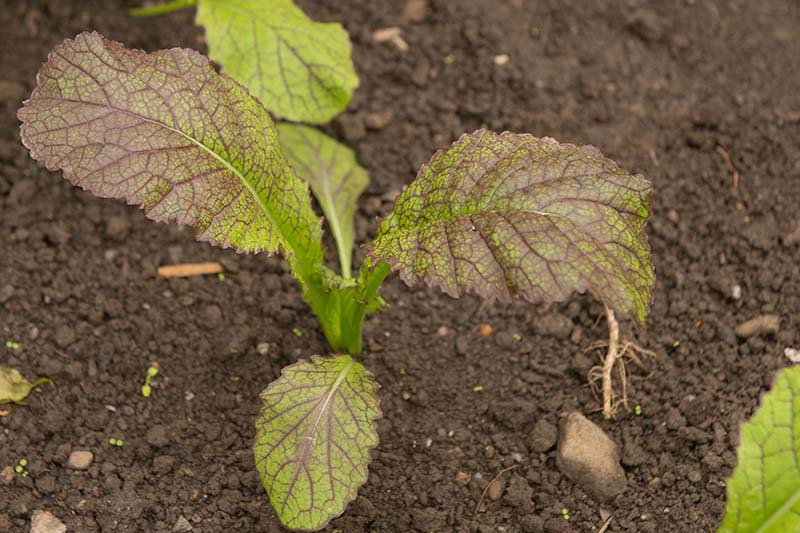
I live in an Appalachian area, in Knoxville, Tennessee. Here, home cooks and cooks at local diners prepare the spicy large leaf varieties like ‘Garnet Giant,’ and most of them are members of the Brassica juncea species.
Usually, they’re simmered with pork or in ham broth as a side dish, and served alongside Sunday roasts or Friday fried fish. Or they can make a meal, paired with a stick-to-the ribs bowl of beans and a fresh skillet of cornbread.
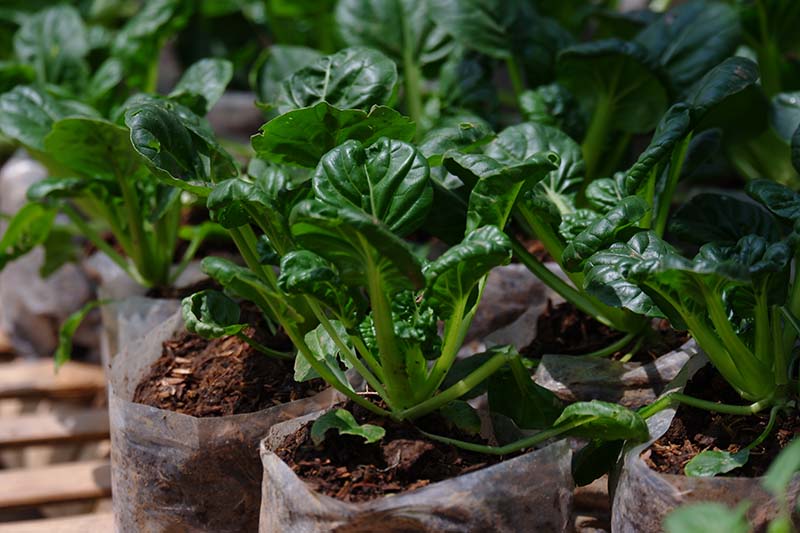
I had eaten the much milder baby Asian greens like mizuna and tatsoi in the past, never suspecting they, too, were mustards.
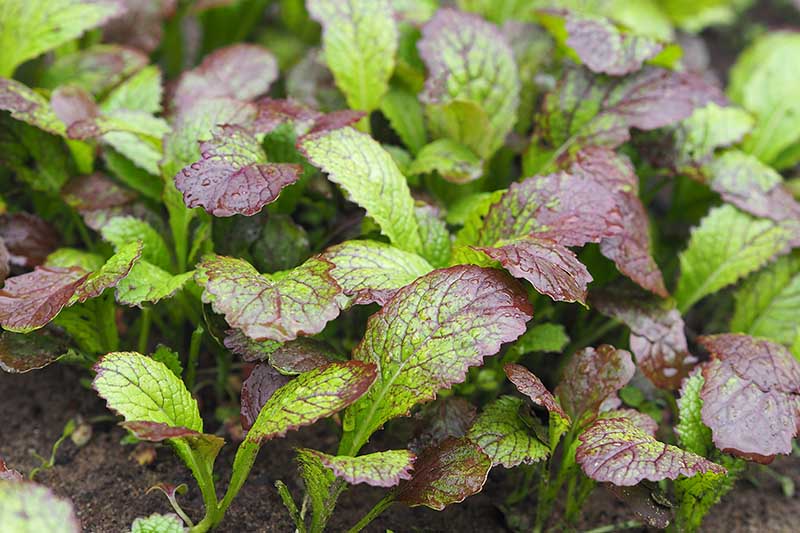
The former, with its narrow, jagged-edge leaves, is a B. rapa var. japonica, while the latter, with its spoon-shaped greenery, is a type of B. rapa var. narinosa.
There are a few, like ‘Amara,’ that originated in Africa and are cultivars of the B. carinata species. Others, like ‘Red Giant,’ are Japanese.
And this hodgepodge of Brassicaceae family members includes some that fall into the species B. hirta, B. nigra or Sinapis alba, which was formerly known as B. alba and reclassified in a different genus.
Most of those species are grown more for their seed than their leaves, and I’ll be concentrating on the B. juncea and B. rapa species here, for the most part.
Still, this relatively expansive group has plenty of shared traits that help define it. All are edible, cool-season vegetables, and all have at least a little of that signature spicy zing.
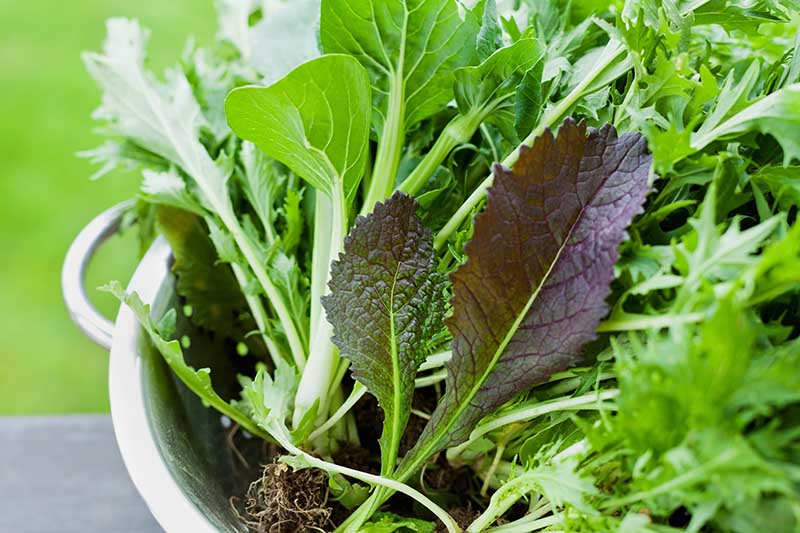
Each variety, from Asian greens to the newest hybrids, to the old-school Southern staples like ‘Florida Broadleaf,’ can also be harvested as baby leaf salad greens.
They all grow quickly, too. Most are ready for baby leaf harvest in 21 days. They reach full maturity anywhere from 37 to 70 days, but usually right at 45 days.
Cultivation and History
Mustard greens are established worldwide as a culinary delight, with different varieties featuring in Chinese, Indian, and Southern cooking (of the American variety), to name a few.
But this is no modern trend. People have been eating these greens for more than 5,000 years, starting in the Himalayan region of India.
Mizuna greens probably originated in China, but are now considered an important part of Japanese culture and cuisine.
Many types of mustard have enjoyed far more success as a source of the condiment, and Canada is the modern day champ of producing that type.
As for the edible greens, while they’re not currently considered a chef’s darling or a trendy food like, say, kale, the greens hold their own and are found from northern Africa to Europe, Asia to North America.
Farmers in Nepal produce the most green mustard. If you want to try your hand at growing your own (substantially smaller) crop, read on!
How to Sow
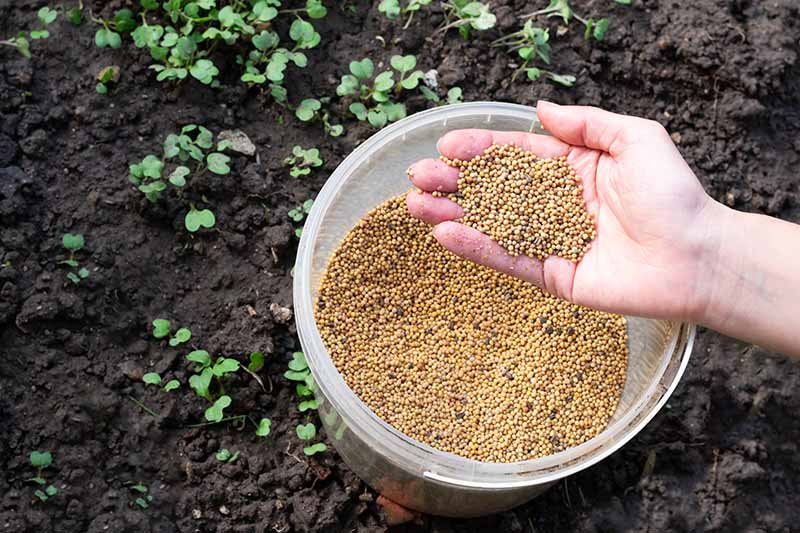
Because it grows so quickly and seeds are so affordable, for my money, direct-sowing these peppy greens is the way to go.
You can plant them up to six weeks before the average last frost date in your area, and keep planting a new swath every 30 days or so.
If the soil is too cool, around 40°F or below, don’t count on those super speedy germination rates.
And prepare your bed ahead of time, even the fall or spring before sowing, so you’ll be able to plant your seeds in loamy soil that you’ve amended with plenty of composted manure or other organic matter.
Mustard seed needs both well-draining soil and plenty of nutrition.
Sow them a half-inch deep and an inch apart, in rows six to eight inches apart. Firm the soil lightly on top and keep them moist until they germinate.
Once they sprout and form a couple of sets of true leaves, thin them to stand four to eight inches apart, about the length of your hand.
To plant them in containers, all the same advice holds true.
Just make sure you place the containers where you can reach them easily to water them, and give them a few more fertilizer boosts throughout the season than their garden bed counterparts.
To plan when to plant in the spring, remember mustard will bolt and the taste will become bitterly hot once average temperatures reach 75°F or higher.
Simply count back from your variety’s estimated maturity date based on the local weather patterns, and sow accordingly.
In fall, you’ll have the opposite worry. While mustard will tolerate a light frost, a freeze will kill the plants.
Take into consideration how many days you have between the time the average temperature is consistently lower than 75°F in later summer or early fall, and the time of your average first hard freeze. That will tell you how late you can plant.
If you intend to grow them just to baby leaf size, plant the seeds closer together from the start, about 60 seeds per foot in a two- to four-inch-wide swath.
And if you want to grow mustard, lettuce, or other varieties of microgreens, check out our complete guide for step-by-step instructions.
Some gardeners just scatter seed all over the available patch of soil, and then press it into the soil with the back of a grass rake.
You’ll want to be able to get in there to pick them, so leave enough space between rows or clumps to reach (if it’s a raised bed) or walk through (if the bed is on the ground).
And don’t rule out transplanting if you want an extra quick start or got started too late in the spring or fall.
Start the seeds indoors in a couple of inches of pre-moistened soil or a soilless mix in a peat pot or other small container about 20 days ahead of transplanting. (Did I mention these veggies grow really fast?)
Bottom heat hastens germination. If you use a heat mat, switch off the heat source as soon as the seeds sprout, since the tiny plants prefer cooler soil to grow – as long as it’s not below 40°F.
They’ll also need a bright sunny window or a grow light between the time they pop up and the time you plant them out, which you should do once they’re a couple of inches tall.
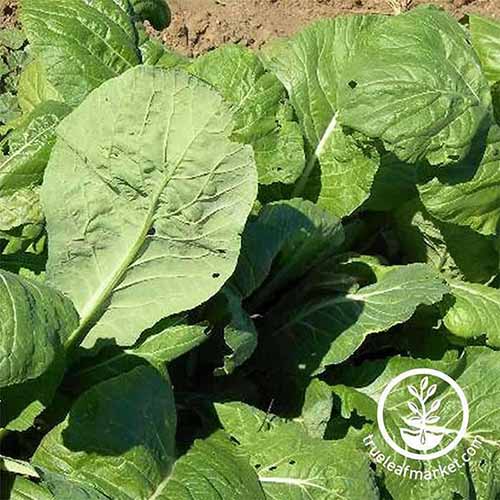
You can also buy transplants from some local greenhouses or farm supply stores.
Mustard Green Seedlings Ready to Plant
Bonnie Plants also sells broadleaf mustard green plants in six-packs for spring planting via Home Depot.
Keep in mind, though, that when you transplant, you’ll want to place the seedlings at their preferred final spacing.
Make sure to loosen the soil to at least six inches below the surface before planting, and amend it the same way you would before sowing seeds.
I’ve also had a good experience planting the seeds directly into a small container, letting them sprout, and then taking the entire container out into the sun when the weather is suitable.
This helps me get a jump on both the early spring pre-frost transplanting, and the early fall second planting.
In my area of the South, it’s way too hot for direct sowing all the way up to about late September.
It seems odd to be starting seeds indoors in the summer, but that’s what it takes for me to get mustard and its cabbage relatives off to a quick start in autumn.
How to Grow
I’ve been making a big deal out of how fast these veggies grow to spicy goodness that’s just waiting to jump in the salad bowl or stir fry.
But you do need to help them along if you want them to grow fast and taste great at every stage.
These greens require a full sun location, although some varieties such as tatsoi, may thrive in part shade. Ideally, they like six to eight hours of sun per day.
If you’ve planted them in their preferred medium, loam amended with plenty of organic material, you don’t need to water mustard greens as often as you will if you grow them in sandy soil.
So they’re tender and nutritious, not hot and tough, it’s key to make sure they get enough water, about an inch or two a week, rain included. Make sure the soil is moist, but not waterlogged.
They’ll also appreciate a side feeding of balanced fertilizer midway through the growing season.
Be sure to keep any weeds out of their space, particularly those that grow fast and might compete for water or nutrition, and these spicy veggies will reward you with a bumper crop in record time.
It’s important not to plant them in the same place two years in a row, and do not grow them where other brassicas like broccoli or kale were planted in the past year or two.
This kind of crop rotation will help you keep soilborne diseases and insects that destroy members of the cabbage family from becoming established in the area. The break also gives the soil a chance to replenish the nutrients these heavy feeders require.
Refrain from planting certain veggies, like tomatoes and peppers, in that spot the next year, since rogue self-seeding broadleafs, mizuna, and tatsoi are bad companion plants for nightshades.
Growing Tips
- Plant in organically-rich, well-draining soil in a full sun location.
- Provide one to two inches of water per week, including rain.
- If your mustard bolts and starts flowering pull it up immediately. Bolted greens have an excessively bitter flavor.
Cultivars to Select
Within a season or two of growing different types of this spicy veggie, you’ll probably be able to experiment enough to find some favorites.
To start with, here are some top species and cultivars to consider:
Mizuna
This Asian green (B. rapa var. japonica) is among the smallest when fully grown, taking just six inches of space between plants in your vegetable garden or a container.
But it will grow 25 inches tall at full size, with its characteristic serrated leaves and thin stalks.
The mustard taste is quite subtle, and the leaves are subtly sweet, too. It’s popular as a microgreen and frequently grown as part of a mesclun mix.
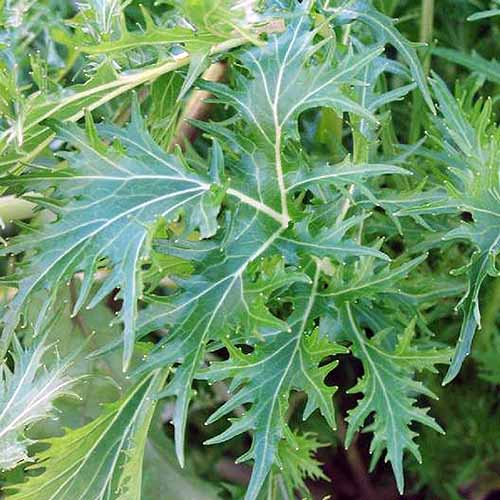
Mizuna is also slower to bolt than most of its fellow brassicas, lasting into the late spring or even early summer.
Mizuna seeds are available in various packet sizes and in bulk from Eden Brothers.
Old Fashioned
This open-pollinated B. juncea heirloom cultivar grows fast, reaches up to two feet tall, and is tasty sauteed.
I particularly like to cook ‘Old Fashioned’ together with a milder leafy vegetable, like collards or even kale, since the spicy and sweet flavors complement one another.
This variety prefers full sun but does pretty well in part shade, and is usually ready for harvest at full size 45 days from sowing.
‘Old Fashioned’ seeds are available in various package sizes from Eden Brothers.
Red Garnet
Even among the various B. juncea cultivars, ‘Red Garnet’ is a quick one. Its broad leaves reach maturity in just 40 days on average, or sometimes as early as 30 days, depending on the growing conditions.
It will also tolerate some shade.
While it’s growing, make sure to pluck a few of the baby leaves for salads and such. They’ll be deep red and rounded starting from the first set of true leaves.
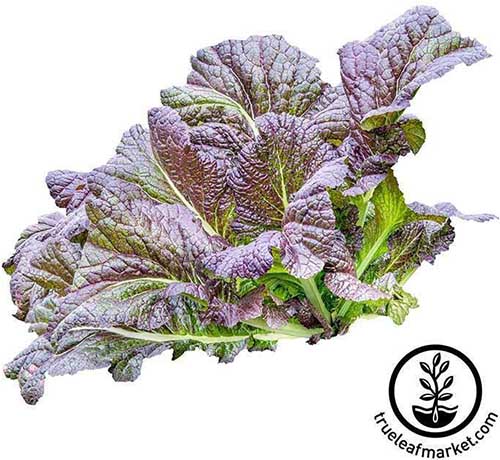
At full size, ‘Red Garnet’ tastes best braised, and you can blanch and freeze a bunch for stews and sides throughout the winter.
‘Red Garnet’ seeds are available from True Leaf Market.
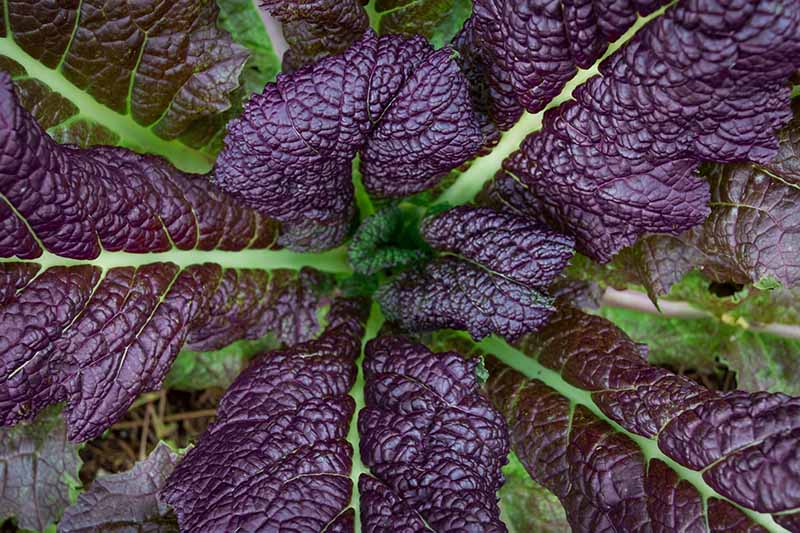
Ruby Streaks
A very attractive maroon and dark green variety, ‘Ruby Streaks’ has feathery leaves when it’s small and serrated leaves at maturity.
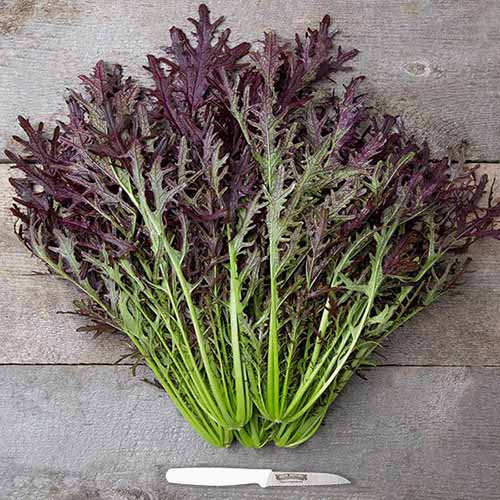
They’re shaped like mizuna, but this cultivar is actually a variety of B. juncea with a sweet, pungent flavor.
‘Ruby Streaks’ seeds are available from High Mowing Organic Seeds.
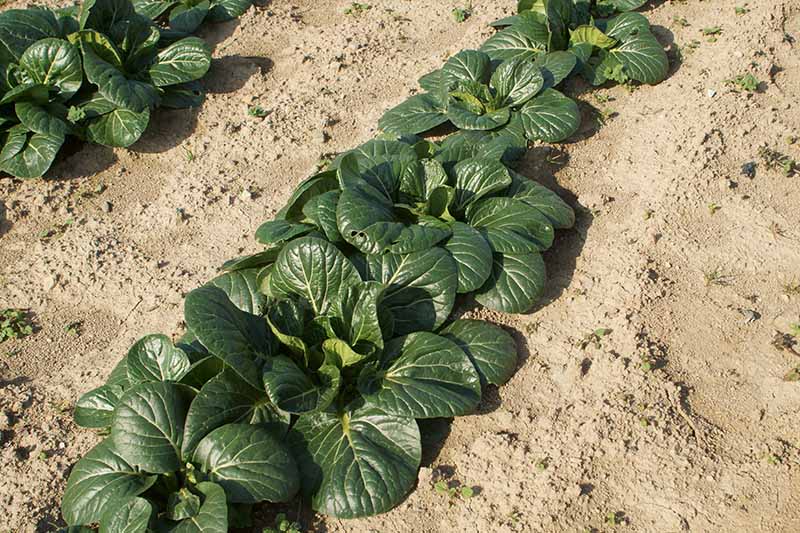
Spinach Mustard Tendergreen
Also known as Komatsuna, B. rapa var. perviridis ‘Tendergreen’ has the ideal flavor for stir fry: like spinach with a little kick.
I pretty much treat it like spinach in my cooking, adding it to quiche or vegetable dips, and using the younger leaves in salad.
It’s a fine choice for containers too, growing six to 12 inches tall and requiring just six to nine inches of space between plants.
Spinach mustard ‘Tendergreen’ seeds are available from True Leaf Market.
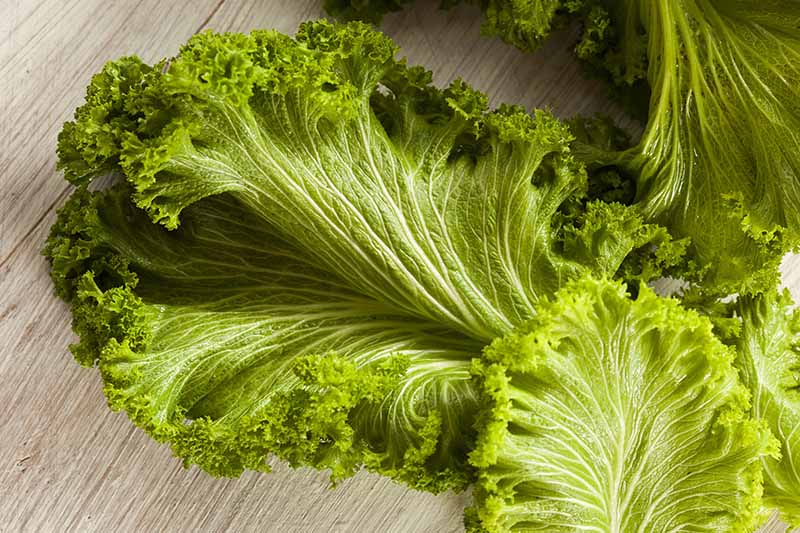
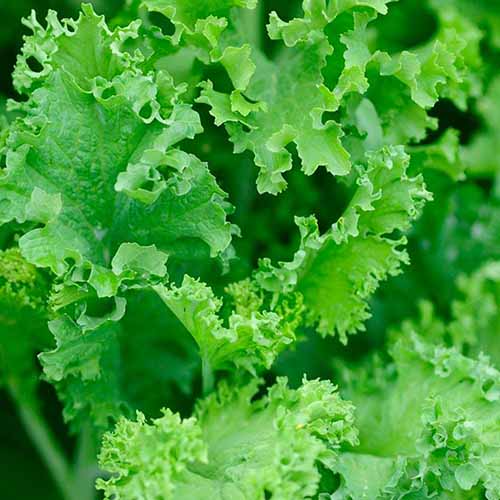
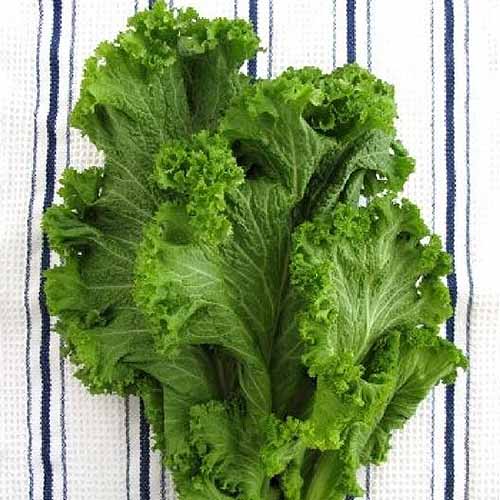
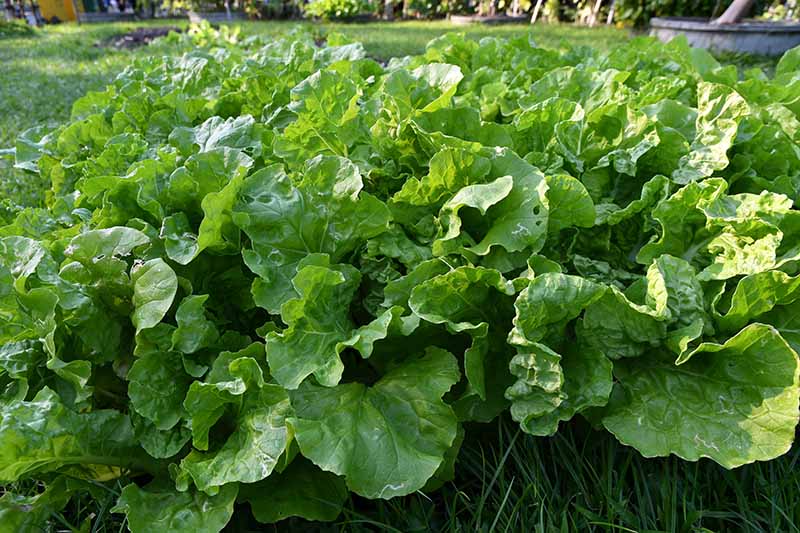
Southern Giant Curled
An oldie but goodie, this B. juncea cultivar took All-America Selections honors in 1935 and has been growing strong since.
It’s particularly popular in the South due to its mild mustard flavor and giant, curly leaves that yield big servings of pork-braised greens.
You can also use them young (up to 50 days old or so) in a salad mix, or to add crunch on sandwiches.
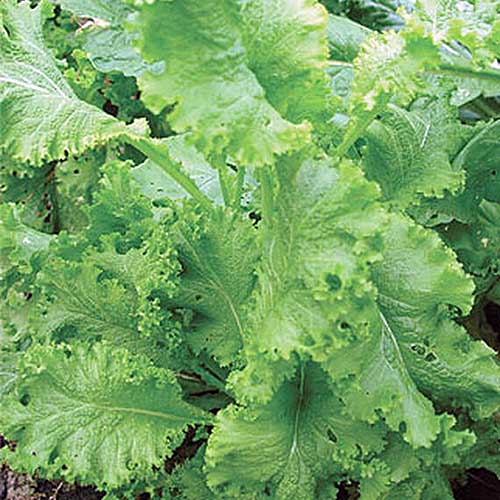
It does take almost 70 days for the bright green, frilly leaves to reach maturity. And they’re big, with the plants spreading 18-24 inches wide and the leaves growing 20-24 inches tall.
That means just a few plants provide enough for stir fries, salads, sautees, and freezing to enjoy later. And since they’ll tolerate a light frost in the garden, you’ll have plenty of time to enjoy them.
‘Southern Giant Curled’ seeds are available from Burpee.
Tatsoi
Tatsoi, B. rapa var. narinosa, is an extra-cold-hardy Asian green. You may even be able to harvest this variety in the snow, though it won’t resist a hard freeze.
It takes a bit longer to reach maturity than some, about 45-55 days. But the wait is worthwhile, especially since you can clip a few outer leaves to enjoy as baby greens or out-of-hand snacks during the season.
When mature, tatsoi is crunchy, with a subtle zing. The middle ribs of the leaves have a flavor that’s almost like celery.
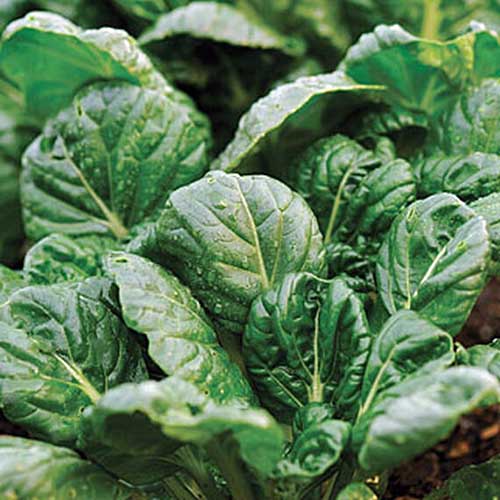
If you’re planting edible landscaping, particularly in a fall or winter window box, tatsoi is a wonderful addition. It forms rosettes, grows to 12 inches max, and may spread eight to 12 inches.
Tatsoi seeds are available from Burpee.
Looking for More Options?
You can find more exciting varieties in our supplemental guide here.
Managing Pests and Disease
To (literally) reap the most from this cool-season vegetable crop, you’ll need to be attentive to the many pests and the handful of diseases that may plague it.
They do have the advantage of growing quickly, so you’ll often be able to harvest before any insects descend on the greens. But they are attractive to a host of bugs.
Pests
To give you a quick rundown, here are four insects that find the spicy leaves to be particularly tasty – probably as tasty as you do:
Aphids
These little suckers (that’s what they do, it’s not an insult!) feed on leaves from the underside, leaving a sticky residue behind.
They reproduce very quickly, so your greens might really suffer once they set up their operation.
You can rid your plants of them with neem oil or pyrethrins, but if you didn’t notice them early on and they’ve seized control, it may be best to pull the plants and start over.
Read more about aphids in the garden here.
Flea Beetles
These tiny bugs chew small holes in leafy plants, particularly varieties with bigger leaves, like ‘Florida Broadleaf.’
To keep flea beetles at bay, start when the plants are young, and cover tiny sprouts or transplants with a floating row cover.
Once you spot them, you can try neem oil.
If you already struggle with flea beetles on other crops like eggplant, you may want to forgo planting these spicy veggies in the spring or summer, which is prime time for flea beetles.
Reserve this crop for autumn only.
Read more about ridding your garden of flea beetles in this guide.
Slugs
For a few seasons, I thought those gaping holes in my greens meant I had rabbit trouble, but it’s actually slugs that chew big holes in the leaves.
If your plants are showing similar damage, you can resort to trying to trap the slugs with beer or cornmeal, or building a barrier to keep them out.
For lots more tips for winning the battle between gardener and slug, read this guide.
Whiteflies
These tiny all-white flying insects are intriguing, but trust me: they’re the enemy.
They produce a sticky substance on the underside of the foliage, and it draws a mold that harms the plant’s ability to photosynthesize – which, you’ll recall, plants need to live.
This condition is known as sooty mold.
Whiteflies will succumb to a light spray of insecticidal soap.
Read more about whitefly control here.
Disease
Along with bugs, and sometimes in tandem with them, there are pathogens that can cause diseases in leafy greens like mustard.
They’re primarily types of fungi or bacteria, but there are a couple of viruses and nematodes in the mix, too.
Fungi cause damping off, for example, where the seeds sprout, grow a little, and then for no apparent reason wither and die.
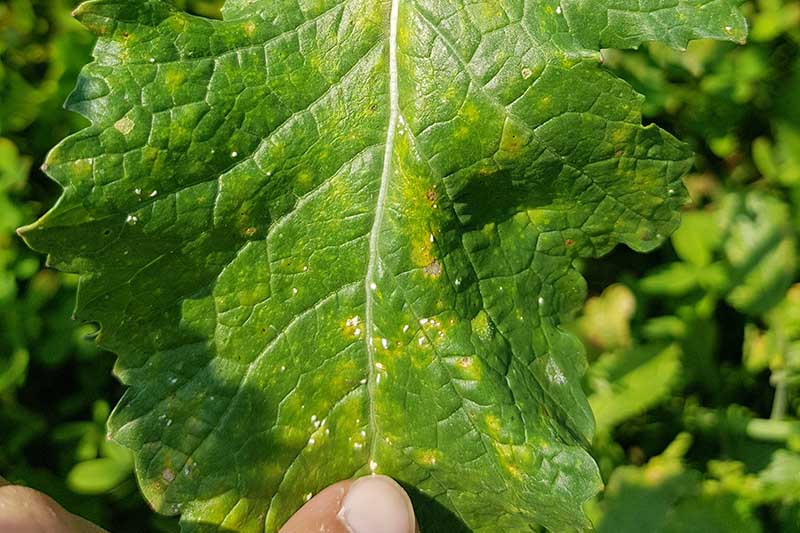
Other types of fungi may attack more mature greens and cause leaf-spotting diseases that can become so severe they ruin the harvest, or at the very least make the greens unappealing as an ingredient.
White spot, caused by Cercosporella brassicae, afflicts the plants with gray or brown lesions. It can be transferred from other cruciferous garden volunteers, like wild mustard, and can even infect seeds and be carried to your crop that way.
Anthracnose, caused by Colletotrichum higginisianum, spreads in similar fashion and forms small circular lesions on the leaves.
Bacterial leaf spot, caused by Pseudomonas maculicola, starts out as tiny circular spots on the top surface of the leaves. As the disease progresses, the spots expand and join together to form large brown areas. The underside of the leaf may appear water-soaked.
White rust, caused by the water mold Albugo candida, creates deformities in the leaves, while downy mildew, caused by Peronospora parasitica, first forms its signature small white lesions on the undersides of the plants, later moving to the top.
But in general, it’s important to note that you can minimize the risk of infection via these unfriendly fungi and bacteria with extra effort on the front end.
In particular, make sure you’re buying high-quality disease-free seed, and planting your mustard in well-drained soil with ample nutrition. These steps alone can prevent problems from many of the seed-borne fungi, and the many pathogens that thrive in waterlogged or overly moist soil.
Make sure you’re not watering your leafy vegetables from above with a sprinkler, or even a watering can. Water that sits on top of the leaves can exacerbate many of these diseases.
Also be sure to destroy any diseased plants quickly and thoroughly, removing them from the garden while wearing garden gloves, and disposing of them inside a sealed bag in the trash.
Sorry, they’re not candidates for the compost, since so many of these pathogens will survive in plant debris.
This leads to another important point. To prevent these diseases on mustard and other cruciferous vegetables, don’t plant them next to each other. They tend to attract – and spread – all the same pests and diseases.
Get detailed info about diseases and pests that affect mustard greens here.
Harvesting
This is one garden vegetable that won’t keep you guessing at harvest time. You’ll be able to look at them and know they’re ready.
You can even obtain a preview of the flavor of any new variety you grow. Just winnow out one of the youngest sprouts and see what it tastes like. (You probably want to rinse it off first.)
You can also wash and eat the microgreens after the first set of true leaves appears, which can take as few as 10-15 days. Use them as a garnish, in salads, and – my favorite option – as pizza toppings.
Baby leaf mizuna, tatsoi, ‘Wasabini,’ and other varieties are usually ready at about 21 days. You can pick them when they’re two or three inches tall.
For both baby leaf and full-size greens, which are usually ready after about 45 days, you do have the option to cut just the outer leaves and let the inner core keep growing, or you can harvest the entire plant.
I recommend using a knife or scissors for this harvest job if you opt for the former, so you don’t accidentally uproot the whole plant while attempting to twist off an outer leaf using your fingers.
Usually, you can also do the “cut and come again” routine, slicing off the whole kit and kaboodle about an inch from the bottom, but leaving the roots and base intact to produce a new round of leaves.
With large-leaf varieties like ‘Red Giant,’ I particularly like to cut the whole plant down to the nubs in late summer, if they’ve gotten larger than I like and I know they’ll be too bitter for my taste.
Then they’ll send up new leaves a few weeks later, when it’s cooler. I pick them at a smaller size and they’re usually more tender and have less of a bite.
Of course, these new sprouts aren’t as reliable, and they don’t usually grow as quickly as the first crop either. If you’re really determined to have a second wave of produce, it’s best to plant more seeds.
And even if you’re growing mustard with the goal of just baby leaf, or just mature leaves, I’d strongly encourage you to taste at least a few bites at every stage, even the microgreens.
You may find you like a different size leaf better, or that you don’t like the taste at a particular stage at all. If that happens when you’ve sampled early in the growing season, there’s still plenty of opportunity to plant some other type of greens, or wait to see if you like them better later.
While they’re tastiest fresh from the garden, you can store harvested greens for about a week in the fridge. Don’t put them in a plastic container, though, or the moisture will cause them to go brown and rot much faster.
Instead, wrap them in a clean, unscented, thin cotton kitchen towel and set it in the vegetable crisper. There, they’ll stay fresh for about a week.
You may also want to let some of the bolts plants bolt so you can harvest and save their seed.
Find more mustard green harvesting tips here.
Preserving
If you’re trying to literally live off the land and eat only food you produce in your own vegetable garden, you might want to mess with a pressure canner to preserve part of your crop.
But for ordinary gardening folks who would just like to save some small portion of the greens they’ve grown for savoring in the cold months, I recommend freezing.
Don’t overdo the portion sizes. A pint- or quart-size bag is plenty for a quick side dish, or to add to a soup.
In many cases, you can also add the greens to a soup and freeze that in containers sized for your convenience.
If they’re not added to another dish before freezing, you’ll need to “blanch” the leaves first.
This simply means you’ll boil them in water for two minutes, stirring them to keep the leaves apart.
Then you drain the leaves in a colander and plunge them into a bowl of ice water. This action halts the cooking process and helps them retain a bright green color. Drain them a second time after this cooling bath.
Pack them into freezer containers or jars, leaving a half inch open at the top for expansion. Seal, label, and freeze.
Defrost overnight in the refrigerator before using, or add small, still-frozen portions directly to boiling broth in a big pot of stew or soup.
If you use them straight from the freezer, make sure to stir the boiling mix often to keep the leaves separated.
You can also dehydrate mustard greens to use later in soups, stews, and casseroles. And they make a tasty chip for snacking – more on that later.
Choose only young, tender leaves and make sure to wash them thoroughly and then spin them dry in a salad spinner.
Before placing them in your dehydrator and following the manufacturer’s instructions, blanch them by steaming them for three minutes, dunking them in ice water, and then draining thoroughly.
The proper drying temperature for mustards and other greens like kale, chard, and beets is 125°F. You’ll know they’re dry enough when a sample leaf feels brittle to the touch.
Store the dehydrated results in a sealed canning jar or a BPA-free plastic container with a tight-fitting lid, or vacuum seal them in appropriate bags.
Looking for the best equipment to treat your harvest right?
You can read about recommended pressure canners, food dehydrators, salad spinners, and vacuum sealers on our sister site, Foodal.
Recipes and Cooking Ideas
You could cook mustard every day for a month and never use it the same way twice.
But if this is your first experience with the spicy greens, the simplest way to enjoy them is to pick leaves when they’re four to five inches tall, and eat them in a salad.
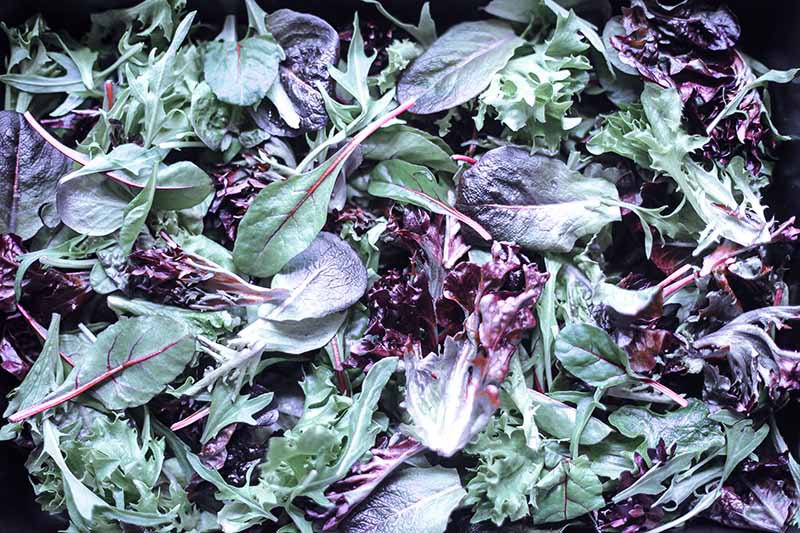
I wouldn’t necessarily make the whole salad from the spicy vegetable, though – that’s likely to be far too pungent. A few leaves make a nice complement to a light, crispy lettuce like romaine, or mild-tasting brassicas like kale.
Same for the dressing: go easy on the spices. You probably don’t want to add anything that will cover up the flavor of the greens, like blue cheese, nor do you want conflicting flavors from any dressing that’s made with strong flavored spices or herbs.
Tastier dressings for a salad that incorporates these baby leaves include a simple vinaigrette with shallot or onion (which always pairs well with mustard the condiment, as well as the greens), or something that’s light and fruity, to offset that zing.
When the leaves are full-size, you can also tuck them into sandwiches, or nestle them into the bun before placing an artisan sausage (traditional or meatless) on top, and slathering it with sweet relish and diced raw onions.
As for actually cooking with mustard greens, I would recommend a simple stir fry or saute to begin with.
You may want to try the tasty Southern prep method if you’re a meat eater and fond of flavorful “cheap eats.”
You can experiment with many different add-ons and mix-ins, from sauteed onion and garlic to red pepper flakes. But the simple two-ingredient recipe that I’m about to describe for you is delicious on its own.
The instructions I like best are designed so you’ll develop your own preference for both the type of green that you use, and how long to cook it. They come from renowned Southern food writer Thomas Head in his “Greens” cookbook, with a few tweaks from me.
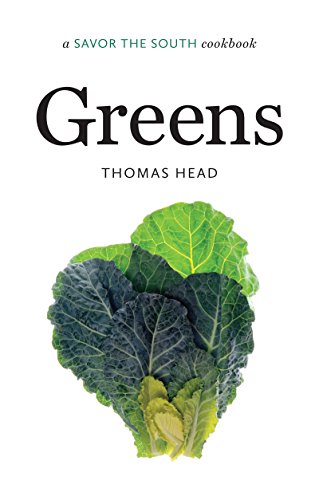
Greens: A Savor the South Cookbook
Interested in adding this tasty tome to your collection? You can find it on Amazon.
Basic Southern Greens
Here’s what you’ll need:
- 2 pounds mustard greens
- 1 pound ham hocks or other smoked meat such as a turkey wing, or 6 strips of thick-sliced bacon
- Water or chicken stock – canned, homemade, or reconstituted from good-quality bouillon cubes like Knorr’s, which you can find on Amazon.
Cut any thick ribs or center stems from the greens and discard. Slice the leaves into pieces that are two inches square.
Wash the cut mustard in two changes of cold water, draining in a colander each time.
Combine the greens and ham hock or alternative smoked meat in a large, heavy stock pot and add water or chicken stock just to cover.
Bring to a boil over medium-high heat.
Reduce heat to medium and simmer until the greens are tender enough for your taste. This may take only half an hour for Asian greens like tatsoi, or an hour or so for mature broadleaf varieties like ‘Southern Giant Curled.’
Stir in salt to taste just before serving, and serve warm. (Remember, ham hocks in particular add quite a bit of salt to the dish, and so does salted chicken stock.)
A bit more involved, Easy Italian-Style Beans and Greens Soup is a comfort food that vegetarians and carnivores alike can enjoy.
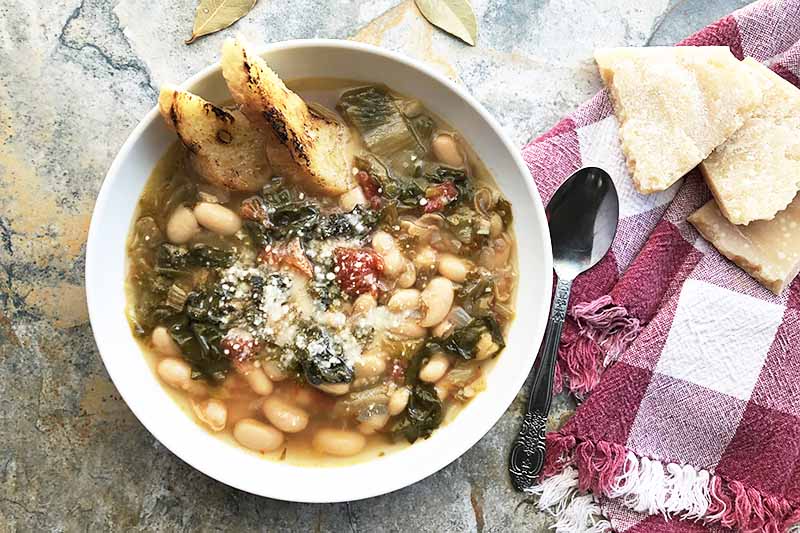
You can make it with any variety, even the Asian greens, in place of all or part of the escarole called for in the recipe, which you can find on Foodal.
And if you’re always on the lookout for a healthy but tasty snacking chip, you’ll be glad you grew such a lavish supply of the ingredients for crispy mustard green chips, in this recipe from Foodal.
You’ll need a broadleaf variety, though, like ‘Old Fashioned’ or ‘Red Garnet.’ This is one time when tatsoi or mizuna won’t work.
Quick Reference Growing Guide
| Plant Type: | Annual leafy green vegetable | Water Needs: | Moderate |
| Native to: | Asia | Maintenance: | Low |
| Hardiness (USDA Zone): | 6-11 | Tolerance: | Light frost |
| Season: | Spring, fall | Soil Type: | Loamy, organically-rich |
| Exposure: | Full sun, part shade | Soil pH: | 6.0-6.8 |
| Time to Maturity: | 35-70 days | Soil Drainage: | Well-draining |
| Spacing: | 8-24 inches, depending on variety | Companion Planting: | Celery, garlic, onions, mint, rosemary, sage, thyme, yarrow |
| Planting Depth: | 1/4-1/2 inch | Avoid Planting With: | Beans (esp. pole beans), peppers, potatoes, strawberries, tomatoes, and other Brassicas |
| Height: | 8-24 inches | Family: | Brassicaceae |
| Spread: | 4-24 inches | Genus: | Brassica or Sinapis |
| Pests & Diseases: | Onion maggot, onion thrip; pink root, purple blotch, white rot. | Species: | juncea, rapa, nigra, hirta |
Relish Growing Your Own Spicy Greens
I told you you’d have plenty of time to grow mustard greens! But if you’re like me, you may still have a couple (or three) options you’d still like to get to.
Well, that’s what the next growing season is for.
And remember, this plant produces happily in both spring and fall. There are also a handful of varieties that will tolerate more cold or more heat than others, so you may be able to extend your harvest a bit into the colder or warmer months, too.
How about you? Have you grown any mustard green varieties that you particularly liked, or any that you would never grow again?
If so, jump in the comments below to give us your picks and pans, along with any tips for preserving or cooking.
And for more information about growing mustard greens in your garden, check out these articles next:
© Ask the Experts, LLC. ALL RIGHTS RESERVED. See our TOS for more details. Product photos via Bonnie Plants, Burpee, Dave’s Garden Seeds, Eden Brothers, True Leaf Market, and University of North Carolina Press . Uncredited photos: Shutterstock.
I have volunteer plants all over my yard but they are spindly, don’t foliage well and go to seed almost immediately In spring. How do I get these volunteers to grow to mature, productive plants?
Hello Georgina Leavell! I fear that your volunteers may have cross-pollinated with some wild mustard, from the sound of it. Even if they haven’t, if they’re reseeding in the same place year after year they’ve probably depleted the soil of its nutrients. In general, you would want to give any patch of soil, even if it’s part of your yard, a break of two years before growing brassicas again. A few examples of brassicas include mustard, kale, broccoli and such. In any case, since they’re not producing greens you like, I would try pulling up the volunteers and adding them… Read more »
This was such a great article and very helpful to me, as I am new at growing mustard greens. Do you have any advice about harvesting and using the seeds to make the condiment? Thank you!