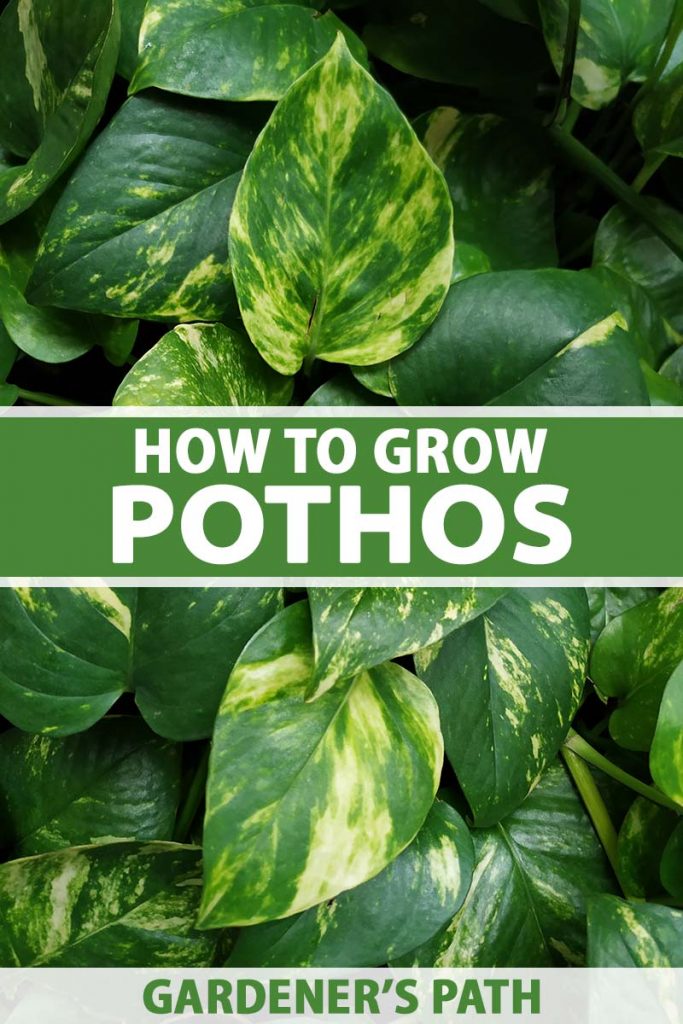
Epipremnum aureum
When you hear of a houseplant that’s nearly impossible to kill, you probably think of something that looks like a stick or is made out of plastic.
But pothos, Epipremnum aureum, is not just easy to keep alive, it’s lush, leafy, and attractive.
It’s a darling of office decorators and those in charge of adding life to retail spaces, with good reason.

We link to vendors to help you find relevant products. If you buy from one of our links, we may earn a commission.
It grows fast and furiously, requires minimal upkeep, and has these appealing bright green or variegated leaves that complement any decor.
If you’re looking for an easy-care addition to grow in a dish garden, freestanding planter, or hanging basket, I’d encourage you to consider pothos.
Need more convincing? Read on to learn more about this easy-going evergreen vine and how to care for it.
Here’s what I’ll cover as we go along:
What You’ll Learn
What Are Pothos Plants?
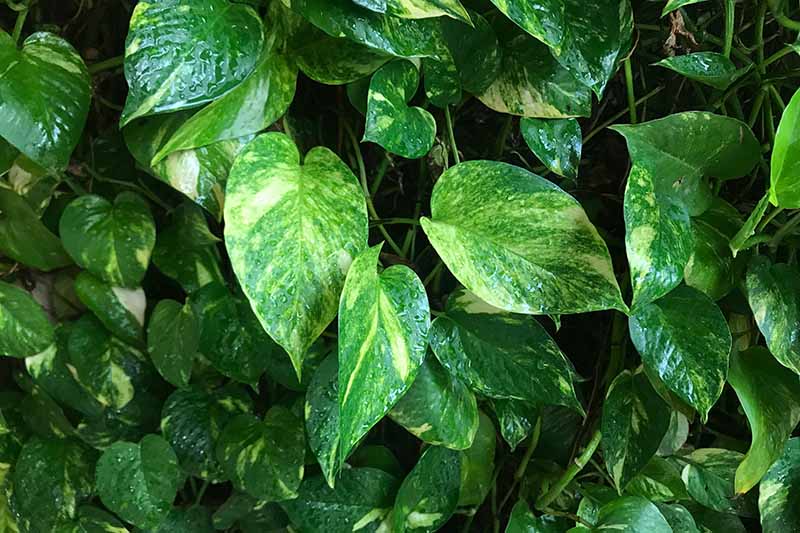
Pothos is an evergreen perennial and popular houseplant. It grows as a vine, with some cultivars producing streaked leaves in bright or lime green, cream, and yellow combinations.
A couple of varieties have jade or neon green leaves without variegation.
It’s commonly referred to as pothos or golden pothos, but it also has some fun aliases, including devil’s ivy, hunter’s robe, and Ceylon creeper.
It also has a reputation for being tolerant of low-light conditions and easy to propagate from cuttings.
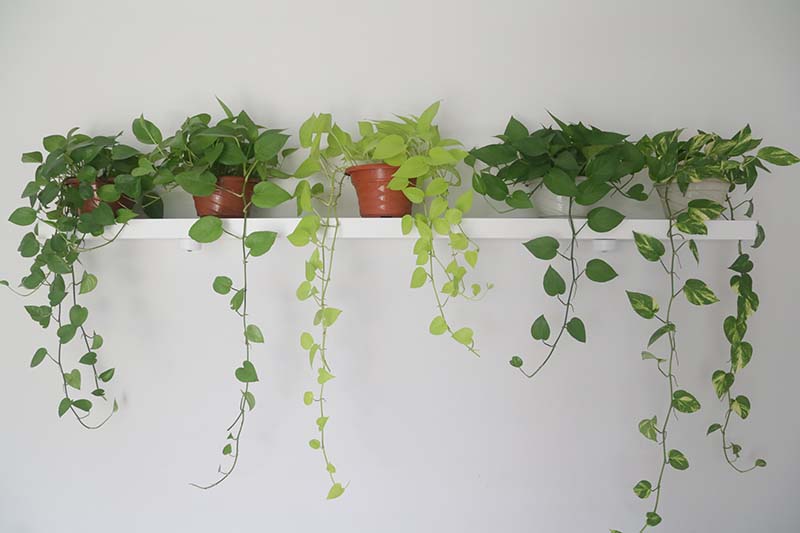
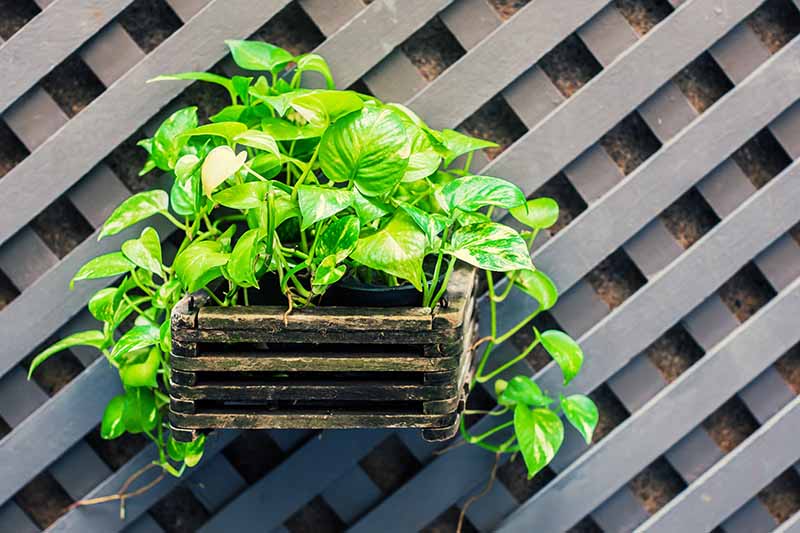
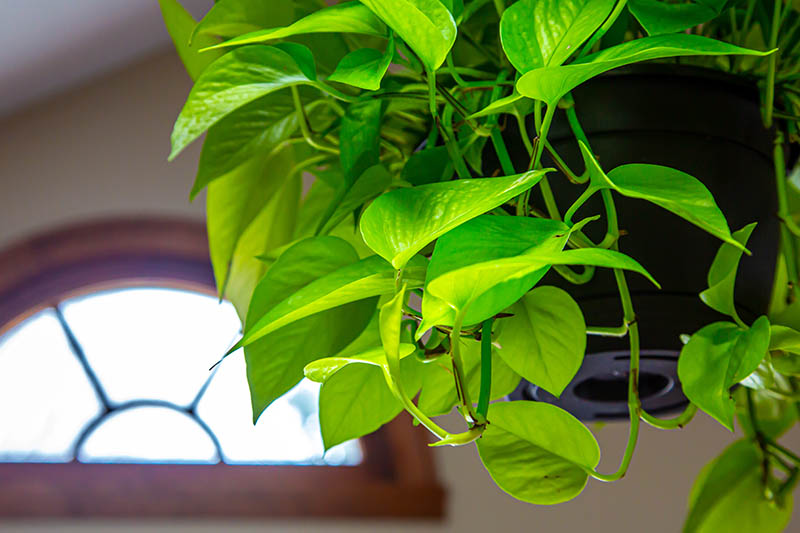
These houseplants will trail from a tall, freestanding planter, a hanging basket, or a pot placed high on a bookshelf or patio wall.
Grown that way, the leaves start getting smaller towards the tips of the vines.
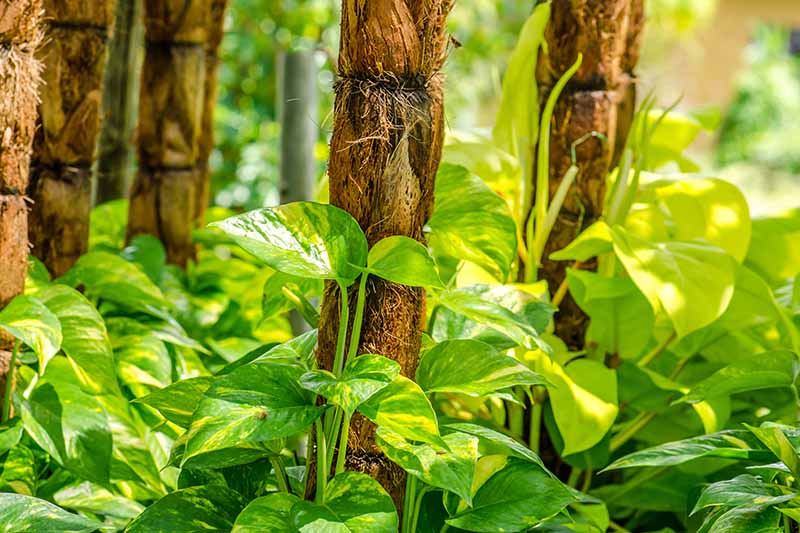
The plants also form aerial roots they use to climb. In the wild, they’ll scale tree trunks.
Cultivated versions grown indoors require a post or trellis if you want them to grow towards the ceiling – ideally one covered with moss they can sink those roots into.
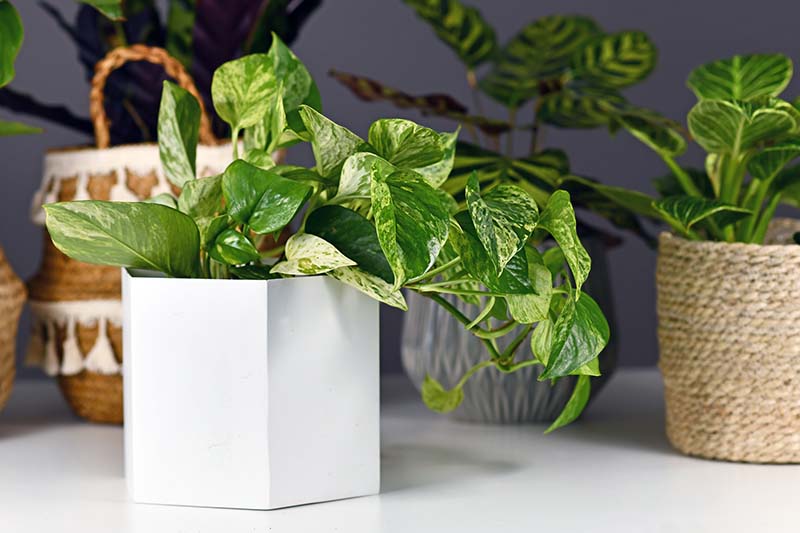
You’ve probably seen pothos in indoor public spaces, filling in planters in corporate lobbies or brightening up a receptionist’s desk.
At a casual glance, they’re easily mistaken for philodendrons. Both types of plants are easy-care, both have aerial roots, and both are members of the Arum family.
To keep them straight, remember philodendron has softer, Valentine heart-shaped leaves and doesn’t tolerate low light quite as well.
In contrast, pothos leaves have pointy tips and simple curves – like spoons – where they attach to the stems.
Pothos foliage is also larger, thicker, and waxier. Its leaves are almost crisp, not pliable like those of philodendrons.
A Note of Caution:
Pothos plants are not technically poisonous, so eating them isn’t fatal, but they are mildly toxic.
Pothos produces insoluble calcium oxalates. Kids who eat small quantities of the leaves will experience mildly harmful effects, which may include a burning sensation in the mouth; swelling of the lips, tongue, and throat; vomiting; or diarrhea.
If your child ingested any part of a plant growing in your home, immediately call the Poison Control Center at (800) 222-1222 and follow their advice for further treatment.
Pothos is also mildly toxic to cats, dogs, and horses according to the ASPCA. Reactions include trouble swallowing; pain and swelling of the mouth, tongue, and lips; and excessive drooling; as well as vomiting in the case of cats and dogs (but not horses).
Consider your pets when choosing where you display this greenery, and contact your veterinarian immediately if your dog or cat nibbles on the leaves and is experiencing any of the above symptoms.
In this article, I will be focusing on how to do a great job with pothos indoors. But in Zones 10 and 11, gardeners may grow it outside year-round in containers, on trellises, or trained up patio walls. Some even use it as a ground cover.
One trait that distinguishes the outdoor or wild versions from the houseplants: Those grown indoors in pots remain juveniles, so they don’t flower or produce seeds. Instead, they grow only juvenile leaves.
In the tropical areas where they’re naturalized, though, the vines reach impressive heights of up to 65 feet!
They also produce two- or three-foot-long leaves that look like granddaddy versions of those you see on plants in far more ordinary settings, like dorm rooms or your dentist’s office.
The behemoths look sort of top-heavy, and from the photos I’ve seen, they seem like they would make a nice snack for an herbivore dinosaur.
In the typical home or office setting, pothos will spread three to six feet and grow six to 10 feet tall.
They’ll dangle gracefully, or climb if you provide a support, like a plank covered with moss (a “totem”) the aerial roots can attach to.
The leaves are shaped and proportioned the same on wee or towering versions, but plants growing outdoors in tropical climates start forming the larger leaves as they scale new heights and gain access to more and more sunlight.

Once the leaves grow longer than about 20 inches or so, they start developing splits on the edges.
I don’t want to crush anyone’s dreams, but the easy-care houseplants you grow indoors in cold climes are never going to get huge and look like they belong on the “Jurassic Park” film set.
For the leaves to even grow large enough to split along the edges requires at least a seven-foot wall or totem, and a decade or so of growing in a warm Zone 10 or 11 climate.
I’m happy to go the indoor, easy peasy route myself. In the world of orchids, asparagus ferns, and the like, I appreciate this low-cost, no-fuss option for greening up areas where I can’t justify a hefty outlay or a lot of maintenance.
If you think I’m just happy to have one houseplant that looks lush while letting me be lazy, yes, that’s exactly what I’m saying!
Which doesn’t mean there aren’t ways to make these plants grow more quickly and look fuller. I’ll share some tips and techniques on those topics coming up.
But first, I want to fill you in on a bit of pothos history.
Cultivation and History
Pothos comes to us from tropical rainforests and is native to Southeast Asia.

According to the Susan Mahr at the University of Wisconsin-Madison Master Gardener Program, E. aureum is “alleged to have originated in the Solomon Islands, but appears never to have been collected in the wild so it may actually have been a horticultural selection.”
It grows wild in many tropical areas, notably Australia, the Cook Islands, Hawaii, Fiji, Japan, the Philippines, and Vietnam.
In the past century and a half, botanists have reclassified pothos more than once.
Records from 1880 describe it as Pothos aureus, a classification based partly on its supposed lack of flowering.
Then some other scientists noted a flower on one in 1962, earning it a spot in the Raphidophora genus as R. aurea.
Shortly thereafter it got a new name, Epipremnum pinnatum, when someone noticed strong similarities with that genus.
By 1964, though, botanists had figured out that the houseplants were actually the same species as the big, tropical tree trunk climbers, only in permanent juvenile form.
So while the species could produce flowers under certain conditions, when grown indoors, they could not.
This time they were classified as Epipremnum aureum, which better describes its leaves, stems, and ability to bloom in the wild or when cultivated outdoors in tropical or semitropical areas.
There’s another intriguing result of indoor and greenhouse pothos living their entire lives as juveniles and never flowering, and wild and tropical versions blooming rarely.
This leaves horticulturalists with no real way to hybridize this evergreen vine, which is why there are so few domesticated cultivars.
But researchers at the University of Florida were able to come up with a new variety in 2009 in a different way.
They induced mutations in available cultivars by irradiating them with gamma rays! ‘Pearls and Jade’ is a mutation selected from a group of irradiated ‘Marble Queen’ plants, and is patented.
It’s one of the varieties with smaller leaves and I’ll share some more details when it’s time to choose the best cultivars.
But first, here’s how to start your own pothos plants.
Propagation
I would discourage you from trying to grow pothos from seed. For one thing, only the mature plants produce flowers and thus seeds, and the houseplants are strictly juveniles.
So it’s not like you can grab a few seeds from a neighbor or a local seed swap.
Even if you look further afield, the seeds are hard to find, with most sellers residing outside the US. The available online options aren’t up to par.
When pothos seeds come from a grower halfway around the globe, it’s super difficult to verify whether they’re disease-free, and you won’t know if they’re the species you’ve purchased until after they germinate – and that’s if they germinate at all.
Honestly, it’s no hardship to skip the seed route when it’s so simple to propagate these vines from cuttings.

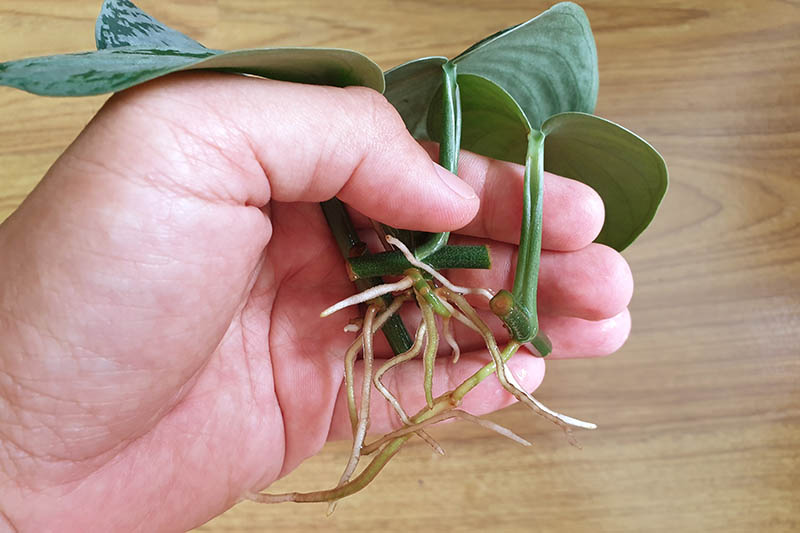
For each potted pothos, you’ll need to snip a few four- to six-inch pieces of healthy stem from an established vine.
Each piece should have at least four leaves and one “node,” which is that bump where the stems send out all new growth – roots, leaves, aerial roots, and stems.
Gently remove the leaf that is nearest to the spot where you made your cut.
Jab three or four of these cuttings into a four-inch pot of pre-moistened potting soil or a mix of half perlite or sand, and half peat.
Space the cuttings an inch or two apart, making sure the node for each rests below the surface of the growing medium.
Keep the cuttings moist, but not waterlogged. Place them in moderate light and out of direct sun.
It will take between four and six weeks for the cuttings to send down roots, and another month before the stems have developed root systems sufficient enough to begin their careers as small plants.
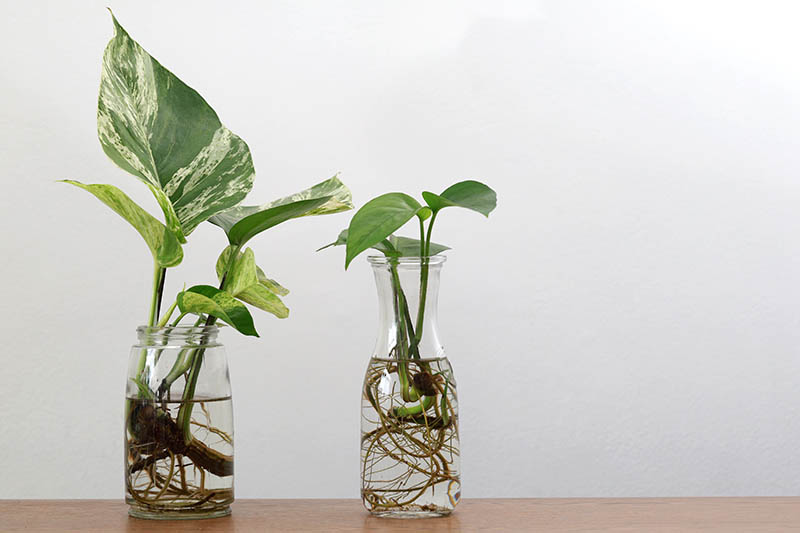
You can also root cuttings in water, placing three or four cut ends in a jelly glass with about four inches of warm tap water. You want the node to be below the water line, but not the leaves.
Place the jar in a spot with at least moderate indirect light, preferably a bit more.
The roots will begin to show anywhere from three to six weeks later. Once they’ve appeared and grown an inch or two long, which takes about another month, go ahead and plant three or four of them in a six-inch pot.
Fill each container to about an inch below the rim with potting mix, making sure to use a type that specifies that it’s for houseplants.
You may want to add a little extra perlite, say one part per five parts of the potting mix, to increase drainage.
Some people continue to grow pothos in water, never planting the new starts in soil.
Growing pothos hydroponically is one option, and I’ve seen some beautiful specimens growing in clear glass vases or vintage canning jars.
But you don’t want to mix growing methods. The longer a rooted cutting stays in that water, the less likely it is that it will be able to transition to a pot with any degree of success.
So make sure to pot up those cuttings as soon as the roots are long enough.
You may have noticed that I’m advising you to plant several cuttings, not just one. That’s how the pros do it and how you should, too.
Just one cutting will produce one vine, and your pothos won’t look full and drape elegantly like the multi-plant versions you have seen in stores and commercial decor.
If you want a mature parent pothos to look fuller, you can plant a few of the rooted stems at its base.
Before you know it, the younger vines will also be ready to supply cuttings, and you can just keep repeating the process of propagating the stems you clip and planting them in the pot until your pothos is as full as you would like it to be.
Read more about pothos propagation here.
How to Grow
So you’ve finally found a houseplant that’s almost impossible to kill. Hooray!
Now, to keep it alive and also growing its best, you’ll want to adopt a few strategies.
You can leave the nursery plant in the pot it came in, but make sure that container has drainage holes and is full of well-draining growing medium.
If you picked up a pothos from a friend or a garage sale, make sure it’s not growing in garden-variety soil, which tends to get soggy or compacted.
These evergreen houseplants can live through just about anything, but they can’t hack too much moisture or wet feet from soil that doesn’t drain.
If you are planting a cutting or your new-to-you houseplant arrived in substandard dirt, give it a great start in a pot of new, well-draining potting mix.
When you buy growing medium from a store, go for a mix plainly labeled as being formulated for houseplants, which will have at least some peat moss, vermiculite, or perlite.
Give bags labeled with the words “topsoil,” “garden,” or “bedding” a pass. They’ll be too heavy!
You could also make your own houseplant growing mix, but if you’re new to this indoor green thumb adventure, laying in a supply of the ideal ingredients could cost more than just buying a small bag of the premixed stuff from a garden center or even the dollar store.
If you do have access to the components, though, use this formula to make your own pothos growing mix: four parts peat moss, two parts perlite, and one part each of sand and shredded bark.
Use your (clean!) hands to mix them up in a separate, freshly washed container with an airtight lid, or use a gallon-size zipper storage bag. That way you can store any extra in a cool, dry spot.
This is a good time to reiterate how hard it is on your houseplants when you try to grow them using ordinary dirt from your garden, or any unsterilized loam.
I’ll talk more about various pests and diseases that thrive in those unsanitary soils that don’t drain well in a minute.
But please do your plants a favor and skip the ordinary “dirt” or potting mix that hasn’t been sterilized first.
You’ll also need to provide a tray or dish to catch excess water if your new plant didn’t arrive with one.
And find an appropriate spot where the plant can thrive. Don’t let all the bragging about how these plants will grow with little illumination convince you to place one somewhere with low light if you don’t have to.
They prefer bright, indirect light, or at least moderate light levels. Too little light and your jazzy houseplant will slowly become all green, with none of the cool variegation. It may also quit growing.
In addition to providing enough light, you’ll want to avoid placing a pothos in direct sunlight. Even if there’s a window separating plant and sunbeams, the sun can scald the leaves.
The temperature is also pretty important. You might be like me, trying to be earth-friendly and also keep your energy bills low by turning down the thermostat in less-used rooms during the cold months.
Those chilly spots in the house aren’t a good choice for this greenery, though. Be sure to place the planters wherever the heat is on in the winter.
And keep them out of range of drafts as well.
These houseplants grow best in temps from 65 to 90℉, whether they live full time in the house or make it out to the patio or deck for the warm months in your area.
They will survive if the thermostat is set as low as 55℉, but you’ll start sacrificing looks and growth pretty quickly.
In other words, it’s okay while you’re on vacation or something, but not for the long-term.
This evergreen vine will also grow more quickly if you water it regularly, but make sure to let the soil dry out in between hydration sessions.
Check first by sticking your pinkie into the soil, which should be utterly dry at least an inch down.
Alternatively, you can wait until the plant tells you it needs water by looking a little limp (not dead limp, just a little droopy, like humans feel on a Monday morning.)
Use room temperature water, and always water around the base of the stems, never from above the leaves. That will help you avoid many plant diseases.
Give the pothos water until you see it start running out of those drainage holes.
Are you listening, overattentive plant parents? Don’t water pothos too often, or too much at one time!
About the only thing that will kill pothos is to let it sit in water. Be sure to give your plant a few minutes to absorb the water, and then pour off any excess that accumulates under the pot.
If you do those things, you probably have a couple of years of easygoing enjoyment to look forward to before you will need to consider giving this houseplant a bigger container to grow in.
Trade up to a pot that’s just two to four inches wider in diameter. You want the roots to have room to expand, but not so much space that the excess growing medium stays wet, promoting plant diseases like root rot or bacterial leaf spot.
How will you know if your pothos needs repotting? Take a peek through the drainage holes. If you can spy roots all the way at the bottom of the container, it’s time.
If those roots have grown a little further and are poking through the bottom, it’s past time. But rest assured, like so many other forms of neglect, pothos will cope with a too-small pot for a bit without dying.
Remember, this is the ultimate stress-free plant, the one you own because you don’t want to fret.
But if you’re still worried you’ll forget to repot and your splashy foliage will suffer (or stop growing), schedule a reminder on your calendar or cell phone to see if your houseplant needs an upgrade about 18 months to two years after the last session.
Growing Tips
- Place the plants in bright or moderate, indirect light.
- Let soil dry between watering.
- Plant in well-draining soil, and never let them sit in water.
Pruning and Maintenance
If you’re a beginner, or think of yourself as an established murderer of houseplants, you may be completely unprepared for this particular aspect of pothos care.
Sometimes they not only live, they grow so much they need pruning to keep them at a manageable length, and to encourage them to grow fuller.
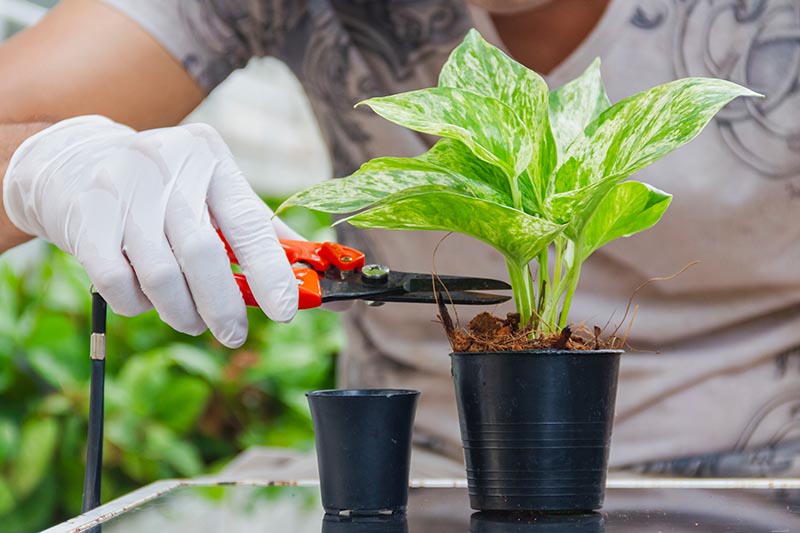
To do this, use your fingers to pinch off two or three inches at the end of each trailing vine, or cut the ends off with a sharp, clean paring knife or scissors.
Make sure to snip or pinch right above one of those bumps on the stem. That ”node” is where the plant will send out new growth.
If you’ve let your plant get extra rangy or it’s growing out of its pot and you don’t want to go to the trouble of finding a new one, consider pruning more radically.
You can cut the whole shebang back to just two inches tall, water it well, and watch it grow back into a fuller shape with more foliage.
Read more about pothos pruning for more tips.
As for other maintenance, if you wish, you can use a dilute 5-5-5 (NPK) liquid houseplant fertilizer once a month in the spring and summer, when these vines do most of their growing.
It will make them grow a little quicker, but I usually skip that step because they’ll grow just fine without it.
And fertilizer becomes a soluble salt when it dissolves in water. If you apply too much, the salt stays in the growing medium, where it can absorb water intended for the plant.
There’s also a good chance the roots will take up chlorine and sodium from the salt residue, instead of the nutrients the plant needs.
This makes chlorophyll production grind to a halt, and can also cause brown leaf tips, dropping leaves, or wilting.
This fertilizer-generated salt may damage root tips directly, too. This whole salty scenario weakens the plant overall, making a pothos more susceptible to a host of pests and diseases.
That’s why I’d rather do without the fertilizer, but if you want that extra boost, you can always accommodate the potential downsides by making extra sure to let the plant drain well after watering, and discarding any excess that ends up in the saucer beneath it.
Every six months or so, make sure to sluice off any salt buildup by running water through the soil and letting it drain out the bottom.
Your goal is to use twice as much water as you have soil – a quart total for a plant in a pint-size pot, for example.
If you suspect your nursery-grown pothos arrived at your place with lots of fertilizer already in the soil, you may want to try this method “leaching,” as it’s known, before you settle the vine into its new home.
It can take a while. When I did this with a new vine in quart-size pot I received one Christmas, it took more than an hour to pour two quarts of water through the soil, let it drain, and pour it out.
One more thing you can do for your pothos, if you think of it:
When you’ve placed the plants near a window, or they rely on grow lights, make sure to rotate them every now and again so that they don’t grow lopsided because some stems aren’t receiving enough light.
If you don’t, though – and this is the prevailing theme with this houseplant – they’ll cope!
Cultivars to Select
Sellers often don’t go into detail on the specific cultivar of pothos you’re buying, so pay careful attention to each variety’s appearance in the photos if you’re looking for particular color combinations.
Costa Farms via Home Depot offers an unspecified green variety with subtle yellow variegation.
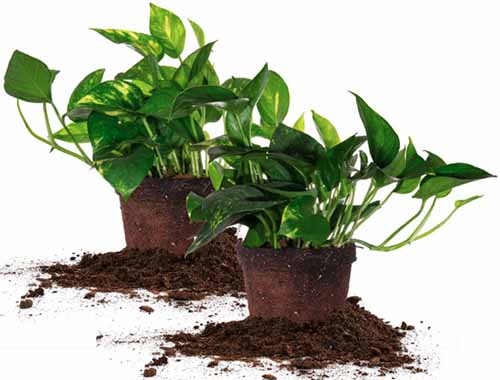
You can also find houseplants labeled “golden pothos” at local sellers, or from online vendors including Home Depot, which sells a two-pack in six-inch pots.
Other cultivars are hailed by name, and here are a few to consider:
Marble Queen
Characterized by larger leaves than most other varieties, up to four inches long, ‘Marble Queen’ has an enchanting variegation of mixed moss green and creamy white.
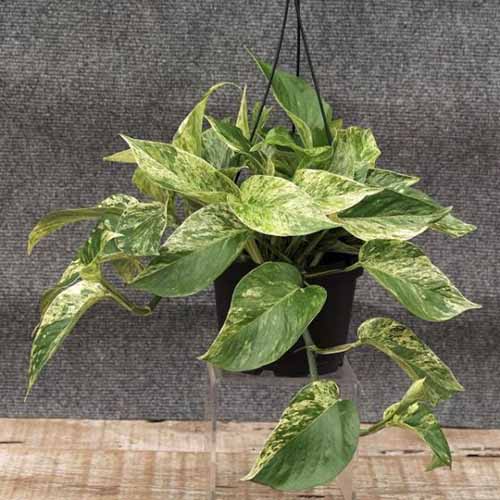
I think the pattern looks like the dappling on an Impressionist painting, and even the stems have some light accents along with the green.
‘Marble Queen’ is available in six-inch pots from Nature Hills Nursery.
Neon
With more elongated leaves than other common varieties, no variegation, and a truly distinct color, ‘Neon’ could be the variety for you. But that’s a matter of taste.
While ‘Neon’ doesn’t glow in the dark, it is a startling shade of bright green-yellow, kind of a chartreuse.
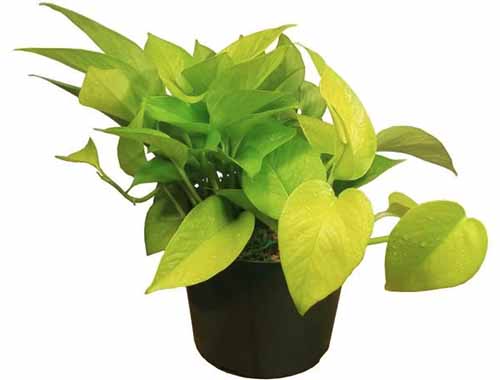
Some think it looks eerie, or sick. But I’m a ‘Neon’ fan, and not just because it’s unusual!
I get a lift from that warm, fresh color, which is almost like having a constant view of spring’s first foliage year round.
‘Neon’ is available in six-inch pots from Home Depot.
‘N Joy
Firm stems and smaller-than-usual leaves characterize this white-and-green variegated pothos.

It’s been described as more “painterly” than other cultivars, with even “strokes” of white on the kelly green leaves.
‘’N Joy’ is available in six-inch pots from California Tropicals via Amazon.
Pearls and Jade
Jazzy and elegant at the same time, this patented variety was produced at the University of Florida.
‘Pearls and Jade’ is a mutation selection from a group of ‘Marble Queen’ plants, mostly cream and green like the parent plant.
But the pattern on the foliage is quite distinct. The variegations occur even on the edges of the leaves, and the white splashes are themselves flecked with green and silver-gray.
This is a good pick if you want daintier leaves, as these grow just two and a half to three inches long, and one and a half inches wide.
As a basis for comparison, ‘Marble Queen’ leaves grow almost twice as big, four and a half inches long and three inches wide.

To maintain the cool color pattern, plant it in the strongest indirect light you have available.
‘Pearls and Jade’ is available in six-inch pots from Home Depot.
Managing Pests and Disease
Being relatively pest- and disease-free is part of what makes this houseplant so hard to kill.
For the most part, it’s also fairly simple to eliminate the insects that occasionally prey on pothos, or solve or prevent other issues that may occur.
Here’s the roundup of what to watch out for:
Insects
Bugs probably won’t take your plant out completely, but a sizable infestation can weaken them a bit – not to mention some insects bring unsightly excretions with them, or make little webs on the stems or dark spots on the leaves.
Keep reading to learn how to get rid of these pests, or prevent them from causing problems in the first place.
Aphids
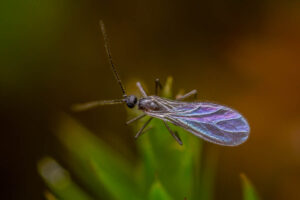
If your plant is drooping a bit, that’s a sign it needs watering. But if it’s wilting, or stops looking lush, aphids could be the culprit.
These bugs, like so many that may plague indoor plants, are very small, maybe a quarter of an inch long. They form clusters on houseplants.
You can recognize them by their pear shape, if you’re willing to get that close, but the color could be white, brown, black, yellow-green, or maybe pink.
If they have a shell, it could be waxy, like a mealybug, or more wooly.
But you’ll be less concerned by how they look than what they do, which is suck vital juices from leaf and stem tissue. And they excrete honeydew as well (more on this in the next section)!
You may be able to get rid of the aphids with nothing more than a steady stream of water from a spray bottle, or neem oil or insecticidal soap.
For other ways to combat aphids, check out our guide.
Mealybugs and Scale Insects
Blech! Even though they won’t usually kill your houseplant outright, you’ll want to do all you can to avoid these pests so you don’t have to look at the residue they leave behind.
Mealybugs have a fitting name. They’re, well, mealy, with no wings and a white, waxy covering that looks like damp flour. In immature stages, they might be tan or gray.
They kind of glom together into an icky, white mass.
Scale insects have bodies that look like miniscule, oval scabs (sorry, but that’s what they look like). They also form a cottony conglomeration, and produce white egg sacs, attaching them in obscure places like leaf axils or even the roots.
Both mealybugs and scale insects, as well as aphids, secrete an ooze euphemistically known as “honeydew,” which leaves a sticky residue on the plant.
This in turn may attract sooty mold, a fungus that loves the sweet taste of honeydew.
Signs of either scale or mealybug infestation include a pothos that’s dropping its leaves, has stopped growing, or is producing stunted foliage.
That’s probably enough of the “ick” factor to convince you both to inspect your plants for any of these symptoms on a once-per-week basis, and also to remove these insect pests when you spot them.
It’s not tough, though it’s not pretty either. Use a cotton ball moistened with rubbing alcohol to kill scale or mealybugs, making sure to wipe them off the affected areas.
If the infestation is running rampant by the time you become aware of it (I know, I’ve forgotten to inspect certain houseplants for weeks on end, too!), you can usually still remove the bugs.
If the plant is still a portable size, take it to the shower or outdoors and blast the bugs with a strong stream of water.
For larger plants that must be treated in place, use towels to protect nearby surfaces, and see if insecticidal soap or neem oil will take care of these pests.
To keep them from coming back, be sure to wash all the pots and trays that might also be harboring these pests.
And be extra careful not to bring an infestation inside with plants that have spent the warm months out of doors, or with new plants purchased from the nursery.
Inspect these carefully for signs of scale and mealybugs, and take care of any issues before allowing those plants into the house.
Read more about controlling scale insects here or find more tips on fighting mealybug infestations here.
Spider Mites
Teeny-tiny creepy crawlies, spider mites are members of the Tetranychidae family.
Like lice (ew!) you might only see them as tiny moving dots, unless you have a magnifying glass handy.
You’ll be able to spot their handiwork on the foliage, though – brown and yellow spots, and perhaps eensy-weensy webbing.
Getting rid of them is pretty easy, if you’re able to pick up the container and take it outside or place it in the sink long enough to blast the mites with water.
Use a spray bottle of room temperature tap water, set the nozzle to stream (not mist), and spray the leaves until the mites come off.
If you can’t move the plant because it’s too tall or heavy or the vines are too long, you may consider setting a few towels or a plastic tarp beneath the pot and attempting “removal by water” with the plant in place.
If the water strategy doesn’t yield results, an application of neem oil may do the trick.
It’s a little easier to direct onto the plant instead of the linoleum, but you’ll probably still need protective coverings for nearby furnishings and floors if you’re making this attempt indoors.
Faced with an infested plant that’s also an immovable object? Try the neem oil first.
Should you discover you have more spider mite invasions as time goes on, you should probably reevaluate your watering habits.
These mini pests prefer dry foliage and soil, so they may disappear if you water your plant more regularly.
Find more tips on combating spider mites here.
Diseases
For the most part, disfigured leaves or inhibited growth on this vine are easily preventable. And these issues are typically physiological in nature, rather than being signs of infection.
You can avoid black tips on leaf margins or yellowing leaves, for example, by making sure you don’t overwater or give your plant too much fertilizer.
Temperatures that dip below 55°F, or that swing quickly from overly hot to moderate, can cause random brown patches on the leaves.
The simple workaround there is to place your plant where it’s sheltered and doesn’t get too cold.
But there are also a few diseases that might affect this vining evergreen, and some of them require treatment, not just forestalling.
Here’s what you need to know about the three most prominent types of infection you may encounter:
Bacterial Leaf Spot
You can spot this issue pretty easily.
Caused by Pseudomonas cichorii, bacterial leaf spot makes young leaves develop water-soaked spots, surrounded by yellowish rings, or “halos.”
Most of the techniques that help prevent bacterial leaf spot will also make your houseplant healthier. Take care not to stress your pothos with too little light, temperature fluctuations, or poor drainage.
Any of these deficiencies can make the plant more susceptible to this type of infection.
Make sure to stick around (or come back promptly) after you pour water on your plants, to give them time to drain.
Consistently discard any excess in the saucers below to reduce your plant’s chances of developing this disease.
Also avoid over-feeding. Excess fertilizer can increase populations of harmful bacteria in the soil, upping the odds of leaf spot.
You’ll also want to avoid placing your pothos anywhere with high humidity.
These bacteria need moisture to grow and multiply, and they thrive where plants are clustered too close together or don’t get ample air circulation.
One more weapon in the fight against leaf spot: Water at the base of the plant, instead of splashing the leaves by watering overhead.
Not only do P. cichorii need moisture to live and multiply, the water itself can transport the bacteria to the leaves, from the soil, stems, or other leaves. (So can air movement, especially if the plants are kept outdoors for part of the summer).
If your plant does begin sporting those spots, start hunting for a new one, because this one is headed for the garbage (not the compost).
That’s a bummer, but at least you’ll know how to do better next time.
Pythium Root Rot
Some pathogens spread to houseplants while they’re still in commercial nurseries. One example: Pythium spp., a genus which was once classified as fungi and now belongs to the order Oomycetes.
It’s a common cause of damping off and root rot.
It’s creepy the way it produces mycelia that grow within the plant and attack the roots. The mycelia also reproduce in your plant’s growing medium if there isn’t a plant host available.
According to research from Agriscience Queensland, part of the Australian Department of Agriculture, “Growing conditions in nurseries, where plants are young, richly fertilized [sic] and often overwatered, are ideal for the development of Pythium spp.”
While not all species of Pythium are plant pathogens, the water molds that are can easily gain a stronghold in nursery plants.
The symptoms of this type of root rot are substantial and sort of sad.
You may notice the cuttings you’re propagating form only poor root systems, and the leaves are turning yellow.
If the root systems of established plants are affected, the plants aren’t able to draw up enough water or food and they’ll turn yellow and die.
Stems of affected cuttings and plants may both develop black rot, which makes them mushy.
If you see this condition on cuttings, it’s best to cut your losses and dispose of them, and the soil or water they’re rooting in.
Put all the plant detritus and affected soil in a sealed bag in the trash.
If an established plant develops this condition and you catch it before the roots are black and mushy, you may have some luck with cutting out the affected portions of the roots with sterilized scissors, and repotting the plant in a sanitized container filled with completely fresh soil.
For my money, though, even though it’s ruthless, I would dispose of a pothos with root rot altogether, right away.
The plants are affordable to buy new, especially in lieu of replacing the soil and possibly the pot, and then potentially having to purchase a new plant anyway in a few weeks.
Remember, this is definitely one of those situations where Ben Franklin would say, “An ounce of prevention is worth a pound of cure.”
It’s far better to avoid root rot in the first place. One preventive measure is making sure you always use sterile potting mix when you plant pothos, never dirt from outside or from another plant you discarded.
Also plant them only in well-draining soil and pour off the excess after your plant’s had a chance to drain.
And make sure you don’t feed your plant more often than necessary. As mentioned, too much fertilizer can lead to salt buildup in the soil.
This salt may absorb water so it’s not available for the plant, or the roots may draw up sodium instead of nutrients your pothos needs to grow.
Salt in the soil can also leach water from the root tips, causing the plant to become dehydrated.
Any of these effects of too much salt can weaken the plant or destroy the roots, making it far more susceptible to root rot.
Learn more about root rot and treatment here.
Rhizoctonia Stem Rot
Rhizoctonia, a soilborne fungus, causes this particular type of rot, which kills stems at the soil level.
When the growing medium is wet, you’ll see a delicate mass of fungal growth near those diseased segments.
Once this fungus gets growing inside your pothos, any affected areas decay fast, forming little red-brown lesions that may girdle the stems at the base.
Rhizoctonia spores spread via moving air, splashing water, or gardeners who move infected soil from one area to another.
So make sure you water houseplants at the soil level and use sterilized potting medium and containers.
Once soil is infected, the fungi can live on for years, so be careful never to move infected soil from one pot to another.
If you determine your pothos has stem rot, you may want to try a fungicide treatment and transplanting to a fresh pot with sterile soil.
But, grim as it sounds, you may actually prefer to give up immediately and discard both plant and soil, because the treatments cost more than a new one.
Best Uses
As long as you don’t give them too much water or leave them to broil in direct sun, pretty much anyone can grow pothos houseplants – even those who have never kept a plant alive for more than a month or two previously.
Once you’re comfortable with the idea that this plant will be here for at least a few years, it’s time to tap into some of the best ways to use it as an indoor plant.
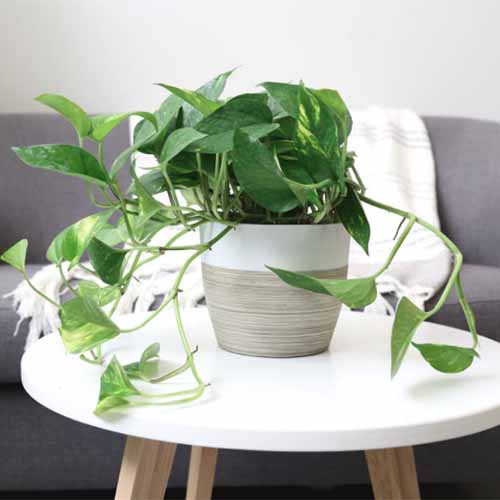
It will trail, so it’s a natural for hanging baskets. You can also place a pot on top of a cabinet or bookshelf and let the vine cascade over the shelves.
You could purchase a plant that’s already trained to grow up a post or “totem,” or create that effect with your own materials.
I also like using smaller pothos plants in frugal decor, the way my sister Amy does. She roots cuttings in water, plants them in vintage drinking glasses or china tea cups, and places them in her guest room and bathroom for fresh, inexpensive decorative elements.
The plants can’t live there indefinitely, since the light isn’t strong enough to preserve the variegation in the leaves.
If you use this idea, you need to make sure the plants that are only getting a meager amount of light are rotated to spend a couple of months in brighter indirect light, before returning them to a spot in the low light rooms.
And don’t forget that pothos looks great underplanted with tall floor plants, like rubber trees or fiddle-leaf figs.
Who needs expensive moss or inorganic fillers when it’s free to root a few cuttings to cover the exposed soil below those bigger plants?
I’d apply the same thinking to creating a dish garden: Splurge on a couple of more expensive plants if you like, and then use this versatile vine to fill in the gaps.
Quick Reference Growing Guide
| Plant Type: | Evergreen vining perennial | Foliage Color: | Variegated, dark green, light green, cream, golden, white |
| Native to: | Southeast Asia | Soil Type: | Potting or soilless mix |
| Hardiness (USDA Zone): | 10-11 | Soil pH: | 6.1-6.5 |
| Height: | 6-10 inches | Soil Drainage: | Well-draining |
| Spread: | 3-6 feet | Uses: | Hanging basket, houseplant, trellised up wall or post |
| Growth Rate: | Fast | Order: | Alismatales |
| Water Needs: | Low | Family: | Araceae |
| Maintenance: | Low | Genus: | Epipremnum |
| Tolerance: | Low light | Species: | Aureum |
| Common Pests: | Mealybugs, scale, spider mites | Common Diseases: | Bacterial leaf spot, cutting soft spot, pythium root rot, Rhizoctonia foot rot, southern blight |
Enjoying the Details in the Devil’s Ivy
My house is in a fairly warm area that still gets gray and cold for a few months each winter. This year, I’ve been on a pothos appreciation kick.
The peppy green, cream, and gold swathes on the leaves are just the cheer I need when it’s gloomy outdoors.

Along with starting a slew of cuttings from a more mature vine to share with friends, I’ve placed a younger ‘Neon’ variety in a pot on top of a cabinet that receives indirect light here in my home office.
It hasn’t started cascading wildly, not yet, but I enjoy studying the offbeat yellow-green shade and checking for new leaves daily. I usually spot one every few days!
What about you? Do you have a relationship with a pothos plant or two? If you’ve come up with a good technique for keeping them extra healthy, or a nifty way to display them indoors, please let us know in the comments section below. And feel free to share a picture!
And if the praise, tips, and techniques I’ve shared here have made you feel more enthusiastic about growing houseplants, you might enjoy reading these guides next:
- How to Grow and Care for Spider Plants
- How to Grow and Care for Aloe Vera
- How to Grow and Care for Spiderwort
© Ask the Experts, LLC. ALL RIGHTS RESERVED. See our TOS for more details. Product photos via California Tropicals, Costa Gardens, Home Depot, Nature Hills Nursery, and Plants.com. Uncredited photos: Shutterstock.