
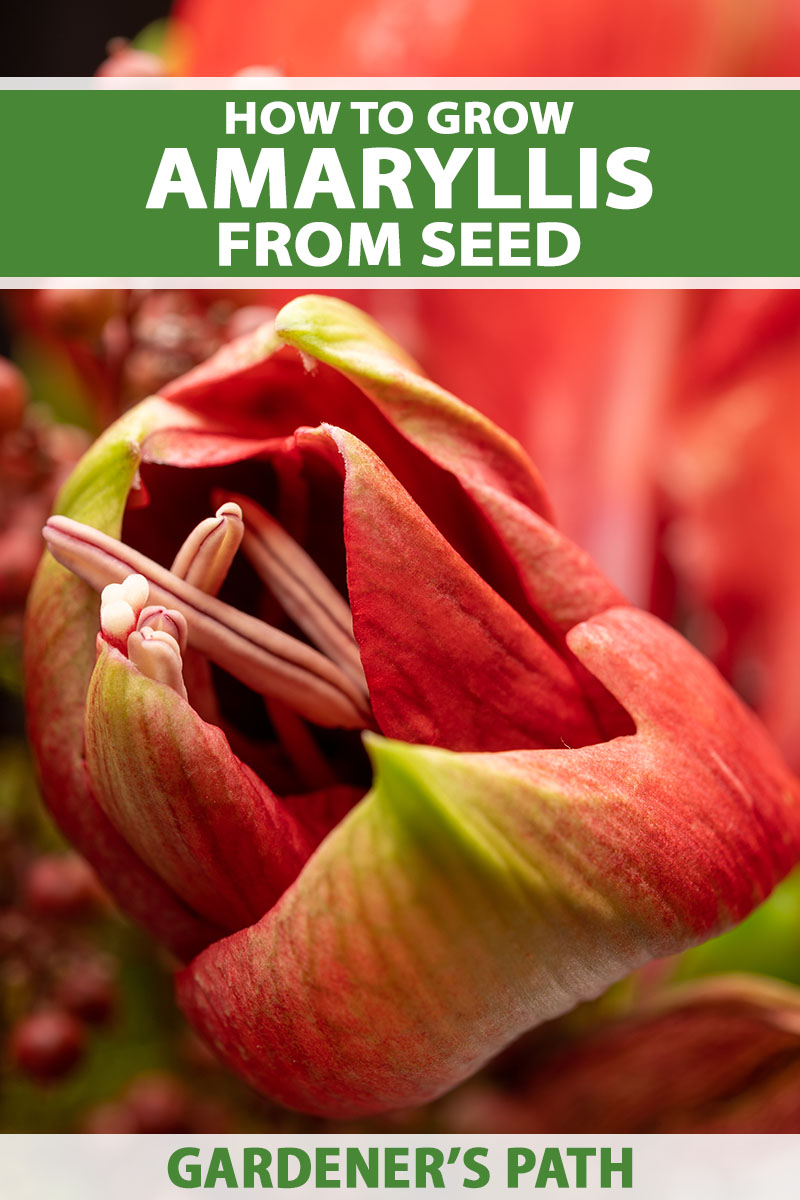
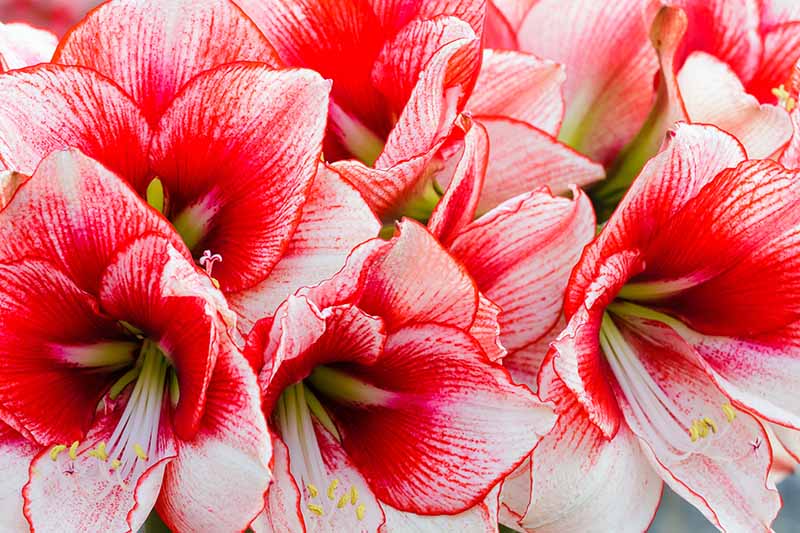
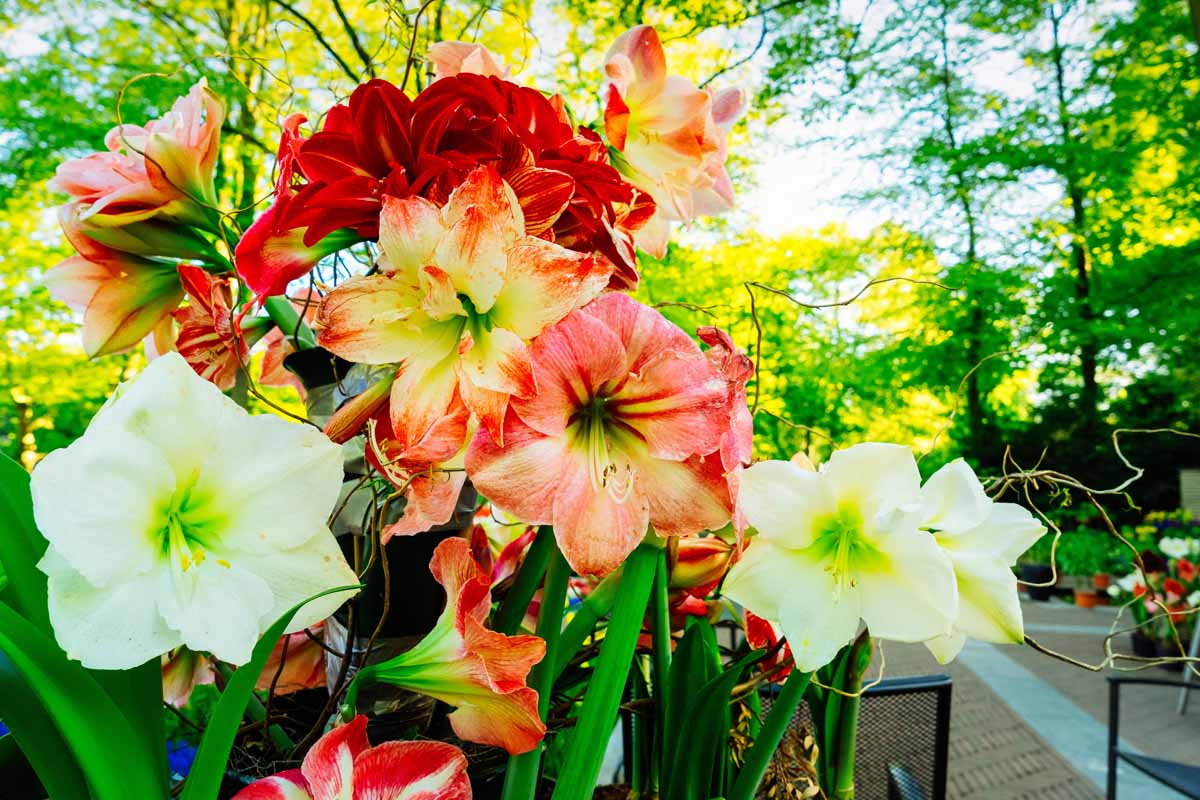
The large, eye catching blooms of amaryllis, Hippeastrum x hybridum, can add astonishing color to the garden and make for perfect indoor displays.
Suitable for outdoor cultivation in USDA Hardiness Zones 9-11, the flowers can be forced to bloom indoors and are a popular addition to winter holiday decor.
Amaryllis can be propagated by the home gardener in a three ways: separating offsets, dividing bulbs, and growing from seed.
We link to vendors to help you find relevant products. If you buy from one of our links, we may earn a commission.
In this article, we will discuss how to propagate amaryllis from seed, and the advantages of doing so.
Here’s what we’ll cover:
What You’ll Learn
Why Grow Amaryllis from Seed?
Starting these dramatic flowers from seed is certainly a process, as it can take from three to five years for the plant to bloom, depending on the variety.
Since some types of amaryllis are expensive or can be hard to find, collecting seeds from existing plants may make sense.
However, you need to keep in mind that most of these plants are hybrids, and the seeds you collect will not produce true to the parent plant, but may exhibit some of its characteristics.
Since amaryllis hybridize easily, by cross pollinating and collecting seeds from your own plants, you can easily create brand new, unique varieties!
If you want to produce a clone of a parent plant, then you should consider bulb re-sectioning or separating offsets, check out our guide to learn more.
Since seeds aren’t widely available on the market, the best way to obtain them is from other growers or by pollinating and hybridizing your own flowers.
How to Harvest Seeds
Flowers grown outdoors are likely to be pollinated naturally by insects, but indoor-grown plants should be helped along by hand pollination.
Pollination
The flowers are self-fertile, so you can do this even if you only have one plant. The seeds will not produce a perfect clone in the case of hybrids, but plants will likely retain some of the traits of the parent plant.

Or if you have more than one variety, you can experiment with cross-pollination.
To hand pollinate your amaryllis, take a small paint brush and brush it gently on the anther of the flower to collect the pollen.
The pollen is the yellow dust that covers the tips of the curved stamens, as you can see in the image below:
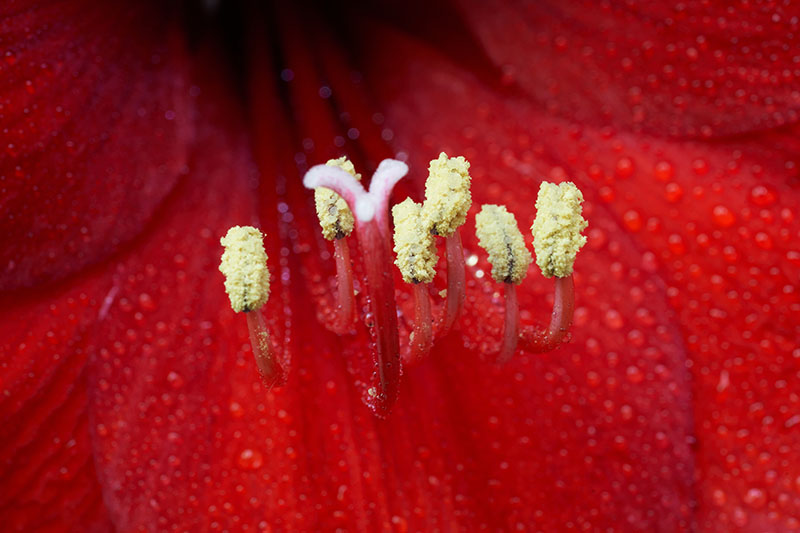
Then you’ll use the brush to gently transfer the collected pollen to the stigma of another flower – or the same one. The stigma is at the top of the style, protruding from the center of the flower.
For best results, repeat this process once a day over the course of a few days, to ensure the pollination is successful.
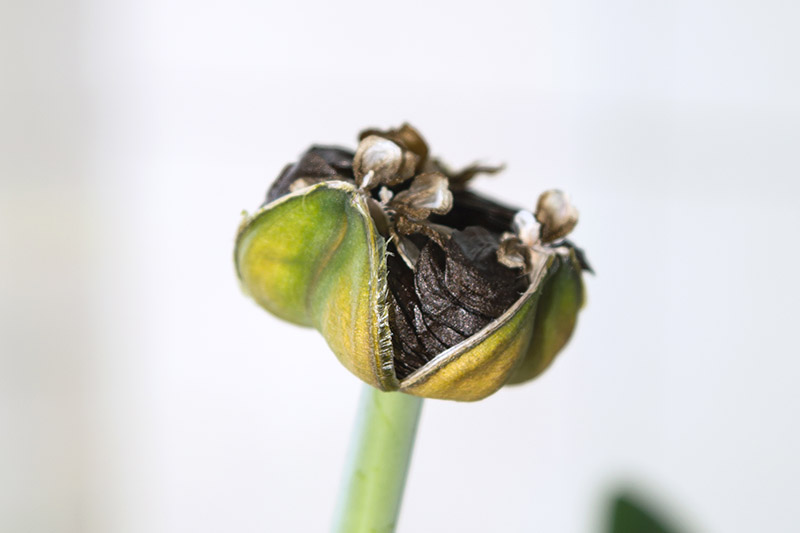
If it is done correctly, as the flower starts to fade, you will see a small green pod start to develop at the base of the bloom, behind the petals.
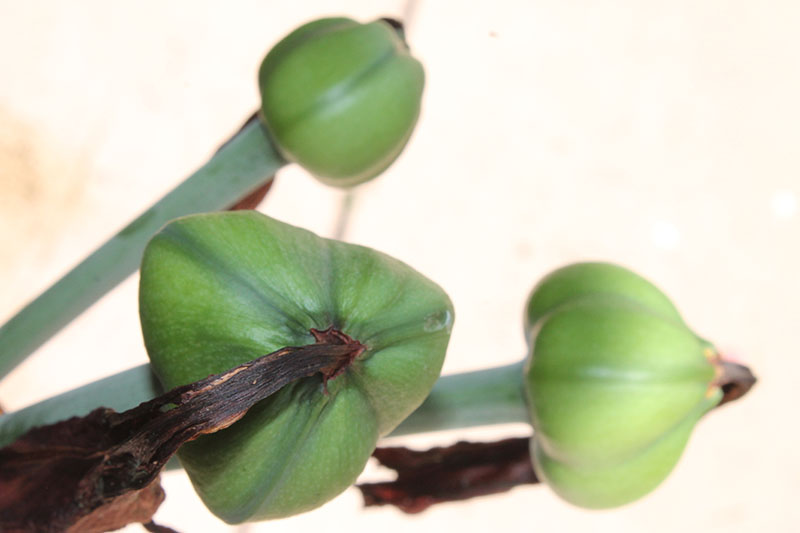
Over time this pod will swell and eventually turn yellow or brown, dry out, and split open at the seams. This ripening process will typically take about four to six weeks.
Collecting the Seeds
When the pod has dried and begun to crack open you can cut it off the plant. Pods are typically divided into three sections, each containing 50-60 seeds – so you will have plenty!
Set the ripe pod in a dark location for a few days to continue to dry.
To collect the seeds, shake the pod over a bowl or plate and let the seeds fall out. Throw away any that appear to be damaged or moldy.
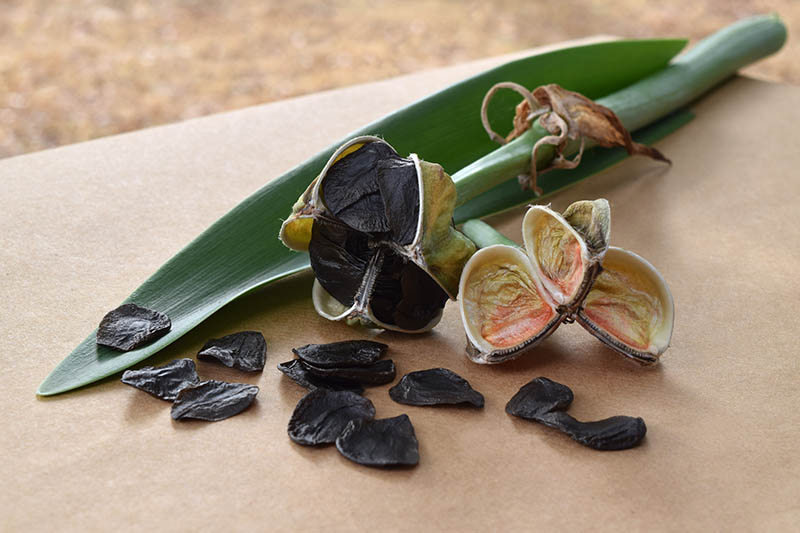
Spread them out on a paper plate or tray to dry for a few more days – or up to a week.
For best results, you should sow the seeds as soon as possible after drying, as they have a short shelf life and do not store very well. As these are tropical plants, they do not need a period of cold stratification prior to planting.
If you do need to store them, dry the seeds for a week, and then keep them in a sealed container in a cool dark location like a pantry. Keep in mind that they will lose viability the longer they are in storage.
How to Sow
You can sow your seeds directly into a container or individual seed trays filled with potting mix amended with perlite or vermiculite to improve drainage.
Sow one seed per cell if using flats, or one inch apart in your container, and cover with a little potting medium, about an eighth of an inch deep. Water in well.
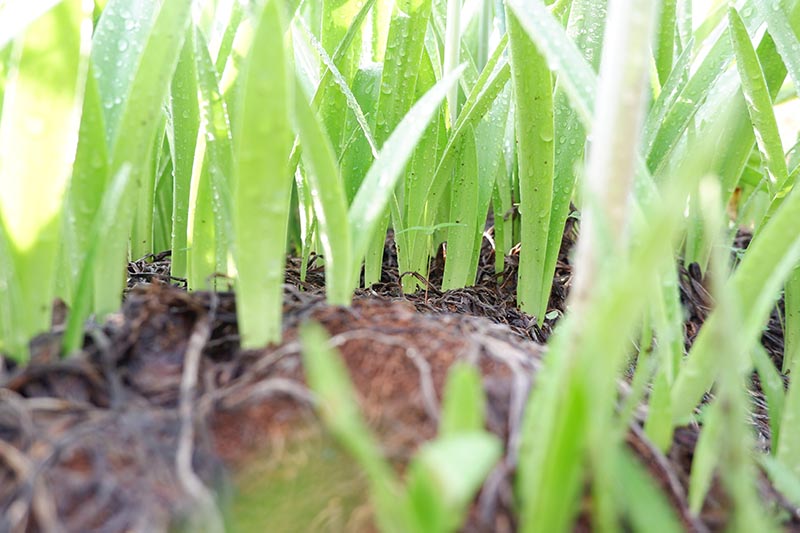
Maintain even moisture in the potting mix, but do not allow it to become waterlogged. In three to five weeks, you’ll see that they’ve germinated as they’ll produce small grass-like leaves.
Alternatively, you can choose to sprout the seeds prior to planting in soil.
An advantage of this method is that you can start a large number of them, and only plant those that have actually germinated.
One way to do this is to float them in water. This can be done by taking a clear glass or baking pan and filling it with at least an inch of tepid water. Spread the seeds on top, discarding any that sink to the bottom, as these will not be viable.
Cover the container with a loose lid, and set it in a warm area, somewhere you can remember to check on it daily and top up the water if any has evaporated.
In one to four weeks, viable seeds will germinate and produce a single root. This root will eventually grow into a bulb. When the root is a half inch or longer, the seedling is ready to plant.
An alternative sprouting method is to wrap seeds in a moist paper towel placed into a sealed ziplock bag. Check on the bag daily and mist with water – do not allow the paper to dry out.
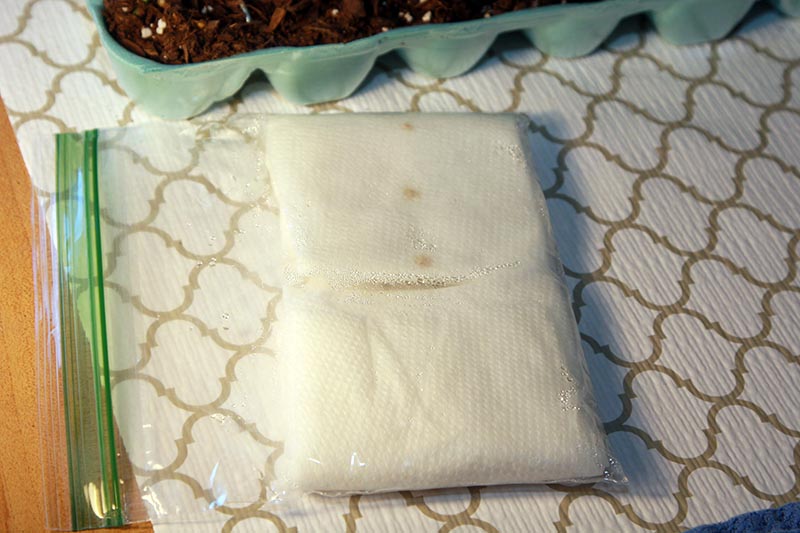
It should take between one and four weeks for the seeds to germinate, and you can plant them when the root is at least half an inch long.
Plant sprouted seeds in a well-draining, sterile potting mixture in small individual containers or in groups in a larger container. Make sure the containers are at least three to four inches deep.
Use a toothpick to create a small hole for the root. Gently place the root into the hole, letting the seed casing rest on top of the soil or just barely covered. Leave an inch or two of space between the seedlings, as they don’t mind being a little crowded.
Water gently and place in a warm location out of direct sunlight.
Don’t forget to label and date your pots!
As roots grow into bulblets, they can be transplanted into larger pots.
Seedling Care
Sprouts will initially resemble a blade of grass and continue to grow slowly over the next few years.
You will need to lightly fertilize your seedlings once every week or two, with a liquid fertilizer such as Miracle-Gro All Purpose Plant Food, available on Amazon, diluted to quarter-strength.

Miracle-Gro All Purpose Plant Food
Make sure it is diluted, or the fertilizer can damage the tiny plants.
Seedlings should be kept in a warm location, such as a greenhouse or indoors on a windowsill with plenty of indirect light.
The soil should be allowed to dry out to an inch down between waterings, but don’t allow it to completely dry out – or become oversaturated. During the winter months you can put them under a grow light.
When the foliage is four to six inches long, you can transplant your seedlings into individual pots of at least six inches deep to give the bulbs room to develop.
Patience is key! Sometimes leaves may appear to brown and die, but don’t worry, new leaves should form to replace them. While all of this is happening, below the soil bulbs are slowly growing.
For the first two to three years, the bulbs are developing and the plant will not go dormant during winter, but growth may slow.
After the second or third year, the plant may go into its first dormancy phase. This is a good sign! It means the bulb is creating a flower and should soon reward you with a spectacular bloom.
With good care, blooms should appear once a year thereafter.
Worth the Wait
It is true that starting amaryllis from seed is a process that requires a lot of patience, but in my opinion, it’s well worth the wait.
You will be able to create brand new hybrids and be rewarded with bountiful displays of unique and colorful flowers for years to come.
Have you grown amaryllis from seed? Share your stories and photos in the comments section below!
And for more information about growing amaryllis, check out these guides next:

Mine are 9 months old now.
Nice!
Wow Heather… What a Great article!! Looking forward to harvesting the seeds from the hundreds of parent plants I have in the gardens (directly in the soil). Each group has multiplied over the years, as I divide bulbs every 3rd year. So I’m not disrupting roots every year. Taking into consideration the amount of seeds I’ll have to work with, I’d be busy for a while planting each; so propagating via moistened paper towel in zip locked bag or covered water then planting (those that have grown roots) into my larger propagation containers for purpose of encouraging bulbs to mature… Read more »
Eric if you have extra seeds I would love to buy some when they are fresh. I put my bulbs outside in a raised garden and bring them in to bloom in the fall. I have cross-pollinated my Candy Cane amaryllis several times but the offspring have not bloomed yet.
Wow, what an interesting process! I didn’t know I could grow these from seeds. I’ll have to try this. I have bright red amaryllis and I’d love to create hybrids with different shades and colors. Thank you!
Thank you for your feedback, and glad you found this article useful! Good luck with the hybrids. Curious to hear how it goes!
Oh my, my first year of getting seeds to grow but got really discouraged reading it’ll take years ????.
My brand new babies. 1st attempt and probably my last since it takes years; I like immediate results ????♀️ Looks like I divided them to soon.
Thanks for sharing your experience! Growing amaryllis from seed is certainly a process of patience and not for everyone. Hope those seedlings make it!
Hi Heather, I started a few of the amazingly paper-thin seeds cases after a gifted, potted, red amaryllis finished its bloom. They had a rough time between the cat thinking they were wheatgrass and other mishaps. So the sole survivor is this plucky individual named Junior. It was one of the small ones I’d had little hope for but seems to have found its stride.
Thanks for the tips, especially the plant food item. I’m in no hurry as it keeps me company as I work from home.
We love amaryllis so we started growing from seed. Our babies are about 7 months old and we have a full nursery. From reading your article it appears I keep them in their pots through the winter and give indirect light (2 hours per day). In the summer I will keep them outside and make sure they have 6 inches soil and not too crowded. Would love to have more info because it’s hard to find.
Hi Lorraine,
Sounds like you have the right idea! I might up the hours of winter light a little bit (maybe more like 4 hours or so of indirect light), but otherwise your method is great. The key with these is patience. Good luck!
I have seedlings/bulblets that are 3 years old. I’m hoping for my own hybrid variety. I will name it “LindaGrace”
Wonderful, thank you for sharing! We would love to see photos!
DC Roger, did you name a LindaGrace? Your post caught my eye as that is my name.
Thank you for all the info. Bought a plant this year hand pollinated and have one good looking seed pack the other one did not mature. From the looks of things I have another week before I can pick dry and then plant
Glad you found the article useful! Look forward to hearing about your progress!
Thanks for the great article. I starting my first attempt at growing amaryllis from seed. Wish me luck!
Glad you enjoyed the article. Good luck! Keep us updated!