
Outside of inviting a pair of roving mountain lions into your garden to act as deterrents, installing a deer fence is your best option to keep deer out of your garden.
This installation isn’t for everybody! It requires a good amount of work and can quickly become an expensive endeavor. But the results speak for themselves.
We link to vendors to help you find relevant products. If you buy from one of our links, we may earn a commission.
Here’s what’s ahead in this article:
DIY Deer Fence Installation Instructions and Tips
Our expert tutorial provides DIY instructions and all the tips you’ll need to do this installation at home, in your own yard. Plus, you’ll find suggestions for where to find some of our favorite tools and materials to get started.
It’s time to let those deer know that the buffet is closed!
How Much Do I Need?
I work at a few properties that use deer fencing to different degrees, but one in particular dwarfs the others.
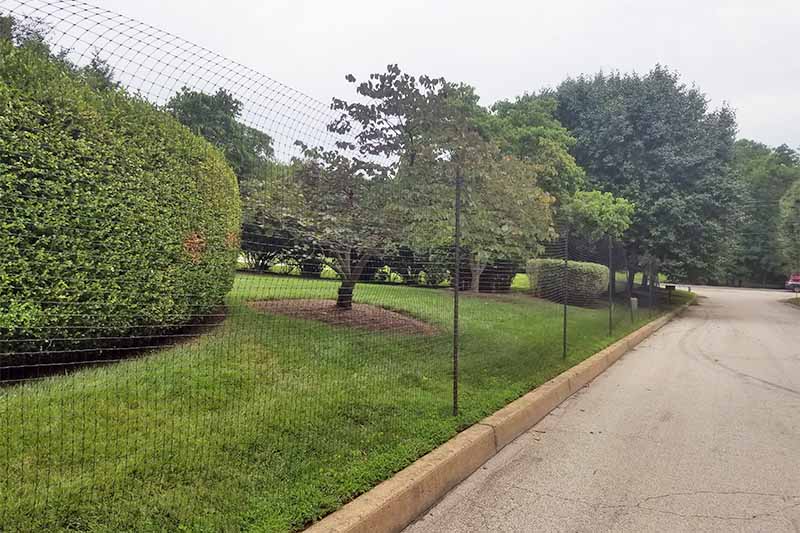
The property stretches on and on, and is completely surrounded with fencing to repel deer and other visitors. The only section not covered by the barrier is the driveway, and you can bet your bottom dollar this is the only way in or out for our four-legged friends.
Don’t worry – covering your whole property may not be necessary. Putting up a barrier just around your vegetable garden works wonders too! One of my clients allows the deer to chomp down on her ornamentals, but she fences in her vegetables to keep them safe and secure.
Take into account natural barriers and structures that could serve as portions of a wall, eliminating the need for fencing. That twenty feet eaten up by your shed may seem inconsequential when you’re ordering hundred-foot rolls of fencing, but it could save you from purchasing an additional, wasted roll.
What Kind of Supplies Do I Need?
You can improvise a lot with this project. The base requirements are the fencing itself, some kind of support to mount the fence to, and something to tie the fence to those supports.
I’ve attached fencing to trees, rebar, and light posts with zip ties, wire, and staples. Sod staples work in a pinch when you don’t want to purchase pins sold specifically for deer fencing.
Here are a some options for you to consider when installing your fencing:
Supports – Anything You can Attach your Deer Fence To
- Lengths of rebar that are 9-10 feet in length
- Specialty deer fence posts (more on this detailed below)
- Existing structures
Fasteners – Anything You Use to Attach your Fence to Supports
- Zip ties (my preferred option)
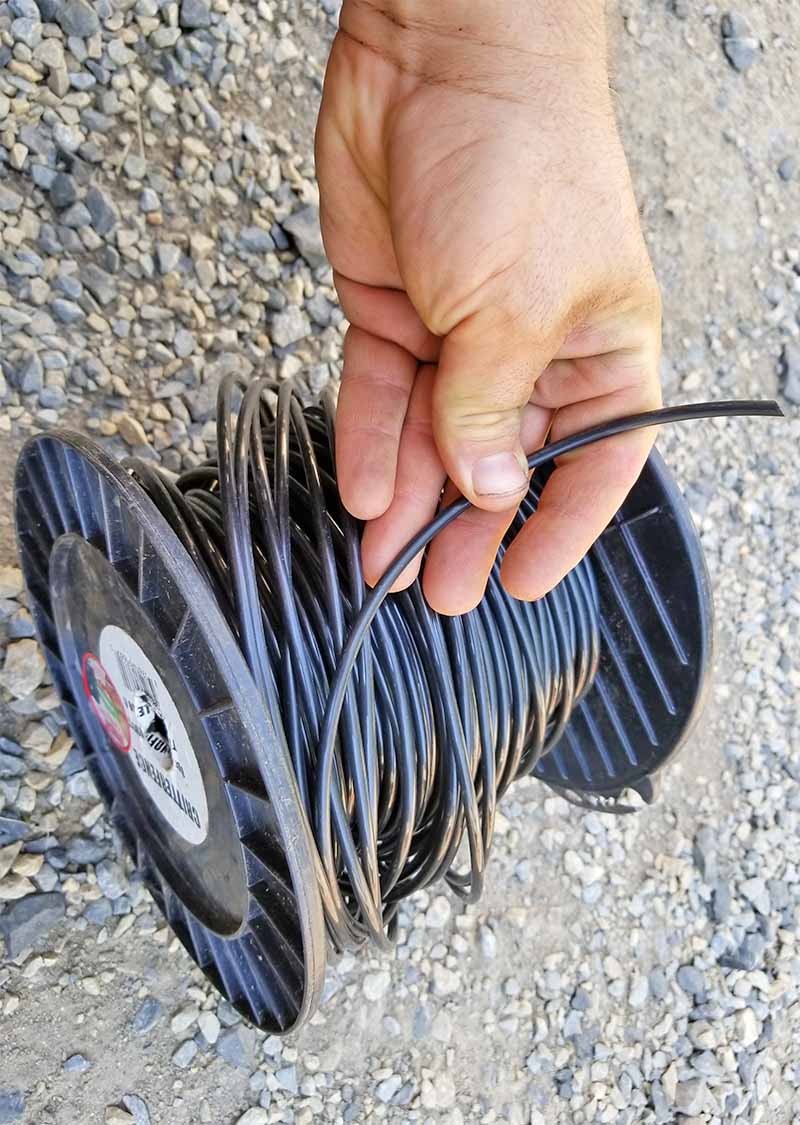
- Strong but flexible wire
- Rope (choose a synthetic material to avoid degradation)
- Staples
Installation Tools – Anything to Help Install Your Fencing
- A strong hammer for driving supports into the ground
- Wire cutters to cut wire and fencing (good pruners work well)
- Staples and stapler (carpenter staples are ideal)
- Gloves (the fencing can have some sharp or pokey parts)
Ladders – Strong and Safe Support to Reach up High
- We love to use the Little Giant style ladder, but any safe ladder that reaches these heights will work
Next, if you’re installing your fence with the specialty posts, you’ll need the following:
- A sledgehammer
- Driver cap
- Sod staples OR ground stakes
- Deer netting
- Deer fence posts
- Zip ties OR your fastener of choice
Many of these products are conveniently available on Amazon – just follow the links above and later in this article for my recommendations.
How to Install Deer Fencing
The basic premise here is the same no matter what installation method you choose. I will describe each step of the process, and do my darndest to address likely scenarios you’ll run into along the way.
1. Outline Your Fence’s Perimeter
Do you know how many people start this workload without considering where they’re even going?!
Use a measuring wheel or old fashioned tape measures to assess the distance your fence needs to cover. This way, you’ll have a good estimate of how much fencing you’ll need. But consider a factor of about 10% extra that you’ll need to cover errors in total fence material needed, mistakes, and eventual replacement.
Watch Out! Remember to take into account the total distance eaten up by permanent structures like buildings, thick hedgerows, and other obstacles.
2. Lay Out Your Corners
Not building your fence over a square area? That’s okay, “corners” is interchangeable with “cardinal points.”
Your goal here is to give yourself definite reference points to tie your fence into. When you run into a complication or error while you’re doing the installation, you can always take a step back and reference your laid-out reference points to get back on track.
Watch Out! Place some high-visibility tape or spray paint so you can spot those points without squinting too hard.
3. Start Your Installation
Yeah, let’s get fencin’!
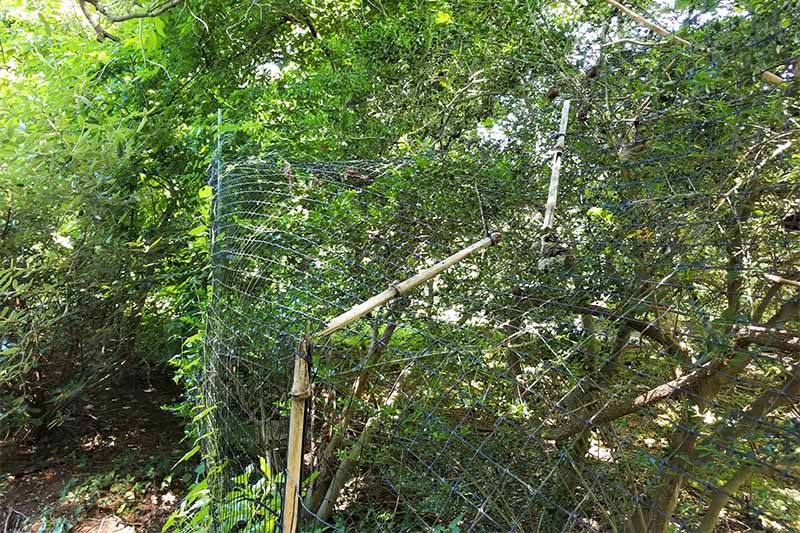
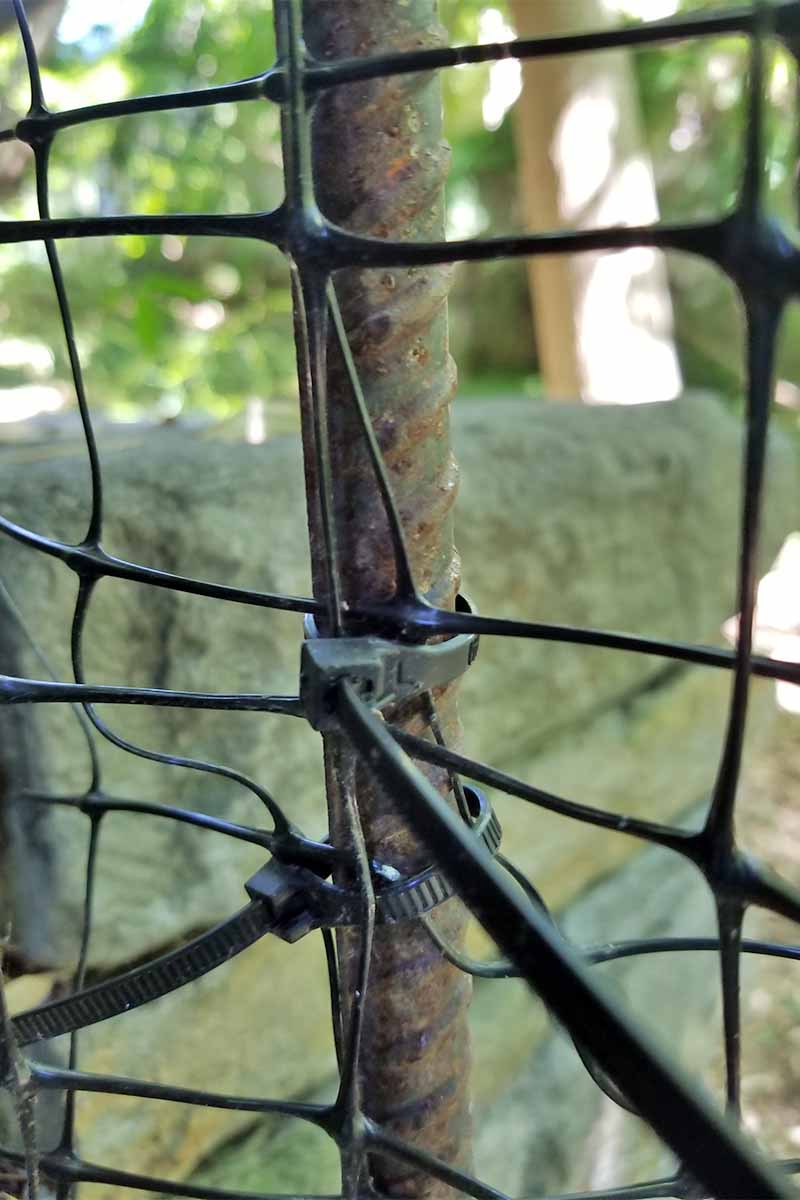
Open the fencing roll and attach it to your first support structure. If you’re a stickler for a clean and sharp look, you can snip loose all of those hanging bits from the edge of the netting before attaching it.
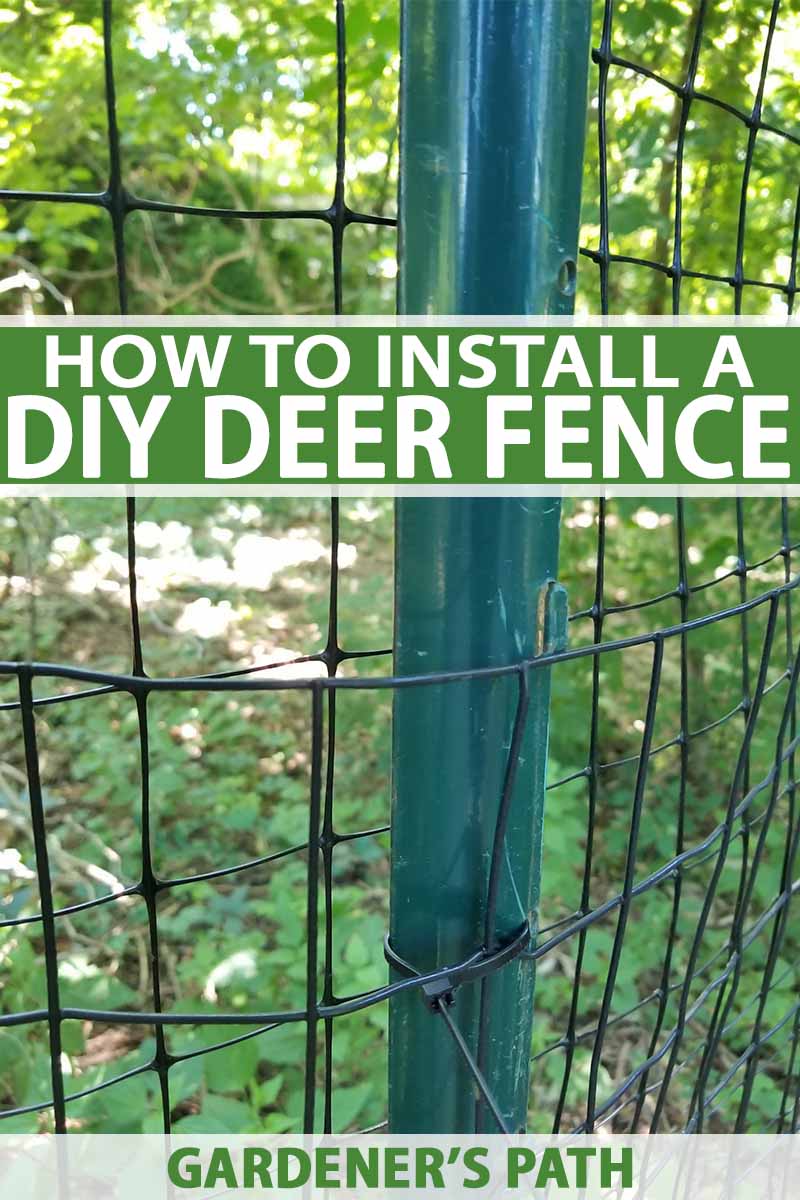
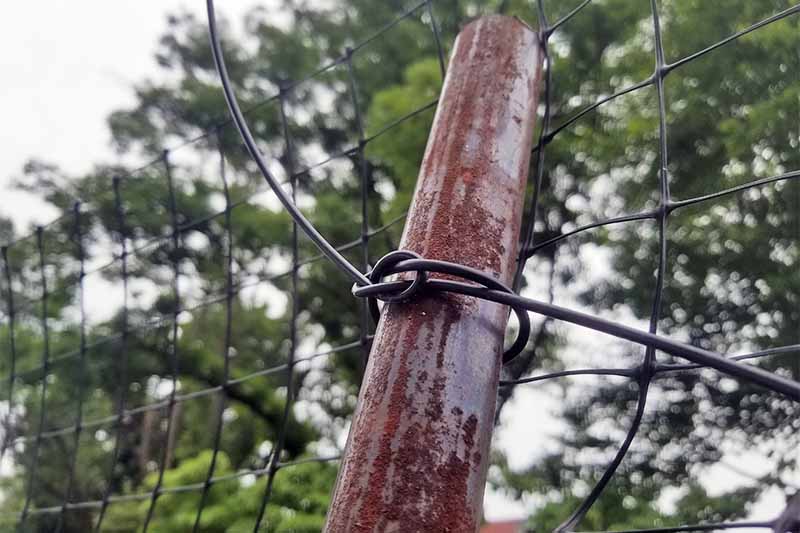
I like to start my fencing with a strong and solid zip tie placement or wire wrapping.
If you’re attaching your deer fencing to a new support, follow these guidelines:
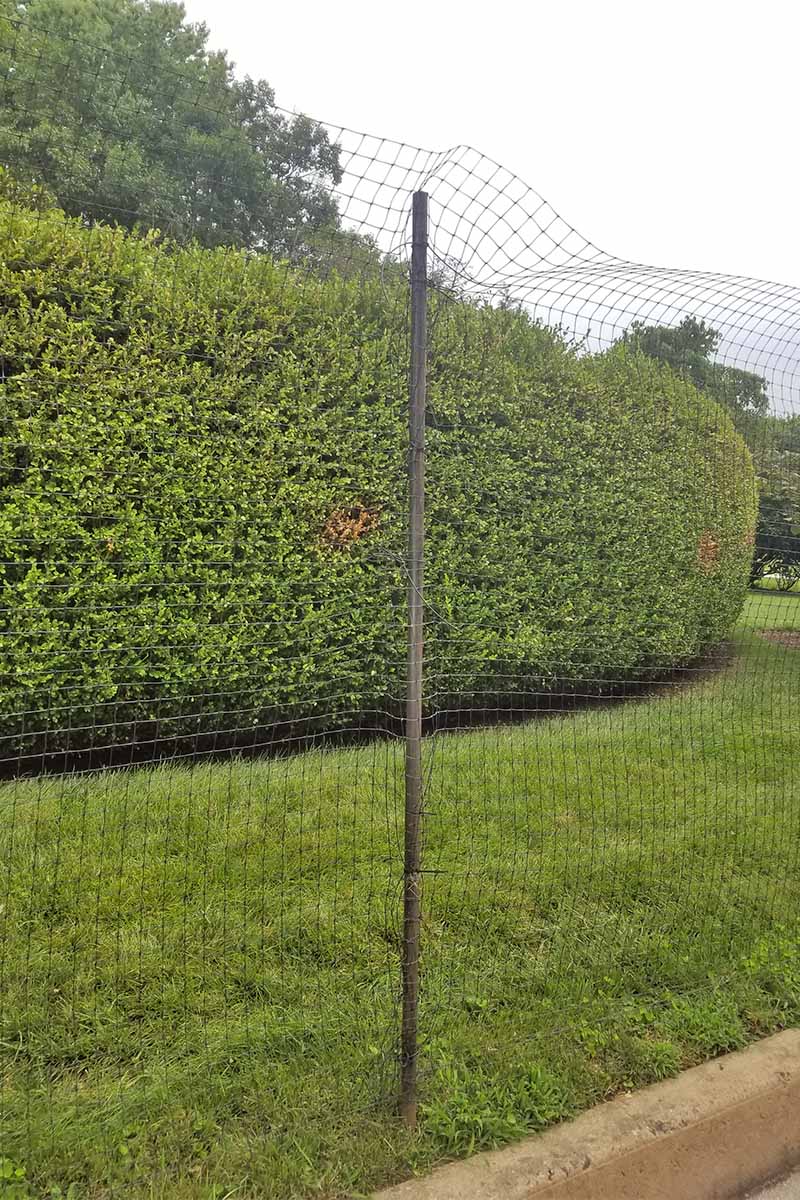
For Rebar or Similar Supports
Hammer that sucker into the ground!
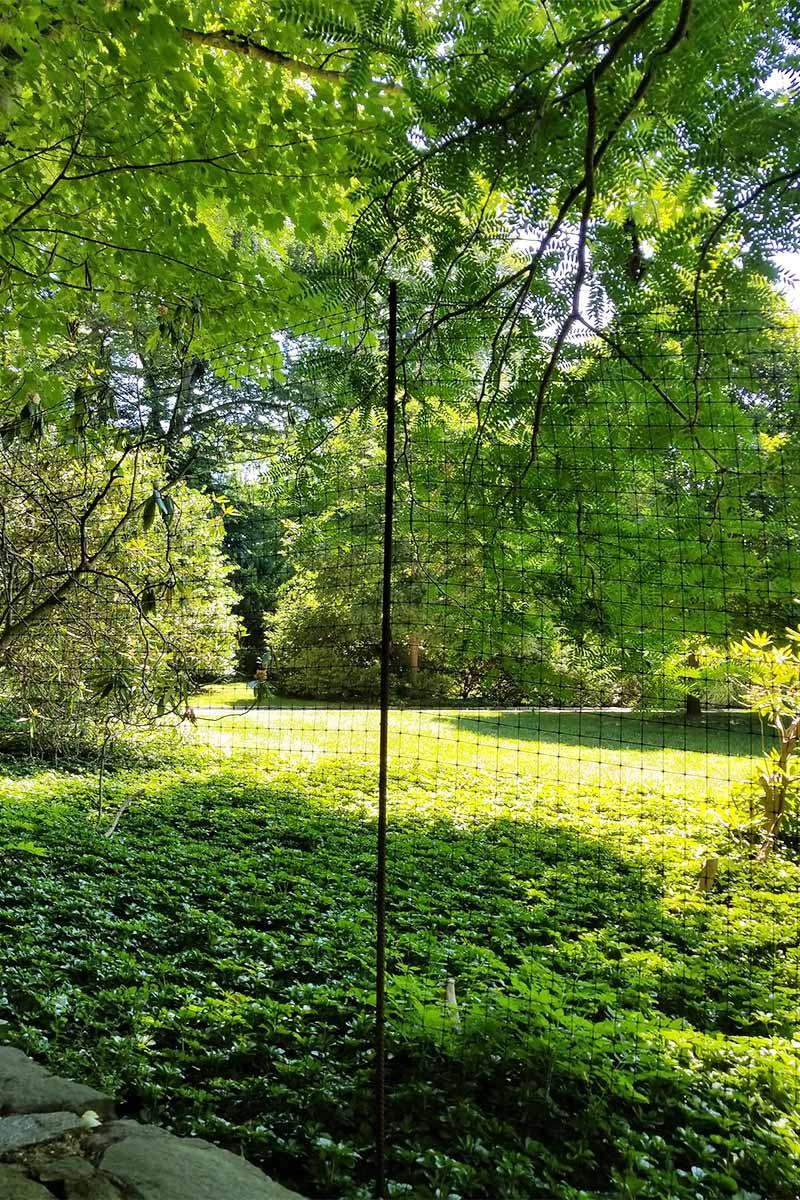
You want to get to depths of at least one foot into the ground; most deer fencing is sold at a height of about eight feet, so your supports need to be at least eight feet above the ground after you’ve put them into the ground firmly.
You can use a post driver for this, or you can hold on and hammer it down the old fashioned way.
Avoid the temptation to use a cheap material like bamboo. It will eventually rot and undo all of your work.
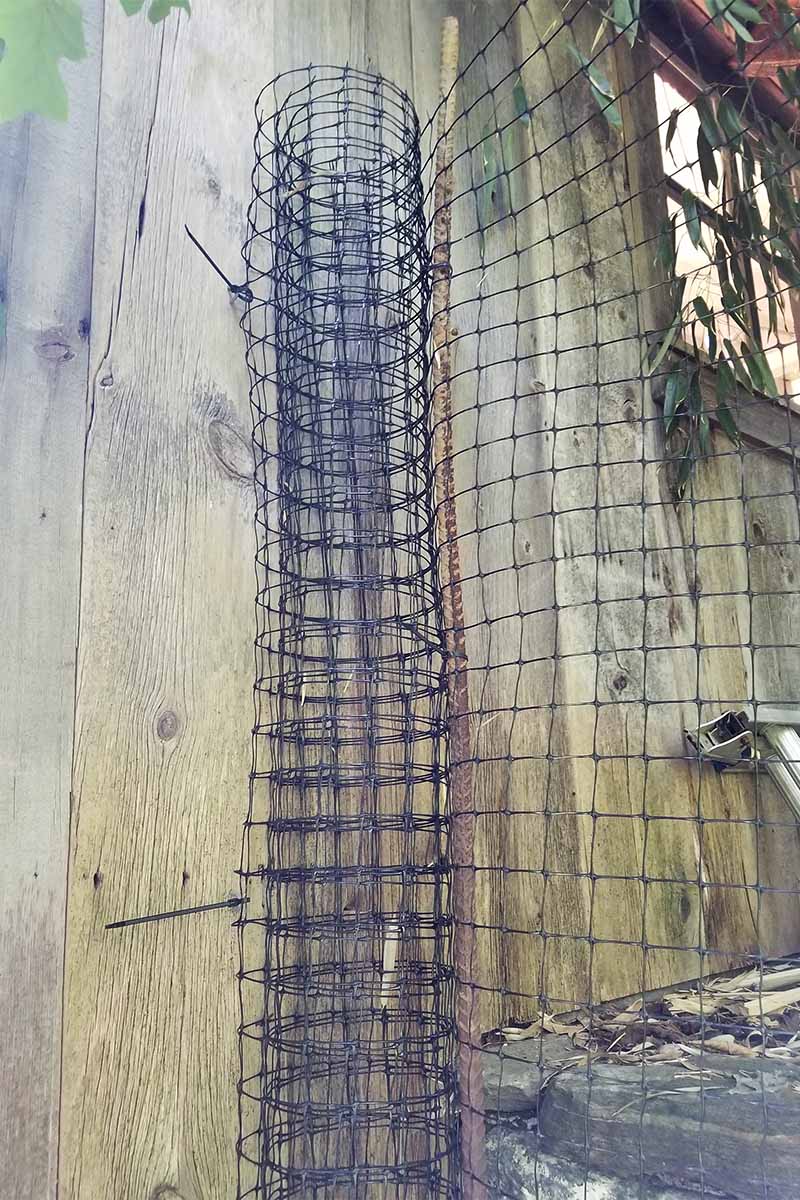
For Deer Fence-Specific Posts and Sleeves
Place the sleeve where you want it to be installed in the ground, and plop the striking cap into place. If you’ve got a partner, have them hold the sleeve while you carefully hammer the cap into the ground.
If you are alone, you can start driving the sleeve into the ground like you would a nail into wood.
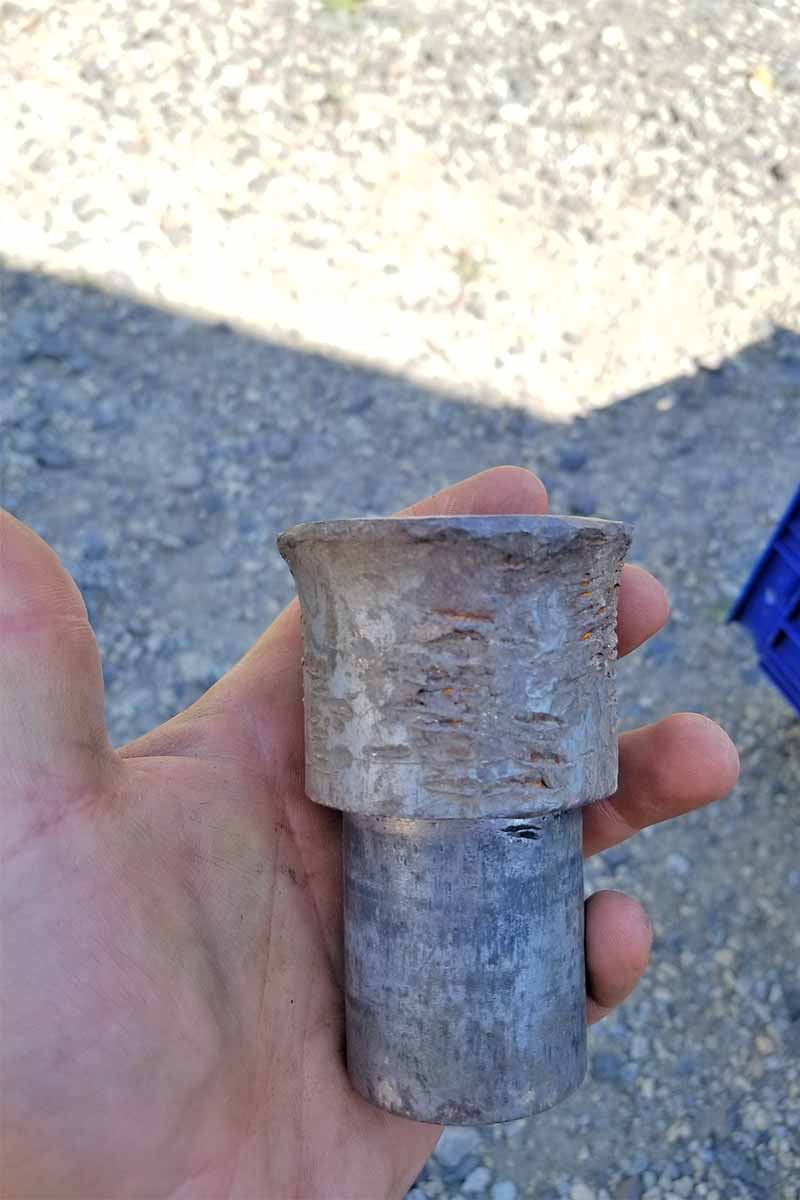
Drive the sleeve in until it’s flush with grade, then add the post. It should slide and lock into place effortlessly.
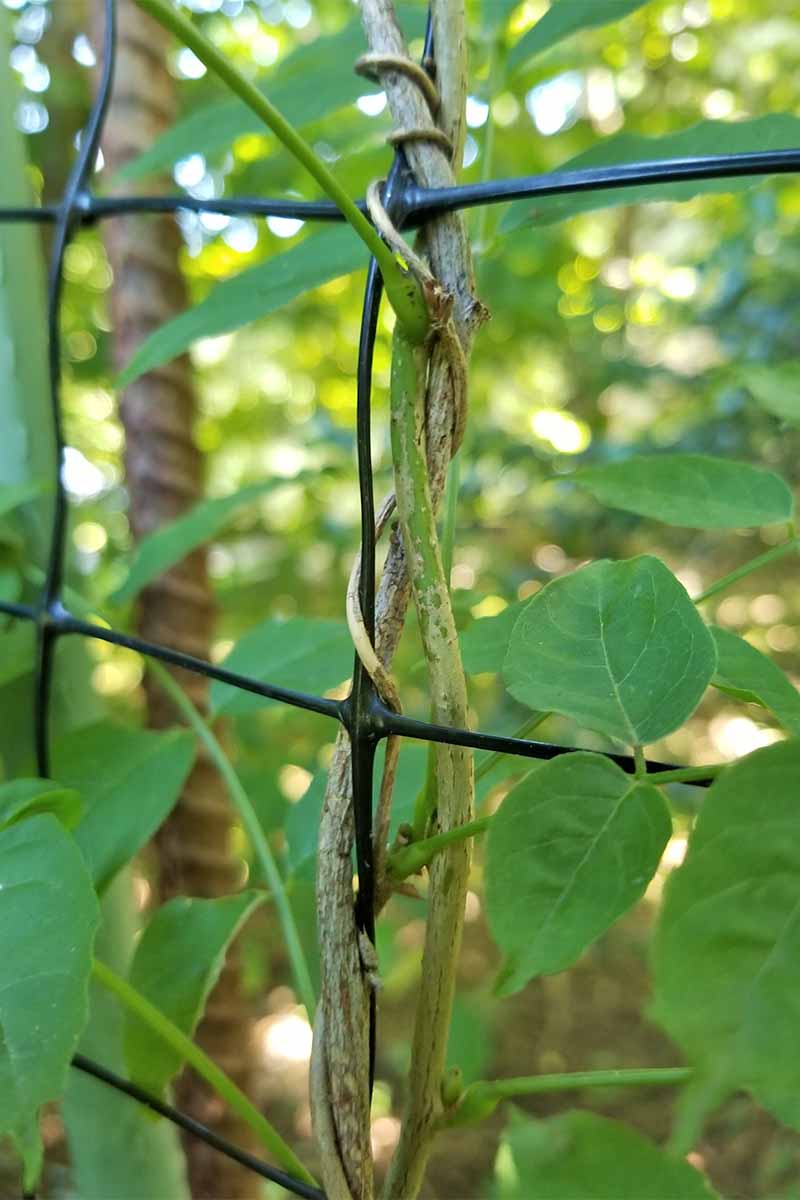
Start attaching the fence to the post from the bottom of your fencing material, and work your way up the support. Leave about 4-6 inches of play to account for dips and hills when you stretch it out. You can always staple the extra fence down and flush with the ground if you don’t need that play.
Watch Out! Sometimes the netting has a lot of “memory.” That is, it tends to retain the curled shape it possessed in the roll and will fight to return to that position. Stretch your fencing out a few feet and bend it against the direction it was rolled up in to help eliminate that memory.
4. Aaaaaand Continue That Installation!
Keep this process going! You can safely space most lightweight deer netting with about 20 feet between posts, while metal fences and those comprised of heavier materials should have supports placed about 15 feet apart.
Place your supports, spaced at these intervals, and unroll your fencing. Attach it with whatever your preferred material is. I’m a fan of zip ties, but whatever works for you is what works for you!
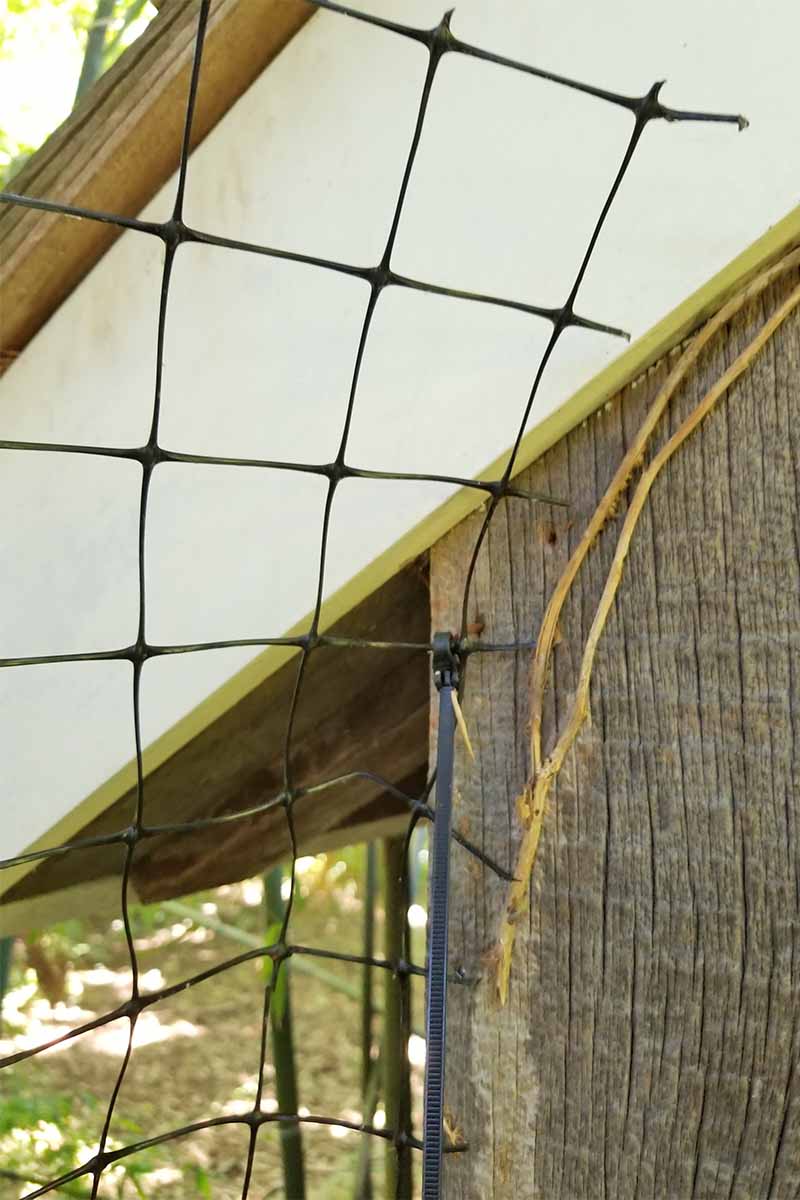
Watch Out! You’re probably going to encounter rough patches in the ground that contain rocks and other obstacles. If your spacing needs to be 17 feet instead of 20 at a particular stretch, that’s okay! If you encounter obstacles in the way (like houses) you can attach the fence to them with carpenter staples (or your preferred material) and cut the netting flush, then continue on the other side of the obstacle.
If you reach the end of your fence and return to the starting point, simply tie the fencing together as cleanly and attractively as you can and wrap things up!
Reinforcement and Repairs
From choosing deer resistant trees to deer proofing your garden in general there are ways to reinforce your deer fence that don’t require a deep pour of cement and machine gun turrets.
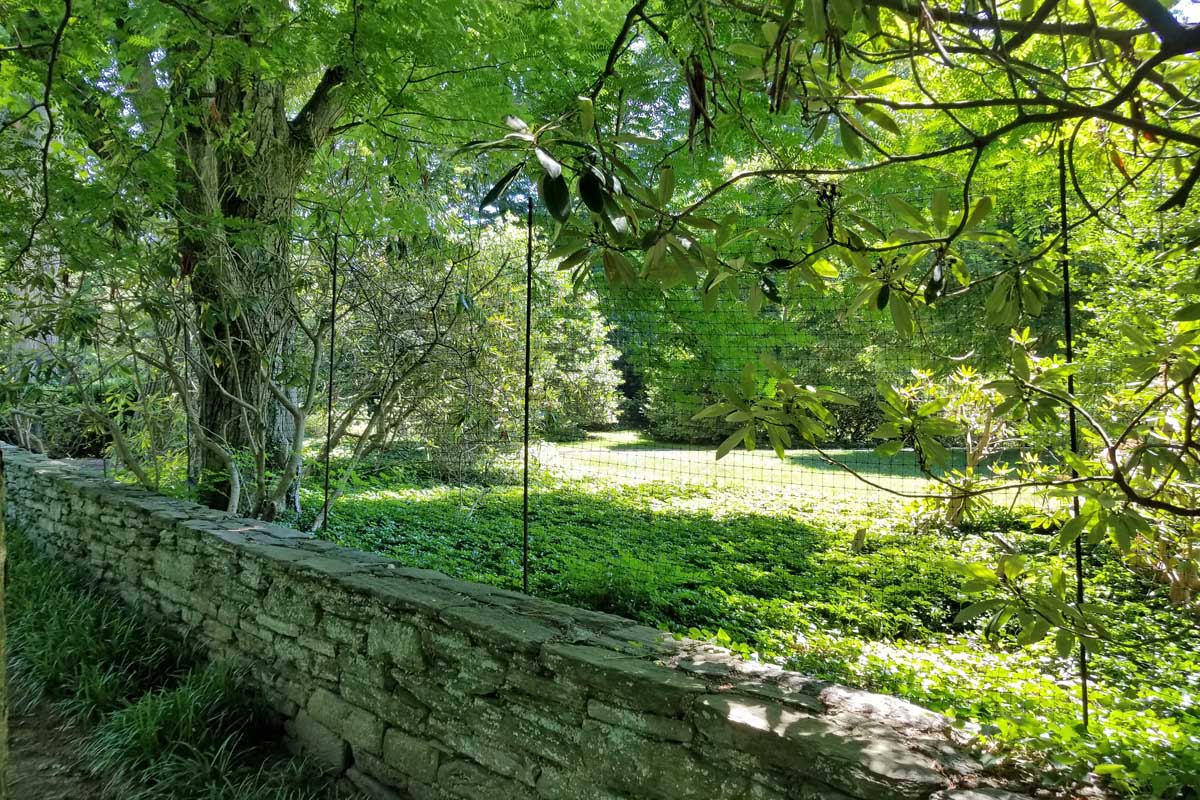
Installing your deer fence in a way that coordinates with other natural barriers like hedges, walls, and natural deterrents is the smartest way to reinforce your fence. Using smelly deterrents like Scram works well, but so does offering the local deer an alternative food source.
My uncle accepts a certain level of deer damage in his backwoods garden plot, but he minimizes the damage by stocking piles of corn and apples a thousand feet away from his garden plots. The deer are hungry, so if you feed them before they get to your plot, they’re less likely to destroy it!
Should I Use a Tension Wire?
Well, it depends!
Running a wire along the top of your posts can help to keep your fencing secure and taut, but I find the process unnecessary. It invites a world of aggravation into the installation and also the maintenance, so I don’t recommend using a tension wire.
If you really want to use it, though, here’s how:
To attach tension wire to rebar, you can wrap the wire firmly around the rebar and continue to the next post.
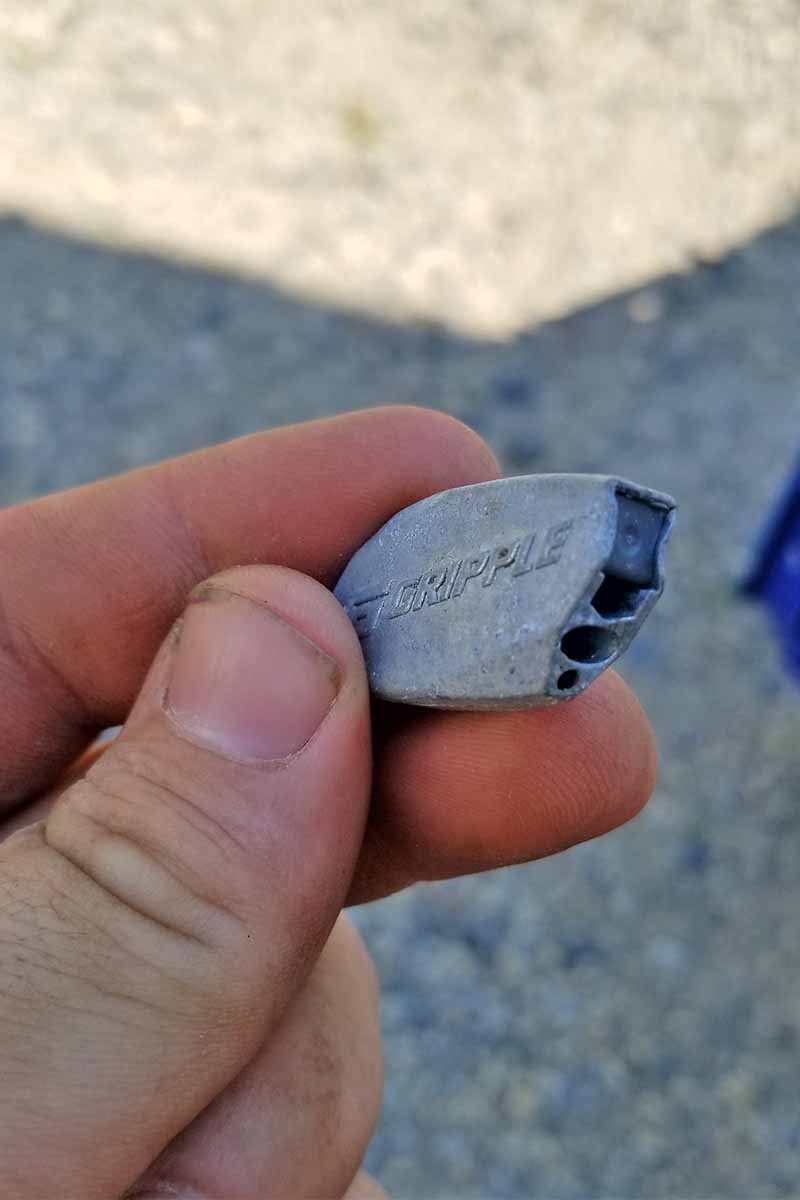
If you are using specialty fence posts for this project, you make a loop with the wire and run a Gripple through it, then tighten the gripple with the ratcheting tool.
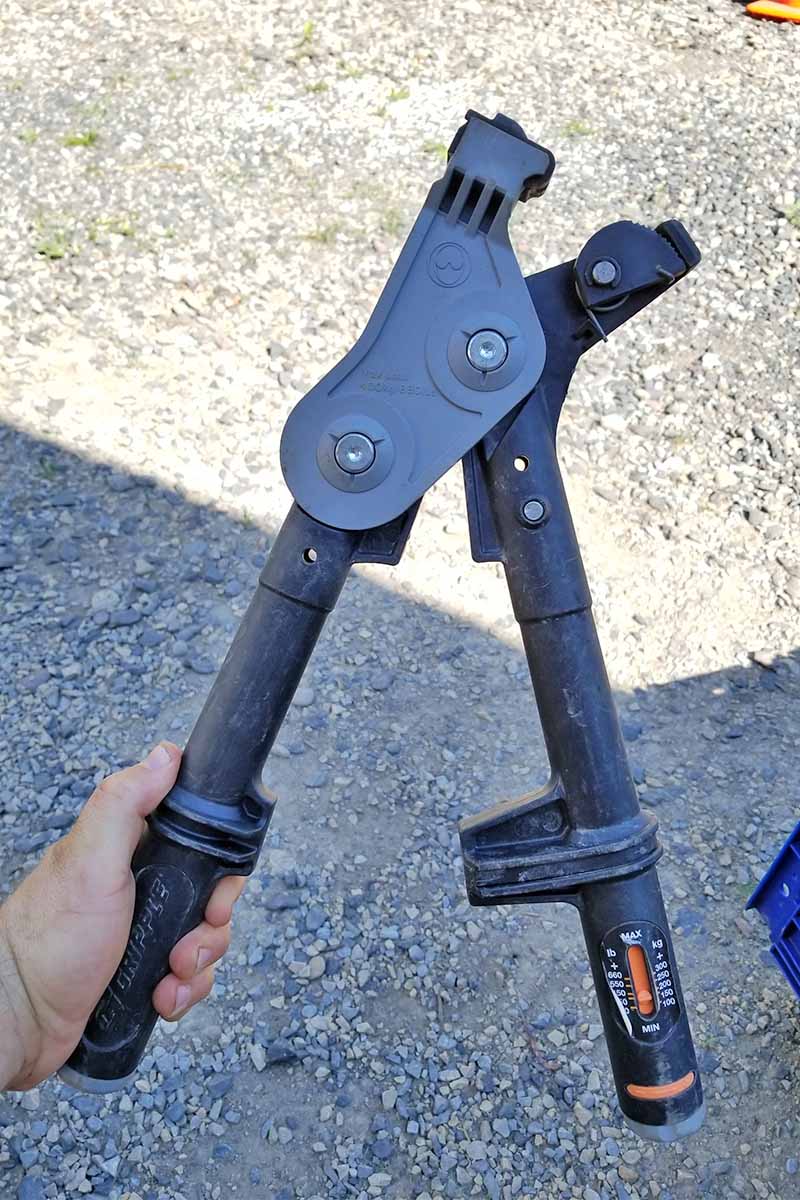
This method tends to bend the posts as you work up and down the line, but applying equal tension along the fenceline helps to straighten things up.
Attach the top edge of the fence to the tension wire with zip ties or your preferred fastener, and you’re done!
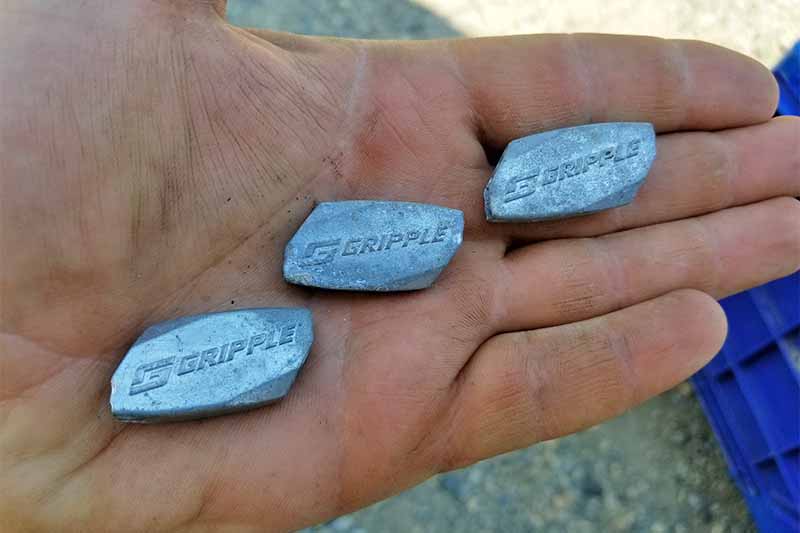
If you want to use the specialty fastening tools, you will need:
Visibility
Although a well-done fence is largely hidden from your view, it should still be visible to the deer themselves, and to birds.
This is especially important when you first set up your fence because the deer are not used to the barrier being in place and could jump right into it, ruining all of your hard work.
I’ve also had to pull out one too many dead birds that got caught in the fencing, so let’s minimize that grisly sight as well.
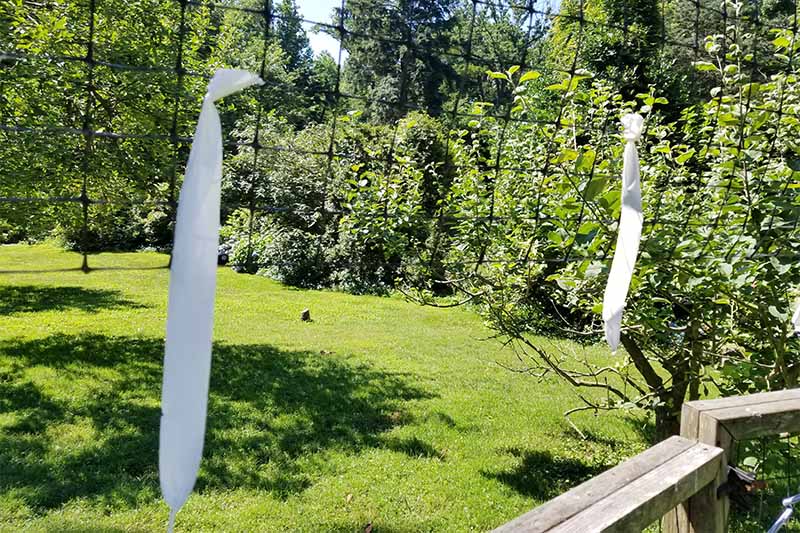
I like to get rolls of high visibility tape to hang every six feet or so from the fence at about head height. Let the loose ends dangle and move in the breeze so that animals can spot it from far away.
Although the fencing strongly deters deer from entering the zoned-off area, they can jump through it if they need to, or if they don’t see it.
Most deer can also jump up to 8 feet in the air, so if your fencing has a low point, they could find it and try to make the leap… Unfortunately, this often tears the fence down in that location because the deer can’t clear it!
That leads us to…
Repairs and Maintenance
Fortunately, this is a breeze to take care of. Give your fence line a little walk and inspection once a week or so to scout for damage.
You literally will zip up sections of the fence that have come undone from their supports, or reinsert pins in the ground to keep it in place. This is almost identical to the installation process. I’ve seen deer scuffle under the fencing, so don’t forget those pins!
Groundhogs could chew their way through, or a fallen tree limb can damage the fencing, so larger repairs are necessary at times. If it’s a small tear in the material, you can zip it back up with your fastening material; it’ll be a little ugly, but it gets the job done!
Otherwise, you should use the spare netting you’ve got stashed somewhere. Using scissors or your pruners, cut out the damaged area. Cut a new piece of fencing and – yep, you guessed it – zip it in place. Cut your repair piece so that it’s one square larger than the area you are fixing.
For example, if you’ve cut out a section of fencing that is 6 squares tall by 8 squares wide, your replacement piece should be 7 squares tall by 9 squares wide. This helps reinforce the strength of your repair.
That’s All For Now
Not too crazy of a project, is it? As long as you’re ready to do some labor installing the posts, you’ve only got a whole lot of tying and zipping to do!
It’s a simple enough project to complete. And once your veggies, ornamentals, and other property are protected from the voracious deer with by an 8-foot fence, you’ll find yourself sleeping more easily at night.
Thanks for reading, and please leave any questions or comments below.
And for more tips on keeping large herbivores out of your gardening spaces, check out some of our other guides:
Hi Matt, Loved your article. I’ve been on the farm for 64 years and have built miles of fencing, for livestock only. I couldn’t have explained fence building any better than you have. I have also grown vegetable gardens for 50 years. A few years ago, I found myself challenged with wildlife causing destruction in my gardens, deer in particular. At that time, I developed an alternative that allows gardeners to fully protect their gardens without fencing or toxic chemicals. Garden Commander offers full garden protection for both conventional gardens and raised beds. It is a green product and is… Read more »
I am considering buying Tenax 7.5 ft deer fencing,but the steel posts that are available are 8 ft and I believe go into the ground 18 inches.That leaves 12 inches loose on top where I have long stretches using the posts and in some areas will use the trees and can staple to the full 7.5 feet. I read about the fabric sagging in the hot sun. How can I address this? WIll the deer actually jump over 7.5 feet? My dilemma is sealing off my wide driveway, especially at night even though the deer eat during the day as… Read more »
Deer can clear 8 ft fencing. If they don’t clear it, their hooves can tear fencing down. Deer are not shy of walking on asphalt.
I’d like to install a dog run for my Jack Russell that allows him full view of the yard. Would you recommend using the material used in this fence for a medium-sized dog or would you suggest something stronger? I like the look of your fence for this purpose.
I have a Jack Russell/Chihuahua mix and my husband creates lots of hardscaping both for our gardens and as the owner of a landscaping business. We both agree that while the rebar would work well with more rigid fencing, the deer fence would be too flexible. Deer are larger than your dog and so those mesh openings of 5/8 in. x 3/4 in. might not be small enough to keep your dog from poking his nose in and working until he’s got a decent size hole. Also, the dog will be there constantly, unlike deer who are just pausing. So… Read more »
Hi Matt, I’m planning on a 65’x 160′ garden w/ wood posts in the corners and 2 @ the door opening. What size rebar would be adequate for 8′-10′ high fence. I’m thinking 1/2″ should work?
I’m always a fan of using what you have on hand, but if you’re buying new and your budget can handle it, you’ll get more stability with rebar thicker than 1/2 inch. When you have the choice, go for 3/4-inch or 1-inch.
Hello Matt! This is a FANTASTIC article! Bravo on such a detailed explanation. I am currently researching DIY fencing as where we live (suburbs) they charge an arm and a leg for simple deer fencing (we also hate the idea of pouring cement into the ground..). I recently purchased T-posts and deer mesh along with other supplemental materials to put up a simple deer fence. I wanted to know, about how long it took you to put this up? Roughly. Thanks again! I wish there were a video to accompany your article!
Hi there!
Thanks for the insight. I’m building a deer fence for my veggie garden, and I’m not exactly sure how to design an entry point?
Any recommendations?
Hanging the tape is a fantastic idea! I install a lot of fences to deter bears (deer aren’t such a big issue in The Villages where I work, but bears are) and I’m wondering if I could maybe attach not just tape but another kind of bear deterrent, something to kinda scare them away. You’ve given me a lot of good ideas!
This is a great “how-to” but how do you construct the entry point?
On some properties I’ve worked the entry way was a space with no deer fencing at all, just a gap in the fence. This was on properties where the owners did not want to install a gate in their driveways or gardens. The fence kept deer issues minimalized but of course any deer could simply wander into and then out of that gate. At other properties we would keep zip-ties on site or in our work trucks. We’d have several locations with a “door”; we’d cut the zip-ties where two lengths of fencing were attached to rebar and roll the… Read more »
Hello Matt! Love this description of fence building to keep out deer! However you mention a Sleeve, but don’t elaborate on what this is!
Ground sockets or fence post sleeves are often used for anchoring, and they hold the posts stable.
Great article! Question: What kind of gate did you build and how did you build it?
Hi Scott, great question! Matt addressed this in answer to another reader, you can see his comment here:
https://gardenerspath.com/how-to/animals-and-wildlife/deer-fence-diy/#comment-25462
Let us know if that helps!